
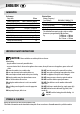
Technical data


Switch the power on (located at the rear side).
The ‘Power-On’ LED will be red. To activate the ma-
chine, press the ‘Power-On’ button on the control panel.
The machine will warm-up, the red LED will flash. The
machine will ‘beep’ (3x) and the LED turns green when
the machine is ready to bind.
Prepare the documents by loading the sheets into the
thermal covers. For best results, do not to place too
many or too few sheets into the cover. Use the binding
thickness scale as a guide. The guide is calibrated in
6mm widths. Helios 30 will accept single or multiple
documents up to a combined total thickness of 30mm
(approximately 300 sheets / 80gsm).
The selected binding cycle is shown by a blue LED. Use
the timer selection buttons to navigate up or down the
scale, if required. The scale has 10 settings. Eg: 6mm
document thickness = setting 1 (up to 60 sheets),
30mm document = setting 10 (up to 300 sheets).
Pull open the document clamp (Heat-Shield feature),
insert the documents into the binding channel. Ensure
the binding covers spine touches the heating element.
Start the binding cycle by pressing the ‘Select / OK’ but-
ton. The blue LED will start flashing and counting down,
in sequence. When the cycle is complete, the machine
will beep (3x). The blue LED will switch off.
The machine has an integral cooling tray. It can be
extended from the back of the machine and can also be
pulled upwards to accept larger documents.
When the binding cycle is complete, immediately
remove the documents and place in the cooling tray
or on a flat surface to allow the document to cool. The
document can be removed from the machine mid-cycle
if required, take care – the glue may be hot and
melted.
5.
6.
7.
8.
9.
10.
11.
HOW TO BIND
6
Let our experts help you with a solution.
Customer Service...
www.fellowes.com
Always call Fellowes before contacting your place of purchase,
see the rear cover for contact details.
NEED HELP?
Ensure the machine is on a stable surface. Check there
is enough clear space around the machine to operate
safely.
Insert the power lead into the power socket (located at
the rear of the machine).
Plug the machine into an easily accessible mains socket.
Switch the mains supply on.
Open and lift the lid by releasing the safety catches on
the front of the lid.
1.
2.
3.
4.
BEFORE BINDING
12.