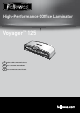
High-Performance High-PerformanceOffice OfficeLaminator Laminator Voyager Voyager 125 125 TM TM E Please read these instructions before use. F Lire ces instructions avant utilisation. S Lea estas instrucciones antes del usarlo.
VOYAGER LAMINATOR Up Standby Reverse Right (+) Left (-) LCD Display Down 5 sec AutoLam - Automatic Lamination 30 min Z Manual Lamination Z Z 30 min EASY-ACCESS LOCKING SCREW ATTENTION: ATTENTION: ATENCIÓN: TOP COVER LOCKING SCREW MUST BE REMOVED BEFORE THIS MACHINE CAN BE OPENED. Note: You will be unable to operate the easy access feature to open the machine for cleaning/maintenance if the top lid locking screw (A) is not removed first.
LAMINATOR CONTROLS I A J B C K D E F G QUICK START GUIDE SETTING UP THE LAMINATOR 1 2 STEPS TO LAMINATE - AutoLam 3 3 4 5 6 7 8 9 10 11 12 H
ENGLISH E CAPABILITIES Performance Entry width 12.5” / 317mm Estimated heat-up time 4 minutes Cool down time 30-60 minutes Lamination speed variable - max. 35” / 90cm/min Laminating mechanism Belt-drive Ready indication Light & beep Auto shut-off Yes (60 mins) Photo-capable Yes Carrier-free Yes Technical Data Voltage / Frequency / Current(Amps) 120V AC, 60Hz, 8.5A Wattage 1100 Watts Dimensions (WxDxH) 25” x 8.5” x 6.3” / 634 x 215 x 159mm Net weight 22lb / 10 kg Laminating capacity (max thickness) 0.
LAMINATOR CONTROLS A Easy-Access opening cover G Selection buttons (up/down/left/right) B Adjustable document entry guide H Select / OK button C Entry support shelf I Detachable document exit tray D Reverse button J On/off switch (at rear) E Standby button K Carry points (at sides) F LCD user interface FEATURES & TIPS The Auto shut-down switches the machine off if it hasn’t been used for 60mins to save energy.
SETTING UP THE LAMINATOR 1. 2. Ensure the machine is on a stable surface. Check that there is enough clear space behind the machine to allow items to pass through freely. 3. 4. Connect the supplied power cord to the machine. Plug the machine in to an easily accessible main socket. To fully support pouches and items of different sizes please use the adjustable entry guide to center the item before laminating. STEPS TO LAMINATE - AutoLam 5. 6. Switch the power on.
STEPS TO LAMINATE - MANUAL OPERATION On start menu, select “Manual” operation within 5 seconds of switching machine on. To return to the “Home” Menu at any stage, press the “Left/back” key on the navigation buttons. The ‘Ready’ screen will show when warm-up is complete and two short beeps indicate that machine is ready and user can insert pouch. Select pouch thickness with navigation buttons as required. Confirm selection with “OK” button.
CleanMe SYSTEM CHECK The CleanMe system check warns the user if glue or dirt has built up inside the laminator. Glue can build up inside every laminator, especially when low-quality laminating pouches are used. We recommend using Fellowes brand pouches to reduce the amount of cleaning required and to get the best laminating quality. The LCD screen will show the CleanMe sequence to guide you through the steps of the Cleaning process. 1. Warning sequence above shows that laminator needs cleaning.
FUNCTION OVERVIEW Open - Easy-Access function 0 - 30 min CleanMe - Maintenance Secure mechanism and close as described above Overload protection - Auto Reverse Help - Information display A) B) C) 9
TROUBLESHOOTING Problem Possible cause Solution No symbols showing in LCD screen Machine is not switched on Switch on machine at rear next to plug inlet and at the wall socket, then press standby button to left of LCD screen Ready screen does not come on after a long period Machine is in a hot or humid area Move the machine to a cooler and dry area Item may be too thick to laminate Pass through the machine again Pouch does not completely seal the item Temperature setting may be incorrect (manual
FCC CLASS B NOTICE - NOTIFICATION POUR LES ETATS-UNIS Note: This equipment has been tested and found to comply with the limits for a Class B digital device, pursuant to part 15 of the FCC Rules. These limits are designed to provide reasonable protection against harmful interference in a residential installation. This equipment generates, uses and can radiate radio frequency energy and, if not installed and used in accordance with the instructions, may cause harmful interference to radio communications.