Image Broadway 6 Help Introduction > Workspace Workspace The Image Broadway interface provides you with an intuitive starting point. Its Workspace consists of Menu Bar, Toolbar, Tool Options, Toolboxes, and Canvas. A. Menu Bar: A standard menu bar that gives you access to all different aspects of the program. B. Toolbar : A bar that gives you various image editing, drawing, and painting tools. C. Tool Options : Depending on the tool you select, individualized options appear to customize your tool. D.
FileStream Home Page
Image Broadway 6 Help Introduction > Toolbars The Image Tools and Edit Tools Toolbars can be displayed or hidden from the Toolbox menu. By clicking the icon on the Toolbar you can get into each tool. To see what each icon is for, simply move the pointer over the icon, its tool tip will automatically appear. To move Toolbar: Drag the gripper of the bar and move to dock the bar at any side of the application window. To show/hide Toolbar: Choose Toolbox > Toolbar from the menu.
Image Broadway 6 Help Introduction > Tool Options Tool Options Some of the tools in the Toolbox have options. Clicking on a tool to select the tool, it will also bring up its Tool Options Bar when applicable. To move Toolbar: Drag the blank part of the bar such as the top of the bar and move to dock it at the top or bottom of the application window. To show/hide Tool Options: Choose from the Toolbox > Tool Options menu. To use popup slider: Some of the tool options have popup slider.
Image Broadway 6 Help Introduction > Toolboxes Toolboxes Toolboxes can be displayed in many different ways. You can always drag and dock individual Toolboxes to position them on screen in ways that you prefer. Auto-Hide Toolbox There are ten toolboxes in four groups: Paints/Brush & Mask/ Swatches group, Navigator/Info group, Layers/Channels/Paths group, and History/Tray group docked on the right side of the windows. They are in auto-hide mode by default.
Merging Toolboxes When you move one toolbox over another toolbox, there are four directional arrows displayed with a small doublebox merge icon in the middle as shown in the red circle below. If you drag one of the toolboxes until the cursor is over the merge icon (see the red circle in the figure below), you will merge the floated toolbox into the other toolbox on the screen. The merged floating toolbox is shown below.
command to toggle back and forth between the group and the non-group mode. It requires restarting the application for this change to take effect. You can also use the Toolbox > Default Layout to reset the toolbox to the original state for each mode. Change Toolbox Size Drag any border of the toolbox to change the size. Note: Only size of floating Layers, Channels, Tray, and Undo History toolboxes can be changed.
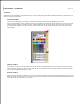
Displays the color RGB (Red/Green/Blue), Index (for 256 Color), hex value, and (X, Y) coordinates of where your cursor is, as well as the canvas dimensions. As you move your cursor around, the corresponding color values and position information are automatically updated in the display. Interface: There are nine different interface looks. Use the View > Application Look > Black Style, Blue Style, Aqua Style, Silver Style, and Classic Style command to select the interface style that you want.
Image Broadway 6 Help Introduction > Associations Associations In Windows, you can associate a file type, for example JPEG, with a default application. That means, when you launch a certain file type, it will be automatically launched into the associated appliation. Windows will display the associated program name and icons with all files of that file type. This does not change the file in any way or keep you from using another application to open those files.
FileStream Home Page
Image Broadway 6 Help Introduction > Preferences Preferences Use the Use File > Preferences > Preferences menu item to set the preferences. The preferences dialog has pages for setting general preferences, image editor preferences, rulers and grid preferences, and entering image comment.
Image Broadway 6 Help Introduction > Preferences > General Preferences General Preferences Use the File > Preferences menu item, General tab to set the general preferences. The preferences dialog has pages for setting general preferences, image editor preferences, rulers and grid preferences, and entering image comment. Startup You have the option to only allow one instance of Image Broaway running if you check off that option.
1. 2. Use the Reset button to restore the original file extensions. Auto Save: Check off this option and enter the number of minutes that you want Image Broadway to automatically save your work. Auto Safe will help to prevent your work being lost if your computer quit working while you are in the middle of editing photos or images.
Image Broadway 6 Help Introduction > Preferences > Image Editor Preferences Image Editor Preferences Use the File > Preferences menu item, Image Editor tab to set the image editor preferences. To change default image interpolation: Choose an interpolation method for default scaling. Interpolation is used to assign color values to any new pixels it creates based on the color values of existing pixels in the image - Bicubic, Bilinear, the Nearest Neighbor, or Lanczcos3.
To set the level of Undo: You can set the number of steps of Undo, applied to each image editor window, or select unlimited Undo. Higher level of Undo or unlimited Undo may take up more computer resources.
Image Broadway 6 Help Introduction > Preferences > Grid/Rulers/Guides Grid/Rulers/Guides Use the File > Preferences menu item, Grid/Rulers/Guides tab to set the grid, rulers, and guides preferences. To change grid settings: 1. Select the color by double clicking on the color. 2. Select the styles: Lines, Dashed lines, or Dots. 3. Select the size of grid from 4 to 16. To change rulers settings: Click to select the units in pixels, inches, or centimeters (cm).
Check off the Show Rulers option if you like to have rulers for the image window. Check off the Show Guides option if you like to have guides for the image.
Image Broadway 6 Help Introduction > Preferences > Image Comment Image Comment Use the File > Preferencesmenu item, Image Comment tab to set the image comment preferences. The preferences dialog has pages for setting general preferences, image editor preferences, rulers and grid preferences, and entering image comment. To enter image comment: Some image formats allow you to include comment as part of the image file, e.g. GIF, JPG, TIFF, and IBW.
Image Broadway 6 Help Getting Started Getting Started Image Broadway provides multiple images interface. You can open or create multiple images in different windows at the same time. To provide a simple composition for each image, you can paste in a different image or clip art, select an area from the image, or create a text as a layer.
Image Broadway 6 Help Getting Started > Open an Image Open an Image To open a file, use the File > Open... (Ctrl+O) menu item to display the Open File dialog for you to select and open an image file. To open a previously opened file, choose from the files list in the File > Recent Files menu item.
Image Broadway 6 Help Getting Started > Create a New Image Create a New Image New Image gives you a blank canvas with size, resolution, and background color as specified. 1. Use the File > New (Ctrl+N) menu item to display the New dialog. 2. In the New Image dialog, choose and type in a name for the image. 3. The image size is preset as the previous selected size or the current clipboard image size. You can change the width and height, and select the unit in pixels, inches, or centimeters (cm). 4.
Image Broadway 6 Help Getting Started > Create New Image from Clipboard Create New Image from Clipboard You can create a new image by pasting in the image from the clipboard. This feature is only available when there is an image in the clipboard. 1. Use the File > Clipboard (Ctrl+L) menu item to paste in the image from the clipboard, or 2.
Image Broadway 6 Help Getting Started > Import Image from Digital Camera or Scanner Import Image from Digital Camera or Scanner Before importing an image from digital camera or scanner, make sure the driver and the software are properly installed. To check the driver availability and device readiness, use the File > Select Source menu item. If it is grayed out or if there is no entry on the list, then it is an indication that the driver is not properly installed and the device is not ready. 1.
Image Broadway 6 Help Getting Started > Undo/Redo/Reload/Purge Undo Undo/Redo/Reload/Purge Undo Getting an image the way you want it often times requires a lot of trial and error. Image Broadway is equipped with unlimited undo and redo functions to support your efforts for making a perfect image. If too many mistakes have been made, you may want to start over with the last saved version. You can use the File > Reload menu item to reload the previous saved file. Undo/Redo uses memory storage.
Image Broadway 6 Help Getting Started > Use the History Toolbox Use the History Toolbox The History palette lets you jump to any state of the image created during the current working session. Each time you apply a change to an image, the new state of that image is added to the toolbox. Click the left arrow to undo it or the right arrow to redo it; click the trash can to remove the selected state from the history list.
Image Broadway 6 Help Getting Started > About RAW Formats About RAW Formats Image Broadway supports RAW formats from over 500 digital camera models (see Image Broadway website for the complete list). The following file extensions are considered as RAW formats: .3FR, .ARW, .BAY, .CR2, .CRW, .CS1, .DC2, .DCR, .DNG, .ERF, .FFF, .K25, .KDC, .MRW, .MOS, .NEF, .NRW, .ORF, .RAF, .RAW, .RDC, .RW2, .RWL, .PEF, .SR2, .SRF, .SRW, .TIF, .
Import Image from Digital Camera or Scanner Undo/Redo/Reload/Purge Undo Use the History Toolbox About Canvas Zooming and Viewing Measuring Tool Use the Tray Toolbox Use the Info Toolbox Drag and Drop an Image File from Another Application Copy Image to Clipbaord Paste Image from Clipboard or from Another Image in Image Broadway Grid Rulers Guides FileStream Home Page
Image Broadway 6 Help Getting Started > About Canvas About Canvas Canvas is the work area of the image, which defines the image's dimensions, 2000 by 3000 pixels for example. It may consist of a single layer or multiple layers. You can use the File > New menu item to begin a new canvas. This canvas will have a layer with its size and background color that you specify. You can work on this layer, or you can add more layers onto your canvas.
Image Broadway 6 Help Getting Started > Zooming and Viewing Zooming and Viewing When you work on an image that requires precise or pixel by pixel editing, there are several available zooming tools that can be very useful. Click on the tool links below for more detailed information.
Image Broadway 6 Help Getting Started > Zooming and Viewing > Use the Zoom Tool Use the Zoom Tool Click the Zoom tool on the Toolbar, then click on the image canvas where you will be working on to zoom in the specified area. There are several buttons provided in the Options dialog: Actual Pixel is 100:100 image and display, Large Size is 100:400, and Fit to Windows is scaled up or down the image if required to fit into the existing windows. You can also click on More for other zoom size options.
Image Broadway 6 Help Getting Started > Zooming and Viewing > Use the Hand Tool Use the Hand Tool The Hand tool is available whenever part of the image cannot be fully displayed in the current window. You can click on the Hand tool on the Toolbar to enable it, then click and drag the image so the area you want to work on is in view. This tool is sometimes more convenient than using the scroll bar to locate an area from a large image.
Image Broadway 6 Help Getting Started > Zooming and Viewing > Use Navigator View the Navigator Toolbox Use the Toolboxes > Navigator menu item or mouse over the Navigator/Info tab at the side of the screen (default) to display the docked Navigator/Info toolbox. See Toolbox for more detailed information about how to use the toolboxes. Zooming 1. Change zooming by dragging the slider. 2. You can set the button 1-5 by clicking the button and press the Shift key at the same time.
Image Broadway 6 Help Getting Started > Measuring > Measuring Tool Measuring Tool To use this tool, click the Measuring tool on the Toolbar. To measure the distance: Click and drag a line on the image to see the distance (see below). To measure the angle from the horizontal line: Click and drag a line on the image to see the angle (see below). To measure the angle from the previous line: Click and drag a line on the image. Click any point you want to see the angle by holding Shift key (see below).
Image Broadway 6 Help Getting Started > Measuring > Drafting Tools Rulers: When visible, rulers appear along the top and left side of the active window. Markers in the ruler display the pointer's certain positions when you move your pointer. Check off the View > Rulers menu item to hide or show the Rulers. Guides: Guides appear as vertical and horizonal lines that float over the entire image.
Image Broadway 6 Help Getting Started > Use the Tray Toolbox Use the Tray Toolbox The Selection Tray feature allows you to see all the image files that you have opened at the same time. You can save, print, close, or select an image from the several buttons on the tray toolbox. Viewing the Tray Toolbox Use the Toolbox > Selection Tray menu item or mouse over the History/Tray tab at the side of the screen (default) to display the docked History/Tray toolbox.
Image Broadway 6 Help Getting Started > Use the Info Toolbox Use the Info Toolbox The Track Info feature provides you with handy information about pixel color values, cursor positions, and image, select area, and object sizes. As you move the cursor around, the corresponding color values and position information are automatically updated in the display.
Image Broadway 6 Help Getting Started > Drag and Drop an Image File from Another Application Drag and Drop an Image File from Another Application You can drag an image file from the file list in Windows Explorer, My Computer, Network, or other compatible applications, like FileStream Turbo Browser, and drop it in Image Broadway to have it automatically opened.
Image Broadway 6 Help Getting Started > Copy Image to Clipbaord Copy Image to Clipbaord Copy selected layer or part of the layer 1. Use one of the selection tools to select an area, which will be marked by marching ants (moving dashed lines). 2. Use the Edit > Copy menu item to copy it to the clipboard. Copy selected image or part of the image 1. Use one of the selection tools to select an area, which will be marked by marching ants (moving dashed lines). 2.
Image Broadway 6 Help Getting Started > Paste Image from Clipboard or from Another Image in Image Broadway Paste Image from Clipboard or from Another Image in Image Broadway Paste image into a layer from Clipboard 1. Use the Edit > Paste menu item and the pasted image will appear at the center of the layer. Paste image into a selection - This function is useful when you want to change part of the layer. 1.
Image Broadway 6 Help Getting Started > Grid Grid You can enable grid for each individual image to help positioning the object elements more easily. 1. Use the File >Preferences menu item, Grid/Rulers/Guides tab to set the default show or hide grid for any image. 2. You can select the grid size, grid color, and style in the File >Preferences menu item, Grid/Rulers/Guides tab. 3. Click the View > Grid menu item or use the Shift+Ctrl+P shortcut keys to show or hide grid in the current image.
FileStream Home Page
Image Broadway 6 Help Getting Started > Rulers Rulers You can enable rulers for each individual image to help knowing the positions of the object elements more easily. 1. Use the File >Preferences menu item, Grid/Rulers/Guides tab to set the default show or hide rulers for any image. 2. You can select the ruler unit - pixels, inches, or centimeters (cm) in the File >Preferences menu item, Grid/Rulers/Guides tab.
Image Broadway 6 Help Getting Started > Guides Guides You can create any number of guides for each individual image. Guides are flexible position lines. It can be vertical or horizontal and can be dragged to any place you like. To create a new guide Click on one of the rulers and drag, a blue dotted line will appear. Drag the line to the place you want and release the cursor. You can also use the View > New Guide menu item to create vertical or horizontal guide at the specified initial position.
Move Guides Horizontal guides can move up and down and vertical guides can move left and right. Click the guide and drag it to the position you want. Delete Guides Drag the guide to outside of the image and it will disappear. Clear Guides Click the View > Clear Guides menu item to clear all guides. Lock Guides Click the View > Lock Guides menu item to lock all guides. You cannot move locked guides. Snap to Guides Click the View > Snap to Guides toggle menu item to turn this function on and off.
Image Broadway 6 Help Selection Selection There are two types of selections. The first type works by drawing lines to indicate the selection. The second type makes a selection by basing on colors or other criteria in the image. Once you have a selection you can draw, paint, or process the image in the selection, or you can cut, copy, stroke, or float the section as a floating layer. Image Broadway uses a special alpha channel to implement the channel. Selections can only be made on the active layer.
Image Broadway 6 Help Selection > Create Selection Create Selection You can first create a selection of your photo or image based on certain selection criteria, such selecting an area. Then, apply photo or image processing only to the selection. FileStream Image Broadway offers you a number of tools for you to create selections.
Image Broadway 6 Help Selection > Create Selection > Use the Rectangle/Ellipse Tools Use the Rectangle/Ellipse Tools Use the Rectangle/Ellipse Tools on the Toolbar to select a rectangular or an elliptical area. Click on the pull down arrow to select the Rectangle or the Ellipse tool. Then click and drag your cursor in the image window to form the rectangular or the elliptical selection. Release the mouse button to complete your selection.
Image Broadway 6 Help Selection > Create Selection > Use the Lasso and the Intelligent Lasso Tools Use the Lasso and the Intelligent Lasso Tools Use the Lasso and Intelligent Lasso Tools on the Toolbar to mark and select an irregularly shaped area. Click on the pull down arrow to select the tool you want. Then follow the instructions below to complete your selection. When completed, the selection border is displayed as moving dashed lines, traditionally referred to as the marching ants.
Edit Selections Save and Load Selections Move, Copy, Paste into, and Delete Selected Area FileStream Home Page
Image Broadway 6 Help Selection > Create Selection > Convert Paths to Selections Convert Paths to Selections Use the Path Tool on the Toolbar to convert paths to selections. The Path tool has the most advanced editing abilities. You can use the Path tool to make a selection. It works by placing control points on an image first. To start creating a path: Select the Create function. Click on the screen to add the control points. Convert path to selection: Only closed path can be converted to selection.
Image Broadway 6 Help Selection > Create Selection > Use the Fuzzy Tool Use the Fuzzy Tool Use the Fuzzy Tool on the Toolbar to select area with similar color. When using the Fuzzy Select tool, click on the photo or image to select a seed pixel as the color reference point. All direct adjoining pixels with colors within the specified color range of the seed pixel are included when the Contiguous option is checked off.
Image Broadway 6 Help Selection > Create Selection > Create Selection by Selecting Color Range Create Selection by Selecting Color Range Use the Select > By Color menu item to select pixels with colors that are close to the color you specify. 1. From the Select color drop down list, choose one of the following: ° Choose Pick a color to enable the "Pick a Color" tool and pick a color from the photo or image.
Image Broadway 6 Help Selection > Create Selection > Use Quick Mask Use Quick Mask You can make a selection, add to it or subtract from it, or both, to make it a mask. You can also create an entirely new mask in the Quick Mask mode to make it a selection. Below is an example of making a selection of a flower mask. 1. Use one of the Select tools to select the flower with a rough outline. 2. Select the Select > Quick Mask Mode menu item, a red colored overlay covers the protected area as shown below.
3. 4. Click the Select > Quick Mask Mode menu item again to turn off the Quick Mask Mode and return to the original image with the selection. The red colored overlay is now off. 5. Copy the selection to the clipboard and paste it in as the image shown below.
Edit Selections Save and Load Selections Move, Copy, Paste into, and Delete Selected Area FileStream Home Page
Image Broadway 6 Help Selection > Create Selection > Change Quick Mask Options Change Quick Mask Options You can use the Select > Quick Mask Options menu item to change mask color and opacity. To change to a new mask color, click on the color button. The default color is red. To change opacity, slide the bar or enter a value from 0 (transparent) to 100 (totally opaque or non-transparent). The default opacity is 50 percent.
Image Broadway 6 Help Selection > Modify Selection To expand or shrink a selection You can grow or shrink the boundary of the current selection by the amount specified in its dialog. 1. Make a selection first. 2. Choose Select > Modify > Grow or Select > Shrink. 3. Enter number of pixels to grow or shrink the selection. To create a new selection based on the border of the current selection You can create a selection of the border around the previous selection's edge.
Image Broadway 6 Help Selection > Soften Selection Edges Soften Selection Edges You can soften selection edges by using anti-aliased or feather. Anti-aliased When you make a selection of ellipse, polygon, or by-color, due to the slope of the segment, some pixels are on both sides of the segment. That is, these pixels are only partially selected. What happens to this set of partially selected pixels is determined by the Antialiasing option.
Image Broadway 6 Help Selection > Combine Multiple Selections Combine Multiple Selections You can click on the Select, Tool Options bar to select: Replace , Add , Subtract , or Intersect . If the selected option is Replace, you can still overwrite the option by holding down the Shift key for Adding, Control key for Subtracting, and both Shift and Control keys for Intersecting when creating the new section.
Image Broadway 6 Help Selection > Move Selections Move Selections You can use the Move tool on the Toolbar to move the selection itself or the selected area (contents). To move the selection itself, make your selection using the Selection or the Lasso tools. Select the Move tool, check off the Move selection option on the Move options toolbar if it is not already checked off, and drag your selection to move it to a new location.
Image Broadway 6 Help Selection > Delete Selection Delete Selection You can always deselect a selection by using the Select > Deselect menu item or by double clicking anywhere on the photo or image to delete a selection. You cannot deselect a selection, however, once it becomes a layer, for example after it has been moved.
Image Broadway 6 Help Selection > Edit Selections Edit Selections You can use Quick Mask and Channels to Edit Selection. Both Quick Mask and Channels are gray scale images. You can edit them just like you edit any other image with the painting tools, editing tools, and filters. The difference between the two is that Quick Mask is a temporary mask. As soon as you exit the Quick Mask mode, the mask is converted back to selection. To save a selection permanently, you should use Channels, which can be stored.
Image Broadway 6 Help Selection > Edit Selections > Use Quick Mask and Channels to Edit Selection Use Quick Mask and Channels to Edit Selection You can use Quick Mask and Channels to Edit Selection. Both Quick Mask and Channels are gray scale images. You can edit them just like you edit any other image with the painting tools, editing tools, and filters. The difference between the two is that Quick Mask is a temporary mask. As soon as you exit the Quick Mask mode, the mask is converted back to selection.
3.
Image Broadway 6 Help Selection > Edit Selections > Use Quick Mask and Channels to Edit Selection > Change Channel Options Change Channel Options You can change Channel options by clicking Selection Copy in the Channels Toolbox, then clicking the first icon from the left at the bottom of the Toolbox. You can change the name of the channel, opacity, and color. To change the opacity, slide the bar or enter a value from 0 (transparent) to 100 (totally opaque or non-transparent).
Image Broadway 6 Help Selection > Edit Selections > Use the Path Tool to Edit Selection Use the Path Tool to Edit Selection You can use the Path tool to edit selection. Create a selection and use the Select > To Path menu item to convert the selection to path. Use the Path tool to edit path as described below. To move the control points: Click on the control point while holding down the Ctrl key, and drag it to the new location or select the Move Pt function on the Path toolbar to drag and move it.
Image Broadway 6 Help Selection > Save and load selections Save and load selections You can save and load selections. Use Channels to Save and Load Selections. See Use Channels for more information. Save and Load Selections Directly. See Load Selections for more information.
Image Broadway 6 Help Selection > Save and load selections > Use Channels Use Channels You can use channels to save and load selections. Use the Select > To Channel menu item to convert selection to channel. When you save the image in Image Broadway native format (*.ibw), the channel information associated with it will be automatically included. You can reload the selection from the channels for reuse when needed.
Image Broadway 6 Help Selection > Save and load selections > Save and Load Selections Directly Save and Load Selections Directly You can save and load selections directly. Use the Select > Save Selection menu item to save the selection. Use the Select > Load Selection menu item to load the selection. You can also load the selection into other images.
Image Broadway 6 Help Selection > Save and load selections > Save and Load Selections Directly > Load Selection Options Load Selection Options You can save and load selections directly with the following options.
Image Broadway 6 Help Selection > Move, Copy, Paste into, and Delete Selected Area Move, Copy, Paste into, and Delete Selected Area You can move, copy, paste into, and delete selected area (contents in the selection). Move the selected area. See Move Selected Area for more information. Copy the selected area. See Copy Selected Area for more information. Paste into Selection. See Paste into Selected Area for more information. Delete the selected area. See Delete Selected Area for more information.
Image Broadway 6 Help Selection > Move, Copy, Paste into, and Delete Selected Area > Move the Selected Area Move the Selected Area You can select the Move tool on the Toolbar to move the selection area (contents) or the selection itself. To move the selected area, make your selection using the Selection or the Lasso tools. Select the Move tool, uncheck the Move selection option on the Move options toolbar if it is checked off, and drag the selected area to move it to a new location.
Image Broadway 6 Help Selection > Move, Copy, Paste into, and Delete Selected Area > Copy the Selected Area Copy the Selected Area Once you select an area, you can use the Edit > Copy menu item to copy the active layer or you can use the Edit > Copy Merged menu item to copy what you see on your screen.
Image Broadway 6 Help Selection > Move, Copy, Paste into, and Delete Selected Area > Paste into Selection Paste into Selection 1. Create a selection 2. Select the Edit > Paste Into menu item. 3. Use Move tool to move the pasted image to the place you want. 4. When you are satisfied with your result, you can use the Layer > Anchor menu item to merge down the pasted layer with the underlying layer.
Image Broadway 6 Help Selection > Move, Copy, Paste into, and Delete Selected Area > Delete the Selected Area Delete the Selected Area You can use the Edit > Clear menu item to clear the selected area. You can also use the Edit > Cut menu item to cut the selection to clipboard. Deleting a selection from the background layer will replace the area with the background color. Deleting a selection from the layer other than the background layer will replace the area with transparency.
Image Broadway 6 Help Resizing and Transforming > Canvas Size Canvas Size When you open an existing image file or create a new image, the size of the image is the size of the canvas. Sometimes we use the words Canvas and Image interchangeably. You can add more images as layers or paste new images to the existing image. If you add a layer that is larger than the canvas, it will only show parts of the new layer that fits into the canvas. The size of the canvas will not change automatically.
Image Broadway 6 Help Resizing and Transforming > Canvas Size > Change Canvas Size Change Canvas Size 1. 2. 3. 4. Choose the Image > Canvas Size menu item. Enter the new canvas size in width and height. You can choose to assign the new pixels as white or background color if you make the new canvas larger. If you only want to change the canvas size but not the layers, uncheck Resize all layers* and all layer sizes will remain the same.
Image Broadway 6 Help Resizing and Transforming > Canvas Size > Fit Canvas to Layers Fit Canvas to Layers Find out first the largest layer in width and the largest layer in height. Then, use these dimensional values as the canvas size.
Image Broadway 6 Help Resizing and Transforming > Canvas Size > Scale Image Scale Image 1. Choose the Image > Scale Image menu item. 2. Enter the new size in pixels, inches, cm or in percent of the original canvas. You can also select the constraint proportions with width, height, or none. Choose an interpolation method for scaling.
Image Broadway 6 Help Resizing and Transforming > Canvas Size > Crop Canvas using Crop Command Crop Canvas using Crop Command 1. Select the area using one of Selection tools. 2. Choose the Image > Crop menu item to only keep the selected are.
Image Broadway 6 Help Resizing and Transforming > Canvas Size > Use the Crop Tool to Crop Canvas Use the Crop Tool to Crop Canvas 1. 2. 3. 4. Click and select the Crop tool from the toolbar. You have the option to enter the starting position in X and Y, width, and height. Uncheck the Layer only option for cropping the canvas. You also have the option to click and drag over the image to select what you like to crop.
Image Broadway 6 Help Resizing and Transforming > Canvas Size > Auto Crop Image Auto Crop Image Use the Image >Auto Crop menu item to auto crop an area based on the active layer. Based on the active layer, it searches for the largest borders with the same color, and crops the borders from the layer. All other layers are cropped to the same size borders. If you want to have more control over how to crop image, use the Image > Trim menu item. See Trim Image for more information.
Image Broadway 6 Help Resizing and Transforming > Canvas Size > Trim Image Trim Image Use the Image >Trim menu item to trim image. In the Trim dialog, you can trim the active layer based on repetitions of Color of top left pixel Color of bottom right pixel Transparent pixels You have the option to trim any or all of four borders. You also have the option to specify the Fuzziness or Tolerance of the border selections.
Image Broadway 6 Help Resizing and Transforming > Canvas Size > Fit Image Fit Image This function will resize the image without changing its aspect ratio to fit into the canvas with size specified in the dialog. Since this function is also one of the batch commands, you can use the "Save Settings" button to save the specified width and height as the default settings for batch processing.
Image Broadway 6 Help Resizing and Transforming > Flip/Mirror/Rotate Image Flip/Mirror/Rotate Image Choose the Image > Image Rotation > Flip, Mirror, Rotate 90 CW (clockwise), Rotate 90 CCW (counter clockwise), or Rotate 180 menu item to perform the desired operation. Rotate 90 CW or Rotate 90 CCW may change canvas size.
Image Broadway 6 Help Resizing and Transforming > Scale Selected Area and Layer Scale Selected Area and Layer 1. Select the layer or the area you want to scale. 2. Click and select the Scale tool from the toolbar (group of Transform tools to the left of the Text tool or use the Edit > Transform > Scale menu item. 3. Click on the image and the scale marquee with four handles in the corners of the bounding rectangle is displayed. 4.
Related Topics Canvas Size Flip/Mirror/Rotate Image Content-Aware Scale Selected Area and Layer Rotate Selected Area and Layer Straighten Selected Area and Layer Skew Selected Area and Layer Perspective Correct Selected Area and Layer Create Panorama FileStream Home Page
Image Broadway 6 Help Resizing and Transforming > Content-Aware Scale Selected Area and Layer Content-Aware Scale Selected Area and Layer Before After Content-Aware Scaling After Scaling Content-Aware Scaling is also called smart scaling. It resizes the image without changing the objects such as building or people. The pictures above show the difference between scaling and content-aware scaling. 1. Select the layer or area you want to scale. 2.
10. Note: Most of menu items and tools are disabled during this operation. You have to either confirm the operation by pressing or cancel the operation by pressing Related Topics Canvas Size Flip/Mirror/Rotate Image Scale Selected Area and Layer Rotate Selected Area and Layer Straighten Selected Area and Layer Skew Selected Area and Layer Perspective Correct Selected Area and Layer Create Panorama FileStream Home Page before you can continue with other operations.
Image Broadway 6 Help Resizing and Transforming > Rotate Selected Area and Layer Rotate Selected Area and Layer 1. Select the layer or area you want to rotate. 2. Click and select the Rotate tool from the toolbar (group of Transform tools to the left of the Text tool ) or use the Edit > Transform > Rotate menu item. 3. Click on the image and the scale marquee with handles in each of the four corners of the bounding rectangle is displayed. The cursor changes to the rotate cursor . 4.
9. 10. The rotated layer exceeds the canvas borders. If you want to change the canvas size to accomodate the rorated image, use Image > Fit Canvas to Layers to do it. The result is as shown below. 11. The Interpolation method selected in the File > Preference > Image Editor tab dialog is used to determine the colors of scaled pixels. 12. When ready, press to rotate, or you can click on the image with the Shift key down to perform the rotating function.
FileStream Home Page
Image Broadway 6 Help Resizing and Transforming > Straighten Selected Area and Layer Straighten Selected Area and Layer 1. Select the layer or area you want to straighten. 2. Click and select the Straighten tool from the toolbar (group of Transform tools to the left of the Text tool ) or use the Edit > Transform > Straighten menu item. 3. Click on the image and a grid with a small center circle is displayed. The cursor changes to a rotate cursor 4.
11. 12. The rotated layer exceeds the canvas borders. If you want to change the canvas size to accomodate the rorated image, use Image > Fit Canvas to Layers to do it. The result is as shown below. 13. Crop the image using Crop tool as shown below.
13. Note: Most of menu items and tools are disabled during this operation. You have to either confirm the operation by pressing or cancel the operation by pressing Related Topics Canvas Size Flip/Mirror/Rotate Image Scale Selected Area and Layer Content-Aware Scale Selected Area and Layer Rotate Selected Area and Layer Skew Selected Area and Layer Perspective Correct Selected Area and Layer Create Panorama FileStream Home Page before you can continue with other operations.
Image Broadway 6 Help Resizing and Transforming > Skew Selected Area and Layer Skew Selected Area and Layer 1. Select the layer or area you want to skew. 2. Click and select the Skew tool from the toolbar (group of Transform tools to the left of the Text tool ) or use the Edit > Transform > Skew menu item. 3. Click on the image and the skew marquee with handles in each of the four corners of the bounding rectangle is displayed. 4.
Image Broadway 6 Help Resizing and Transforming > Perspective Correct Selected Area and Layer Perspective Correct Selected Area and Layer 1. Select the layer or area you want to correct. (See the photo at the left below.) 2. Click and select the Perspective Correction tool from the toolbar (group of Transform tools to the left of the Text tool ) or use the Edit > Transform > Perspective Corrective menu item. from the toolbar. 3.
Canvas Size Flip/Mirror/Rotate Image Scale Selected Area and Layer Content-Aware Scale Selected Area and Layer Rotate Selected Area and Layer Straighten Selected Area and Layer Skew Selected Area and Layer Create Panorama FileStream Home Page
Image Broadway 6 Help Resizing and Transforming > Create Panorama Create Panorama You can create a panoramic photo from layers. 1. Use the File > Open as Layers menu item to open multiple files that you want to blend into one panoramic image. 2. Arrange layers from top to bottom as from left to right or from right to left. 3. Use the Edit > Panorama Blend Layers menu item to display the Panarama dialog, which is shown below. 4. You can choose the direction of the layers.
4. the percentage of image to be overlapped with the next one. 5. The panoramic photo below is the result of blending five images.
Image Broadway 6 Help Image Adjustments Image Adjustments Before Image Adjustment 1. Use the Image > Duplicate menu item to save a copy of image file. 2. Clean up blemishes and remove unwanted objects. 3. Use a Selection tool to select the area you want to make adjustment.
Image Broadway 6 Help Image Adjustments > Color and Tonal Adjustments Color and Tonal Adjustments Please refer to the following topics for more information about: Adjust Brightness and Contrast Make Color Correction Convert Color to Black and White Adjust Colors Related Topics Before Image Adjustment Adjust Brightness and Contrast Make Color Corrections Convert Color to Black and White Adjust Colors FileStream Home Page
Image Broadway 6 Help Image Adjustments > Color and Tonal Adjustments > Adjust Brightness and Contrast Adjust Brightness and Contrast If you only want to change the brightness of mid-tone colors, use the Adjust/Enhance > Auto Gamma menu item. It applies gamma correction automatically. Gamma value is the calculated mean value of luminance of the image. Click on the additional tool links below for more detailed information.
Image Broadway 6 Help Image Adjustments > Color and Tonal Adjustments > Adjust Brightness and Contrast > Adjust Tonal Range Adjust Tonal Range 1. Adjust the tonal range to increase contrast by using the Adjust/Enhance > Auto Levels menu item. This function finds out the darkest and brightest colors. It also ignores the top 1% darkest and brightest pixels in the image. Then, it redistributes the values proportionally for each color channel.
Image Broadway 6 Help Image Adjustments > Color and Tonal Adjustments > Adjust Brightness and Contrast > Adjust Backlighting Adjust Backlighting You can bring out details of the background by using the Adjust/Enhance > Darkroom > Adjust Backlighting Command. Select the Adjust Backlighting menu item to open the Darkroom toolbox. This and other menu commands are grayed out when the Darkroom toolbox is open.
Image Broadway 6 Help Image Adjustments > Color and Tonal Adjustments > Adjust Brightness and Contrast > Fill Flash Fill Flash You can brighten the shadow areas by using the Adjust/Enhance > Darkroom > Fill Flash Command. Select the Fill Flash menu item to open the Darkroom toolbox. This and other menu commands are grayed out when the Darkroom toolbox is open. Click the OK or the Cancel button in the Darkroom toolbox before you can access this and other menu command. 1.
Image Broadway 6 Help Image Adjustments > Color and Tonal Adjustments > Adjust Brightness and Contrast > Brightness/Contrast Brightness/Contrast You can change brightness and contrast by using the Adjust/Enhance > Darkroom > Brightness/Contrast Command. Select the Fill Flash menu item to open the Darkroom toolbox. This and other menu commands are grayed out when the Darkroom toolbox is open. Click the OK or the Cancel button in the Darkroom toolbox before you can access this and other menu command. 1.
Image Broadway 6 Help Image Adjustments > Color and Tonal Adjustments > Adjust Brightness and Contrast > Shadow/Highlights Shadow/Highlights When taking pictures indoor near windows, you will get silhouetted images due to strong backlighting from the windows, like in the sample photo shown below. You can use the Shadow/Highlight tool to improve Shadow and Highlight details. 1. Click the Adjust/Enhance > Shadows/Highlights menu item to open the Shadows/Highlight dialog.
1. Shadow Amount - is the shadow lightening amount. Tonal width - is the shadow tonal width. Smaller values limit modifications on the darker part of the image; larger values increase the toner areas to be adjusted. Radius - is the shadow radius in pixels. This value is used to control the neighboring areas around the pixel. Compare the pixel to its neighboring pixels to determine it is a shadow or a highlight. A large value is likely to make the whole image lighten up.
Amount - is the highlight darkening amount. Tonal width - is the highlight tonal width. Smaller values limit on the brighter part of the image; larger values increase the toner areas to be adjusted. Radius - is the highlight radius in pixels. This value is used to control the neighboring areas around the pixel. Compare the pixel to its neighboring pixels to determine it is a shadow or a highlight. A large value is likely to make the whole image darken.
Related Topics Adjust Tonal Range Adjust Backlighting Fill Flash Brightness/Contrast FileStream Home Page
Image Broadway 6 Help Image Adjustments > Color and Tonal Adjustments > Make Color Corrections Make Color Corrections You can refer to the following topics for information about these tools: Remove Color Cast - Use this tool to remove unwanted tint of a particular color. Hue/Saturation - Use this tool to adjust the hue, saturation, luminosity values of the entire image or of individual colors.
Image Broadway 6 Help Image Adjustments > Color and Tonal Adjustments > Make Color Corrections > Remove Color Cast Remove Color Cast Color cast generally refers to unwanted tint of a particular color. 1. Use the Adjust/Enhance > Auto Color menu item to adjust color balance by shifting the mean value of each channel to the neutral gray to remove color cast. 2. If the Auto Color tool cannot remove color cast completely, use the Adjust/Enhance > Levels menu item instead.
Image Broadway 6 Help Image Adjustments > Color and Tonal Adjustments > Make Color Corrections > Hue/Saturation Hue/Saturation You can change Hue and Saturation by using the Adjust/Enhance > Darkroom > Hue/Saturation Command. Select the Hue/Saturation menu item to open the Darkroom toolbox. This and other menu commands are grayed out when the Darkroom toolbox is open. Click the OK or the Cancel button in the Darkroom toolbox before you can access this and other menu command. 1.
Image Broadway 6 Help Image Adjustments > Color and Tonal Adjustments > Make Color Corrections > Color Balance Color Balance You can change color balance by using the Adjust/Enhance > Darkroom > Color Balance Command. Select the Color Balance menu item to open the Darkroom toolbox. This and other menu commands are grayed out when the Darkroom toolbox is open. Click the OK or the Cancel button in the Darkroom toolbox before you can access this and other menu command. 1.
Image Broadway 6 Help Image Adjustments > Color and Tonal Adjustments > Make Color Corrections > Curves Curves More precise color adjustments can be made by using the Adjust/Enhance > Curves command, but you need to understand how it relates to the Levels command. The Levels tool can improve the contrast of the image. However it sometime produces color casts. Color casts happens easily in photographs when the picture’s color balance is off due to the different sensibilities of the film and human eyes.
5. Input range, it shows more contrast details than the bottom part of the Input range that is the midtones to highlights ranges. 6. In the Figure below, there are 4 control points picked up from the image. Some of them to stretch to show more details to get the contrast you want. 7. You can press the Reset or the Cancel button at any moment to undo the changes. Reset will also reset the settings to the default values.
Image Broadway 6 Help Image Adjustments > Color and Tonal Adjustments > Convert Color to Black and White Convert Color to Black and White You can refer to the following topics for information about these commands: Black and White Desaturate Related Topics Black and White Desaturate FileStream Home Page
Image Broadway 6 Help Image Adjustments > Color and Tonal Adjustments > Convert Color to Black and White > Black and White Black and White You can use the Adjust/Enhance > Black and White menu item to generate Black and white picture. Each RGB color of a pixel will have the same Intensity as before.
Image Broadway 6 Help Image Adjustments > Color and Tonal Adjustments > Convert Color to Black and White > Desaturate Desaturate You can use the Adjust/Enhance > Desaturate menu item to remove colors from the image. Each RGB color of a pixel will be reassigned using lightness of the pixel.
Image Broadway 6 Help Image Adjustments > Color and Tonal Adjustments > Adjust Colors Adjust Colors You can refer to the following topics for information about these commands: Invert Posterize Equalize Threshold Related Topics Invert Posterize Equalize Threshold FileStream Home Page
Image Broadway 6 Help Image Adjustments > Color and Tonal Adjustments > Adjust Colors > Invert Invert You can use the Adjust/Enhance > Adjust > Invert menu item to generate color inverted image with the appearance of a negative.
Image Broadway 6 Help Image Adjustments > Color and Tonal Adjustments > Adjust Colors > Posterize Posterize Posterization of an image entails conversion of a continuous gradation of tone to several regions of fewer tones, with abrupt changes from one tone to another. Choose Adjust/Enhance > Adjust > Posterize to posterize an image. This command lets you specify how many levels you want to have for each color channel. It matches each color to the closest levels in that channel.
Image Broadway 6 Help Image Adjustments > Color and Tonal Adjustments > Adjust Colors > Equalize Equalize You can use the Adjust/Enhance > Adjust > Equalize menu item to evenly redistribute the RGB color channels.
Image Broadway 6 Help Image Adjustments > Color and Tonal Adjustments > Adjust Colors > Threshold Threshold The Threshold tool is useful because it reveals color value distribution in an image and lets you select the desired range. 1. The original image is below. 2. Open the Threshold dialog by choosing the Adjust/Enhance > Threshold menu item. 3. The Threshold tool consists of a dialog that displays the histogram of the image's pixel values.
5. 6. 7. 8. 9. You can press the Cancel button to return to your original image. You can use Threshold on layers to create a cool effect on your photo as shown below. Use the Duplicate tool in the Layers toolbox to create four more layers. Make the top layer visible. Use the Threshold command. In the Threshold dialog, drag the slider to 90 for the top layer, and increase the number for the layers below. The bottom layer is using 158 shown in the picture above. 10.
11. 12. Use the Layers > Merge > Merge All menu item to merge all the layers and fill in the white background. You can also use the Adjust/Enhance > Darkroom > Hue/Saturation menu item to change colors.
Related Topics Invert Posterize Equalize FileStream Home Page
Image Broadway 6 Help Image Adjustments > Smooth and Sharpen Smooth and Sharpen After color and tonal adjustment, as one of the final steps, you can: Use the Filters/Effects > Sharpen menu item to sharpen the edges in the image. Use the Filters/Effects > Smooth menu item to remove noise or blemishes from the image.
Image Broadway 6 Help Image Adjustments > Reduce Noise and Sharpen Image > Reduce Noise Reduce Noise Digital cameras often produce quite some noise in their pictures especially in the shadow areas. Some are worse than others but they are there. You can use the Adjust/Enhance > Reduce Noise menu item to minimize noise.
Image Broadway 6 Help Image Adjustments > Reduce Noise and Sharpen Image > Auto Sharpen Auto Sharpen Digital cameras often produce quite some noise in their pictures especially in the shadow areas. Some are worse than others but they are there. You can use Filters > Sharpen >Auto Sharpen menu item to automatically minimize noise.
Image Broadway 6 Help Image Adjustments > Reduce Noise and Sharpen Image > Unsharp Mask Unsharp Mask Unsharp mask is one of the commands you can use to sharpen all or part of a photo or image. It works by performing a reverse or negative blurring operation.
Image Broadway 6 Help Image Adjustments > Reduce Noise and Sharpen Image > Smart Sharpen and Contrast Smart Sharpen and Contrast 1. Choose the Filter > Sharpen > Smart Sharpen command to open the Smart Sharpen and Contrast dialog as shown below. 2. This filter includes many components and creates multiple adjustment layers. It has the option to merge them together. Or you can keep them as separated adjustment layers. The merged layer uses less resource.
5. For local contrast enhancement, use Unsharp Mask with large radius (widening the edge) to shows more detail in the shadow and highlight areas. 6. Use the screen adjustment layer in Screen blend mode to brighten the highlights areas without changing the shadow areas. 7. Use the overlay adjustment layers in Overlay mode to increase the contrast between the highlights areas and the shadow areas. 8. Check off Preview to see the image as shown below.
8.
Unsharp Mask FileStream Home Page
Image Broadway 6 Help Image Adjustments > Levels Adjustments Levels Adjustments Please refer to the following topics for more information about: Use Levels to Adjust Color Use Levels to Adjust Tonal Range Related Topics Use Levels to Adjust Color Use Levels to Adjust Tonal Range FileStream Home Page
Image Broadway 6 Help Image Adjustments > Levels Adjustments > Levels > Use Levels to Adjust Color Use Levels to Adjust Color 1. Select the Adjust/Enhance > Levels menu item to open the Levels dialog. The three eye dropper buttons , from left to right, are the Black Color Picker, Gray Color Picker, and White Color Picker. 2. If you find, for example, the color of the flower in the above photo is not as white as it is supposed to be, you can first check off the Preview option.
Related Topics Use Levels to Adjust Tonal Range FileStream Home Page
Image Broadway 6 Help Image Adjustments > Levels Adjustments > Levels > Use Levels to Adjust Tonal Range Use Levels to Adjust Tonal Range Tonal range of an image refers to the range of distribution of the darkest tone (shadow) to the lightest tone (highlights) with the full range being from 0 to 255. An image with a lot of pixels in the shadow area appear dark while an image with a lot of pixels in the highlights area appear bright. Tonal Range Adjustment is the redistribution of pixel tones. 1.
4. 5. You can drag the black and white Output levels sliders to define new shadow and highlight values. You can also enter values directly in the Output levels text boxes. 6. You can press Reset or Cancel button at any moment to undo the changes. Reset will also reset the settings to the default values. 7. You may also use the Auto button to have Image Broadway find out the lowest and the highest values in each channel to increase the contrast to 0-255 for you.
Image Broadway 6 Help Image Adjustments > Check Image Quality with Histogram Check Image Quality with Histogram You can use the Adjust/Enhance > Histogram menu item to open the Histogram dialog. The Histogram graph shows the distribution of pixel intensity levels. The horizontal axis represents each of the intensity levels (0-255). The vertical axis shows the number of pixels with that intensity level.
FileStream Home Page
Image Broadway 6 Help Brush and Retouching > Use Brush & Mask Toolbox Use Brush & Mask Toolbox You can use the Toolbox > Brush & Mask menu item to display the dockable Brush/Mask toolbox on the screen, or scroll and find the Brush/Mask tab on the Shortcuts Bar and click it to display the Brush/Mask toolbox. You can float the Brush/Mask toolbox or dock it to the side of the screen. When it is already displayed on the screen, the Brush/Mask tab is hidden from the Shortcut bar.
Image Broadway 6 Help Brush and Retouching > Use Brush & Mask Toolbox > Select Brush Select Brush Click in Customized brush box to use customized brush. Click in Preset brush box to use one of the preset brushes.
Image Broadway 6 Help Brush and Retouching > Use Brush & Mask Toolbox > Customize Brush Customize Brush Click and drag in Customized brush box to change the shape of the brush. Radius of the brush is displayed in the upper left corner. To keep the brush as circle, use the Shift key. Drag the slider to change the angle and hardness of brush.
Image Broadway 6 Help Brush and Retouching > Use Brush & Mask Toolbox > Preset Brush Preset Brush Click the down arrow of the Preset brush box to choose any preset brush.
Image Broadway 6 Help Brush and Retouching > Use Brush & Mask Toolbox > Load Brush Load Brush Click the arrow button and choose Select to load previously saved customized brush.
Image Broadway 6 Help Brush and Retouching > Use Brush & Mask Toolbox > Save Brush Save Brush Click the arrow button and choose Save or Save As to save customized brush.
Image Broadway 6 Help Brush and Retouching > Use Brush & Mask Toolbox > Use Opacity Use Opacity Opacity is the degree of how much the background can be seen through the selected object. The background is less visible with higher opacity value. You can drag the Opacity bar to select the desired opacity in the same way as you drag the color bars to select the color hues or use the left and right arrows above the Opacity bar to increase or decrease the opacity by 1 to precisely specify the opacity.
Image Broadway 6 Help Brush and Retouching > Use Brush & Mask Toolbox > Build up Build up This function is available when you turn on the Painting tool. When drawing or painting, the color overlaps itself simulating repeated strokes. When this option is unchecked, it has no effects on the same area with additional strokes.
Image Broadway 6 Help Brush and Retouching > Use Brush & Mask Toolbox > Mode Specification Mode Specification Mode specification is very important to achieve certain designs and looks and is sometimes overlooked as a significant feature. Widely used in anything involving color or value, whether it is filling or painting, the mode controls how colors and values should be blended with one another. For quick and easy accessibility it is located in the Brush and Mask toolbox.
Image Broadway 6 Help Brush and Retouching > Use Brush & Mask Toolbox > Pressure Sensitivity Pressure Sensitivity Image Broadway supports digitalizing tablets such as Wacom tablets. You can specify your stylus pressure using the Control Panel. Check off Size, Opacity, or Pressure if you want the increasing pressure to change the size, opacity or pressure of your brush.
Image Broadway 6 Help Brush and Retouching > Use Brush & Mask Toolbox > Mask/Remask Mask/Remask Mask Color - Mask color can be specified by clicking on the mask color box, which is to the right of the three Mask mode buttons. Clicking on the Mask color box will make it to assume the foreground color. After the mask color has been set, it will stay unchanged until you click on the Mask color box again. Normal Mode - Normal mode can be selected by clicking the far left of the three Mask mode buttons.
Image Broadway 6 Help Brush and Retouching > Use Brush & Mask Toolbox > Viewing the Brush/Mask Toolbox Viewing the Brush/Mask Toolbox Click the Toolbox > Brush/Mask menu item to display the dockable Brush/Mask toolbox on the screen, or scroll and find the Brush/Mask tab on the Shortcuts Bar and click it to display the Brush/Mask toolbox. You can float the Brush/Mask toolbox or dock it to the side of the screen. When it is already displayed on the screen, the Brush/Mask tab is hidden from the Shortcut bar.
Image Broadway 6 Help Brush and Retouching > Blending Mode Blending Mode How pixels in an image are affected by a painting or editing tool is defined by the painting mode. It blends the color you paint with the underlying pixels. Painting modes are similar with layer blending modes. The following notations are used.
Addition The result of adding the blending image to the original can produce values > 255. If a component of the resulting is larger than 255, it will be clipped to 255. The result color is: R=O+B. Subtraction The result of subtracting the blending image from the original can produce negative values. If a component of the resulting is less than zero, it will be clipped to 0. The result color is: R=O-B.
Related Topics Use Brush & Mask Toolbox FileStream Home Page
Image Broadway 6 Help Brush and Retouching > Opacity Opacity Opacity sets the transparency of the color you apply. It controls the opacity of each stroke. Adjust the Opacity slider in the Brush & Mask toolbox to change it. If the Build up option is not checked off, the paint will not exceed the set opacity no matter how many times you paint over the same area until you release mouse button.
Image Broadway 6 Help Brush and Retouching > Retouching Tools > Clone Tool Clone Tool 1. 2. 3. 4. 5. 6. 7. 8. 9. 10. Select the Clone tool. Select a brush from the Brush/Mask toolbox. Click the down arrow on the blending Mode and select a blending mode in Brush/Mask toolbox. Select the Opacity from 0-100 in Brush/Mask toolbox. Lower value gives transparent effect; higher value gives more opaque painting. Check off the Align option if you want to align the source point with the first target point.
Image Broadway 6 Help Brush and Retouching > Retouching Tools > Blur, Sharpen, Smudge Tools Blur, Sharpen, Smudge Tools 1. Select a brush from the Brush/Mask toolbox. 2. Click the Down arrow on the blending Mode and select a blending mode in Brush/Mask toolbox. 3. Select the Opacity from 0-100 in Brush/Mask toolbox. Lower value gives transparent effect; higher value gives more opaque painting. 4. Select the Pressure from 0-100. Lower value gives weak effect; higher value gives stronger effect. 5.
Image Broadway 6 Help Brush and Retouching > Retouching Tools > Dodge and Burn Tools Dodge and Burn Tools Both tools are used for retouching image. Dodge tool lightens the image under the brush; Burn tool darkens the image under the brush. These two terms come from Photographer's darkroom. To show more details in the shadow, Photographers use hand or tool covers part of the picture to dodge the light.
Image Broadway 6 Help Brush and Retouching > Retouching Tools > Remove Red Eye Tool Remove Red Eye Tool You can remove red eye by using the Adjust/Enhance > Darkroom > Remove Red Eye Command. Select the Remove Red Eye menu item to open the Darkroom toolbox. This and other menu commands are grayed out when the Darkroom toolbox is open. Click the OK or the Cancel button in the Darkroom toolbox before you can access this and other menu command. 1. Select the Threashold from 0-100 percent.
Image Broadway 6 Help Brush and Retouching > Retouching Tools > Heal Tool Heal Tool The Heal tool removes irregularities from an image. It uses the texture of the sample area or the relationship between pixels to apply to the target area. The color of target area will be be similar as before but its texture will be similar to that of the sampled area. How to use this tool: 1. 2. 3. 4. 5. 6. 7. 8. 9. 10. Select the Heal tool from the toolbar. Select a brush from the Brush/Mask toolbox.
Image Broadway 6 Help Painting, Drawing, Filling, and Gradients Painting, Drawing, Filling, and Gradients Click on each of the topic links below for more detailed information.
Image Broadway 6 Help Painting, Drawing, Filling, and Gradients > Choosing Colors Choosing Colors Click on each of the topic links below for more detailed information.
Image Broadway 6 Help Painting, Drawing, Filling, and Gradients > Choosing Colors > Use the Paint Toolbox Use the Paint Toolbox You can use the Toolbox > Paint menu item to display the dockable Paint toolbox on the screen, or scroll and find the Paint tab on the Shortcuts Bar and click it to display the Paint toolbox. You can float the Paint toolbox or dock it to the side of the screen. When it is already displayed on the screen, the Paint tab is hidden from the Shortcut bar.
Image Broadway 6 Help Painting, Drawing, Filling, and Gradients > Choosing Colors > Use the Paint Toolbox > Select Foreground and Background Colors Select Foreground and Background Colors At any given time, either the foreground color (left box) or the background color (right box) is in focus as indicated by a double lined box border. To the right of the foreground and background color boxes are the black and white color boxes for your convenience.
Image Broadway 6 Help Painting, Drawing, Filling, and Gradients > Choosing Colors > Use the Paint Toolbox > Set Palette Colors Set Palette Colors When you click on a color box in the palette while holding down the Shift key, the color box will be replaced with the foreground or background color in focus.
Image Broadway 6 Help Painting, Drawing, Filling, and Gradients > Choosing Colors > Use the Paint Toolbox > Use the RGB Control Bars Use the RGB Control Bars The RGB Control bars as seen underneath the palette controls respectively, the amount of red, green, and blue within a particular color. This can be changed using the drag feature of the color bars.
Image Broadway 6 Help Painting, Drawing, Filling, and Gradients > Choosing Colors > Use the Paint Toolbox > Use Color Map Use Color Map Color consists of hue, intensity, and value. Hue is the pigment, or the source color. For example, red is a color hue. However, more than hue is needed to achieve a beautiful array of colors. Intensity is controlled by the Color Map. You can select the desired color by moving the cursor on the Color Map to where you want it. Finally, Value is the degree of light and dark.
Image Broadway 6 Help Painting, Drawing, Filling, and Gradients > Choosing Colors > Use the Paint Toolbox > Use Color Dialog Use Color Dialog Click on the Foreground or Background color you will get the dialog with Custom Color, Web Safe Colors, and Named Web Colors. Click on the color to select the active foreground or background. You can also use the Pick a Color tool in the toolbar to select a color.
Image Broadway 6 Help Painting, Drawing, Filling, and Gradients > Choosing Colors > Use the Paint Toolbox > Viewing the Paint Toolbox Viewing the Paint Toolbox You can use the Toolbox > Paint menu item to display the dockable Paint toolbox on the screen, or scroll and find the Paint tab on the Shortcuts Bar and click it to display the Paint toolbox. You can float the Paint toolbox or dock it to the side of the screen. When it is already displayed on the screen, the Paint tab is hidden from the Shortcut bar.
Image Broadway 6 Help Painting, Drawing, Filling, and Gradients > Choosing Colors > Use the Swatches Toolbox Use the Swatches Toolbox You can use the Toolbox > Swatches menu item to display the dockable Swatches toolbox on the screen, or scroll and find the Swatches tab on the Shortcuts Bar and click it to display the Swatches toolbox. You can float the Swatches toolbox or dock it to the side of the screen. When it is already displayed on the screen, the Swatches tab is hidden from the Shortcut bar.
Image Broadway 6 Help Painting, Drawing, Filling, and Gradients > Choosing Colors > > Use the Swatches Toolbox > Select Foreground and Background Colors Select Foreground and Background Colors At any given time, either the foreground color (left box) or the background color (right box) is in focus as indicated by a double lined box border. To the right of the foreground and background color boxes are the black and white color boxes for your convenience.
Image Broadway 6 Help Painting, Drawing, Filling, and Gradients > Choosing Colors > > Use the Swatches Toolbox > Manage Swatches Color Palette Manage Swatches Color Palette You can create your own custom palette by adding, deleting, or switching to web safe color. You can also click on more button for the popup menu to load or save the swatches, or sort the color by hue or luminance. To show or hide the color swatches toggle the Toolbox > Swatches menu item.
Image Broadway 6 Help Painting, Drawing, Filling, and Gradients > Choosing Colors > > Use the Swatches Toolbox > Shift a Color to Web Safe Color Shift a Color to Web Safe Color Double click on the color in the swatches to display the Color dialog with Custom Color, Web Safe Colors, and Named Web Colors. Click on the Web Safe Color tab to shift a color to Web safe color.
Image Broadway 6 Help Painting, Drawing, Filling, and Gradients > Choosing Colors > > Use the Swatches Toolbox > Add a Color in Swatches Add a Color in Swatches The total size of the color swatches is 256. If there is enough space, you can add the foreground color by pressing add button. If there is no room, add button will be disabled. You can use delete button colors to free up space for adding.
Image Broadway 6 Help Painting, Drawing, Filling, and Gradients > Choosing Colors > > Use the Swatches Toolbox > Delete Color(s) in Swatches Delete Color(s) in Swatches 1. Click on the color you want to delete from the swatches. 2. Hold down the Ctrl key to select multiple colors, or use Shift key to select a range of multiple colors. 3. Press the delete button to delete the color(s).
Image Broadway 6 Help Painting, Drawing, Filling, and Gradients > Choosing Colors > > Use the Swatches Toolbox > Change a Color in Swatches Change a Color in Swatches 1. Double click on the color in swatches you want to change for the Color dialog. 2. Select a new color from the Color dialog and click OK to replace the old color.
Image Broadway 6 Help Painting, Drawing, Filling, and Gradients > Choosing Colors > > Use the Swatches Toolbox > Viewing the Swatches Toolbox Viewing the Swatches Toolbox You can use the Toolbox > Swatches menu item menu item to display the dockable swatches toolbox on the screen, or scroll and find the swatches tab on the Shortcuts Bar and click it to display the swatches toolbox. You can float the swatches toolbox or dock it to the side of the screen.
Image Broadway 6 Help Painting, Drawing, Filling, and Gradients > Choosing Colors > Use Pick a Color Tool Use Pick a Color Tool You can pick to select a color from the image or any part of the screen. 1. Select the Pick a Color tool from the toolbar. 2. You have option to select the sample size. Enter the size from 1 to 15, or click the down arrow to use the popup slider for selecting the sample size. 3. Click on the screen with the Eyedropper cursor screen to pick a color for the Background color.
Image Broadway 6 Help Painting, Drawing, Filling, and Gradients > Choosing Colors > Use Keyboard Shortcuts Use Keyboard Shortcuts You can use keyboard shortcuts to pick up Foreground and Background colors. 1. Use Ctrl+Shift+J to pick a color during painting. This shortcut does not change the tool, but displays the Eyedropper cursor. You can pick up Foreground color with left click and Background color with right click. 2.
Image Broadway 6 Help Painting, Drawing, Filling, and Gradients > Painting, Drawing, Filling, Gradients Tool Options Painting, Drawing, Filling, Gradients Tool Options Click on each of the topic links below for more detailed information.
Image Broadway 6 Help Painting, Drawing, Filling, and Gradients > Painting, Drawing, Filling, Gradients Tool Options > Blending Mode Blending Mode How pixels in the image are affected by a painting or editing tool is defined by the painting mode. It blends the color you paint with the underlying pixels. Painting modes are similar to the layer blending modes. See Brush and Retouching, Blending Mode for detailed descriptions of each mode.
Image Broadway 6 Help Painting, Drawing, Filling, and Gradients > Painting, Drawing, Filling, Gradients Tool Options > Opacity Opacity Opacity sets the transparency of the color you apply. As you paint over an area, the paint will not exceed the set opacity no matter how many times you paint over the same area until you release mouse button. It controls the opacity of each stroke. The only exception is the Build up option for some of the tools.
Image Broadway 6 Help Painting, Drawing, Filling, and Gradients > Painting Tools Painting Tools Click on each of the topic links below for more detailed information.
Image Broadway 6 Help Painting, Drawing, Filling, and Gradients > Painting Tools > Air Brush Tool Air Brush Tool 1. 2. 3. 4. 5. 6. 7. 8. 9. Select Foreground color in the Paint/Brush/Swatches toolbox. Select a brush from the Brush/Mask toolbox. Click the down arrow on the blending Mode and select a blending mode in Brush/Mask toolbox. Select the Opacity from 0-100 in Brush/Mask toolbox. Lower value gives transparent effect; higher value gives more opaque painting. Select the Pressure from 0-100.
Image Broadway 6 Help Painting, Drawing, Filling, and Gradients > Painting Tools > Paint Brush Tool Paint Brush Tool Paint Brush gives soft strokes. Use the Pencil tool 1. 2. 3. 4. 5. 6. 7. 8. 9. from the toolbar if you want to have strokes with hard edges. Select Foreground color in the Paint toolbox. Select a brush from the Brush/Mask toolbox. Click the down arrow on the blending Mode and select a blending mode in Brush/Mask toolbox. Select the Opacity from 0-100 in Brush/Mask toolbox.
Image Broadway 6 Help Painting, Drawing, Filling, and Gradients > Painting Tools > Eraser Tool Eraser Tool 1. 2. 3. 4. 5. 6. 7. 8. 9. 10. Select Background color in the Paint toolbox. Select a brush from the Brush/Mask toolbox. Click the down arrow on the blending Mode and select a blending mode in Brush/Mask toolbox. Select the Opacity from 0-100 in Brush/Mask toolbox. Lower value gives transparent effect; higher value gives more opaque painting.
Image Broadway 6 Help Painting, Drawing, Filling, and Gradients > Painting Tools > Pencil Tool Pencil Tool 1. 2. 3. 4. 5. 6. 7. 8. 9. Select Foreground color in the Paint toolbox. Select a brush from the Brush/Mask toolbox. Click the down arrow to select a blending mode in the Brush/Mask toolbox. Select the Opacity from 0-100 in Brush/Mask toolbox. Lower value gives transparent effect; higher value gives more opaque painting. Select pixel size from 1-5 pixels.
Image Broadway 6 Help Painting, Drawing, Filling, and Gradients > Drawing Tools Drawing Tools Click on each of the topic links below for more detailed information.
Image Broadway 6 Help Painting, Drawing, Filling, and Gradients > Drawing Tools > Line, Rectangle, Rounded Rectangle, and Ellipse Tool Line, Rectangle, Rounded Rectangle, and Ellipse Tool 1. 2. 3. 4. 5. 6. 7. 8. 9. 10. 11. Select Foreground color in the Paint toolbox. Select a brush from the Brush/Mask toolbox. Click the down arrow on the blending Mode and select a blending mode in Brush/Mask toolbox. Select the Opacity from 0-100 in Brush/Mask toolbox.
Image Broadway 6 Help Painting, Drawing, Filling, and Gradients > Drawing Tools > Arrow Tool Arrow Tool 1. 2. 3. 4. 5. 6. 7. 8. 9. 10. 11. 12. 13. 14. Select Foreground color in the Paint toolbox. Select a brush from the Brush/Mask toolbox. Click the down arrow on the blending Mode and select a blending mode in Brush/Mask toolbox. Select the Opacity from 0-100 in Brush/Mask toolbox. Lower value gives transparent effect; higher value gives more opaque painting. Check off Soft for a smooth shape.
Image Broadway 6 Help Painting, Drawing, Filling, and Gradients > Stroking Selections Stroking Selections Once you have a selection, you can cut and copy it. You can also paint, draw, and process the selected image without changing the unselected area. Select the Edit > Stroke Selection with Pencil, Air Brush, Brush, Eraser, Blur, Sharpen, Smudge, Dodge, or Burn command to paint a selection edge outline with the selected tool. 1. Create a selection. 2.
Image Broadway 6 Help Painting, Drawing, Filling, and Gradients > Stroking Selections > Stroking Path Stroking Path Path is a collection of points and can be created by using the Path Tool. You can save and load a path. Each image window allows only one active path at any given time.
Image Broadway 6 Help Painting, Drawing, Filling, and Gradients > Filling Tools Filling Tools Click on each of the topic links below for more detailed information.
Image Broadway 6 Help Painting, Drawing, Filling, and Gradients > Filling Tools > Fill Tool Fill Tool The Fill tool is based upon the seed color you pick on the image to select a contiguous region or contiguous regions and fill with the specified contents. 1. Select the Fill tool and click the down arrow from Type to choose from: Foreground, Background, Black, White, Pattern and Transparent. 2. Click the down arrow on the blending Mode and select a blending mode. 3. Select the Opacity from 0-100.
Image Broadway 6 Help Painting, Drawing, Filling, and Gradients > Filling Tools > Pattern Filling Pattern Filling The Fill tool is based upon the seed color you pick on the image to select a contiguous region or contiguous regions and fill with the specified contents. 1. 2. 3. 4. Click the Type pull down menu to select a pattern. Choose a pattern from the pattern menu. To load a pattern, right click on one of the existing patterns and click change pattern. Click on the image to select the seed point.
Image Broadway 6 Help Painting, Drawing, Filling, and Gradients > Filling Tools > Fill Command Fill Command The Fill tool is based upon the seed color you pick on the image to select a contiguous region or contiguous regions and fill with the specified contents. If you have a selection or you want to change the whole image color, you can use the Fill command to do it. 1. Choose the Edit > Fill command to open the Fill dialog. 2.
Image Broadway 6 Help Painting, Drawing, Filling, and Gradients > Gradients Gradients The Gradient tool fills the selected area with blend of foreground and background colors, foreground to transparent color, or custom colors. To create gradients, select the Gradient tool on the toolbar. Then, drag the cursor in the direction you want the gradient to go from one color to another, release the mouse button where you want the gradient to end.
Example: To add special color effect to your photo. 1. Use the Layers menu or the Layers/Channels/paths toolbox to create a new layer. 2. Select red as the foreground color. 3. Click the Gradient tool on the toolbar. 4. Select Liner shape gradient from the Shape pull down selections. 5. Mouse over Gradient types to see the name of available Gradient types. Select the Spectrum 2 gradient type. 6. Drag the cursor from left to right. The new gradient layer will cover the original photo background layer. 7.
Related Topics Painting, Drawing, Filling, and Gradients Choosing Colors Painting, Drawing, Filling, Gradients Tool Options Painting Tools Drawing Tools Stroking Selections Filling Tools FileStream Home Page
Image Broadway 6 Help Text > About Text Layer About Text Layer Text Layer is a special layer created by using the text tool. The advantage of Text Layer is that you can change the text, orientation, alignment, font, color, and size of the text via Text tool options easily. The disadvantage of Text layer is that painting, drawing and filters cannot be directly applied to it. When you paint, draw, or apply a filter to the text layer, Image Broadway creates an image layer from the text layer first.
Image Broadway 6 Help Text > Text Tool Text Tool 1. Select the Text tool and click the point on the image. The cursor will show the starting position and the base line of the text. A text dialog will also be displayed. 2. Type or paste your text in the text box. While you are typing, most of other tools and functions are all disabled. 3. Choose the combination of styles from: Normal, Bold, Italic, and Bold Italic. 4. Choose a predefined text size or enter the text size that you want. 5.
Image Broadway 6 Help Text > Edit Text Edit Text 1. Select the Text Layer. 2. Choose the Text tool . 3. Click inside the text box. The Text dialog with the current text will be displayed. 4. Change the text to what you want.
Image Broadway 6 Help Text > Change Text Color Change Text Color 1. Select the Text Layer. 2. Choose the Text tool . 3. You can click on the color rectangle to open the color selection dialog or use the Pick a Color tool Text toolbar to select a color. Use this tool will keep the Text tool as the active tool.
Image Broadway 6 Help Text > Change Text Size Change Text Size 1. Select the Text Layer. 2. Choose the Text tool . 3. Click inside the text box. The Text dialog with the current text will be displayed. 4. The predefined text sizes are from 8 to 72. Choose a predefined text size or enter the text size that you want. You can enter size larger than 72 or smaller than 8. 5. You can use on the Text toolbar to increase the font size or to decrease the font size.
Image Broadway 6 Help Text > Rotate Text Rotate Text 1. Select the Text Layer. 2. 3. 4. 5. Choose the Text tool . Click inside the text box. The Text dialog with the current text will be displayed. Enter a new angle for the text. Use the Vertical Text tool on the text tool bar to switch the Text orientation to vertical (270 degrees); use the Horizontal Text tool to switch it to horizontal orientation.
Image Broadway 6 Help Text > Create Text Effects Create Text Effects Click on each of the topic links below for more detailed information.
Image Broadway 6 Help Text > Create Text Effects > Text Layer to Image Layer Text Layer to Image Layer Choose the Layer > Image Layer menu item to convert Text Layer to Image Layer so you can apply image editing tools and filters to your text object. However, once Text Layer is converted to Image Layer, you can no longer change its font, style, and other text attributes.
Image Broadway 6 Help Text > Create Text Effects > Convert Text To Selection Convert Text To Selection Use the Layer > Transparency > Select Transparency command to convert text to selection.
Image Broadway 6 Help Text > Create Text Effects > Text on Path Text on Path Below is an example of creating Text on Path. 1. Select the Text Layer. 2. Choose the Text tool . Enter, for example, a text as follows. 3. Select the Text on Curve tool and it will automatically switch to the Path tool 4. The Text-Path toolbar is shown below. 5. You can use the Load Path button the current path. . on the Text-Path toolbar to create a new path, load active path, or save 6.
7. 8. Choose the Spline Curve and Text over Path options. The Spline interpolation creates curve based on the anchor points. 9. The result is shown below. 10. When ready, press to confirm the changes and return to the Tex tool. To start over, press changes and return to the Text tool. to undo the Note: Most of menu items and tools are disabled during this operation.
Image Broadway 6 Help Text > Create Text Effects > Text on Circle Path Text on Circle Path Below is an example of creating Text on Circle Path. 1. Select the Ellipse Select tool with Constraint Aspect Ratio to create a circle selection. 2. Use the Select > To Path (Bezier) menu item to convert it to selection. 3. Select the Text tool the Text dialog. and click in the image to open the Text dialog. Create or paste text into the text box of 4.
8. Choose the Bezier Curve option, since the conversion was from selection to Bezier, and Text over Path options. 9. Click OK in the Text on Path dialog. The result is shown below. 10. When ready, press to confirm the changes and return to the Tex tool. To start over, press changes and return to the Text tool. to undo the Note: Most of menu items and tools are disabled during this operation.
Image Broadway 6 Help Text > Create Text Effects > Warp Text Image Warp Text Image Below is an example of creating a Warp Text Image. 1. Select the Text tool to open the Text dialog. Enter or paste text into the text box of the dialog. 2. Use the Filters > Distort > Warp menu item to display the Warp dialog as shown below. Select Upper or Lower Curve. Click on the curve and drag it to create the warp shape. Check off Preview to see the warped text. Click the Reset button to return to the previous shape. 3.
Image Broadway 6 Help Text > Create Text Effects > Text Effects with Image Text Effects with Image Below is an example of creating a Text Effects with Image. 1. Open the picture you want to use in Text Effects and send it to the Clipboard. 2. Select the Text tool to open the Text dialog. Enter or paste text into the text box of the dialog. 3. Use the Layers > Transparency > Select Transparency menu item to select the text. 4.
5.
Image Broadway 6 Help Text > Create Text Effects > Text Effects with Pattern Text Effects with Pattern Below is an example of creating a Text Effects with Pattern. 1. Select the Text tool to open the Text dialog. Enter or paste text into the text box of the dialog. 2. Choose the Bucket Fill tool and select Pattern type. 3. Click the down arrow of the pattern and select one of the patterns as shown below. 4.
3. 4. Click on Toolbox > Brush & Mask menu item or use the Brush/Mask Tab on the Shortcut Bar. (The Brush/Mask Tab is hidden if the toolbox is already on screen.) 5. Slide the Opacity slider to 75 and select the Screen Mode as shown below. 6. Click anywhere in the text to fill it with patterns. The pattern combines with the red text on the screen. The result is as shown below.
6.
Image Broadway 6 Help Text > Use Layer Styles to Create Text Effects Use Layer Styles to Create Text Effects Layer styles are popular ways to add effects in a non-destructive way to the text layer. In other words the text layer itself will remain unchanged. You can use most of them with just the default values. Check off the Preview option to view the changes on screen so you can adjust their setting to get the effects you want. Click on each of the topic links below for more detailed information.
Image Broadway 6 Help Text > Use Layer Styles to Create Text Effects > Inner Glow Inner Glow This effect can glow text on the edge or in the center. Below is an example of creating text inner glow. 1. Create a text layer as shown below. 2. Use the Layer > Layer Styles > Inner Glow menu item to display the Inner Glow dialog. Use the Size slider or enter 3 in the px (pixels) entry box as the size and use default settings for all other settings. Check off Preview to view the effects on screen.
3. 4. Use 9 pixels as the size and choose Inside glow. Use default for all other settings. Larger size glow creates emboss effect; smaller size glow creates outline effect. The result is as shown below.
Image Broadway 6 Help Text > Use Layer Styles to Create Text Effects > Inner Shadow Inner Shadow This effect can create shadow inside the text either on the edge or near the center. Below is an example of creating text inner shadow. 1. Create a text layer as shown below. 2. Use the Layer > Layer Styles > Inner Shadow menu item to display the Inner Shadow dialog. Choose black as the shadow color. Use the Size slider or enter 27 in the px (pixels) entry box as the size and use 17 % for choke.
3. 4. Set the shadow size to 15 pixels and no choke. Change Distance to 20 pixels and choose the shadow to be in the center. The result is as shown below.
Image Broadway 6 Help Text > Use Layer Styles to Create Text Effects > Outer Glow Outer Glow This effect can create Outer Glow effect that is similar to outline. Below is an example of creating text outer glow. 1. Create a text layer as shown below. 2. Use the Layer > Layer Styles > Outer Glow menu item to display the Outer Glow dialog. The example below uses white glow color on black background. If white background is used, the glow will disappear in Screen mode.
Drop Shadow Bevel, Emboss, and Metal Look 3D Pattern Border Satin Stroke Color Overlay Gradient Overlay Pattern Overlay FileStream Home Page
Image Broadway 6 Help Text > Use Layer Styles to Create Text Effects > Drop Shadow Drop Shadow This effect can create Drop Shadow effect that simulates lighting from an angle and distance. Below is an example of creating text Drop Shadow. 1. Create a text layer as shown below. 2. Use the Layer > Layer Styles > Drop Shadow menu item to display the Drop Shadow dialog. This example below uses black as the shadow color. Check off Preview to view the drop shadow on screen.
3.
Image Broadway 6 Help Text > Use Layer Styles to Create Text Effects > Bevel, Emboss, and Metal Look Bevel, Emboss, and Metal Look This effect can create bevel effects inside and outside the text. It can create bevels towards and away from you. It can also create hard metallic, glass, and soft pillow looks. 1. Create a text layer as shown below. 2. Use the Layer > Layer Styles > Bevel and Emboss menu item to display the Bevel and Emboss dialog. This example uses the Outer Bevel style.
3. mode, and opacity to create the pattern overlay effects. Check off Preview to view the result on screen. Click OK when you are satisfied with the Pattern Overlay result and move on to the next step. 4. Use the Layer > Layer Styles > Bevel and Emboss menu item to display the Bevel and Emboss dialog. Select Inner Bevel style to apply bevel inside the text and set Soften to 0 to give it a hard edge metal look. Check off Preview to view the result on screen. It is as shown below. 5.
Color Overlay Gradient Overlay Pattern Overlay FileStream Home Page
Image Broadway 6 Help Text > Use Layer Styles to Create Text Effects > 3D Pattern Border 3D Pattern Border This effect can create decorated borders to text or shape. Below is an example of creating text 3D Pattern Border. 1. Create a text layer as shown below. 2. Use the Layer > Layer Styles > 3D Pattern Border menu item to display the 3D Pattern Border dialog. Select pattern from the Down arrow and the blend mode. Check off Preview to view the result on screen.
FileStream Home Page
Image Broadway 6 Help Text > Use Layer Styles to Create Text Effects > Satin Satin This effect can create satin or silk look. It can also be used to add metallic and glass effects. Below is an example of creating text Satin look. 1. Create a text layer as shown below. 2. Use the Layer > Layer Styles > Satin menu item to display the Satin dialog. Check off Preview to view the result on screen. You may make changes and press the Enter key to preview again. When you are satisfied with the effects, click OK.
Drop Shadow Bevel, Emboss, and Metal Look 3D Pattern Border Stroke Color Overlay Gradient Overlay Pattern Overlay FileStream Home Page
Image Broadway 6 Help Text > Use Layer Styles to Create Text Effects > Stroke Stroke This effect can create borders or outlines to text and shape. Below is an example of creating text Stroke. 1. Create a text layer as shown below. 2. Use the Layer > Layer Styles > Stroke menu item to display the Stroke dialog. Check off Preview to view the result on screen. You may make changes and press the Enter key to preview again. When you are satisfied with the effects, click OK.
Pattern Overlay FileStream Home Page
Image Broadway 6 Help Text > Use Layer Styles to Create Text Effects > Color Overlay Color Overlay Color Overlay is very simple but useful tool. You can create text in any color and change it easily. You can use the preview function to see your color changes in real time. Check off Preview and try different blending with the background and different transparency levels to see different effects. Below is an example of creating text Color Overlay. 1. Create a text layer as shown below. 2.
4. Layer Style is created as an additional layer on top of the text layer (see below) to create the effects. It it is not destructive because pixels in the original image are not changed in any way. When you are satisfied with the effects, click OK.
Satin Stroke Gradient Overlay Pattern Overlay FileStream Home Page
Image Broadway 6 Help Text > Use Layer Styles to Create Text Effects > Gradient Overlay Gradient Overlay Gradient Overlay effect usually is used to add depth to an image. You can check off Preview and try on different blending with the background and use different transparency levels to get different looks. Below is an example of creating text Gradient Overlay. 1. Create a text layer as shown below. 2. Use the Layer > Layer Styles > Gradient Overlay menu item to display the Gradient Overlay dialog.
Inner Shadow Outer Glow Drop Shadow Bevel, Emboss, and Metal Look 3D Pattern Border Satin Stroke Color Overlay Pattern Overlay FileStream Home Page
Image Broadway 6 Help Text > Use Layer Styles to Create Text Effects > Pattern Overlay Pattern Overlay Pattern Overlay creates a surface. It can also be used with other effects to create the look you want. Below is an example of creating text Pattern Overlay. 1. Create a text layer as shown below. 2. Use the Layer > Layer Styles > Pattern Overlay menu item to display the Pattern Overlay dialog. Check off Preview to view the result on screen. You may make changes and press the Enter key to preview again.
Inner Glow Inner Shadow Outer Glow Drop Shadow Bevel, Emboss, and Metal Look 3D Pattern Border Satin Stroke Color Overlay Gradient Overlay FileStream Home Page
Image Broadway 6 Help Layers > About Layers About Layers Think of Layers as transparent sheets fitted around your canvas so that you can apply affects or make major changes without changing or damaging the entire body of the work. As you add brush strokes, objects, or text, you cover up parts of the Background layer. Transparent parts allow you to see through to the underlying layers. Each layer has a name, opacity value, blending mode, lock, visibility, and link status.
Related Topics Image Layer, Background Layer, Text Layer, and Floating Layer Use the Layers Toolbox Create a New Layer Remove a Layer Change the Stack Order of Layers Merge Layers Select a Layer Find a Layer Link and Unlink Layers Move the Contents of Layers Align Layers Lock and Unlock a Layer Hide and Show a Layer Open Files as Layers Change Layer Name Resize a Layer Transform a Layer Layer Opacity and Blending Transparency Layer Mask Layer Styles FileStream Home Page
Image Broadway 6 Help Layers > Image Layer, Background Layer, Text Layer, and Floating Layer Image Layer, Background Layer, Text Layer, and Floating Layer Image Layer An image layer is a layer consists of image. Most layers are image layers. Background Layer The Background layer is the first layer when you open an image file or a new image. The default status of background layer is locked. Text Layer A Text Layer is created by the Text tool .
Image Broadway 6 Help Layers > Use the Layers Toolbox Use the Layers Toolbox The Layers Toolbox lists all the layers in an image. The order layers are displayed in the toolbox is according to the order of layers stacked in the image. The top layer is listed first at the top and the bottom layer is the last. The Selected layer is highlighted and is the one being worked on exclusively unless it is merged with another layer.
Resize a Layer Transform a Layer Layer Opacity and Blending Transparency Layer Mask Layer Styles FileStream Home Page
Image Broadway 6 Help Layers > Create a New Layer Create a New Layer Layers: transparent sheets fitted to overlap on your canvas. Click on the blank sheet button, the first button to the left on the Layer Toolbox, or use the Layers > New menu item to create a new layer. Floating Layers: temporary layers that belong to an existing permanent layer.
Image Broadway 6 Help Layers > Remove a Layer Remove a Layer Click on the trash can button, the first button to the left on the Layer Toolbox, or use the Layers > Delete menu item to delete the selected layer.
Image Broadway 6 Help Layers > Change the Stack Order of Layers Change the Stack Order of Layers Move layer down Click on the down arrow button, which is the third button on the Layer Toolbox, or use the Layers > Arrange > Move Down menu to lower a layer. To make the layer the bottom layer: use the Layers > Arrange > Bring to Bottom command. To be the bottom layer means for all other visible layers appear above it.
Image Broadway 6 Help Layers > Merge Layers Merge Layers Merging layers is also called flattening an image. You can merge selected layers, or all of the layers in an image. Merging layers decreases the memory requirements for the image. Consider merging as gluing two or more layers together. Note: Merging of Layers is permanent. Merge All: Combines all the layers. 1. Position the layers or layer sets in the order how you want them to be merged. 2.
Change the Stack Order of Layers Select a Layer Find a Layer Link and Unlink Layers Move the Contents of Layers Align Layers Lock and Unlock a Layer Hide and Show a Layer Open Files as Layers Change Layer Name Resize a Layer Transform a Layer Layer Opacity and Blending Transparency Layer Mask Layer Styles FileStream Home Page
Image Broadway 6 Help Layers > Select a Layer Select a Layer Select A Layer Using the Layer Toolbox 1. Click on the layer thumbnail or layer name to select the active layer. Select A Layer Using the Select and Move Tool 1. Click the Select and Move tool . 2. Check off the Auto-Select Layer option. Click on the layer. The top layer under the click cursor is selected. The selected layer is outlined as shown below.
Layer Mask Layer Styles FileStream Home Page
Image Broadway 6 Help Layers > Find a Layer Find a Layer Find A Layer Using the Layer Toolbox 1. Click on each layer name or thumbnail, and the selected layer is outlined.
Image Broadway 6 Help Layers > Link and Unlink Layers Link and Unlink Layers You can link two or more layers and move them together. You can also align them based on the commands. 1. Click on the spot to the immediate left of the layer thumbnail, as shown below, to turn the toggle Link icon on and off.
Image Broadway 6 Help Layers > Move the Contents of Layers Move the Contents of Layers Use the Select and Move tool 1. Select the layer (see Select a Layer) or linked layers (see Link and Unlink Layers). 2. Click the Select and Move tool 3. Do one of the following: . o Click and Drag the layer to where you want it. o Use the keyboard arrow keys to move it one pixel at a time, to the left, to the right, up, or down.
Image Broadway 6 Help Layers > Align Layers Align Layers You can align two or more layers together. You also have the option to align layers to the active layer or to the selection. Use the Select and Move tool to align to the active layer 1. Select the layer (see Select a Layer) or linked layers (see Link and Unlink Layers). 2. Click the Select and Move tool . 3. Use the Align icon - left, right, top, or bottom (see below) to align layers. Use the menu command to align to the active layer 1.
2. Use the Select and Move tool to align to the selection You can align linked layers or the active layer to the selection. 1. To align to selection, turn on the Link icon of the layers or select the layer to be active layer. 2. Make the Selection. 3. Click the Select and Move tool . 4. Check off the Align to selection option. Use one of align icons: left, right, top, or bottom to align layers. Use the menu command to align to the selection You can align linked layers or the active layer to the selection.
Transform a Layer Layer Opacity and Blending Transparency Layer Mask Layer Styles FileStream Home Page
Image Broadway 6 Help Layers > Lock and Unlock a Layer Lock and Unlock a Layer You can lock a layer so that it cannot be moved. 1. 2. 3. 4. Click on the layer thumbnail or the layer name to select it as the active layer. Click on the Lock check box (1) at the top. The Lock icon (2) is shown below, immediately to the right of the thumbnail. Click to uncheck the Lock check box at the top to unlock the layer.
FileStream Home Page
Image Broadway 6 Help Layers > Hide and Show a Layer Hide and Show a Layer You can hide and show a layer. Use the Layers Toolbox to hide and show a layer. 1. 2. 3. 4. Click on the layer thumbnail or the layer name to select it as the active layer. Click on the Eye icon, if it is shown, to the left of the active layer selection. The Eye icon will disappear and the selected layer will become invisible. Click the circled area below to show the layer and the Eye icon will also reappear.
FileStream Home Page
Image Broadway 6 Help Layers > Open Files as Layers Open Files as Layers If you want to add images from files as layers, you can 1. use the File > Opan as Layer menu item to add images as layers.
Image Broadway 6 Help Layers > Change Layer Name Change Layer Name Each layer is automatically assigned a unique layer name to help you identify it. If you want to change it, 1. use the Layers > Rename menu item to change the name of active layer.
Image Broadway 6 Help Layers > Resize a Layer Resize a Layer Resize layer to canvas size Layers can be in different sizes at different locations. Some of the pasted, imported, drawings, or text images are cropped to fit the object size. When you draw or paint to those layer areas outside the object, you will get a warning message "Drawing to the empty area!". If you want your layer to be the same size as the canvas, use the Layers > Layer to Canvas Size menu item to resize it.
Layer Mask Layer Styles FileStream Home Page
Image Broadway 6 Help Layers > Transform a Layer Transform a Layer Click on each of the topic links below for more detailed information.
Image Broadway 6 Help Layers > Opacity and Blending Opacity and Blending Specify Layer Opacity Layer Opacity determines to what degree it obscures or shows the layer beneath it. A layer with 100 percent opacity is completely opaque. A layer with 0 percent opacity appears completely transparent. 1. Select the active layer from the Layers toolbox first. 2. Enter the desired opacity, from 0 to 100, in the entry box near the top of the Layers toolbox.
Image Broadway 6 Help Layers > Layer Mask > About Layer Mask About Layer Mask Only certain file formats support transparency. You have the option of using PNG or GIF format if you want part of your image to be transparent. The PNG format is supported by all popular browsers and has the advantage of 32-bit color depth. The Image Broadway IBW format saves transparency and alpha channel information as well. Transparency is implemented by using alpha channel. Alpha channel actually is a grayscale image.
Image Broadway 6 Help Layers > Transparency > Create Transparency Create Transparency 1. Select the active layer from the Layers toolbox first. 2. Choose the Layers > Transparency > Create by Color menu item. 3. You have the option to create alpha channel that uses the foreground, background, or the upper left corner color of the image. 4. You also have the option to Pick a Color. Use the displayed cursor to pick a color on the screen. 5.
Image Broadway 6 Help Layers > Transparency > Edit Transparency Edit Transparency 1. You can convert transparency to Layer Mask by using the Layers > Mask > Add Mask Using Tranaparency menu item. 2. Then, use the Layers > Mask > Edit Layer Mask menu item to edit the Layer Mask. 3. After editing, use the Layers > Mask > Apply Layer Mask menu item to convert layer mask to alpha channel.
Image Broadway 6 Help Layers > Transparency > Convert Transparency to Selection Convert Transparency to Selection To create new selection from transparency 1. Use the Layers > Transparency > Select Transparency menu item to create new selection from transparency. To create selection from transparency and add into the current selection 1. Use the Layers > Transparency > Add to Selection menu item to create new selection from transparency and add it into the current selection.
Image Broadway 6 Help Layers > Transparency > Change an Area to be Transparent Change an Area to be Transparent 1. 2. 3. 4. Use any selection tool to make a selection. Use the Edit > Fill menu item to open the Fill dialog. Select Transparent contents. Press OK.
Image Broadway 6 Help Layers > Transparency > Lock Transparency Lock Transparency 1. Use the Layers/Channels/Paths toolbox. 2. Click on the layer thumbnail or layer name to select the active layer. 3. Check off the Lock transparency option as indicated below.
Image Broadway 6 Help Layers > Transparency > Change Transparent Pixels back to Opaque Pixels Change Transparent Pixels back to Opaque Pixels 1. Select the Eraser tool from the Image Tools toolbar. 2. Check off the Reverse Transparency option. 3. Click and drag the brush over the transparent pixels to return them to the original opaque pixels.
Image Broadway 6 Help Layers > Layer Mask > About Layer Mask About Layer Mask You can use Layer Mask to control the transparency of a layer without changing the actual pixel of the layer. While you can use the Opacity control to adjust the transparency of a layer, using layer mask gives you more flexibilities in what to show, and what to hide. Layer mask can be edited. When you are satisfied with the results, just apply the layer mask to the layer.
Image Broadway 6 Help Layers > Layer Mask > Create Layer Mask Create Layer Mask Click on each of the topic links below for more detailed information.
Image Broadway 6 Help Layers > Layer Mask > Create Layer Mask > Create a Mask to Show or Hide the Entire Layer Create a Mask to Show or Hide the Entire Layer 1. 2. 3. 4. Click on the layer thumbnail or layer name to select the active layer. Choose the Layers > Mask > Add Mask to Reveal All menu item to create a layer mask to show all. Choose the Layers > Mask > Add Mask to Hide All menu item to create a layer mask to hide all.
Image Broadway 6 Help Layers > Layer Mask > Create Layer Mask > Create a Mask from Layer's Alpha Channel (Transparency) Create a Mask from Layer's Alpha Channel (Transparency) 1. Click on the layer thumbnail or layer name to select the active layer. 2. Choose the Layers > Mask > Add Mask Using Transparency menu item to create a layer mask from alpha channel. 3. A thumbnail box for the layer mask will be shown to the right of the thumbnail box of the layer image in the Layer toolbox (see below).
Image Broadway 6 Help Layers > Layer Mask > Create Layer Mask > Create a mask from selection Create a mask from selection 1. Click on the layer thumbnail or layer name to select the active layer. 2. Choose the Layers > Mask > Add Mask Using Selection menu item to create a layer mask from selection. 3. A thumbnail box for the layer mask will be shown to the right of the thumbnail box of the layer image in the Layer toolbox (see below).
Image Broadway 6 Help Layers > Layer Mask > Edit Layer Mask Edit Layer Mask 1. Click on the Layer Mask thumbnail or use the Layers > Mask > Edit Layer Mask menu item to edit the layer mask. 2. The white borders around the layer mask in the Layers toolbox indicate that the layer mask is in the Edit mode. 3. In the Edit mode, the palette colors are from black (RGB = 0, 0, 0), Gray (R = G = B), to white (RGB = 255, 255, 255).
5. Select black as the color for the paint brush to paint the sky. You will see the image with transparent sky as shown in the example below. 6. The following tools are commonly used in the edit mode. Paint Tool One of the most direct ways to modify masks is with the painting tools. The Brush, Airbrush, Eraser, Dodge, Burn, Blur, Sharpen, and Smudge tools can all be used. Using white brush tool on the background area to make them visible. To clear the selection, you can simply using the black brush tool.
Related Topics About Layer Mask Create Layer Mask Apply Layer Mask Delete Layer Mask Convert Layer Mask to Selection FileStream Home Page
Image Broadway 6 Help Layers > Layer Mask > Apply Layer Mask Apply Layer Mask 1. Choose the Layers > Mask > Apply Mask menu item. 2. It converts the layer mask to the layer alpha channel (as transparency). 3. The Layer Mask is applied to the layer.
Image Broadway 6 Help Layers > Layer Mask > Delete Layer Mask Delete Layer Mask 1. Choose the Layers > Mask > Delete Mask menu item and the layer mask is removed from the layer.
Image Broadway 6 Help Layers > Layer Mask > Convert Layer Mask to Selection Convert Layer Mask to Selection To create the new selection from layer mask 1. Use the Layers > Mask > Select Mask menu item to create new selection from layer mask. To create selection from layer mask and add into current selection 1. Use the Layers > Mask > Add to Selection menu item to create new selection from layer mask and add it into the current selection.
Image Broadway 6 Help Layers > Layer Styles About Layer Styles Stylized Layers is a great tool that lets you alter an image using some of Image Broadway's cool features with the use of layers without changing the original image. When you select a particular layer style, Image Broadway will create a separate special layer to add the special effects to the image. Some of the Style layers are created by using the selection or alpha channel of the active layer shown in the figure below.
Image Broadway 6 Help Layers > Layer Styles > Inner Glow Inner Glow Inner Glow adds glows to the inside of the layer alpha channel boundaries. Also see an example of Inner Glow Text Effect. Create Inner Glow 1. Click on the layer thumbnail or layer name to select the active layer. 2. Use the Layers > Layer Styles > Inner Glow menu item to create inner glow. Options: Color - Click on the color patch to specify the glow color. Size - Specifies the size of glow in pixels.
Image Broadway 6 Help Layers > Layer Styles > Inner Shadow Inner Shadow Inner Shadow adds shadows to the inside of the layer alpha channel boundaries. Also see an example of Inner Shadow Text Effect. Create Inner Shadow 1. Click on the layer thumbnail or layer name to select the active layer. 2. Use the Layers > Layer Styles > Inner Shadow menu item to create inner shadow. Options: Color - Click on the color patch to specify the shadow color. Size - Specifies the size of shadow in pixels.
Image Broadway 6 Help Layers > Layer Styles > Outer Glow Outer Glow Outer Glow adds glows to the outside of the layer alpha channel boundaries. Also see an example of Outer Glow Text Effect. Create Outer Glow 1. Click on the layer thumbnail or layer name to select the active layer. 2. Use the Layers > Layer Styles > Outer Glow menu item to create outer glow. Options: Color - Click on the color patch to specify the glow color. Size - Specifies the size of glow in pixels.
Image Broadway 6 Help Layers > Layer Styles > Drop Shadow Drop Shadow Drop Shadow adds shadows to the outside of the layer alpha channel boundaries. Also see an example of Drop Shadow Text Effect. Create Drop Shadow 1. Click on the layer thumbnail or layer name to select the active layer. 2. Use the Layers > Layer Styles > Drop Shadow menu item to create drop shadow. Options: Color - Click on the color patch to specify the shadow color. Size - Specifies the size of shadow in pixels.
Image Broadway 6 Help Layers > Layer Styles > Bevel, Emboss, and Metal Look Bevel, Emboss, and Metal Look Bevel, Emboss, and Metal Look add shadows and highlights to the layer alpha channel boundaries to give it more of a 3D look. Also see an example of Bevel, Emboss, and Metal Look Text Effect. Create Bevel, Emboss, and Metal Look 1. Click on the layer thumbnail or layer name to select the active layer. 2. Use the Layers > Layer Styles > Bevel and Emboss menu item to create bevel, emboss, and metal look.
Pattern Overlay Preview Layer Styles FileStream Home Page
Image Broadway 6 Help Layers > Layer Styles > 3D Pattern Border 3D Pattern Border 3D Pattern Border adds a 3D pattern border to the layer alpha channel boundaries to make the image appears to be in a decorative frame. Also see an example of 3D Pattern Border Text Effect. Create 3D Pattern Border 1. Click on the layer thumbnail or layer name to select the active layer. 2. Use the Layers > Layer Styles > 3D Pattern Border menu item to create 3D pattern border look.
Image Broadway 6 Help Layers > Layer Styles > Satin Satin It creates satin and silk look. It also adds additional depth and more realistic details to glass or metal effects. See also an example of Satin Text Effect. Create Satin 1. Click on the layer thumbnail or layer name to select the active layer. 2. Use the Layers > Layer Styles > Satin menu item to create satin look. Options: Color - Click on the color patch to specify the satin color.
Image Broadway 6 Help Layers > Layer Styles > Stroke Stroke It adds stroke or borders to shapes. Also see an example of Stroke Text Effect. Create Stroke 1. Click on the layer thumbnail or layer name to select the active layer. 2. Use the Layers > Layer Styles > Stroke menu item to create stroke. Options: Color - Click on the color patch to specify the stroke color. Position Inside - The stroke will be created from the boundary and grow inward.
Image Broadway 6 Help Layers > Layer Styles > Color Overlay Color Overlay It changes color to the shape. Also see an example of Color Overlay Text Effect. Create Color Overlay 1. Click on the layer thumbnail or layer name to select the active layer. 2. Use the Layers > Layer Styles > Color Overlay menu item to create color overlay. Options: Color - Click on the color patch to specify the color.
Image Broadway 6 Help Layers > Layer Styles > Gradient Overlay Gradient Overlay It adds gradient to the shape. Also see an example of Gradient Overlay Text Effect. Create Gradient Overlay 1. Click on the layer thumbnail or layer name to select the active layer. 2. Use the Layers > Layer Styles > Gradient Overlay menu item to create gradient overlay. Options: FG to BG - It shows the current gradient from foreground color to background color.
Image Broadway 6 Help Layers > Layer Styles > Pattern Overlay Pattern Overlay It adds texture to the shape. Also see an example of Pattern Overlay Text Effect. Create Pattern Overlay 1. Click on the layer thumbnail or layer name to select the active layer. 2. Use the Layers > Layer Styles > Pattern Overlay menu item to create pattern overlay. Options: Pattern - Click on the down arrow to select the pattern you want to use.
Image Broadway 6 Help Layers > Layer Styles > Preview Layer Styles To preview layer styles Choose the Layers > Layer Styles > Preview Styles menu item to preview all styles with the Next or Back button (see below). You can also click on an item in the left panel to preview the effects. If you like what the result, click the Apply button. When you are done with the preview, click the Close button to exit.
Image Broadway 6 Help Channels > About Channels About Channels A channel is used to store and edit selections. Each image in Image Broadway has at least three channels: Red, Green, and Blue. They are created automatically when you open a new image. You can also save the selections as additional channels. The selection tools are good, but channels provide a whole new set of options for creating, combining, and editing selections. In addition, it allows you to restore and reuse it again.
Image Broadway 6 Help Channels > Use the Channels Toolbox Use the Channels Toolbox The Channels toolbox lets you create and manage channels. The palette lists all channels in the image for instance, RGB, then the individual color channels and finally alpha channels. A thumbnail of the channel's contents appears to the left of the channel name. There are several buttons in the Channels toolbox for creating a new channel, duplicating a channel, moving a channel, or deleting a channel.
Image Broadway 6 Help Channels > View the Channels Toolbox View the Channels Toolbox The Channels toolbox is docked at the right side of the screen as its default position. You can float, move, dock to the other sides or other toolboxes. Click the Toolboxes > Channels menu item or mouse over the docked side to show or hide the Channels toolbox. To make it stay on screen or disappear, click on the toggle Auto-Hide pin icon in the upper right corner of the toolbox.
Image Broadway 6 Help Channels > Save Selections to Channels Save Selections to Channels After you complete a selection, you can save it to a channel mask using the Select > To Channel menu item.
Image Broadway 6 Help Channels > Add New Channel Add New Channel To add new channel, you must first have a selection. 1. Show the Layers/Channels/Paths toolbox. 2. Select the layer in the Layers toolbox that you want to add alpha channel. 3. Click the New Channel button at the bottom of the Channels toolbox to add new channel.
Image Broadway 6 Help Channels > Select a Channel Select a Channel Click on a channel's thumbnail or label in the Channels toolbox to select the channel. Select an alpha channel to be an active channel.
Image Broadway 6 Help Channels > Make Channels Visible Make Channels Visible A channel mask's visibility can be toggled on or off by clicking on its Eye icon to the left of the thumbnail in the Channels toolbox. It is visible when the Eye icon is displayed and invisible otherwise.
Image Broadway 6 Help Channels > Edit Channels Edit Channels To edit a channel, first click on the label to activate it. Click the Eye icon to make it visible if it is not visible already. In order to assist the editing, you can right click the label and choose Properties to change the mask color and opacity. The contrast you choose between the selection and the background can can make it easier for you to refine the selections.
Image Broadway 6 Help Channels > Change Channel Name and other Properties Change Channel Name and other Properties 1. Show the Layers/Channels/Paths toolbox. To make it stay on screen or disappear, click on the toggle Auto-Hide pin icon in the upper right corner of the toolbox. 2. Select the alpha channel and right click for the popup menu. 3. Select Properties in the right click popup menu. 4. The Channel Properties dialog allows you to change the channel Name, Opacity, and Mask Color.
Image Broadway 6 Help Channels > Add/Delete/Up/Down/Duplicate Channels Add/Delete/Up/Down/Duplicate Channels At the bottom of the Channels toolbox, there are several tool buttons for adding new channel, deleting, moving, and duplicating channel. To delete, move, or duplicate a channel, you should first select a channel by click on the label (not the icon). Then, click on the respective tools for the desired actions.
Image Broadway 6 Help Channels > Additional Channel Commands Additional Channel Commands For any selection channel, you can right click on the channel and select from the following additional commands. You can convert a channel back to selection, or add, subtract or intersect it with the current selection.
Image Broadway 6 Help Channels > Edit Alpha Channel to Remove Background Edit Alpha Channel to Remove Background You can edit an alpha channel to remove the background. 1. Show the Layers/Channels/Paths toolbox. To make it stay on screen or disappear, click on the toggle Auto-Hide pin icon in the upper right corner of the toolbox. 2. Select the alpha channel. 3. If the channel is not visible, click on the Eye icon to make it visible. A new channel is automatically visible by default.
4. If the mask color is too dark, right click on the channel and select Properties in the popup menu. In the channel properties dialog, change the color and opacity of the mask. 5. Select the Tools > Brush & Mask menu item. Select the top custom brush. Drag the circle to the size you want. You can start with a large brush to do a general mask. Then, use smaller ones or use a preset brush to do the details. The first brush in the preset brush is pixel brush. It does one pixel at a time. 6.
7. 8. If the image is too small to work on the details, click the Zoom tool the More button. on the Toolbar and select the Large Size or 9. Make sure you select all parts of the butterfly. You can use the brush to continue working on the image. The marquee marching ants will give you an indication where you should work on. The marching ants won't limit your brush strokes; however, they will not be updated by your work neither.
10. Once you are done with editing the alpha channel, you can do a Replace Selection and click on the Eye icon of the alpha channel to make it invisible. You will get the selection as below. 11. Copy the selection to clipboard and there is the butterfly without the background. 12.
12. Unselect the alpha channel to exit the edit mode.
Image Broadway 6 Help Channels > Alpha Channel Mask Effect Alpha Channel Mask Effect You can use alpha channel to create effects. 1. Show the Layers/Channels/Paths toolbox. To make it stay on screen or disappear, click on the toggle Auto-Hide pin icon in the upper right corner of the toolbox. See also Edit Alpha Channel to Remove Background. 2. Select the butterfly alpha channel and make sure it is visible. 3. Use the gradient tool on the Toolbar to create gradient on the alpha channel.
6. The thumbnail below shows the alpha channel after the cut. 7. Unselect the alpha channel to exit the edit mode.
Image Broadway 6 Help Paths > About Paths About Paths Path is a collection of points that can be created by using the Path Tool. A closed path can be converted to a selection. You can also convert a selection to a closed path. You can save and load a path. Click on each of the topic links below for more detailed information.
Image Broadway 6 Help Paths > Path Creation Path Creation 1. Click on the Path tool on the Toolbar as shown below. 2. Select Add/Edit from the Path Options Toolbar as shown below. 3. Click on the screen to create an anchor point, and move the mouse to the next point and click on the screen again to create the next anchor point. There is a straight line connected between these two points. Continue the steps to create more anchor points. See the example below for three anchor points. 4.
7. 8. 9. may have multiple disjoint or overlapping segments in one path.
Image Broadway 6 Help Paths > Managing Paths via the Path Toolbox Managing Paths via the Path Toolbox The Paths Toolbox lists the names and thumbnails of each path. To view a path, you must use the Path tool Toolbar. on the 1. Select the Toolbox > Paths menu item. The Paths toolbox will be displayed as shown below. Select a Path 1. Click on the Path tool on the Toolbar. 2. Show the Layers/Channels/Paths toolbox.
1. Click on the Path tool on the Toolbar. 2. Show the Layers/Channels/Paths toolbox. To make it stay on screen or disappear, click on the toggle Auto-Hide pin icon in the upper right corner of the toolbox. 3. Click on the New icon at the bottom left of the Paths toolbox to start creating a new path. Delete a Path 1. Click on the Path tool on the Toolbar. 2. Show the Layers/Channels/Paths toolbox.
1. 2. 3. Path from the popup menu to save it. Load a Path 1. Click on the Path tool on the Toolbar. 2. Show the Layers/Channels/Paths toolbox. To make it stay on screen or disappear, click on the toggle Auto-Hide pin icon in the upper right corner of the toolbox. 3. Click on the thumbnail or the name of a path to select the path to be loaded. Right click on the path and select Load Path from the popup menu to load it.
Image Broadway 6 Help Paths > Make Path from Text Make Path from Text 1. Use the Text tool on the Toolbar to create text. 2. Use the Layer >Transparency > Select Transparency menu item to create transparency. 3. Show the Layers/Channels/Paths toolbox. To make it stay on screen or disappear, click on the toggle Auto-Hide pin icon in the upper right corner of the toolbox. 4. Select and Delete the text layer. You can see the selection on screen as shown in the example below. 5.
Path Creation Managing Paths via the Path Toolbox Text on Path Strokes on Path FileStream Home Page
Image Broadway 6 Help Paths > Text on Path Text on Path Below is an example of creating Text on Path. 1. Use the Text tool on the Toolbar to create text. 2. Click on Text Curve tool on the Text Options toolbar to display the Path tool and the Path Options toolbar. 3. The Text-Path toolbar is shown below. 4. You can use the Load Path button the current path. on the Text-Path toolbar to create a new path, load active path, or save 5. Show the Layers/Channels/Paths toolbox.
8. pressing or cancel the operation by pressing Related Topics About Path Path Creation Managing Paths via the Path Toolbox Make Path from Text Strokes on Path FileStream Home Page before you can continue with other operations.
Image Broadway 6 Help Paths > Strokes on Path Strokes on Path 1. Click on the Path tool on the Toolbar. 2. Show the Layers/Channels/Paths toolbox. To make it stay on screen or disappear, click on the toggle Auto-Hide pin icon in the upper right corner of the toolbox. 3. Click on the thumbnail or the name of a path to select it. 4. Click on the stroke tool menu below.
Image Broadway 6 Help Filters and Special Effects Filters and Special Effects You can apply one or multiple filters to your images to enhance or add special effects to them. Most of the filters come with the preview function. You can change the settings and see the results instantly. To see the differences of each filter and have some ideas of what each filter does, you can use the Filetrs/Effects > Filters Browser menu item to quickly find out what the outcome looks like.
Click on each of the topic links below for more detailed information.
Noise Effect Photo Effect Photography Effect Sharpen Effect Smooth Effect Stylize Use Overlay for Special Effects Use the Curves Tool to Create Special Effect Related Topics Filter Browser Artistic Effect Blur Effect Color Effect Distort Effect Light Effect Noise Effect Photo Effect Photography Effect Sharpen Effect Smooth Effect Stylize Use Overlay for Special Effects Use the Curves Tool to Create Special Effect FileStream Home Page
Image Broadway 6 Help Filters and Special Effects > Filters Browser Filters Browser Use the Filters/Effects > Filters Browser menu item to open the Filter Browser. You can preview and apply any filter of your choice as shown in the example below.
FileStream Home Page
Image Broadway 6 Help Filters and Special Effects > Artistic Effect Artistic Effect Image Broadway offers several artistic filters that can make your photos appear as works of artistic rendition. Click on each of the topic links below for more detailed information.
Image Broadway 6 Help Filters and Special Effects > Artistic Effect > Charcoal Charcoal Choose the Filter > Artistic > Charcoal menu item and select the radius to indicate the number of neighboring pixels to be included in the simulation for the active item or for the selected area. Check off the Preview option to preview the effect of the filter on the active item. Try different options if you want, and press Enter to see the result on the screen instantly.
Related Topics Artistic Color Pencil on Paper Oil Paint Water Paint FileStream Home Page
Image Broadway 6 Help Filters and Special Effects > Artistic Effect > Color Pencil on Paper Color Pencil on Paper Choose the Filter > Artistic > Color Pencil on Paper menu item, and select the paper pattern. You also have the choice to have multiple-color pencil or single color pencil. Check off the Preview option to preview the effect of the filter on the active item. Try different options if you want, and press Enter to see the result on the screen instantly.
Related Topics Artistic Charcoal Oil Paint Water Paint FileStream Home Page
Image Broadway 6 Help Filters and Special Effects > Artistic Effect > Oil Paint Oil Paint Choose the Filter > Artistic > Oil Paint menu item, and select the radius to indicate the number of neighboring pixels to be included in the simulation for the active item or for the selected area. Check off the Preview option to preview the effect of the filter on the active item. Try different options if you want, and press Enter to see the result on the screen instantly.
Related Topics Artistic Charcoal Color Pencil on Paper Water Paint FileStream Home Page
Image Broadway 6 Help Filters and Special Effects > Artistic Effect > Water Paint Water Paint Choose the Filter > Artistic > Water Paint menu item, and select the radius to indicate the number of neighboring pixels to be included in the simulation and opacity of the edge drawing. Check off the Preview option to preview the effect of the filter on the active item. Try different options if you want, and press Enter to see the result on the screen instantly.
Related Topics Artistic Charcoal Color Pencil on Paper Oil Paintt FileStream Home Page
Image Broadway 6 Help Filters and Special Effects > Blur Effect Blur Effect Image Broadway offers several blur filters that are used to smooth out or reduce details in your image. Click on each of the topic links below for more detailed information.
Image Broadway 6 Help Filters and Special Effects > Blur Effect > Blur Blur Choose the Filters/Effects > Blur > Blur menu item to blur the active item or the selected area.
Image Broadway 6 Help Filters and Special Effects > Blur Effect > Gaussian Blur Gaussian Blur Choose the Filters/Effects > Blur > Gaussian Blur menu item and select the radius to indicate the number of neighboring pixels to be included in the convolution to blur the active item or the selected area by a Gaussian function (symmetrical bell shaped distribution with equal mean, median, and mode). Check off the Preview option to preview the effect of the filter on the active item.
Image Broadway 6 Help Filters and Special Effects > Blur Effect > Motion Blur Motion Blur Choose the Filters/Effects > Blur > Motion Blur menu item and select the angle (direction) and the distance to indicate the number of neighboring pixels to be included in the convolution to motion blur the active item or the selected area by a Gaussian function (symmetrical bell shaped distribution with equal mean, median, and mode). Check off the Preview option to preview the effect of the filter on the active item.
Image Broadway 6 Help Filters and Special Effects > Blur Effect > Selective Blur Selective Blur This blur filter is intended for smoothing out but not losing details in your image. It is similar to Gaussian Blur except that neighboring pixels that differ more than the specified threshold amount (0 - 255) will be excluded from being blended. Choose the Filters/Effects > Blur > Selective Blur menu item and select the radius and the threshold to blur the active item or the selected area.
Related Topics Blur Effect Blur Gaussian Blur Motion Blur FileStream Home Page
Image Broadway 6 Help Filters and Special Effects > Color Effect Color Effect Click on each of the topic links below for more detailed information about the many special color effects in Image Broadway.
Image Broadway 6 Help Filters and Special Effects > Color Effect > Invert Color Only Invert Color Only Choose the Filters/Effects > Color > Invert Color Only menu item to invert the hue of an image. See the example below for the before and after images.
Related Topics Color Effect Invert Luminosity Solarize Color Effects FileStream Home Page
Image Broadway 6 Help Filters and Special Effects > Color Effect > Invert Luminosity Invert Luminosity Choose the Filters/Effects > Color > Invert Luminosity menu item to invert the luminosity of an image. The hue and saturation of the image will not be affected. If you want to invert the hue and saturation of an image, use the Adjust/Enhance > Invert menu item to do so. See the example below for the before and after images.
Related Topics Color Effect Invert Color Only Solarize Color Effects FileStream Home Page
Image Broadway 6 Help Filters and Special Effects > Color Effect > Solarize Solarize Choose the Filters/Effects > Color > Solarize menu item to simulate overexposure during film development. Select a value between 0.10 and 99.90 for Factor. Check off the Preview option to preview the effect of the filter on the active item. Try different options if you want, and press Enter to see the result on the screen instantly.
Image Broadway 6 Help Filters and Special Effects > Color Effect > Color Effects Color Effects There are many color effects to give your images a warm, cool, or nature feel. Color effects use the Curve tool for each channel to bring out more or less of each color. Color effects cannot not generate colors, however. For example, you cannot generate red color from a winter snow image by using the Classic Red effect. Certain color effects work better with certain color hues.
Image Broadway 6 Help Filters and Special Effects > Color Effect > Color Effects > Blue and Green Blue and Green Choose the Filters/Effects > Color > Blue and Green menu item to improve photos that lack blue and green hues. Sometimes, it can also achieve retro effect. See the example below for the before and after images.
Related Topics Color Effects Chills Classic B/W Classic Film Classic Red Classic Portrait Creamy Light Icy Winter Nature Orange Pastel Haze Purple Soft Warm Summer Heat Sunrise FileStream Home Page
Image Broadway 6 Help Filters and Special Effects > Color Effect > Color Effects > Chills Chills Choose the Filters/Effects > Color > Chills menu item to bring out the green and blue hues for a chills effect in the image. See the example below for the before and after images.
Related Topics Color Effects Blue and Green Classic B/W Classic Film Classic Red Classic Portrait Creamy Light Icy Winter Nature Orange Pastel Haze Purple Soft Warm Summer Heat Sunrise FileStream Home Page
Image Broadway 6 Help Filters and Special Effects > Color Effect > Color Effects > Classic B/W Classic B/W Choose the Filters/Effects > Color > Classic B/W menu item to emulate the Classic B/W color tones in the image. See the example below for the before and after images.
Orange Pastel Haze Purple Soft Warm Summer Heat Sunrise FileStream Home Page
Image Broadway 6 Help Filters and Special Effects > Color Effect > Color Effects > Classic Film Classic Film Choose the Filters/Effects > Color > Classic Film menu item to emulate classic film with strong contrast and shining characteristics in the image. See the example below for the before and after images.
Orange Pastel Haze Purple Soft Warm Summer Heat Sunrise FileStream Home Page
Image Broadway 6 Help Filters and Special Effects > Color Effect > Color Effects > Classic Red Classic Red Choose the Filters/Effects > Color > Classic Red menu item to bring out more red in the shadow and the midtone in the image. See the example below for the before and after images.
Nature Orange Pastel Haze Purple Soft Warm Summer Heat Sunrise FileStream Home Page
Image Broadway 6 Help Filters and Special Effects > Color Effect > Color Effects > Classic Portrait Classic Portrait Choose the Filters/Effects > Color > Classic Portrait menu item to bring out richer skin tone in the image. See the example below for the before and after images.
Orange Pastel Haze Purple Soft Warm Summer Heat Sunrise FileStream Home Page
Image Broadway 6 Help Filters and Special Effects > Color Effect > Color Effects > Creamy Light Creamy Light Choose the Filters/Effects > Color > Creamy Light menu item to give the image a soft feel with creamy light. See the example below for the before and after images.
Related Topics Color Effects Blue and Green Chills Classic B/W Classic Red Classic Film Classic Portrait Icy Winter Nature Orange Pastel Haze Purple Soft Warm Summer Heat Sunrise FileStream Home Page
Image Broadway 6 Help Filters and Special Effects > Color Effect > Color Effects > Icy Winter Icy Winter Choose the Filters/Effects > Color > Icy Winter menu item to bring out more cool hue for an icy effect in the image. See the example below for the before and after images.
Related Topics Color Effects Blue and Green Chills Classic B/W Classic Red Classic Film Classic Portrait Creamy Light Nature Orange Pastel Haze Purple Soft Warm Summer Heat Sunrise FileStream Home Page
Image Broadway 6 Help Filters and Special Effects > Color Effect > Color Effects > Nature Nature Choose the Filters/Effects > Color > Nature to bring out more green and orange hue for a nature effect in the image. See the example below for the before and after images.
Related Topics Color Effects Blue and Green Chills Classic B/W Classic Red Classic Film Classic Portrait Creamy Light Icy Winter Orange Pastel Haze Purple Soft Warm Summer Heat Sunrise FileStream Home Page
Image Broadway 6 Help Filters and Special Effects > Color Effect > Color Effects > Orange Orange Choose the Filters/Effects > Color > Orange to bring out more orange hue for a richer effect in the image. See the example below for the before and after images.
Icy Winter Nature Pastel Haze Purple Soft Warm Summer Heat Sunrise FileStream Home Page
Image Broadway 6 Help Filters and Special Effects > Color Effect > Color Effects > Pastel Haze Pastel Haze Choose the Filters/Effects > Color > Pastel Haze to make pastel hazy look photos. See the example below for the before and after images.
Related Topics Color Effects Blue and Green Chills Classic B/W Classic Red Classic Film Classic Portrait Creamy Light Icy Winter Nature Orange Purple Soft Warm Summer Heat Sunrise FileStream Home Page
Image Broadway 6 Help Filters and Special Effects > Color Effect > Color Effects > Purple Purple Choose the Filters/Effects > Color > Purple to bring out more blue and red hues in the image. See the example below for the before and after images. For demonstration purpose, the processed image below runs through the Purple effect twice.
Related Topics Color Effects Blue and Green Chills Classic B/W Classic Red Classic Film Classic Portrait Creamy Light Icy Winter Nature Orange Pastel Haze Soft Warm Summer Heat Sunrise FileStream Home Page
Image Broadway 6 Help Filters and Special Effects > Color Effect > Color Effects > Soft Warm Soft Warm Choose the Filters/Effects > Color > Soft Warm to bring out cool hues in the shadow and warm hue in the highlight for a soft effect in the image. See the example below for the before and after images.
Related Topics Color Effects Blue and Green Chills Classic B/W Classic Red Classic Film Classic Portrait Creamy Light Icy Winter Nature Orange Pastel Haze Purple Summer Heat Sunrise FileStream Home Page
Image Broadway 6 Help Filters and Special Effects > Color Effect > Color Effects > Summer Heat Summer Heat Choose the Filters/Effects > Color > Summer Heat to bring out more gold hue for a richer effect in the image. See the example below for the before and after images.
Related Topics Color Effects Blue and Green Chills Classic B/W Classic Red Classic Film Classic Portrait Creamy Light Icy Winter Nature Orange Pastel Haze Purple Soft Warm Sunrise FileStream Home Page
Image Broadway 6 Help Filters and Special Effects > Color Effect > Color Effects > Sunrise Sunrise Choose the Filters/Effects > Color > Sunrise to bring out more magenta and peach glow in the image. See the example below for the before and after images.
Icy Winter Nature Orange Pastel Haze Purple Soft Warm Summer Heat FileStream Home Page
Image Broadway 6 Help Filters and Special Effects > Distort Effect Distort Effect Click on each of the topic links below for more detailed information about distort effects in Image Broadway.
Image Broadway 6 Help Filters and Special Effects > Distort Effect > Glass Glass 1. Choose the Filters/Effects > Distorts > Glass menu item to display the Glass dialog. 2. Distortion is the size of the displacement. Density is the closeness or frequency of details. Small Curviness gives dust like details; large Curviness gives more curvy clusters. 3. The before and after images as a result of applying the default settings are as shown below.
2. 3.
FileStream Home Page
Image Broadway 6 Help Filters and Special Effects > Distort Effect > Pinch Pinch Choose the Filters/Effects > Distorts > Pinch menu item and select the extent to which the pinch effect applies to the active item or to the selected area.
Image Broadway 6 Help Filters and Special Effects > Distort Effect > Spherize Spherize Choose the Filters/Effects > Distorts > Spherize menu item and select the amount of distortion (0 being the default) for the active item or for the selected area. The middle image as shown below is done using the default distortion while the bottom image is done using 5 percent distortion.
Related Topics Glass Pinch Twirl Warp Wave FileStream Home Page
Image Broadway 6 Help Filters and Special Effects > Distort Effect > Twirl Twirl Choose the Filters/Effects > Distorts > Twirl menu item and select the angle, from 0 to 500, at which the selected image pixels will be swirled. Check off the Preview option to preview the effect of the filter on the active item. Try different options if you want, and press Enter to see the result on the screen instantly.
Image Broadway 6 Help Filters and Special Effects > Distort Effect > Warp Warp 1. Choose the Filters/Effects > Distort > Warp menu to open the Warp dialog as shown below. 2. This filter lets you warp the image to be between the upper and lower curves. Select the Upper or the Lower curve from the option panel on the side. Click and drag the curve to create the warped image. 3. Check off the preview option to see the warped image in the view panel. 4.
5. 6.
Wave FileStream Home Page
Image Broadway 6 Help Filters and Special Effects > Distort Effect > Wave Wave Choose the Filters/Effects > Distorts > Wave menu item and select the wavelength and wave amplitude to alter the selected image pixels along a sine wave. Check off the Preview option to preview the effect of the filter on the active item. Try different options if you want, and press Enter to see the result on the screen instantly.
Image Broadway 6 Help Filters and Special Effects > Light Effect Light Effect Click on each of the topic links below for more detailed information about light effects in Image Broadway.
Image Broadway 6 Help Filters and Special Effects > Light Effect > Lens Flare Lens Flare 1. Choose the Filters/Effects > Light > Lens Flare menu item. 2. Move the cursor to the position where you want the flare to appear. 3. You can use the Edit > Undo Flare menu item, or use the Undo button on the Edit Tools bar to undo the effect. You can also use the Edit > Redo Flare menu item, or use the Redo button on the Edit Tools bar to redo the effect.
Image Broadway 6 Help Filters and Special Effects > Light Effect > Lighting Lighting 1. Choose the Filters/Effects > Light > Lighting menu item. 2. Drag the Point (red dot) to the position of the lighting source. For Direct Sun, the light source can be outside the bounding box. 3. Slide the Intensity and the Ambience sliders to change the intensity and diffusion of the light source. 4. Slide the Diffuse, Glossy, Mirror sliders to change surface reflection. 5.
Image Broadway 6 Help Filters and Special Effects > Noise Effect Noise Effect Click on each of the topic links below for more detailed information about noise effects in Image Broadway.
Image Broadway 6 Help Filters and Special Effects > Noise Effect > Add Noise Add Noise Choose the Filters/Effects > Noise > Add Noise menu item and select the type and the amount of noise to add. Noise Type Uniform Noise is uniformly distributed. The noise variance is independent of the image intensity. Gaussian Gaussian Noise is normally distributed (symmetrical bell shaped distribution with equal mean, median, and mode), which is most common in nature.
Image Broadway 6 Help Filters and Special Effects > Noise Effect > HSV Noise HSV Noise Choose the Filters/Effects > Noise > HSV Noise menu item to generate and apply HSV noise to the image. The HSV noise is applied to the Hue, Saturate, and Value of the pixels. You can use the Edit > Undo Flare menu item, or use the Undo button on the Edit Tools bar to undo the effect. You can also use the Edit > Redo Flare menu item, or use the Redo button on the Edit Tools bar to redo the effect.
Image Broadway 6 Help Filters and Special Effects > Noise Effect > Spread Spread Choose the Filters/Effects > Noise > Spread menu item and select the amount of noise, from 1 to 20, for the spread noise. The Spread filter swaps the pixel value with a randomly chosen pixel with the user specified amount. The higher the number, the grainier the image will appear. No new color is introduced. Check off the Preview option to preview the effect of the filter on the active item.
Image Broadway 6 Help Filters and Special Effects > Photo Effect Photo Effect Click on each of the topic links below for more detailed information about photo effects in Image Broadway.
Image Broadway 6 Help Filters and Special Effects > Bevel Frame Bevel Frame Choose the Filters/Effects > Photo > Bevel Frame menu item to add bevel frame to the selected layer. When adding beveled frame, the image size will remain the same. Enter additional settings in the Beval Frame dialog as detailed below. 1. Choose the style as Up or Down. 2. Enter the frame width and height. 3. Check off the Preview option to preview the effect of the filter on the active item.
Image Broadway 6 Help Filters and Special Effects > Frame and Border Frame and Border Choose the Filters/Effects > Photo > Frame and Border menu item to add frame and border to the selected layer. When adding frame or border, extra pixels are added to the width and height of the image automatically. Check off the Preview option to preview the effect of the filter on the active item. Try different options if you want, and press Enter to see the result on the screen instantly.
Image Broadway 6 Help Filters and Special Effects > Jagged Frame Jagged Frame This effect adds the jagged frame (see below) to your picture. 1. Choose the Filters/Effects > Photo > Jagged Frame menu item to add jagged frame to the image.
FileStream Home Page
Image Broadway 6 Help Filters and Special Effects > Old Black Frame Old Black Frame This effect adds old black frame (see below) to your picture. 1. Choose the Filters/Effects > Photo > Old Black Frame menu item to add old black frame to the image.
FileStream Home Page
Image Broadway 6 Help Filters and Special Effects > Photo Drop Shadow with Optional Round Corners Photo Drop Shadow with Optional Round Corners 1. Choose the Filters/Effects > Photo > Photo Drop Shadow with Optional Round Corners menu item to open the Photo Drop Shadow dialog. 2. Check off the Preview option to preview the effect of the filter on the active item. Try different options if you want, and press Enter to see the result on the screen instantly.
3.
Image Broadway 6 Help Filters and Special Effects > Photo Frame with Optional Title Photo Frame with Optional Title 1. Choose the Filters/Effects > Photo > Photo Frame with Optional Title menu item to open the Photo Frame dialog. 2. Check off the Preview option to preview the effect of the filter on the active item. Try different options if you want, and press Enter to see the result on the screen instantly.
3.
Related Topics Bevel Frame Frame and Border Jagged Frame Old Black Frame Photo Drop Shadow with Optional Round Corners Vintage Matte FileStream Home Page
Image Broadway 6 Help Filters and Special Effects > Vintage Matte Vintage Matte This effect adds vintage matte (see below) to your picture. 1. Choose the Filters/Effects > Photo > Vintage Matte menu item to add vintage matte to the image.
FileStream Home Page
Image Broadway 6 Help Filters and Special Effects > Photography Effect Photography Effect Click on each of the topic links below for more detailed information about photography effects in Image Broadway.
FileStream Home Page
Image Broadway 6 Help Filters and Special Effects > Photography Effect > Bleach Bypass Effect Bleach Bypass Effect Use the Bleach bypass effect to simulate a traditional film processing technique to skip bleach processing. This prevents the silver color from being removed from the negative, and the result is a contrast image with muted color. 1. Choose the Filters/Effects > Photography > Bleach Bypass Effect menu item to use this effect. 2. An example with the before and after images is shown below.
Related Topics Cross Process Exposure Blending Film Grain Holga Black and White Old Polaroid Polaroid 600 Rainbow Gradient Rainbow Mapping Random Lomo Effect Sepia Effect Soft Focus Effect Soft Orton Effect Velvia Satuation Vignette Vintage Photo Vintage Photo with Color Variation FileStream Home Page
Image Broadway 6 Help Filters and Special Effects > Photography Effect > Cross Process Cross Process Use Cross Processing to simulate processing a film in a chemical solution intended for a different type of film such as processing slide in a solution for negative. The results of cross processing are often characterized by unnatural colors with high contrast. 1. Choose the Filters/Effects > Photography > Cross Process menu item to use this effect. 2.
Related Topics Bleach Bypass Effect Exposure Blending Film Grain Holga Black and White Old Polaroid Polaroid 600 Rainbow Gradient Rainbow Mapping Random Lomo Effect Sepia Effect Soft Focus Effect Soft Orton Effect Velvia Satuation Vignette Vintage Photo Vintage Photo with Color Variation FileStream Home Page
Image Broadway 6 Help Filters and Special Effects > Photography Effect > Exposure Blending Exposure Blending Use this effect to create a specified number of images, from the specified lower intensity to the higher intensity, and blend them together. 1. Choose the Filters/Effects > Photography > Exposure Blending menu item to open the Exposure Blending dialog. 2. Check off the Preview option to preview the effect of the filter on the active item.
3.
Rainbow Mapping Random Lomo Effect Sepia Effect Soft Focus Effect Soft Orton Effect Velvia Satuation Vignette Vintage Photo Vintage Photo with Color Variation FileStream Home Page
Image Broadway 6 Help Filters and Special Effects > Photography Effect > Film Grain Film Grain Use this effect to apply film grain to the image. 1. Choose the Filters/Effects > Photography > Film Grain menu item to use this effect. 2. An example with the before and after images is shown below. To demonstrate the effect, the processed image is applied Film Grain twice.
Related Topics Bleach Bypass Effect Cross Process Exposure Blending Holga Black and White Old Polaroid Polaroid 600 Rainbow Gradient Rainbow Mapping Random Lomo Effect Sepia Effect Soft Focus Effect Soft Orton Effect Velvia Satuation Vignette Vintage Photo Vintage Photo with Color Variation
FileStream Home Page
Image Broadway 6 Help Filters and Special Effects > Photography Effect > Holga Black and White Holga Black and White Use this effect to create image resembling that taken with a Holga camera with Ilford X2 film. It has a dark blue undertone to it. 1. Choose the Filters/Effects > Photography > Holga Black and White menu item to use this effect. 2. An example with the before and after images is shown below.
Related Topics Bleach Bypass Effect Cross Process Exposure Blending Film Grain Old Polaroid Polaroid 600 Rainbow Gradient Rainbow Mapping Random Lomo Effect Sepia Effect Soft Focus Effect Soft Orton Effect Velvia Satuation Vignette Vintage Photo Vintage Photo with Color Variation FileStream Home Page
Image Broadway 6 Help Filters and Special Effects > Photography Effect > Old Polaroid Old Polaroid Use this effect to create image resembling that taken with an old Polaroid shot with orange and pink tint in the center. 1. Choose the Filters/Effects > Photography > Old Polaroid menu item to use this effect. 2. An example with the before and after images is shown below.
Related Topics Bleach Bypass Effect Cross Process Exposure Blending Film Grain Holga Black and White Polaroid 600 Rainbow Gradient Rainbow Mapping Random Lomo Effect Sepia Effect Soft Focus Effect Soft Orton Effect Velvia Satuation Vignette Vintage Photo Vintage Photo with Color Variation FileStream Home Page
Image Broadway 6 Help Filters and Special Effects > Photography Effect > Polaroid 600 Polaroid 600 Use this effect to create image with peach/orange overlay emulating photos taken with a Polaroid 600 camera. 1. Choose the Filters/Effects > Photography > Polaroid 600 menu item to use this effect. 2. An example with the before and after images is shown below.
Related Topics Bleach Bypass Effect Cross Process Exposure Blending Film Grain Holga Black and White Old Polaroid Rainbow Gradient Rainbow Mapping Random Lomo Effect Sepia Effect Soft Focus Effect Soft Orton Effect Velvia Satuation Vignette Vintage Photo Vintage Photo with Color Variation FileStream Home Page
Image Broadway 6 Help Filters and Special Effects > Photography Effect > Rainbow Gradient Rainbow Gradient Use this effect to overlay picture with rainbow gradient. 1. Choose the Filters/Effects > Photography > Rainbow Gradient menu item to use this effect. You can specify the direction of rainbow and the offset of the starting point. 2. An example with the before and after images is shown below.
2.
Related Topics Bleach Bypass Effect Cross Process Exposure Blending Film Grain Holga Black and White Old Polaroid Polaroid 600 Rainbow Mapping Random Lomo Effect Sepia Effect Soft Focus Effect Soft Orton Effect Velvia Satuation Vignette Vintage Photo Vintage Photo with Color Variation FileStream Home Page
Image Broadway 6 Help Filters and Special Effects > Photography Effect > Rainbow Mapping Rainbow Mapping Use this effect to make rainbow colors in image. 1. Choose the Filters/Effects > Photography > Rainbow Mapping menu item to use this effect. 2. Click the color patch to select starting and ending colors 3. Enter the number of bands where color changes from starting color to ending color. 4. Check off the Preview option to preview the effect of the filter on the active item.
Related Topics Bleach Bypass Effect Cross Process Exposure Blending Film Grain Holga Black and White Old Polaroid Polaroid 600 Rainbow Gradient Random Lomo Effect Sepia Effect Soft Focus Effect Soft Orton Effect Velvia Satuation Vignette Vintage Photo Vintage Photo with Color Variation FileStream Home Page
Image Broadway 6 Help Filters and Special Effects > Photography Effect > Random Lomo Effect Random Lomo Effect Use this effect to emulate images taken from a Lomo camera. It adds saturation and contrast to the images. Bright and dark overlay layers with random lights are added to emulate chromatic aberration peculiar in the pictures took from a Lomo camera. 1. Choose the Filters/Effects > Photography > Random Lomo Effect menu item to use this effect. 2.
3.
Bleach Bypass Effect Cross Process Exposure Blending Film Grain Holga Black and White Old Polaroid Polaroid 600 Rainbow Gradient Rainbow Mapping Sepia Effect Soft Focus Effect Soft Orton Effect Velvia Satuation Vignette Vintage Photo Vintage Photo with Color Variation FileStream Home Page
Image Broadway 6 Help Filters and Special Effects > Photography Effect > Sepia Effect Sepia Effect Use this effect to emulate black and white sepia effect. 1. Choose the Filters/Effects > Photography > Sepia Effect menu item to use this effect. 2. An example with the before and after images is shown below.
Related Topics Bleach Bypass Effect Cross Process Exposure Blending Film Grain Holga Black and White Old Polaroid Polaroid 600 Rainbow Gradient Rainbow Mapping Random Lomo Effect Soft Focus Effect Soft Orton Effect Velvia Satuation Vignette Vintage Photo Vintage Photo with Color Variation
FileStream Home Page
Image Broadway 6 Help Filters and Special Effects > Photography Effect > Soft Focus Effect Soft Focus Effect 1. Choose the Filters/Effects > Photography > Soft Focus Effect menu item to use this effect. 2. Check off the Preview option to preview the effect of the filter on the active item. Try different options if you want, and press Enter to see the result on the screen instantly. Click OK to confirm the action, click Cancel to cancel the action, or click Reset to reset the values in the dialog. 3.
3.
Rainbow Gradient Rainbow Mapping Random Lomo Effect Sepia Effect Soft Orton Effect Velvia Satuation Vignette Vintage Photo Vintage Photo with Color Variation FileStream Home Page
Image Broadway 6 Help Filters and Special Effects > Photography Effect > Soft Orton Effect Soft Orton Effect This effect is named after Michael Orton. He took two shots of the same subject. Both are overexposed in different degrees. These overexposed pictures gave an impressionistic sense to it. He then put both together to give it a softness to the subject. 1. Choose the Filters/Effects > Photography > Soft Orton Effect menu item to use this effect. 2.
3.
Rainbow Gradient Rainbow Mapping Random Lomo Effect Sepia Effect Soft Focus Effect Velvia Satuation Vignette Vintage Photo Vintage Photo with Color Variation FileStream Home Page
Image Broadway 6 Help Filters and Special Effects > Photography Effect > Velvia Satuation Velvia Satuation Use this effect to create images that resemble those taken using FUJI Velvia film. It creates high saturation images. 1. Choose the Filters/Effects > Photography > Velvia Satuation menu item to use this effect. 2. An example with the before and after images is shown below.
Related Topics Bleach Bypass Effect Cross Process Exposure Blending Film Grain Holga Black and White Old Polaroid Polaroid 600 Rainbow Gradient Rainbow Mapping Random Lomo Effect Sepia Effect Soft Focus Effect Soft Orton Effect Vignette Vintage Photo Vintage Photo with Color Variation
FileStream Home Page
Image Broadway 6 Help Filters and Special Effects > Photography Effect > Vignette Vignette This effect vignettes the image to reduce the saturation and brightness at the edges of the image. 1. Choose the Filters/Effects > Photography > Vignette menu item to use this effect. 2. You can specify the color, the offsets of the center points, opacity of the gradient layer, and the percent of radius (+ for adding and - for subtracting of the radius).
4.
Related Topics Bleach Bypass Effect Cross Process Exposure Blending Film Grain Holga Black and White Old Polaroid Polaroid 600 Rainbow Gradient Rainbow Mapping Random Lomo Effect Sepia Effect Soft Focus Effect Soft Orton Effect Velvia Satuation Vintage Photo Vintage Photo with Color Variation
FileStream Home Page
Image Broadway 6 Help Filters and Special Effects > Photography Effect > Vintage Photo Vintage Photo Use this effect to give your image the retro or vintage look. 1. Choose the Filters/Effects > Photography > Vintage Photo menu item to use this effect. 2. An example with the before and after images is shown below.
Related Topics Bleach Bypass Effect Cross Process Exposure Blending Film Grain Holga Black and White Old Polaroid Polaroid 600 Rainbow Gradient Rainbow Mapping Random Lomo Effect Sepia Effect Soft Focus Effect Soft Orton Effect Velvia Satuation Vignette Vintage Photo with Color Variation
FileStream Home Page
Image Broadway 6 Help Filters and Special Effects > Photography Effect > Vintage Photo with Color Variation Vintage Photo with Color Variation Vintage Photo with Color Variation changes the color tone of your photo. The PANETONE color of 2014 is Radiant Orchard and it is said to spark the imagination if you stare at it long enough. To have a radient orchard color tone: 1. Choose the Filters/Effects > Photography > Vintage Photo with Color Variation menu item.
Related Topics Bleach Bypass Effect
Cross Process Exposure Blending Film Grain Holga Black and White Old Polaroid Polaroid 600 Rainbow Gradient Rainbow Mapping Random Lomo Effect Sepia Effect Soft Focus Effect Soft Orton Effect Velvia Satuation Vignette Vintage Photo FileStream Home Page
Image Broadway 6 Help Filters and Special Effects > Sharpen Effect Sharpen Effect Click on each of the topic links below for more detailed information about sharpen effects in Image Broadway.
Image Broadway 6 Help Filters and Special Effects > Sharpen Effect > Auto Sharpen Auto Sharpen Choose the Filters/Effects > Sharpen > Auto Sharpen menu item to use this effect. This filter automatically sharpens the active item or the selected area.
Image Broadway 6 Help Filters and Special Effects > Sharpen Effect > Selective Sharpen Selective Sharpen This filter selectively sharpens the active item or the selected area. It enhances the edges in an image. 1. Choose the Filters/Effects > Sharpen > Selective Sharpen menu item to use this effect. 2. Check off the Preview option to preview the effect of the filter on the active item. Try different values if you want, and press Enter to see the result on the screen instantly.
3.
Related Topics Auto Sharpen Sharpen Unsharp Mask Smart Sharpen and Contrast Auto Local Contrast FileStream Home Page
Image Broadway 6 Help Filters and Special Effects > Sharpen Effect > Sharpen Sharpen This filter sharpens the active item or the selected area. 1. Choose the Filters/Effects > Sharpen > Sharpen menu item to use this effect. 2. Enter a value from 0.10 to 250.00 for the radius. A larger radius value requires more hardware resources and takes longer processing time. The status bar at the bottom of the Sharpen dialog indicates the status of progress. 3.
Image Broadway 6 Help Filters and Special Effects > Sharpen Effect > Unsharp Mask Unsharp Mask The unsharp mask filter uses the Gaussian blur filter with a defined number of neighboring pixels to be included in the convolution. It applies the amount of the percentage of the differences between the original and the blurred image pixels and add it back into the image for those pixels with differences above the specified threshold. 1.
5.
Related Topics Auto Sharpen Selective Sharpen Sharpen Smart Sharpen and Contrast Auto Local Contrast FileStream Home Page
Image Broadway 6 Help Filters and Special Effects > Sharpen Effect > Smart Sharpen and Contrast Smart Sharpen and Contrast 1. Choose the Filters/Effects > Sharpen > Smart Sharpen and Contrast menu item to display the Smart Sharpen and Contrast dialog. 2. This filter includes many components and creates multiple adjustment layers. You have the option to merge them together. Or you may keep them as separated adjustment layers. The merged layer uses less resource.
2. 3. The Shadow Recovery filter inverts the black and white copy of the image as a mask on a brightening black and white adjustment layer. This adjustment layer is, then, set to "overlay" blend with the original image to brighten the shadow area. 4. The Smart Sharpen filter uses the value of the original image to create the adjustment layer and, then, sharpens the adjustment layer with the amount specified. The adjustment layer mask is created by using the find edges, auto level, and blur filters.
9.
Related Topics Auto Sharpen Selective Sharpen Sharpen Unsharp Mask Auto Local Contrast FileStream Home Page
Image Broadway 6 Help Filters and Special Effects > Sharpen Effect > Auto Local Contrast Auto Local Contrast Instead of improving contrast of the entire image, use the Filters/Effects > Sharpen > Auto Local Contrast menu item to improve the contrast on the edges (see below for the before and after images).
FileStream Home Page
Image Broadway 6 Help Filters and Special Effects > Smooth Effect Smooth Effect Click on each of the topic links below for more detailed information about smooth effects in Image Broadway.
Image Broadway 6 Help Filters and Special Effects > > Smooth > Despeckle Despeckle Choose the Filters/Effects > Smooth >Despeckle menu item to reduce speckle noise by replacing each pixel in the active item or in the selected area by one of its eight surrounding pixels using a polarity and negative hull function.
Image Broadway 6 Help Filters and Special Effects > Smooth > Median Median Choose the Filters/Effects > Smooth >Median menu item to apply a median cut filter to the active item or to the selected area. This filter replaces each pixel component with the median color within a radius window. Check off the Preview option to preview the effect of the filter on the active item. Try different values if you want, and press Enter to see the result on the screen instantly.
Image Broadway 6 Help Filters and Special Effects > Smooth > Smooth Smooth Choose the Filters/Effects > Smooth >Smooth menu item to apply a noise peak elimination filter to the active item or to the selected area. The noise peak elimination filter is to smooth the objects within the area without losing edge information and without creating undesired structures. The algorithm replaces a pixel with its next neighbor in value within a radius window if this pixel is considered being noise.
Image Broadway 6 Help Filters and Special Effects > Smooth > Wavelet Decompose Wavelet Decompose The Wavelet Decompose tool selectively smoothes out certain types of imperfection. It produces multiple layers with different sizes of details on each of them and a final residual layer with all the rest of the information. You can pick and choose which layers you want to include in reconstructing the final image. This means you can suppress certain scales of details to contribute to the final image. 1.
3. The first image is the original; the next image is after wavelet decompose and the last image is done with selective sharpen after merging the layers.
Related Topics Despeckle
Median Smooth FileStream Home Page
Image Broadway 6 Help Filters and Special Effects > Stylize Stylize Click on each of the topic links below for more detailed information about stylize in Image Broadway.
Image Broadway 6 Help Filters and Special Effects > Stylize > Bump Map Bump Map The Bump Map filter simulates the light source reflected from the surface of the object. The gradient of color value between pixels represents the slope of the surface. If the object is black and while, then the surface of the object is vertical. No light will be reflected to the direction of light source.
Image Broadway 6 Help Filters and Special Effects > Stylize > Emboss Emboss Choose the Filters/Effects > Stylize > Emboss menu item to shade the active item or the selected area. To shade the red, green, and blue components of the image check off the Color shading option. Use the slider or enter the light source elevation and direction (angle) information. Use the slider or enter the depth value for the shade. Check off the Preview option to preview the effect of the filter on the active item.
Image Broadway 6 Help Filters and Special Effects > Stylize > Find Edge Find Edge Choose the Filters/Effects > Stylize > Find Edge menu item to find the vertical and horizontal edges from the active item or from the selected area. You can use the Edit > Undo Find Edge menu item, or use the Undo button on the Edit Tools bar to undo the effect. You can also use the Edit > Redo Find Edge menu item, or use the Redo button on the Edit Tools bar to redo the effect.
Image Broadway 6 Help Filters and Special Effects > Stylize > Perspective Reflection Perspective Reflection Choose the Filters/Effects > Stylize > Perspective Reflection menu item to create perspective reflection from the image.
Related Topics Bump Map Emboss Find Edge Round Corners Texturizer Tile Watermark FileStream Home Page
Image Broadway 6 Help Filters and Special Effects > Stylize > Round Corners Round Corners Choose the Filters/Effects > Stylize > Round Corners menu item to create round corner image with specified radius. You can use the slider or enter the corner radius value from 1 to 200. Check off the Preview option to preview the effect of the filter on the active item. Try different radii if you want, and press Enter to see the result on the screen instantly.
Image Broadway 6 Help Filters and Special Effects > Stylize > Texturizer Texturizer The texturizer effect adds pattern to your image. 1. Choose the Filters/Effects > Stylize > Texturizer menu item to open the Texturizer dialog. 2. Check off the Preview option to preview the effect of the filter on the active item. Try different options if you want, and press Enter to see the result on the screen instantly.
3.
Find Edge Perspective Reflection Round Corners Tile Watermark FileStream Home Page
Image Broadway 6 Help Filters and Special Effects > Stylize > Tile Tile The tile effect creates tiled image. 1. Choose the Filters/Effects > Stylize > Tile menu item to create tiled effect of your image. 2. You can use the Edit > Undo Tile menu item, or use the Undo button on the Edit Tools bar to undo the effect. You can also use the Edit > Redo Tile menu item, or use the Redo button on the Edit Tools bar to redo the effect.
Image Broadway 6 Help Filters and Special Effects > Stylize > Watermark Watermark This effect adds watermark to your image. 1. Choose the Filters/Effects > Stylize > Watermark menu item to open the Watermark dialog and add watermark to your image. 2. Type in the watermark words and choose the font and size. You also have the option to set the location and the opacity of your watermark. 3. Check off the Preview option to preview the effect of the filter on the active item.
4.
Image Broadway 6 Help Filters and Special Effects > Use Overlay for Special Effects Use Overlay for Special Effects Click on each of the topic links below for more detailed information about use overlay for special effects in Image Broadway.
Image Broadway 6 Help Filters and Special Effects > Use Overlay for Special Effects > Use Overlay to Change Color Tone and Texture Use Overlay to Change Color Tone and Texture You can use overlay to change the color tone and texture of an image. 1. Use the File > Open as Texture Overlay Layers menu item to open files into Image Broadway. 2. Select three files as shown below, as light blue gray, light red and dark brown texture files.
Related Topics Use Overlay to Create Composition
FileStream Home Page
Image Broadway 6 Help Filters and Special Effects > Use Overlay for Special Effects > Use Overlay to Create Composition Use Overlay to Create Composition If you've ever wanted to boost your creativity, this tip can help you. 1. Use the File > Open as Texture Overlay Layers menu item to open files into Image Broadway. 2. Select the two files as shown below, as violet texture and dogs. 3. The bottom image is the final result. Image Broadway will scale the texture files to cover the background file if needed.
Related Topics Use Overlay to Change Color Tone and Texture FileStream Home Page
Image Broadway 6 Help Filters and Special Effects > Use the Curves Tool to Create Special Effect Use the Curves Tool to Create Special Effect The Curves tool can not only adjust or enhance your images, but it is also a valuable tool to create many special effects in color variations. The color in each image can be divided into 3 regions - Darks as shadows, Mids as midtones, and Lights as Highlights as shown below in the Curves dialog. Use the Adjust/Enhance > Curves menu item to open the Curves dialog.
If you drag the curve in the middle section upward as shown in the curve below, the same input is now mapped to higher output, which means the intensity for the mid-range pixels is now higher. Since the curve is smooth, both the shadows and highlights areas are also higher but not as much.
The processed image below shows a brightened image especially with those tree leaves.
You can also manipulate the color channels in the same way. The HSV color wheel below shows that the opposite of red is cyan, the opposite of green is magenta, and the opposite of blue is yellow. Any color is combination of red, green, and blue. If you drag blue curve down, the picture is going to show more yellow. If you have less green and blue, then you are going to see more red.
In the winter image we use as demo, we want to have cyan trees and red sky. We adjust the blue curve and green curve in the highlights area having low output as below. In the shadow area, we have a relative low red because high green and blue.
By manipulating the blue and green curves as above, the before and after images are shown below with red background and cyan trees.
By manipulating the curves of color channels, you can have as many variations as you like. Below are some more examples.
Related Topics Filters and Special Effects Filter Browser Artistic Effect Blur Effect Color Effect Distort Effect Light Effect
Noise Effect Photo Effect Photography Effect Sharpen Effect Smooth Effect Stylize Use Overlay for Special Effects FileStream Home Page
Image Broadway 6 Help Multiple Panels and Batch Processing Multiple Panels and Batch Processing Click on each of the topic links below for more detailed information about multiple panels and batch processing in Image Broadway.
Image Broadway 6 Help Multiple Panels and Batch Processing > Side By Side Photo Comparing and Editing in Multiple Panels Side By Side Photo Comparing and Editing in Multiple Panels Image Broadway comes with the multiple panels option in horizontal (top/down panes) or vertical (left/right panes) view. You can choose which view to use based upon the layout of the images. You can compare two or more images side by side in Image Broadway to see which one you like better.
Image Broadway 6 Help Multiple Panels and Batch Processing > Batch Processing Batch Processing Use the File > Batch for Active Image menu item to run multiple filters automatically. To apply multiple filters to multiple images, you can use the File > Batch for Tray Images menu item. There are filters, like adjust/enhance commands, scale, crop, and rotate commands in the batch dialog. You can select them and put them into the right sequence, run and save the images after they have been processed.
Image Broadway 6 Help Multiple Panels and Batch Processing > Batch Processing Multiple Filters and Commands for Selected Folder Batch Processing Multiple Filters and Commands for Selected Folder 1. Click the File > Batch for Folder menu item. 2. Select the folder to be batch processed. 3. Select the Filters/Effects, Adjust/Enhance, and Image transform commands you want to use and click the Add Command button to add the selected commands into the list of batch commands. 4. Select the desired options.
Image Broadway 6 Help Multiple Panels and Batch Processing > Batch Processing Multiple Filters and Commands for Active Image Batch Processing Multiple Filters and Commands for Active Image 1. Open or select the image you want to process as the active image. 2. Click the File > Batch for Active Image menu item to open the Batch dialog. 3.
Image Broadway 6 Help Batch Processing Multiple Filters and Commands for Multiple Images Batch Processing Multiple Filters and Commands for Multiple Images 1. Click the Toolbox > Selection Tray menu item and the Tray Toolbox as in the example shown below will be displayed. 2. Click the image thumnails with the Ctrl key down to select multiple images, or use the Select All Images button at the bottom of the Tray toolbox to select all images. 3.
Image Broadway 6 Help Multiple Panels and Batch Processing > Batch Dialog Batch Dialog 1. In the Batch dialog, select the Filters/Effects, Adjust/Enhance, and Image transform commands you want to use and click the Add Command button to add the selected commands into the list of batch commands. 2. You can select sequence the commands by using the Up, Down, and Delete buttons. 3. Click Run or Run and Save to start batch processing. 4. Click the Stop button to abort batch processing.
Stop for error When error is encountered, Image Broadway will prompt you to skip or to stop the processing. Save as a copy Check off this option if you want to save the image as a copy. If the file name already exists, the program will add "#1", "#2", etc. to the end of file name in order to create a unique file name. If this option is not checked off, Image Broadway will save the processed image in the same file name and overwrite any existing file with that same file name in the destination folder.
Image Broadway 6 Help Multiple Panels and Batch Processing > Batch Resize Images Batch Resize Images To resize multiple images, follows the instructions below: 1. Use the File > Open menu item to open image files. 2. Click the Image > Fit Image menu item and change the width and height of the container. Click Save Settings to close the dialog. 3. Click the Toolbox > Selection Tray menu item to display the Tray toolbox. 4.
Image Broadway 6 Help Multiple Panels and Batch Processing > Batch Convert Images Batch Convert Images To convert multiple images, such as camera RAW files, to JPEG format, follows the instructions below: 1. Use the File > Open menu item to open image files. 2. Click the Toolbox > Selection Tray menu item to display the Tray toolbox. 3. Click the image thumnails with the Ctrl key down to select multiple images, or use the Select All Images button at the bottom of the Tray toolbox to select all images. 4.
Image Broadway 6 Help Multiple Panels and Batch Processing > Batch Watermark Images Batch Watermark Images To convert multiple images, such as camera RAW files, to JPEG format, follows the instructions below: 1. Use the File > Open menu item to open image files. 2. Click the Filters >Stylize >Watermark menu item and type in the text and setup the options. Click Save Settings to close the dialog. 3. Click the Toolbox > Selection Tray menu item to display the Tray toolbox. 4.
Image Broadway 6 Help Printing Printing Click on each of the topic links below for more detailed information about printing in Image Broadway.
Image Broadway 6 Help Printing > Print Images Print Images You can select an image and use the File > Print menu item to print the image. You may click the Setup button to choose the printer, paper size, and orientation (portrait or landscape) from available options. You may choose from various printing options. You can add header, which includes the date, file name, and page numbers, with your print; you can enter the number of copies you want.
Image Broadway 6 Help Printing > Photo Print Photo Print To print all open images, choose the File > Photo Print menu item. To print selected images, use the Selection Tray toolbox to select images, and click the Print Icon in the Selection Tray. In the Photo Print dialog (see below), choose from the available options, full page, multiple images per page, crop to fit or scale to fit. You can preview in Photo Print. You can also print contact sheet for proofing.
Image Broadway 6 Help Importing and Saving Images Importing and Saving Images Click on each of the topic links below for more detailed information about importing and saving images in Image Broadway.
Image Broadway 6 Help Importing and Saving Images > Importing Images Importing Images Click on each of the topic links below for more detailed information about importing images in Image Broadway.
Image Broadway 6 Help Importing and Saving Images > Importing Images > Open Images Open Images You can open all the images directly from a camera memory card, scanner, or hard drive, in one action. You can also drag an image file from the file list in other applications such as Windows Explorer, My Computer, Network, or FileStream Turbo Browser and drop it in Image Broadway to have it automatically opened. 1. Use the File > Open menu item to open one or more photos. 2.
Open as Texture Overlay Layers Import Image from Scanner, Phones, and Digital Camera directly Get Image from Clipboard FileStream Home Page
Image Broadway 6 Help Importing and Saving Images > Importing Images > Open as Layers Open as Layers You can open all the images directly from a camera memory card, scanner, or hard drive, in one action. You can use the File > Open as Layers menu item when you want to do a panorama or composition. If there is no active image opened, the first image opened will be the background image. If there is active image opened, all the opened images will be layers of the existing active image. 1.
Image Broadway 6 Help Importing and Saving Images > Importing Images > Open as Texture Overlay Layers Open as Texture Overlay Layers You can open all the images directly from a camera memory card, scanner, or hard drive, in one action. You can use the File > Open as Texture Overlay Layers menu item when you want to do a composition. If there is no active image opened, the first image opened will be the background image.
Image Broadway 6 Help Importing and Saving Images > Importing Images > Import Images from Scanner, Phone, and Digital Camera Directly Import Image from Scanner, Phone, and Digital Camera Directly Before importing any image, make sure the device driver and software are properly installed. To check the availability of the driver, choose the File > Select Source menu item. If the menu item is grayed out, or there is no entry in the list, it indicates that the driver is not properly installed. 1.
Image Broadway 6 Help Importing and Saving Images > Importing Images > Get Image from Clipboard Get Image from Clipboard You can create an image by pasting in the image from the clipboard. This feature is only available when there is an image in the clipboard. 1. Use the File > Create From Clipboard (Ctrl+L) menu item to paste in the image from the clipboard.
Image Broadway 6 Help Importing and Saving Images > Saving Images Saving Images Click on each of the topic links below for more detailed information about saving images in Image Broadway.
Image Broadway 6 Help Importing and Saving Images > Saving Images > Save Image Save Image An image can be saved with the File > Save Image As menu item in the menu bar. The Save Image As dialog is similar to the Open File dialog. An image can be saved to a new or an existing file. You can select the file type from the Save Image As popup menu by clicking save as. If no file type is selected (None), Image Broadway will use the entered file extension from the file name to determine the file type.
Image Broadway 6 Help Importing and Saving Images > Saving Images > Save Multiple Images Save Multiple Images 1. Select the Toolbox > Selection Tray menu item. If you want to keep the tray staying on the screen, push down the toggle pin at the top right corner. 2. Hold the Shift key down and click the image thumbnails to select multiple images. 3. Click the Save Selected Images icon at the bottom of the panel to save all selected images.
Image Broadway 6 Help Importing and Saving Images > Saving Images > File Formats File Formats Image Broadway supports many image formats to open and to save an image. It can open and edit an image in one format and output and save it to another. In addition to saving your image file in bitmapped formats, Image Broadway also allows you to save your work as Image Broadway Work (*.ibw) format, which preserves floating layers and objects, selections, channels, and active paths.
3. 4. 5. The Progressive option creates a file that can be displayed gradually in Internet browser when it is being downloaded. This option slightly increases the file size. 6. For new image, the default comments will be displayed. Default comments can be viewed and edited using the File > Preferences menu item, Image Comments tab. 7. For existing files, the preserved comments will be displayed. TIFF format can be opened in various ways in Image Broadway - RGB, indexed_color, CMYK, Lab, and grayscale.
Image Broadway 6 Help Windows Shortcuts Windows Shortcuts Tools Result Shortcuts Pick a color Ctrl +Shift + I Pick a color without changing tool Ctrl +Shift + J Set Foreground Color Shift + F Set Background Color Shift + B Zoom or Magnify Shift + Z Select - Rectangle Shift + R Select - Ellipse Shift + E Select - Lasso Shift + L Select - Fuzzy Shift + W Select - Path (Bezier) Shift + P Move Ctrl + M Crop Shift + C Transform - Scale Shift + S Transform- Rotate Shift + I Transform
Viewing and Zooming Result Shortcuts Maximize Image Window Ctrl + Shift + M Fits image in window Ctrl + Shift + W Actual Pixel Ctrl + Shift + N Zoom in or out Ctrl + “+” or “-“ Zoom in Zoom tool + Click Zoom out Zoom tool + Alt + Click Zoom in with any tool Ctrl + Space + Click Zoom out with any tool Alt + Space + Click View specified area of an image Drag over preview in Navigator palette Scrolls image with hand tool Drag Scrolls up or down one screen Page Up or Page Down> Scrolls u
Result Shortcuts Confirms Transform Action Shift + click Scaling and Content-Aware Scaling Result Shortcuts Change width only Ctrl + drag Change height only Alt + drag Text Result Shortcuts New text Shift + click Draw Rectangle, Rounded Rectangle and Ellipse Result Shortcuts Draws with same width and height Shift + drag Gradient Result Shortcuts Gradient with multiples of 15 degrees Ctrl + drag Measurement Result Shortcuts Measures the angle from the previous line Shift + drag Path Result S
Result Shortcuts Reload F5 New Ctrl + N Open Ctrl + O Clipboard Ctrl + L Close Ctrl + Shift + O Save Image Ctrl + S Pring Ctrl + P Exit Alt + F4 Menu - Edit Result Shortcuts Undo Ctrl + Z Redo Ctrl + Y Cut Ctrl + X Copy Ctrl + C Copy Merged Ctrl + Shift + C Copy Visible Ctrl + Shift + V Paste Ctrl + V Clear Del Help F1 Menu - View Result Shortcuts Zoom In Ctrl ++ Zoom Out Ctrl +- Actual Pixel Ctrl + Shift + N Fit to Window Ctrl + Shift + W Grid Ctrl + Shift + P Gu
Anchor Ctrl + G Transparency > Add Alpha Channel Ctrl + Shift + Z Transparency > Select Transparency Ctrl + T Arrange > Bring To Top Ctrl + Shift + F Arrange > Bring To Bottom Ctrl + Shift + B Merge > Merge Down Ctrl + Shift + K Merge > Merge Visible Ctrl + Shift + M Merge > Merge All Ctrl + Shift + G Menu - Select Select All Ctrl + A Deselect Ctrl + D Inverse Ctrl + I By Color Range Ctrl + K Float> Ctrl + F To Path Ctrl + B To Channel Ctrl + H Quick Mask Mode Ctrl + Shift + Q Ad
FileStream Home Page