JM-17, JM-20, JM-30 Instructions for installation and use of Electric Sauna Heater Finlandia Sauna Products. Inc. 14010-B.S.W., 72nd Ave.
Purpose of the electric heater: The JM heater is designed for the heating of family saunas to bathing temperature. It is forbidden to use the heater for any other purposes. The guarantee period of a JM electric heater in family use is one year and in communal use, 3 months. Please read the user’s instructions carefully before using the heater.
1. INSTRUCTIONS FOR USE This heater shall not be operated unless the rock compartment in the top of the heater is filled with the rocks, and the guard is in place. 1.1. Piling of the Sauna rocks The sauna rocks for an electric heater should be 1 9/16" – 3 1/8" (4–8 cm) in diameter. The heater rocks should be solid blocks of rock specially intended for use in the heater.
Example 1. You want to go jogging and have a sauna bath after that. The estimated duration of your run is 5 hours. Turn the timer clockwise over the scale 0–1 to the preset section (scale 1–8) at number 4. The timer will start, and after four hours, the heater will come on. Because it takes about one hour for the sauna to be heated, it will be warm and ready for bathing after about 5 hours, that is, when you come back from your run. Example 2.
Both thermometers and hygrometers suitable for use in a sauna are available. As the effect of steam on people varies, it is impossible to give an exact, universally applicable bathing temperature or percentage of moisture. The bather’s own comfort is the best guide. The sauna room should be equipped with proper ventilation to guarantee that the air is rich in oxygen and easy to breathe. See item 2.4., ”Ventilation of the Sauna Room”.
2. THE SAUNA ROOM 2.1. Insulation and Wall Materials of the Sauna Room In an electrically heated sauna, all the massive wall surfaces which store plenty of heat (such as bricks, glass blocks, plaster etc.), must be sufficiently insulated in order to keep the heater output at a reasonably low level. A wall and ceiling construction can be considered to have efficient thermal insulation if: • the thickness of carefully fitted insulating wool inside the house is 4" (100 mm) minimum 2" (50 mm).
2.3. Heater Output When the walls and ceiling are covered with panels, and the insulation behind the panels is sufficient to prevent thermal flow into the wall materials, the heater output is defined according to the cubic volume of the sauna. See table 1. If the sauna has visible uninsulated wall surfaces, such as walls covered with brick, glass block, concrete or tile, each 10 square feet (ca. 1m²) of said wall surface causes thecubicvolumeofthesaunatoincreaseby42 Cu.Ft.(ca. 1.2m3).
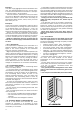
3.2. Fastening the Heater on a Wall 1. 2. 3. Fasten the wall-mounting rack on the wall byusing the screws which come with the rack. Observe the minimum safety distances given in table 1 and fig. 5. The fastening of the mounting rack is shown in figure 6. NOTE! There should be a support, e.g. a board, behind the panel, so that the fastening screws can be screwed into a thicker wooden material than the panel. If there are no boards behind the panel, the boards can also be fastened on the panel.
3.5. Electrical Connections The heater may only be connected to the electrical network in accordance with the current regulations by an authorised, professional electrician. Refer to the chart in table 2 to determine the wire size and circuit protection required. The complete sauna system should be properly grounded as per NEC or as required by local codes. A grounding terminal is provided in the wiring compartment of each heater, complate the wiring according to the appropriate wiring figure 10.
3.8. Troubleshooting 3.10. Maintenance instructions A. If sauna does not operate after initial installation and wiring: 1. Check breaker to be sure that it is on. Also, breaker should be correct size. 2. Make sure that a neutral wire has been included 3. Check circuit breaker in contactor to be sure that it has not been shorted out. 4. Be sure that thermostat and timer are both in on position. 5. Be sure that timer winds down. If timer has been shorted out, heater will not operate. 1. B.
3.11. Guarantee This HARVIA SAUNA heater is guaranteed for one year date of purchase, and includes all heater parts such as heating elements, controls, contactors, etc. This guarantee covers faults in manufacture and material only, and includes the exchange of new parts supplied by the manufacturer or manufacturer‘s agent, after the faulty parts have been returned to same. The replacement of parts under warranty does not extend the warranty period beyond the original one year.
4. SPARE PARTS 2. 3. 4. 4. 5. 6. 7. 7. 8. 9. 9. Overheating limiter Thermostat Timer 1+8 / 120V Timer 1h/240V Fitting Supply terminal block Lamp Lamp 240 V Control box plastic part Scale plate Scale plate ZSV-330 ZSK-762 ZSJ-290 ZSA-720 ZSK-555 ZSK-779 ZSJ-245 ZSA-530 ZSA-480 ZSJ-3 ZSA-670 JM-30 JM-30 JM-30 10. 11. 12. 13. 14. 15. 16. 17. 18. 19. 20.