
Manual


94 MS-9200UDLS Series Manual — P/N 52750:H 4/14/2014
Programming Master Programming Level
Daylight Savings Time
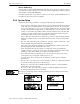
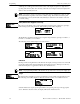
Pressing 1 while viewing Time-Date Screen #2 will cause the following screens to be displayed:
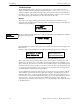
Pressing 1 while viewing Daylight Savings Screen #1 will cause the display to toggle between
Enabled Yes and Enabled No. The control panel will automatically update the time for daylight
savings time when Enabled Yes is selected.
Pressing 2 while viewing Daylight Savings Screen #1 will display another screen which allows the
programmer to select the month that daylight savings time will begin. In this sub-screen, pressing
1 will select March, 2 will select April, and 3 will select May.
Pressing 3 while viewing Daylight Savings Screen #1 will display two sub-screens which allow the
programmer to select the week of the month that daylight savings time will begin. In the first sub-
screen, pressing 1 will select the first week, 2 will select the second week and 3 will select the third
week, while in the second sub-screen, pressing 1 will select the fourth week and 2 will select the
last week of the selected month.
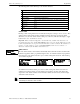
Pressing 1 while viewing Daylight Savings Screen #2 will display another screen which allows the
programmer to select the month that daylight savings time will end. In this sub-screen, pressing 1
will select September, 2 will select October, and 3 will select November.
Pressing 2 while viewing Daylight Savings Screen #2 will display two sub-screens which allow the
programmer to select the week of the month that daylight savings time will end. In the first sub-
screen, pressing 1 will select the first week, 2 will select the second week and 3 will select the third
week, while in the second sub-screen, pressing 4 will select the fourth week and 5 will select the
last week of the selected month.
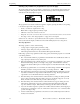
Timers
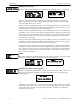
Timer delays for PAS, Pre-signal and waterflow activation can be programmed by pressing 1 while
viewing System Setup Screen #2. The following screen will be displayed:
PAS (Positive Alarm Sequence) Delay
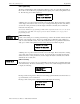
The factory default setting for PAS is 000 for no delay. To select a PAS delay of 001 to 180 seconds
for all devices programmed for PAS, press 1 while viewing Timer Screen #1. The following
display will appear:
A flashing cursor is positioned in the lower left corner of the display. Enter a delay time consisting
of three digits, such as 005 for five seconds. Upon entering the third digit, the time delay will be
stored in the control panel memory and the display will return to the Delay Screen which will
indicate the new delay time.
TIME AND DATE
1=DAYLIGHT SAVINGS
Time & Date Screen #2
DAYLIGHT SAVINGS
1=ENABLED YES
2=START MONTH MAR
3=START WEEK WEEK-2
Daylight Savings Screen #1
Daylight Savings Screen #2
DAYLIGHT SAVINGS
1=END MONTH NOV
2=END WEEK WEEK-1
SYSTEM SETUP
1=TIMERS
2=NAC
3=RELAYS
System Setup Screen #2
TIMERS
1=PAS DELAY 000
2=PRE SIGNAL 000
3=WATERFLOW 000
Timer Screen #1
Timer Screen #2
TIMERS
1=AC LOSS DELAY 000
TIMERS
1=PAS DELAY 000
2=PRE SIGNAL 000
3=WATERFLOW 000
Timer Screen #1
PAS DELAY
RANGE 0-180 SECONDS
PAS Delay Screen