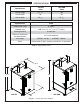
SMOKER For Outdoor Use Model # 24S-SM(B) INSTALLATION INSTRUCTIONS AND OWNER’S MANUAL INSTALLER: Leave these instructions with consumer. CONSUMER: Retain for future reference. 24S-SM shown IMPORTANT: READ THESE INSTRUCTIONS CAREFULLY BEFORE STARTING INSTALLATION OR USE. WARNINGS AND SAFETY CODES WARNING WARNING Improper assembly, adjustment, alteration, service, or maintenance can cause injury or property damage. Refer to this manual.
CONTENTS 3 IMPORTANT PRE-OPERATION AND SAFETY INFORMATION 4 REPLACEMENT PARTS LIST 5 SPECIFICATIONS 6 CHIMNEYS 6 DRIP COLLECTOR & TRAY 6 ASSEMBLY 7 COOKING GRIDS 7 ASH COMPARTMENT 8 PRE-OPERATION / LOCATION NOTES 8 PREPARATION FOR USE 9 LIGHTING 9 OPERATION GUIDELINES 10 PRE-HEATING, SMOKING START-UP & LOADING 12 COOKING 13 DIGITAL THERMOMETER 14 ADDING ADDITIONAL CHARCOAL / WOOD CHIPS DURING COOKING 14 OVERHEATING 14 OPERATION SUMMARY 15 SMOKING TIMES AND TEMPERATURES
IMPORTANT PRE-OPERATION AND SAFETY INFORMATION WARNING! 1. Read all instructions. 2. This unit is designed FOR OUTDOOR USE ONLY. DO NOT use this unit under unprotected flammable surfaces. DO NOT use this appliance inside a building, garage, or any other enclosed area. 3. For household use only. Do not use this unit for purposes other than intended. 4. Only use this unit on a hard, level, non-combustible, surface capable of supporting the unit's weight. 5.
REPLACEMENT PARTS LIST 24S-SM Item Description 24S-SMB Part No. Qty. Part No. Qty. 23311 1 23311 1 1. Smoker door assembly 2. Digital thermometer 24180-12 1 24180-12 1 3. Chimney assembly 23312 2 23312 2 4. Firebox door 23313 1 23313 1 5. Ash compartment door 23314 1 23314 1 6. Cooking grid 3553 5 3553 5 7. Drip collector 23315 1 23315 1 8. Drip tray 23316 1 23316 1 9. Wood pellet screen 23317 1 23317 1 10. Wood chip grid 23318 1 23318 1 11.
SPECIFICATIONS Specification 24S-SM Value 24S-SMB Value Overall height 47 1/2" 60" Overall width 26" 26" Overall depth 35 1/2" 35 1/2" Specification Value Temperature range 0 - 450°F Cooking area 1640 sq. in.
ASSEMBLY This smoker comes shipped with accessories and components packaged inside of it. Remove these items and discard all packaging. PRIORTO ASSEMBLING; use a damp cloth to completely wipe down all of the items, and the interior compartments of the smoker. This will remove any loose debris that may have built up during the manufacturing process. REFER TO THE PARTS LIST WHEN FOLLOWING THESE INSTRUCTIONS. CHIMNEYS 1. Locate a chimney assembly. Align chimney over smoker and fasten 2.
ASSEMBLY (cont.) COOKING GRIDS 1. Slide each cooking grid into place as desired. Be sure that the cooking grid properly enters the grid supports and completely slides in. See Fig. 7-1. Slide in cooking grids Note: Cooking grids may be added / removed as desired depending on the sizes of the food loaded into the smoker. ASH COMPARTMENT 1. Locate the ash tray, charcoal grid, wood chip grid, and wood pellet screen. Fig. 7-1 2. Open the ash compartment door located on the rear of the smoker. 3.
PREPARATION FOR USE Important: Prior to initial use; the smoker interior MUST be wiped down (as instructed in the previous ASSEMBLY section) and cured. Curing the smoker helps to protect the finish, and remove any smoker smells that may affect the first meal cooked. See below for curing details. Wipe down interior and all items with a damp cloth, then lightly coat with vegetable oil /spray 1. Unlatch and open the smoker door. 2.
OPERATION GUIDELINES The following sections cover the basic guidelines for lighting and using your smoker. Cooking temperatures, times, and methods may vary depending on personal preference, weather conditions, etc. DO NOT LEAVE THE UNIT UNATTENDED WHEN IN USE. (open) (open) Firebox door Charcoal chamber LIGHTING Wood chip chamber 1. Unlatch and open the firebox door located on the top rear of the smoker (see Fig. 9-1). The larger chamber on the left is for loading charcoal.
OPERATION GUIDELINES (cont.) over, carefully pour it down into the charcoal chamber. Add additional charcoal to the chamber for a total of 2-5 pounds. Then refer back to steps # 7 and #8. PRE-HEATING, SMOKING START-UP & LOADING 1. Once the charcoal is glowing red, pour approximately 1 pound of wood chips into the wood chip chamber. (The wood chips may be pre-soaked in water if desired.
OPERATION GUIDELINES (cont.) 8. Once the desired temperature is reached; adjust the two air shutters on the ash door to an approximate 1/8" (see Fig. 11-1). 9. At this stage, additional charcoal required for the cook must CAREFULLY be added to the charcoal chamber. (Approximately 2 lbs of charcoal for every 15 lbs of meat to be cooked. This is based on a 6 hour cook. Adjust accordingly.) For large amounts of meat, charcoal may be added throughout the cooking period.
OPERATION GUIDELINES (cont.) COOKING All surfaces of the smoker may become HOT during use. Exercise caution at all times when this unit is in operation. To avoid burns when cooking, wear (dry) protective gloves or oven mitts and use long handled BBQ tools. When opening a door; open slowly to carefully allow heat and steam to escape. Use caution and keep hands, face, and body at a safe distance. Important: Be prepared when opening the smoker.
OPERATION GUIDELINES (cont.) The smoker comes with a digital thermometer, which includes a built-in timer and alarms. The thermometer is located on the front smoker door. (run wire from behind) The thermometer provides an overall, average temperature reading. The temperature will be higher toward the top and rear of the unit, and lower toward the bottom and front of the unit. Plug the meat probe as shown in Fig. 13-1. Carefully run the wire (use protective gloves) behind the smoker door.
OPERATION SUMMARY The operation section provides basic guidelines for lighting and using your smoker. Cooking temperatures, times, and methods may vary depending on personal preference, weather conditions, etc. The thermometer provides an overall, average temperature reading. The temp. will slightly vary amongst the interior of the smoker (top, center, bottom, sides, rear).
POST-OPERATION Once the cook is done and the food has been removed, please follow these post-operation instructions. DO NOT LEAVE THE UNIT UNATTENDED WHEN IN USE. 1. Open the air shutters and chimneys completely. 2. Allow to burn completely. This will allow the charcoal and wood chips to be safely consumed. 3. Once the coals have completely burned out, allow sufficient time for the coals and the smoker to completely cool. 4. Remove all of the ashes from the ash compartment.
SERVICING AND CLEANING ALWAYS ALLOW THE SMOKER TO COMPLETELY COOL BEFORE ANY SERVICING / CLEANING. DO NOT SPRAY ANY CLEANER OR LIQUIDS ON THE APPLIANCE WHEN HOT. Any components removed during servicing/cleaning must be reinstalled, as previously instructed in this manual, prior to future operation. CONTACT YOUR DEALER FOR REPLACEMENT PARTS. th e wi Wip ain r g It is recommended that the smoker be cleaned after each use. INTERIOR CLEANING 1.
ACCESSORIES ACCESSORY DRAWER (optional) The smoker may be ordered equipped with a base drawer, or retro-fitted with the drawer (model #24-SMB) at a later time. The drawer provides for convenient storage and is designed to be installed directly below the smoker. Reference Fig. 17-1 for a base drawer installed. To remove the drawer; pull it completely out. Release the drawer from the drawer slides by pressing the black lever down on the right side, and up on the left side.
NOTES PAGE Please use this page to record any information about your unit that you may want to have at hand.
TROUBLESHOOTING If you have trouble with this smoker, please use this list to identify the problem. By trying one or more of the solutions to the possible cause, you should be able to solve the problem. If this list does not cover your present problem, or if you have other difficulties with the smoker, please contact your local Fire Magic dealer or visit our web site at www.rhpeterson.com. PROBLEM POSSIBLE CAUSE CORRECTION Thermometer does not turn on or is malfunctioning 1. Low or dead batteries 1.
WARRANTY LIFETIME WARRANTY - Fire Magic® cast stainless-steel burners, stainless-steel rod cooking grids, and stainless-steel housings are warranted for as long as you own your Fire Magic® grill. FIFTEEN-YEAR WARRANTY - Fire Magic® cast brass burners, brass valves, backburner assemblies (except ignition parts), and manifold assemblies are warranted for 15 years from the date of purchase of your Fire Magic® grill.