Installation, Operation and Maintenance Instructions Outdoor Refrigerators 3589-DR 3589-DL
CONTENTS Contents: Important Safety Instructions Safety information ...............................................................2 Unpacking your appliance ..................................................3 Installing your appliance ......................................................4 Cabinet clearances .........................................................4 Leveling the appliance ....................................................4 Electrical connection .........................................
UNPACKING YOUR APPLIANCE ! WARNING EXCESSIVE WEIGHT HAZARD Use two or more people to move product. Failure to do so can result in personal injury. Remove Interior Packaging Your appliance has been packed for shipment with all parts that could be damaged by movement securely fastened. Remove internal packing materials and any tape holding internal components in place. The owners manual is shipped inside the product in a plastic bag along with the warranty registration card, and other accessory items.
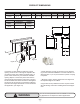
INSTALLING YOUR APPLIANCE Select Location The proper location will ensure peak performance of your appliance. We recommend a location where the unit will be out of direct sunlight and away from heat sources. To ensure your product performs to specifications, the recommended installation location temperature range is from 55 to 115°F (13 to 46°C). Front Grille, keep this area open. Cabinet Clearance Ventilation is required from the bottom front of the appliance.
INSTALLING YOUR APPLIANCE ! WARNING Electrical Shock Hazard Do not remove ground prong • Do not use an extension cord with this appliance. They can be hazardous and can degrade product performance. • This appliance should not, under any circumstances, be installed to an un-grounded electrical supply. • Do not remove the grounding prong from the power cord. (See Figure 3). • Do not use an adapter. (See Figure 4). • Do not splash or spray water from a hose on the appliance.
INSTALLING THE ANTI TIP DEVICE FOR FREESTANDING INSTALLATIONS Anti-Tip Bracket WARNING ! • ALL APPLIANCES CAN TIP RESULTING IN INJURY. • INSTALL THE ANTI-TIP BRACKET PACKED WITH THE APPLIANCE. • FOLLOW THE INSTRUCTIONS BELOW 211⁄2" (54.6 cm) Leveling Leg Bottom View of Refrigerator Front of cabinet Figure 7 Anti-Tip Device ! Step by step instructions for locating the position of the bracket: WARNING 1) Decide where you want to place the refrigerator.
INSTALLING THE ANTI TIP DEVICE FOR FREESTANDING INSTALLATIONS NOTE When the floor mounted anti-tip bracket is used the minimum adjusted height of the cabinet is increased by 3 ⁄8" (9 mm). nt o Fro net bi f ca line Sid eo f c Rear Leveling leg ab ine t li ne Screw 211⁄2" (54.
PRODUCT DIMENSIONS ROUGH-IN OPENING DIMENSIONS MODEL "A" "B" 3589-DR 3589-DL 24" (61 cm) **34" to 35" (86.4 to 88.9 cm) CABINET DIMENSIONS "C" "D" "E" "F" "G" "H" "J" * 237⁄8" (60.7 cm) 333⁄4" to 343⁄4" (85.7 to 88.3 cm) 2323⁄32" (60.2 cm) 2611⁄32" (66.9 cm) 4613⁄32" (117.9 cm) 269⁄16" (67.5 cm) PRODUCT DATA MODEL ELECTRICAL REQUIREMENTS # PRODUCT WEIGHT 115V/60Hz/15A 140 lbs (63.6 kg) 3589-DR 3589-DL "J" "H" "D" "G" "E" "A" "B" Figure 11 "E" "C" 211⁄2" (54.
USING YOUR ELECTRONIC CONTROL Alarm Figure 12 close-up of control Set F Colder Press and Hold Warmer ON/OFF Press and Hold Starting your refrigerator Plug the refrigerator power cord into a wall outlet. Your refrigerator will begin cooling after power is applied. If your refrigerator does not start, check that the refrigerator is turned on and the set temperature is cold enough.
SHELVING CONFIGURATIONS Loading Tips and Suggestions Your appliance is equipped with a cantilever shelf system which provides maximum adjust ability and customizing of the shelving arrangements listed below. Refrigerator: ! CAUTION Never try to move a loaded shelf, remove everything from the shelf before moving. Use both hands when moving the shelf. To Add or Remove a Shelf 24" (61 cm) Wide Models: With a solid door and door racks. Figure 14.
CARE AND CLEANING Front Grille Be sure that nothing obstructs the required air flow openings in front of the cabinet. At least once or twice a year, brush or vacuum lint and dirt from the front grille area (see page 4). ! ! WARNING Electrocution Hazard • Never attempt to repair or perform maintenance on the appliance until the main electrical power has been disconnected. Turning the appliance control "OFF" does not remove electrical power from the unit's wiring.
CARE AND CLEANING Outdoor Product Long-Term Storage / Winterization: 18. Do not place a cover on the unit, as this can trap condensation. 1. Time to Winterize, when the daily low ambient temperature is at or below 38°F (3.3°C). ! CAUTION After completion of the above, you may choose to store the unit indoors, although this is not required. Operation of the unit at ambient temperatures below the recommended Winterization temperature will void your warranty. 2. Turn unit off, (see page 10) 3.
STAINLESS STEEL MAINTENANCE AND ENERGY SAVING TIPS Background NOTE Stainless steel does not stain, corrode, or rust as easily as ordinary steel, but it is not stain or corrosion proof. Stainless steels can discolor or corrode if not maintained properly. Stainless steel products should never be installed, or stored in close proximity to chlorine chemicals. Stainless steels differ from ordinary carbon steels by the amount of chromium present.
TROUBLESHOOTING Before You Call for Service Problem Appliance not cold enough WARNING ! If the appliance appears to be malfunctioning, read through this manual first. If the problem persists, check the troubleshooting guide below. Locate the problem in the guide and refer to the cause and its remedy before calling for service. The problem may be something very simple that can be solved without a service call. However, it may be required to contact your dealer or a qualified service technician.
WARRANTY Peterson Fire Magic Limited Warranty What is covered and for how long? This warranty covers all defects in workmanship or materials for a period of: 12 months parts The warranty commences on the date the item was purchased and the original purchase receipt must be presented to the authorized service center before warranty repairs are rendered. What is covered? 1. The mechanical and electrical parts, which serve as a functional, purpose of this appliance for a period of 12 months.
41014112-EN Rev B 9/21/15 All specifications and product designs subject to change without notice. Such revisions do not entitle the buyer to corresponding changes, improvements, additions, replacements or compensation for previously purchased products.