
Product Overview


9
®
Minimum Pilot Test
This test insures that the flame detector will not sense a pilot flame too small to light the main flame
reliably. It must be made on every new installation as well as following the repositioning of the flame
detector. This procedure should not be used on a direct spark ignited burner.
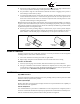
1. Manually shut off the fuel to the main burner.
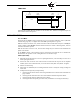
2. Connect a test meter to the test jacks.
3. Initiate a normal startup.
4. Reduce the fuel to the pilot until the DC voltmeter reads approximately 6 volts or when the pilot
is at the minimum to provide a reliable main flame light-off. See WARNING below. This is the
minimum pilot.
5. Slowly turn on the main fuel and insure that the main flame lights off promptly and normally.
WARNING: If light off is delayed, shut off the power to the installation. Realign the flame
detector so that pilot flame detection requires a larger pilot flame. Repeat this test until the
main flame lights reliably with minimum pilot.
WARNING: The minimum pilot test must be accomplished by a trained and qualified burner
technician.
6. After the minimum pilot test is completed satisfactorily, increase the pilot flame to normal size,
and observe that the main flame is properly established during a normal cycle ("Run-Check"
switch in the "Run" position).
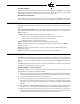
Flame Failure Test
1. Temporarily connect spark ignition and pilot valve to Terminal #3.
2. Initiate a normal startup.
3. Manually shut off all fuel and observe the loss of flame signal on the test meter.
4. If flame signal does not reduce to zero within the flame failure response time of the control, a
grounded metallic shield may need to be inserted between the flame rod and spark ignition to
prevent interference.
5. IMPORTANT: When the test is completed, reconnect the spark ignition to Terminal #4.