OWNER’S MANUAL DUAL FUEL GENERATOR MODEL NUMBER H05752 Rev Level:00 IMPORTANT: Read all safety precautions and instructions carefully before operating equipment. Ensure engine is stopped and level before performing any maintenance or service. Record product information to reference when ordering parts or obtaining warranty coverage.
Table of Contents Introduction . . . . . . . . . . . . . . . . . . . . . . . . . . . .1 Maintenance And Storage. . . . . . . . . . . . . . 25 Safety Precautions . . . . . . . . . . . . . . . . . . . . .2 Maintenance Schedule . . . . . . . . . . . . . 25 Unpacking the Generator. . . . . . . . . . . . . . . .6 Engine Maintenance .. . . . . . . . . . . .. . . . 26 Parts Included. . . . . . . . . . . . . . . . . . . . . . . .7 Change Engine Oil . . .. . . . . . . . . . . . . . 26 Assembly . . . . . . .
INTRODUCTION Thank you for purchasing a FIRMAN generator. This manual contains safety information to make you aware of the hazards and risks associated with generator products and how to avoid them. This generator is designed and intended only for supplying electrical power for operating compatible electrical lighting, appliances, tools and motor loads, and is not intended for any other purpose.
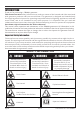
SAFETY PRECAUTIONS • WARNING POISONOUS GAS HAZARD.
CORRECT USAGE Example location to reduce risk of carbon monoxide poisoning • • ONLY use outside and downwind, far away from windows, doors and vents. Direct exhaust away from occupied spaces.
WHEN OPERATING EQUIPMENT WARNING • • • • • • • • •WHEN STORING FUEL OR EQUIPMENT Transport/move/repair with fuel tank EMPTY or with fuel valve shut OFF. DO NOT tip engine or equipment at angle which causes fuel or oil to spill. Make certain that a LPG cylinder is not attached to generator and is securely stowed away. Disconnect spark plug wire.
• • •• When using generator for backup power, notify utility company. Use a ground fault circuit interrupter (GFCI) in any damp or highly conductive area, such as metal decking or steel work. DO NOT touch bare wires or receptacles. DO NOT use generator with electrical cords which are worn, frayed, bare or otherwise damaged. DO NOT operate generator in the rain or wet weather. DO NOT handle generator or electrical cords while standing in water, while barefoot, or while hands or feet are wet.
• • • NOTE: Gasoline is a skin irritant and needs to be cleaned up immediately if spilled on skin or clothes. Improper treatment of generator could damage it and shorten its life. Gasoline has a distinctive odor, this will help Use generator only for intended uses. detect potential leaks quickly. If you have questions about intended use, In any gasoline fire, flames should not be ask dealer or contact local service center.
• If you smell gas: close off the gas supply. Spray a soapy water solution to check all connections for leaks before attempting to use generator. Contact a qualified technician to inspect and repair the LPG system if a leak found before using the generator. • • • • • CAUTION LPG under pressure is highly flammable and can cause a fire or explosion if ignited. LPG is heavier than air and can accumulate in confined spaces and low places in the event of a leak.
ASSEMBLY Install the Support Leg The generator requires some assembly prior to 1. Attach the rubber support (H) to the support usage. If problems arise when assembling the leg (G) with flange bolt (I) (M6X25) and flange generator, call 1-844-347-6261. lock nut(J) (M6). 2. Attach the support leg (G) to the generator Install the Wheel Kit frame with flange bolt (E) (M8X16) and flange CAUTION lock nut(F) (M8). The wheel kit is not intended for over-the-road 3.
Battery Cable Connection NOTE: The generator comes equiped with the positive red cable(red cable) already attached. 1. Verify the positive (+) red cable is securely tightened to the positive (+) terminal. 2. Connect the negative(-) black cable to negative(-) terminal on the battery.
CONTROLS AND FEATURES Generator ③ 2 ① ② ⑬ ④ ⑤ ⑫ ⑪ ⑭ ⑩ ⑧⑨ ⑥ ⑦ ⑮ 1- Fuel Gauge 2- 8.0 Gallon Capacity Fuel Tank 3- Fuel Cap 4- Choke Lever(behind air filter box) 5- Air Filter 6- 439cc FIRMAN OHV Engine 7- Recoil Starter 8- 10.0" Flat Free Wheel 9- Oil Filler Cap 10- LPG Hose Connector(Inlet) 11- Outlet Cover 12- Control Panel 13- Handle 14- Hose Holder 15- LPG Hose with Regulator *We are always working to improve our products.
Control Panel 1 2 3 4 10 5 8 6 7 9 NOTE: Total power drawn from all receptacles must not exceed the name plate rating. 1 Fuel Selector Switch – Use to select and turn on gasoline or LPG fuel source. Fuel (gasoline) valve is closed when the switch is on “OFF” or “LPG” positions. Engine switch is on when the switch is on “GAS” or “LPG” positions. 2 Indicator Light When the fuel selector switch is turned to the “GAS” or “LPG” position, the indicator light will become RED up to 4 minutes(before goes off).
Testing the GFCI: Test the GFCI outlet every 8 120/240V, 30A Twist-Lock – (NEMA L14-30R) Maximum 30 Amp current maybe drawn from month as follows: 1. Plug a test lamp into the receptacle. this 120/240 Volt receptacle. 2. Start the generator, the test lamp should be on. 9 Outlet Cover - Protect the receptacles from 3. Press the “Test” button located on the front dust and debris. of the receptacle to trip the device. 4.
SPECIFICATIONS Model H05752 Starting Watts 7125(GASOLINE)/7125(LPG) Running Watts 5700(GASOLINE)/5700(LPG) Rated AC Voltage 120/240V Rated Fequency 60Hz Phase Single Voltage Regulator AVR Power Factor 1 Total Harmonic Distortion(THD) Standard Alternator Type Brushed Engine FIRMAN Engine Type Single Cylinder, 4-Stroke OHV Air Cooled Displacement 439cc Low Oil Shutdown Yes Ignition System Breakless Ignition Type, Flywheel Magneto Starting System Recoil Fuel Unleaded Automotive
4.Using oil funnel, slowly pour contents of provided oil bottle into oil fill opening to the "H" mark on dipstick. Be careful do not overfill. Overfilling with oil could cause the engine to not start or hard starting. ADD ENGINE OIL CAUTION NOTE: Degrees Celsiusº(Outside) 5.Replace oil fill cap/dipstick and fully tighten. 6.Oil level should be checked prior to each use or at least every 8 hours of operation. Keep oil level maintained.
ADD FUEL 1.Gasoline Fuel must meet these requirements: Clean, fresh, unleaded gasoline. Use regular UNLEADED gasoline with the generator engine with a minimum 87 octane / 87 AKI (91 RON). For high altitude use, see "Operation at High Altitude". Do not use gasoline with more than 10% alcohol such as E85 or ethanol. Avoid generator damage. Failure to follow Operator's Manual for fuel recommendations voids warranty. DO NOT use unapproved gasoline such as E85. DO NOT mix oil in gasoline.
• • • Do not check for leaks with a lighted match or flame. The LPG cylinder valve should be fully closed when the generator is not in use or is running with gasoline. If you smell gas: close off the gas supply. Make sure there is no leak before using the generator. • • • • • WARNING Attach the LPG regulator/hose assembly (included) to the LPG hose connector (inlet) on the control panel of the generator. Tighten the nut with 19 mm or adjustable wrench.
• • • LPG has a distinctive odor to help detect potential leaks. Do not allow children to tamper or play with the LPG cylinder. In the event of an LPG fire, flames should not be extinguished unless by doing so the fuel supply valve can be turned off. If the fire is extinguished and a supply of fuel is not turned off, an explosion hazard greater than the fire hazard could be created. Keep a fire extinguisher near the generator all the time. Always keep the LPG cylinder in an upright position.
Connecting to a Building's Electrical System Grounding The National Electric Code requires your generator must be properly connected to an appropriate ground to help prevent electric shock. WARNING Failure to properly ground the generator can result in electric shock. WARNING Generator voltage could cause electrical shock or burn resulting in death or serious injury. THERE IS A PERMANENT CONDUCTOR BETWEEN THE GENERATOR (STATOR WINDING) AND THE FRAME.
5. OPERATION • Generator Location WARNING Make sure you review each warning in order to • prevent fire hazard. Keep area clear of inflammables or other hazardous materials. Select a site that is dry, well ventilated and protected from the weather. • Keep exhaust pipe clear of foreign objects. Keep generator away from open flame. Keep generator on a stable and level surface. CAUTION Tilting can cause fuel spillage. • Do not block generator air vents with paper or other material.
Starting the Generator (Gasoline) 1. Before starting the generator, check for loose or missing parts and for any damage which may have occurred during shipment. 2. Check oil level and fuel(Gasoline). 7. Pull the starter cord slowly until resistance is felt and then pull rapidly. 3. Make sure the LPG cylinder knob is fully closed. 4. Turn the fuel selector switch to “GAS” position.
7. Move choke lever located on engine to “START” position. 3. Connect the regulator to both LPG cylinder and generator. 8. PULL - TO-PRIME: Pull the starter cord 1-2 times. Pull slowly until resistance if felt and then pull rapidly. 1-2 Times NOTE:Do not place the LPG cylinder in the path of muffler outlet. 4. Fully open the LPG cylinder knob. 9.Move the choke lever to the “RUN” position. 5. Turn the fuel selector switch to “LPG” position. 10.
THE FUEL SELECTOR SWITCH IS TURNED TO THE “OFF” 3.Plug in and turn on the desired 120 Volt POSITION AND THEN TURNED BACK TO THE “LPG” AC, single phase, 60Hz electrical loads. It is better to attach the item with largest load first. POSITION. See Indicator light-Battery power Saving Mode section for more information. WARNING When starting engine, pull cord slowly until resistance is felt and then pull rapidly to avoid kickback. Keep choke lever in “START” position for only 1 pull of the recoil starter.
2. Turn the fuel selector switch to OFF (O)position. Starting the engine unsuccessfully or not attempting to start the engine at all during these 4 minutes will switch generator to Battery Power Saving Mode in order to conserve and increase the life of battery. MUST HAVE SOLID RED INDICATOR LIGHT TO BE ABLE TO START THE GENERATOR.
Do Not Overload Generator Overloading a generator in excess of its rated wattage capacity can result in damage to the generator and to connected electrical devices. • Placing the LPG cylinder at the end of the generator near the handle, where engine fan air flows out from the generator. This air is slightly heated by flowing over the engine.
MAINTENANCE AND STORAGE MAINTENANCE SCHEDULE ITEM NOTES Spark Plug Check condition. Adjust gap and clean. Replace if necessary. Every Daily(Before Initial Every 100 hours Every operation) 25 hours 50 hours (or annual) 250 hours √ √ Check oil level. Engine Oil √ Replace. √ Air Filter Clean, replace if necessary. Fuel Filter Clean fuel filter and fuel tank strainer. Replace if necessary. Fuel Line Check fuel hose for cracks or other damage. Replace if necessary.
• ENGINE MAINTENANCE To prevent accidental starting, remove and ground spark plug wire before performing any service. Change Engine Oil Use fresh and high quality lubricating oil to the specified quantity. If contaminated or deteriorated oil is used or the quantity of the engine oil is not sufficient, the engine damage will result and its life will be greatly shortened. Air Filter Maintenance Change engine oil every 100 hours. (for a new engine, change oil after 25 hours.
Spark Plug Maintenance Inspect Muffler and Spark Arrester Changing the spark plug will help your engine to start easier and run better. (a) Remove the spark plug cap. (b) Remove spark plug using provided wrench. Inspect the muffler for cracks, corrosion, or other damage. Remove the spark arrester, if equipped, and inspect for damage or carbon blockage. If replacement parts are required, make sure to use only original equipment replacement parts.
Battery Replacement Battery Holder Band Flange Screw Spark arrester screen 1. Disconnect the negative(-) black cable to negative(-) terminal on the battery and disconnect the positive(+) red cable to positive(+) terminal on the battery. 2. Remove the battery holder rubber band. 3. Remove the battery and recycle and dispose of properly. 4. Install the new battery with following specification: 12V sealed lead acid 2.5AH LXWXH:80X70X105mm(3.15X2.75X4.13inch) 5. Reattach the battery holder rubber band. 6.
SERVICE AND STORAGE Infrequent Service If the unit is used infrequently, difficult starting may result. To eliminate hard starting, follow these instructions: 1. Run the generator at least 30 minutes every month. 2. Run the generator, then close the fuel shut-off valve and allow the unit to run until the engine stops. 3. Move the fuel selector to the "OFF" position.
Battery Charging & Maintenance The battery powers up the control module in this generator. This product is equipped with an automatic battery charging circuit. The battery will receive charging voltage when the engine is running. The battery will maintain a proper charge if the unit is used on a regular basis (about once every two weeks).
TROUBLE SHOOTING Problem Engine is running, but no AC output is available. Engine runs good at no-load but “bogs down” when loads are connected. Engine will not start; starts and runs rough or shuts down when running. Cause Correction 1. Circuit breaker is open. 1. Reset circuit breaker. 2. Fault in generator. 2. Contact authorized service facility. 3. Poor connection or defective cord set. 4. Connected device is bad. 3. Check and repair. 1. Short circuit in a connected load. 1.
PARTS DIAGRAM AND PART LIST H05752 PARTS DIAGRAM 132 131 English Page 32 Customer Service: 1-844-FIRMAN1
439cc ENGINE PARTS DIAGRAM English Page 33 Customer Service: 1-844-FIRMAN1
H05752 PARTS LIST NO.
FIRMAN 439cc Engine Parts List NO.
SERVICE INFORMATION CONTACT THE FIRMAN PRODUCT SERVICE DEPARTMENT AT 1-844-347-6261 WARRANTY FIRMAN Three (3) Year Limited Warranty or at www.firmanpowerequipment.com to obtain warranty service information or to order replacement parts or accessories. HOW TO ORDER REPLACEMENT PARTS 1. Model No. ,Rev. Level and Serial No. and all specifications shown on the Model No./Serial No. plate. 2. Parts number or numbers as shown in the Parts List section. 3. A brief description of the trouble with the generator.
Installation, Use and Maintenance Contact Information This warranty will not apply to parts and/or labor if your product is deemed to have been misused, neglected, involved in an accident, abused, loaded beyond the generator's limits, modified, installed improperly or connected incorrectly to any electrical component. Normal maintenance is not covered by this warranty. You may contact FIRMAN at: Other Exclusions This warranty excludes: – cosmetic defects such as paint, decals, etc.
FIRMAN POWER EQUIPMENT INC. Emission Control System Warranty CALIFORNIA AND FEDERAL EXHAUST AND EVAPORATIVE EMISSIONS CONTROL WARRANTY STATEMENT YOUR WARRANTY RIGHTS AND OBLIGATIONS The California Air Resources Board, US Environmental Protection Agency (“US EPA”) and FIRMAN POWER EQUIPMENT INC.(FIRMAN) are pleased to explain the emissions control systems warranty on your 2019-2020 or later Small Off-Road Engine (“SORE”) and engine powered equipment.
(8) Throughout the emissions warranty period defined in Subsection (b)(2), FIRMAN will maintain a supply of warranted parts sufficient to meet the expected demand for such parts. (9) Any replacement part may be used in the performance of any warranty maintenance or repairs and must be provided without charge to the owner. Such use will not reduce the warranty obligations of the manufacturer. (10) Add-on or modified parts that are not exempted by the Air Resources Board may not be used.
Firman Power Equipment Inc. 8716 West Ludlow Dr. Suite #6 Peoria, AZ 85381 www.firmanpowerequipment.
MANUAL PARA EL PROPIETARIO GENERADOR COMBUSTIBLE DUAL MODELO Nº H05752 Nivel rev:00 IMPORTANTE: Lea detenidamente todas las instrucciones y precauciones de seguridad antes de operar con el equipo. Asegúrese de que el motor está parado y nivelado antes de realizar ningún mantenimiento o servicio. Guarde la información del producto como referencia de consulta al realizar pedidos de piezas u obener la cobertura de la garantía.
Índice de Contenido Introducción . . . . . . . . . . . . . . . . . .. . . . . . . . .1 Mantenimiento Y Almacenamiento. . . . . .. 25 Precauciones De Seguridad . . . . . . . . . . . . .2 Programa de Mantenimiento . . . . . . . .. . 25 Desempaquetar El Generador. . . . . . . . . . . .7 Mantenimiento del Motor . . . . . . . . . . . . . 26 Piezas Incluídas. . . . . . . . . . . . . . . . . . . . . .7 Cambiar El Aceite Del Motor. . . . . . . . . . 26 Montaje. . . . . . . . . . . . . . . . . . . . . . . . .
INTRODUCCIÓN Muchas gracias por comprar el generador FIRMAN. Este manual contiene información de seguridad para que usted tome conciencia de los peligros y riesgos asociados a los productos electrógenos y para saber cómo puede evitarlos. Este generador está diseñado y previsto solo para suministrar energía eléctrica para operar con iluminación, aparatos, herramientas y cargas de motor compatibles, y no está previsto para ningún otro propósito.
• SAFETY PRECAUTIONS PELIGRO Utilizar un generador en el interior PUEDE MATARLE EN CUESTIÓN DE MINUTOS. NUNCA lo use en el interior Utilizar solo EN EL EXTERIOR de una casa o de un garaje, y lejos de ventanas, puertas y INCLUSO SI las puertas o las conductos de ventilación. ventanas están abiertas. ADVERTENCIA PELIGRO DE GAS TÓXICO verlo ni notarlo al gusto. Incluso si usted no huele el gas del tubo de escape, podría seguir estando expuesto al gas del monóxido de carbono.
USO CORRECTO Ubicación ejemplar para reducir los riesgos de intoxicación por monóxido de carbono • • lSOLO usarse en el exterior y en la dirección del viento, lejos de ventanas, puertas y conductos de ventilación. Direccionar el tubo de escape lejos de espacios ocupados. USO INCORRECTO No utilizar en ninguno de los lugares siguientes: Cerca de una puerta, ventana o conducto de ventilación Garaje Sótano Sótano de poca altura Espacio habitado Ático Pasillo de acceso Porche Vestíbulo.
PONER EL EQUIPO EN FUNCIONAMIENTO ADVERTENCIA • • • • • lCuando vaya a poner en marcha el motor, estire el cable poco a poco hasta que note resitencia, y entonces estire rápidamente para evitar el retroceso. NO ponga en funcionamiento este producto dentro de un edificio, garaje abierto, porche, equipamiento móvil, aplicaciones marinas o recintos cerrados. NO incline el motor o el equipo hacia un ángulo que pueda hacer verter combustible.
• • Cuando utilice el generador como energía de ADVERTENCIA reserva, notifique a la empresa eléctrica. No usar un interruptor de circuito con falla a tierra (GFCI de las siglas en inglés) en ningun área húmeda o altamente conductora, como entablados de metal u obras de acero. NO tocar cables o receptáculos pelados. AJUSTAR O HACER REPARACIONES A SU NO utilizar el generador con cuerdas eléctricas que GENERADOR Desconecte el cable de la bujía de la bujía y estén gastadas, peladas o dañadas de algún modo.
• • • NOTA: La gasolina es un irritante cutáneo y requiere ser limpiado inmediatamente en caso de verterse en la piel o la ropa. Un tratamiento inapropiado del generador podría dañarlo y acortarle la vida. La gasolia tiene una hedor distintiva, esto Use el generador solo para los usos intencionados. ayudara detectar ridamente escapes potenciales. Si tiene alguna duda sobre el uso intencionado, Si se produce un incendio de gasolina, las llamas no se pregúntele o contacte con el centro de servicio local.
• Si huele gas: apague el suministro de gas. Rocíe con un espray una solución enjabonada para revisar todas las conexiones y ver si hay fugas antes de intentar usar el generador. Contacte con un técnico cualificado para examinar y reparar el sistema GLP en caso de que encuentre una fuga, antes de usar el generador. • • • • • PRECAUCIÓN El GLP bajo presión es altamente inflamable y puede causar un incendio o explosión si se enciende.
MONTAJE Instalar la Pata de Apoyo 1. Sujete el soporte de goma (H) a la pata de soporte (G) con el perno de brida (I) (M6X25) y la tuerca de bloqueo de brida (J) (M6). 2. Adjunte la pata de apoyo G al marco del generador con los tornillos para brida E (M8x16) y las contratuercas para brida F (M8). 3. Incline lentamente el generador para que se apoye sobre las ruedas y sobre la pata de apoyo. 4. Ajuste el tornillo E y la tuerca F con las llaves facilitadas.
Conexión del Cable de La Batería NOTA: El generador viene equipado con el cable rojo positivo (caja roja) ya adjunto. 1. Compruebe el cable (+) positivo rojo está bien apretado al terminal positivo (+) del terminal. 2. Conectar el cable negativo (-) cable negro al negativo (-) de la batería.
CONTROLES Y CARACTERÍSTICAS Generador ③ 2 ① ② ⑬ ④ ⑤ ⑫ ⑪ ⑭ ⑩ ⑧⑨ ⑥ ⑦ ⑮ 1-Medidor de combustible 2-Depósito de combustible con capacidad para 8.0 galones 3-Tapón del combustible 4-Palanca del obturador 5-Filtro de aire 6-Motor FIRMAN OHV 439cc 7-Interruptor de encendido de retroceso 8-Rueda libre y plana 10.
Panel de Control 1 2 4 3 10 NOTA: 8 9 7 6 5 La potencia total recogida desde todos los receptáculos no debe ser superior a la potencia de la placa de identificación. 1 Interruptor selector de combustible - Use para 4 seleccionar y girar En la gasolina o en la fuente de combustible LPG. Combustible (gasolina) Válvula está cerrada cuando el interruptor está en "OFF" o Posiciones "GLP". El interruptor del motor está encendido Está en las posiciones "GAS" o "GLP".
Receptáculo 6 120V, 30A Cierre de giro (NEMA L5-30R) Máxima 30A corriente se pueden dibujar de este receptáculo 120V. Indicador LED Botón de REINICIO 8 120/240V, 30A Cierre de giro (NEMA L14-30R) Máxima 30A corriente se pueden dibujar de este receptáculo 120/240V. Botón de PRUEBA 9 Cubierta de la toma de corriente – Protege los receptáculos del polvo y escombros.
SPECIFICATIONS Modelo H05752 Vatios de encendido 7125(GASOLINE)/7125(LPG) Vatios en funcionamiento 5700(GASOLINE)/5700(LPG) Voltaje de CA catalogado 120/240V Frecuencia catalogada 60Hz Fase Fase única Regulador de voltaje AVR Factor de potencia 1 Distorsión Armónica Total(THD) Estándar Tipo de alternador Con Cepillo Motor FIRMAN Tipo de motor Cilindro único, 4-tiempos OHV Enfriamiento por Aire Cilindrada 439cc Apagado por nivel de aceite bajo Yes Sistema de encendido Tipo de Enc
AÑDIR ACEITE AL MOTOR PRECAUCIÓN NOTE: Grados Centígradosº (exterior) Completamente Sintético 5W-30 5W-30 10W-40 10W-30 5. Vuelva a poner el tapón/varilla de nivel y asegúrelo completamente. 6. El nivel de aceite debería ser revisado antes de cada uso o almenos cada 8 horas de funcionamiento. Realice un buen mantenimiento del nivel de aceite. PRECAUCIÓN Grados Fahrenheitº (Exterior) 1. Ponga el generador en una superfície llana y nivelada. 2.
AÑADIR COMBUSTIBLE 1.Gasolina El combustible debe cumplir con los siguientes requisitos: Gasolina limpia, nueva, y sin plomo. Utilice gasolina SIN PLOMO regular con el motor del generador con un mínimo de 87 octanos /87 AKI (91 RON). Para un uso a gran altitud, lea “Funcionamiento a gran altitud”. No use gasolina con más de un 10% de alcohol como E85 o etanol. •• • NOTA: Evitar daños al generador. PRECAUCIÓN •• • • •• NO usar gasolina no aprobada, como la E85. NO mezclar aceite en la gasolina.
• • • • soldadoras y trituradoras. No use o almacene un cilindro GLP en un edificio, garaje o área cerrada. No revise si hay fugas con una cerilla encendida o una llama. La válvula del cilindro GLP debería estar completamente cerrada cuando el generador no esté en uso o esté funcionando con gasolina. Si huele gas: apague el suministro de gas. Asegúrese de que no hay fugas antes de usar el Junte el ensamblaje de regulador/manguera GLP generador.
• • • • El GLP es más pesado que el aire y puede acumularse en espacios limitados y en lugares bajos, en el caso de una fuga . El GLP tiene un hedor distintivo para ayudar a detectar posibles fugas. No permita que los niños alteren o jueguen con el cilindro GLP. En el caso de un incendio GLP, las llamas no deberían ser extinguidas a menos que haciéndolo se pueda apagar la válvula de suministro de combustible.
Conectar al Sistema Electrico del Edificio Toma de Tierra ADVERTENCIA ADVERTENCIA HAY UN CONDUCTOR PREMANENTE ENTRE EL GENERADOR (BOBINA DEL ESTÁTOR) Y EL MARCO. • • • Cuando utilice el generador como energía de reserva, notifíquelo a la empresa eléctrica. No usar un interruptor de circuito con falla a tierra (GFCI de las siglas en inglés) en ningun área húmeda o altamente conductora, como entablados de metal u obras de acero. NO tocar cables o receptáculos pelados.
FUNCIONAMIENTO Ubicación del Generador • ADVERTENCIA Asegúrese de repasar todas las advertencias para prevenir riesgo de incendio. Mantenga el área alejada de materiales inflamables u otros materiales peligrosos. Escoja un lugar seco, bien ventilado y protegido de la intemperie. Mantenga el tubo de escape alejado de objetos extraños. Mantenga el generador lejos de llamas abiertas. Mantenga el generador encima de una superficie estable y nivelada. • hacia espacios ocupados.
Encendido del Generador (Encendido de retroceso - Gasolina) 1. Antes de arrancar el generador, compruebe que no haya partes sueltas, que falten o algún tipo de daño ocasionado durante el envío. 2. Compruebe el nivel de aceite y carburante. 7. Estire la cuerda de arranque lentamente hasta que se note resistencia y entonces estire rápidamente. 3. Asegúrese de que el nudo del cilindro GLP esté completamente cerrado.
7. Gire la palanca del obturador situada en el motor hacia la posición “START”. 3. Conecte el regulador al cilindro GLP y al generador. 8. ESTIRAR PARA PREPARAR: Estire la cuerda del motor de arranque 1-2 veces. Estire lentamente hasta que note resistencia y luego estire rápidamente. 1-2 Times NOTA:No coloque el cilindro GLP en medio de la toma de corriente de un silenciador. 4. Abra completamente el nudo del cilindro GLP. 9.Gire la palanca del obturador hacia la posición “RUN”. 5.
BATERÍA A MENOS QUE EL INTERRUPTOR SELECTOR DE 2.Asegúrese de que el cortacircuitos en el panel COMBUSTIBLE HAYA ESTADO EN POSICIÓN “OFF” Y de control está en posición “on”. LUEGO HAYA VUELTO A LA POSICIÓN “GLP”. 3.Enchufe y encienda las cargas eléctricas deseadas Consulte la sección Luz indicadora-Modo ahorro de 120 y 240 voltios AC, fase única, 60Hz. de potencia de la batería para más información.
Si se consigue encender el motor con éxito durante estos 4 minutos, la luz indicadora se pondrá de color VERDE. Si no se consigue encender el motor con éxito o no se intenta encender el motor durante estos 4 minutos, el generador se pondrá en Modo Ahorro de Potencia de la Batería para conservar y aumentar la vida de la batería. GAS LPG LA LUZ INDICADORA DEBE SER DE COLOR ROJO SÓLIDO PARA PODER ENCENDER EL GENERADOR. 3. Cierre completamente el nudo del cilindro GLP.
No Sobrecargue el Generador Sobrecargar un generador excediendo su capacidad de potencia eléctrica indicada, podría resultar en daños al generador y a los dispositivos eléctricos conectados. Para prolongar la vida de su generador y los dispositivos conectados, siga estos pasos para añadir carga eléctrica: 1. Arranque el generador sin cargas eléctricas conectadas. 2. Permita que el motor funcione durante unos minutos para que se estabilice. 3. Enchufe y encienda el primer dispositivo.
MANTENIMIENTO Y ALMACENAMIENTO PROGRAMA DE MANTENIMIENTO ITEM Bujía Aceite del motor OBSERVACIONES A diario ( Antes de usar) Comprobar el estado. Ajustar la separación y limpiar. Cambiar si es necesario. Cada 250 horas √ √ Comprobar el nivel de aceite. √ Reemplazar. √ √ Filtro de aire Limpiar, reemplazar si es necesario. Limpiar el filtro de carburante y el Filtro de Carburante colador del depósito de combustible.
MANTENIMIENTO DEL MOTOR Para evitar el arrancado accidental, quite y ponga en el suelo el cable de la bujía antes de realizar cualquier servicio. • Cambiar el Aceite del Motor Cambie el aceite del motor cada 100 horas. (para motores nuevos, cambie el aceite cada 25 horas.) Utilice lubricante nuevo y de alta calidad en la cantidad especificada. Si se utiliza aceite contaminado o deteriorado o si la cantidad del aceite del motor no es suficiente, el motor será dañado y se acortará su vida.
Mantenimiento de La Bujía Inspeccionar el Silenciador Y el Apagachispas Cambiar la bujía hará que su motor arranque con más facilidad y funcione mejor. (a) Quite el tapón de la bujía. (b) Quite el tapón de la bujía con la llave proporcionada. ADVERTENCIA A B A- Bujía B- Tapón de la bujía ( c) Inspeccione la bujía en busca de daños y límpiela con un cepillo de alambre antes de reinstalarla. (d) Ajuste la distancia entre electrodos a 0.7 a 0.8mm (0.028” a 0.031”).
Revise todos los orificios y ranuras de refrigeración para asegurar que están limpias y despejadas. Cambio de Batería Brida Battery Holder Band Tornillo Rejilla del apagachispas 3. Retire cuidadosamente los restos de carbono de la rejilla del apagachispas con un cepillo de alambre. 1. Desconectar el cable negativo (-) cable negro al negativo (-) de la batería y desconecte el cable positivo (+) rojo al positivo (+) de la batería. 2. Retire la cinta de goma soporte de la batería. 3.
NUNCA conecte el cable de la batería (funda protectora roja) positivo (+) al poste negativo (-) en la batería. NUNCA toque los dos postes de la batería simultáneamente. NUNCA coloque una herramienta metálica a través de los dos postes de la batería. SIEMPRE use herramientas aisladas o no conductoras cuando instale la batería. DANGER SERVICIO Y ALMACENAMIENTO Drene el combustible en el recipiente aprobado al aire libre,Lejos de la llama abierta. Asegúrese Servicio Infrecuente de que el motor esté fresco.
• Si no es práctico vaciar el tanque de combustible y la unidad se va a almacenar durante algún tiempo, utilice un ESTABILIZADOR de COMBUSTIBLE disponible en el mercado agregado a la gasolina para aumentar la vida útil de la gasolina. Haga funcionar la unidad durante 5-10 minutos para hacer circular la gasolina tratada en el carburador de las líneas de combustible antes de apagarse.
LOCALIZACIÓN Y RESOLUCIÓN DE PROBLEMAS Problema Motivo Corrección 1. El cortacircuitos está abierto. El motor funciona, 2. Desperfecto en el generador. 3. Mala conexión o conjunto de pero no hay ninguna defectuoso. salida de CA disponible. 4. cuerdas El dispositivo está mal conectado. 1. Reinicie el cortacircuitos. 2. Contacte con instalación de servicio autorizado. 3. Revise y repare. 4. Conéctelo a otro dispositivo que esté en buenas condiciones.
DIAGRAMA DE LAS PIEZAS Y LISTA DE PIEZAS H05751 DIAGRAMA DE LAS PIEZAS 132 131 Spanish 32 Servicio al Cliente: 1-844-FIRMAN1
FIRMAN 439cc Motor DIAGRAMA DE LAS PIEZAS Spanish 33 Servicio al Cliente: 1-844-FIRMAN1
H05751 LISTA DE PIEZAS NO.Número de Pieza Descripción Qty.
FIRMAN 439cc Motor LISTA DE PIEZAS NO.Número de Pieza Descripción 1 380723514 Cárter Comp. 2 357723501 Tornillo de drenaje 3 357723502 Arandela, tornillo de drenaje 4 357723503 Sensor de nivel de aceite 5 357723504 Flg. Bolt M6 × 15 6 357723505 Cojinete 7 336723501 Pernos de localización 8 357723506 Cojinete 9 357723507 Eje de equilibrio 10 357723508 Comp de árbol de levas 11 380723501 Cigüeñal 12 357723510 Engranaje, eje de manivela 13 357723511 Engranaje 14 357723512 Gskt.
INFORMACIÓN DE SERVICIO GARANTÍA Garantía Limitada de Tres (3) Años FIRMAN Calificaciones de Garantía El GENERADOR FIRMAN registrará la garantía cuando reciba su Carta de Registro de Garantía y una copia de su recibo de compra de uno de los puntos de venta FIRMAN como comprobante de compra. Envíe su registro de garantía y el comprobante de compra en un plazo de diez (10) días tras la fecha de compra. o en www.firmanpowerequipment.
Instalación, Uso y Mantenimiento Información de Contacto Esta garantía no se aplicará a las partes y / o mano de obra si su producto se considera que ha sido mal utilizado, descuidado, involucrado en un accidente, abusado, cargado más allá de los límites del generador, modificado, instalado incorrectamente o mal conectado a cualquier componente eléctrico. El mantenimiento normal no está cubierto por esta garantía.
FIRMAN POWER EQUIPMENT INC. Garantía Del Sistema De Control De Emisiones DECLARACIÓN DE GARANTÍA FEDERAL Y CALIFORNIANA SOBRE EL CONTROL DE EMISIONES DE ESCAPE Y EVAPORACIÓN MOTORES DE GASOLINA SUS DERECHOS Y OBLIGACIONES DE GARANTÍA La Junta de Recursos del Aire de California, Agencia de Protección Ambiental de EE.UU. ("US EPA") y FIRMAN POWER EQUIPMENT INC.
9) Las piezas añadidas o modificadas que no estén exentas por el Air Resources Board (Agencia de Protección Ambiental de California) no deberán utilizarse. El uso de cualquier pieza añadida o modificada que no esté exenta por el último comprador tendrá fundamento para serle denegada la petición de garantía. El fabricante no se hará responsable de fallos en la garantía de piezas en garantía causados por el uso de piezas añadidas o modificadas no exentas.
Firman Power Equipment Inc. 8716 West Ludlow Dr. Suite #6 Peoria, AZ 85381 www.firmanpowerequipment.com Todos los derechos reservados. Cualquier reimpresión o uso no autorizado sin la autorización por escrito queda explícitamente prohibido.
MANUEL DE PROPRIÉTAIRE CARBURANT À DOUBLE GÉNÉRATEUR NUMÉRO DE MODÈLE H05752 Niveau:00 IMPORTANT: lisez toutes les précautions et instructions de sécurité avec grand soin avant d'opérer l'équipement. Assurez que le moteur s'arrête et le niveau avant d'appliquer aucun entretien ou service. Enregistrez l'information du produit comme référence lors de la commande de pièces ou d'obtenir la couverture de garantie.
Table des matières Introduction . . . . . . . . . . . . . . . . . . . . . . . . . . . .1 L'entretien Et La Conservation. . . . . . . . . . . . 25 Précautions De Sécurité . . . . . . . . . . . . . . . . .2 Recommandations Générales . . . . . . . . . . 25 Déballage Du Générateur. . . . . . . . . . . . . . . .7 Entretien Du Moteur .. . . . . . . . . . . . . ... . . . 26 Parts Inclus. . . . . . . . . . . . . . . . .. . . . . . . . .7 Changement D'huile De Moteur. . .. . . . . . 26 Assemblez . . . . . .
INTRODUCTION Je vous remercie pour acheter le générateur du FIRMAN. Ce manuel contient l'information de sécurité afin de vous faire prendre conscience des dangers et des risques associés aux produits de générateur et comment y éviter. Ce générateur est dessiné et visé seulement pour founir énergie électique dans l'intention d'opérer l'éclairage d'électrique compatible, les appareils, les outils et les charges de moteur, en plus, il ne vise pas à d'autres objets.
Précautions de Sécurité • Toujours placez ce produit sous le vent et pointez l'échappement du moteur loin des espaces occupés. Si vous commencez à vous sentir malade, étourdi ou faible en utilisant ce produit, l'éteignez et le prenez à l'air frais immédiatement. Voyez un docteur. Vous pouvez rencontrer un monoxyde de carbone toxique. L'utilisation d'une générateur à l'intérieur PEUT VOUS TUER EN QUELQUES MINUTES. L'échappement du générateur contient du monoxyde de carbone.
USAGE CORRECT Location d'exemple à réduire le risque de monoxyde de carbone toxique • • Juste utilisez à l'extérieur et sous le vent, loin de fenêtres, portes et évents. Echappement direct loin des espaces occupés.
AVERTISSEMENT • • LORS D'OPÉRER L'ÉQUIPEMENT Rebond de corde de lanceur (retrait rapide) va tirer votre main et votre bras vers le moteur plus rapide que vous pouvez laisser aller ce qui peut causer des OS cassés, des fractures, des contusions, entorses ou provoquant de graves blessures. Lors de démarrer le moteur, tirez lentement sur la corde jusqu'à sentir la résistance, et puis tirez rapidement pour éviter tout recul.
• • •• • • • Lorsque vous utilisez le générateur pour l'aliment AVERTISSEMENT -ation de secours, notifiez des utilisateurs de companie. Unintentional d'allumage Utilisez un disjoncteur de circuit de terre dans une peut causer l'incendie ou zone humide ou de haute conduction, comme les un choc électrique terrasses en métal ou de travail de l'acier. entraînant la mort ou des NE PAS touchez les fils nus ou les prises. blessures graves.
REMARQUE: Un traitement inapproprié de la génératrice pourrait endommager et réduire sa durée de vie. Utilisez la génératrice uniquement pour les utilisations prévues. Si vous avez des questions sur l'utilisation prévue, demandez votre fournisseur ou contactez le centre de service local. N'opérez la génératrice que sur des surfaces planes. N'exposez pas la génératrice à une humidité excessive, la poussière, la saleté ou des vapeurs corrosives. N'insérez pas d'objets à travers les fentes de refroidissement.
1. Goupille De Pont . . . . . . . . . . . . . . . . . . . . . . . . .2 2. Roué De 10.0" . . . . . . . . . . . . . . . . . . . . . . . . . . . 2 3. Rondelle Plate . . . . . . . . . . . . . . . . . . . . . . .. . . . 2 4. Goupille Fendue . . . . . . . . . . . . . . . . . . . . . . . . . 2 5. Huile De Moteur (bouteille) . . . . . . . . . . .. . . . 1 6. Entonnoir D'huile . . . . . . . . . . . . . . . . . . . . . . .. 1 7. Clé Pour Bougie D'allumage . . . . . . . . . . . . . . 1 8.
ASSEMBLEZ Installez Le Support Du Pied L e g é n é r a t e u r e x i g e u n c e r t a i n u s a g e . S i l e 1. Fixer le support en caoutchouc (H) à la jambe p r o b l è m e s e p o s e l o r s d e l ' a s s e m b l a g e d u de support (G) avec le boulon à bride (I) (M6X25) générateur, appelez 1-844-347-6261. et l 'écrou à bride (J) (M6). 2. Fixez le pied de support G au cadre du générateur Installez Le Kit De Roue avec des boulons E (M8x16) et de la bride contreCAUTION écrous F (M8).
Câble De Connexion De La Batterie NOTE: Le générateur est équipé du câble rouge positif (câble rouge) déjà fixée. 1. Vérifiez que le (+) câble rouge positif est bien serré à la borne positive (+) terminal. 2. Connecter le négatif (-) câble noir négatif (-) de la batterie.
CONTRÔLES ET CARACTÉRISTIQUES Générateur ③ 2 ① ② ⑬ ④ ⑤ ⑫ ⑪ ⑭ ⑩ ⑧⑨ ⑥ ⑦ ⑮ 1- Jauge De Combustible 2- Réservoir De Combustible De Capacité 8 Gallon 3- Bouchon De Combustible 4- Levier D'étranglement 5- Filtre À Air 6- Moteur 439cc Firman OHV 7- Démarrage De Recul 8- 10.
Panneau de Contrôle 1 2 4 3 10 8 9 7 6 5 NOTE: Puissance totale tirée de tous les récipients ne doit pas dépasser la valeur nominale de la plaque signalétique. 1 Sélecteur de carburant - Permet de sélectionner et de Sur l'essence ou la source de carburant LPG. Carburant (essence) la vanne est fermée lorsque le commutateur est sur "OFF" ou positions "GPL". L'interrupteur du moteur est Le commutateur se trouve sur les positions "GAZ" ou "GPL".
Réceptacle 6 120V, 30A Twist-Lock - (NEMA L5-30R) Une charge pleine maximum de 30 ampères peut être tirée de ce réceptacle de 120 Volts. Voyant lumineux LED Bouton de Réinitialisation Bouton de Test 8 120 / 240V, 30A Twist-Lock - (NEMA L14-30R) Une charge pleine maximum de 30 ampères peut être tirée de ce réceptacle de 120/240 Volts. 9 Couverture de Sortie - Protégez les récipients de poussière et de débris.
SPÉCIFICATIONS Modèle H05752 Watts de démarrage 7125(GASOLINE)/7125(LPG) Watts courir 5700(GASOLINE)/5750(LPG) Tension CA Nominale 120/240V Fréquence Nominale 60Hz Phase Phase Monoposé Régulateur de Tension AVR 1 Facteur de Puissance La Norme Distorsion Harmonique Totale(THD) Type D'alternateur Brossé Moteur FIRMAN Type du Moteur Cylindre Simple, 4 OHV Refoidi Par Air Déplacement 439cc Arrêt de L'huile Basse Système D'allumage de Feu Yes Type D'allumage De Feu Statique, Volant Magné
4.Utilisez l'entonnoir d'huile, versez lentement le contenu de la bouteille d'huile fournie en remplissage d'huile ouverture à la marque '' H1 'sur la jauge. CAUTION Soyez prudent de ne pas trop remplir. Un remplissage NE PAS tentez de démarrer le moteur avant qu'il ait été rempli proprement avec le type et la quantité excessif d'huile peut causer le moteur à ne démarrer d'huile recommandés. Les dommages au générateur pas ou le démarrer difficilement.
Ajoutez le Combustible 1.Essence Le combustible doit répondre aux exigences: •• • Propre, frais, l'ssence sans plomb. Utilisez l'ssence sans plomb rulieavec le moteur du gateur du minimum 87 octane 87 AKI (91 RON) Pour utiliser l'altitude haute, voyez 'opération sur l'altitude haute' . Ne pas utilisez l'essence avec plus de 10% d'alcool comme E85 ou éthanol. Évitez le dommage de générateur. L'échec à suivre le manuel de l'opérateur pour les recommandations du combustible de garantie vide.
• • • • N'utilisez pas ni stockez la bouteille de GPL dans un bâtiment, un garage ou un espace clos. N'utilisez pas ni stockez la bouteille de GPL dans un bâtiment, un garage ou un espace clos. Ne vérifiez pas les fuites avec une allumette allumée ou d'une flamme. La valve de la bouteille de GPL doit être complètement fermée lorsque la génératrice n'est pas utilisée ou qu'elle fonctionne à l'essence. Si vous sentez le gaz: fermez l'alimentation de gaz.
PRÉCAUTION • • • • • Opération À La Haute Altitude Le GPL sous pression est très inflammable et peut provoquer un incendie ou une explosion en cas d'inflammation. Le GPL est plus lourd que l'air et peut s'accumuler dans l'espace clos et les lieux bas en cas de fuite. LPG a une odeur particulière pour aider à détecter les fuites potentielles. Ne laissez pas les enfants manipuler ou jouer avec la bouteille de GPL.
Connectez Au Système Électrique D'un Bâtiment Mise À La Terre Connexions pour alimentation de secours au Le Code d'électrique National exige votre générateur système électrique d'un bâtiment doivent être qui doit être correctement relié à la terre approprié effectuées par un électricien qualifié. La connexion pour éviter les chocs électriques.
• OPÉRATION Location de Générateur AVERTISSEMENT Opérez cet appareil uniquement à l'extérieur loin des fenêtres, portes et ventilations à réduire le risque de monoxyde de carbone en provenant de l'accumulation et potentiellement d'être attiré vers les espaces occupés. Installez des alarmes de monoxyde de carbone à piles ou des alarmes de brancher l'alimentation du monoxyde de carbone avec batterie de secours selon les instructions du fabricant.
Démarrage de la génératrice (Démarrage de recul- Essence) 1. Avant de démarrer la génératrice, vérifiez les pièces qui manquent ou lâches et tout dommage qui aurait pu se produire pendant le transport. 2. Vérifier le niveau d'huile et de carburant (essence). 7. Tirez le cordon de starter doucement jusqu'à sentir une résistance, puis tirez rapidement. 3. Assurez-vous que le bouton de la bouteille de GPL est complètement fermé. RAPPEL: DOIRE AVOIR LE VOYANT ROUGE SOLIDE POUR POUVOIR DEMARRER LA GENERATRICE.
7. Déplacez le levier de starter sur le moteur à la position «START». 3. Branchez le régulateur à la fois à la bouteille de GPL et à la génératrice. 8. Tirer Pour Amorcer: Tirez sur le cordon de démarrage 1-2 fois. Tirez lentement jusqu'à ce que la résistance est senti, puis tirez rapidement. 1-2 Times Remarque: Ne placez pas la bouteille de GPL dans la voie de la sortie du silencieux. 4. Ouvrez complètement le bouton de la bouteille de LPG. 9.Déplacez le levier de starter sur la position "RUN". 5.
D'ENERGIE DE LA BATTERIE, SAUF SI LE SELECTEUR DE CARBURANT EST TOURNE VERS LA POSITION "OFF", PUIS SE RETOURNA VERS LA POSITION "GPL". Voir la partie mode d'économie d'énergie de la batterie pour plus d'informations. 1.Laissez le moteur se stabiliser et chauffer pendant quelques minutes après le démarrage. 2.Assurez que le disjoncteur sur le panneau de contrôle est en position. 3.
Voyant Lumineux Mode D'économie D'énergie De Batterie Ce générateur est équipé d'un module électronique qui consomme de l'énergie de la batterie. Lorsque le sélecteur de carburant est tourné vers la position «GAZ» ou « GPL », le voyant deviendra ROUGE jusqu'à 4 minutes (avant de s'éteindre). Laissez le générateur tourner sans charge pendant Le démarrage du moteur avec succès au cours plusieurs minutes afin de stabiliser les températures de ces 4 minutes tournera le voyant en VERT.
un débit de carburant suffisant pour le moteur. Il ne constitue pas une indication d'un problème avec la génératrice, mais seulement un problème avec le flux de gaz de la bouteille de GPL. Si les performances de la génératrice semblent se détériorent en même temps que la formation de la glace est observée sur la valve du réservoir, le tuyau ou le régulateur, alors il doit prendre certaines actions pour éliminer ce symptôme.
Français 25 Service Clients: 1-844-FIRMAN1
ENTRETIEN DU MOTEUR Pour empêcher un démarrage accidentel, retirez le fil de contact de la bougie avant d'effectuer tout service. • CHANGEMENT D'HUILE DE MOTEUR Utilisez l'huile lubrifiante frais avec la bonne qualité à la quantité spécifiée. Si l'huile contaminée ou détériorée est utilisé ou la quantité de l'huile de moteur ne suffit pas, les dommages du moteur se produit et sa durée de vie sera grandement réduite. Changez l'huile de moteur toutes les 100 heures.
L'ENTRETIEN DE BOUGIE INSPECTEZ SILENCIEUX ET PARE-ÉTINCELLES Changeant de la bougie aidera votre moteur de démarrer plus facilement et de mieux fonctionner. (a) Retirez le capuchon de bougie. (b) Retirez la bougie à l'aide de la clé fournie. Inspectez le silencieux pour des fissures, des corrosions ou d'autres dommages. Retirez le pare-étincelles, en cas d'échéant, et inspectez des dommages ou de blocage de carbone.
la poussière et les débris du générateur. Inspectez tous les évacuations d'air et le slot de refroidissement pour assurer qu'ils sont propres et dégagées. Bride Battery Holder Band Vis Écran pare-étincelles 3. Retirez soigneusement les dépôts de carbone à partir de l'écran pare-étincelles avec une brosse métallique. 1. Débrancher la borne négative (-) câble noir négatif (-) de la batterie, déconnectez le positif (+) câble rouge positive (+) de la batterie. 2.
SERVICE ET STOCKAGE DANGER SERVICE PEU FREQUENT Si l'appareil est rarement utilisé, il peut entraîner des difficultés au démarrage. Pour éliminer un démarrage difficile, suivez les instructions suivantes: 1. Fonctionnez le générateur au moins 30 minutes chaque mois. 2. Fonctionnez le générateur, puis fermez la vanne d'arrêt de carburant et permettez à l'appareil de fonctionner jusqu'à l'arrêt du moteur. 3. Déplacez le commutateur du moteur à la position «OFF».
STABILISATEUR DE CARBURANT DANS LE SYSTÈME DE COMBUSTIBLE COMPRENANT LE RÉSERVOIR, LES LIGNES DE CARBURANT ET LE CARBURATEUR. Les dommages ou dangers résultant de l'utilisation d'un carburant inadéquat, d'un stockage incorrect de carburant et / ou de stabilisateurs mal formatés ne sont pas couverts par la garantie du fabricant. Ne pas stocker l'essence d'une saison à une autre saison.
LE DÉPANNAGE Problème Le moteur marche, mais pas de sortie de CA est disponible Le moteur marche bien sans charge mais "enlise" lorsque les charges sont connectés. Cause Correction 1. Disjoncteur est ouvert. 1. Réenclenchez le disjoncteur. 2. Défaut dans le générateur. 3. Pauvre connexion ou rallonge défectueuse. 4. Dispositif branché est défectueux. 2. Contactez le dispositif de service autorisé. 3. Vérifiez et réparez. 4. Branchez un autre dispositif qui est en bon état. 1.
LE SCHEMA DES PIECES ET LA LISTE DE PIECES H08052 LE SCHEMA DES PIECES 132 131 Français 32 Service Clients: 1-844-FIRMAN1
439cc Moteur Schéma Des Pièces Français 33 Service Clients: 1-844-FIRMAN1
H05752 LISTE DES PIECES NO.
439cc Liste des Pièces de Moteur 1 2 3 4 5 6 7 8 9 10 11 12 13 14 15 16 17 18 19 20 21 22 23 24 25 26 27 28 29 30 31 32 33 34 35 36 37 38 39 40 41 42 43 44 45 46 47 48 49 50 51 52 53 54 55 56 57 58 380723514 357723501 357723502 357723503 357723504 357723505 336723501 357723506 357723507 357723508 380723501 357723510 357723511 357723512 357723513 357723514 357723515 357723516 357723517 357723518 357723519 380723502 336723503 357723521 380723503 380723504 380723505 357723525 357723526 357723527 357723528 357
INFORMATION DE SERVICE CONTACTEZ LE DEPARTEMENT DE SERVICE DE PRODUIT DE FIRMAN PAR 1-844-347-6261 OU ALLEZ SUR LE SITE: www.firmanpowerequipment.com pour obtenir les informations de service de garantie, ou afin de commander les pièces de remplacement et les accessoires.
Usure Normale Votre produit a besoin de pièces et de service périodiques de bien performer. Cette garantie ne comprend pas les réparations quand d'une partie ou de l'équipement ensemble a épuisé à l'usage normale pendant la durée de vie. Cette garantie vous donne certains droits juridiques qui peuvent varier d'un pays à l'autre. Votre pays peut également avoir d'autres droits que vous pourriez avoir ce qui ne sont pas mentionnés dans cette garantie.
Français 38 Service Clients: 1-844-FIRMAN1
Français 39 Service Clients: 1-844-FIRMAN1
Firman Power Equipment Inc. 8716 West Ludlow Dr. Suite #6 Peoria, AZ 85381 www.firmangenerators.com Tous droits réservés.