Store and Share your Digital Creations SeriTek /2SE2-E ™ Two External Port Hot-Swap Serial ATA PCI Express Host Adapter User Manual for Windows PC
FirmTek, LLC www.firmtek.com Copyright Copyright © 1999-2006 FirmTek, LLC. All rights reserved. No part of this manual may be reproduced, translated by any means, photocopied, or transmitted in any form without the prior written permission of FirmTek. Trademarks FirmTek, UltraTek, AV-Tek, SeriTek names and logotypes are trademarks of FirmTek, LLC. Windows is a registered trademark of Microsoft Corporation in the United States and other countries.
TABLE OF CONTENTS I. Introduction………………………………….............................................. 1 II. Installing the SeriTek/2SE2-E.................................................................. 5 III. Connecting External Enclosures ............................................................. 7 IV. Installing Windows Drivers....................................................................... 9 V. Formatting Hard Drives.......................................................................... 11 VI.
I. Introduction Welcome Congratulations and thank you for purchasing the SeriTek/2SE2-E Serial ATA host adapter. This product is yet another innovative solution from the innovative folks at FirmTek. About This User’ s Manual This User’ s Manual was written with the assumption you are familiar with your computer, and are comfortable with opening its case. For further information, and to get acquainted with your computer, please refer to your computer user’ s manual.
SeriTek/2SE2-E Key Features and Benefits Two external ports with hot-swap capability Plug-and-Play ease of use, completely self-contained booting functionality, no driver installation necessary Boosts overall system performance with per-port data transfer rates of up to 300 MBytes/sec or 3.
SeriTek/2SE2-E Specifications General System Hardware Requirements PC with available PCI Express expansion slot Operating Systems Supported Windows Windows Windows Windows Bus Type PCI Express 1x lane Can be inserted in any available PCI Express slot (4x, 8x, etc) External Connectors 2-port external Serial ATA (SATA) interface connectors support up to 2 external hard drives or peripherals (eSATA type/I-shape connectors) Drive Types Supported Serial ATA hard drive Backward compatible with
SeriTek/2SE2-E System Requirements Operating System Windows 2000 Windows XP Windows 2003 Hardware Requirements PC with available PCI Express expansion slot (The SeriTek/2SE2-E can be installed in any available PCI Express slot: 1X, 4X, 8X, etc.) External powered enclosure equipped with Serial ATA hard drive(s) or Parallel ATA hard drives (Parallel ATA hard drives require compatible Serial ATA to Parallel ATA converters contained within the enclosure).
II. Installing the SeriTek/2SE2-E Caution: Prior to installing the SeriTek/2SE2-E host adapter and hard drive(s) or peripheral(s), please make sure your data is backed up. The SeriTek/2SE2-E host adapter and your PC contain sensitive components that can be permanently damaged by Static Electric Discharge. Be sure you’ re working in an area free of static electricity to prevent them from being damaged.
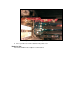
Figure 1: Inserting and securing the SeriTek/2SE2-E 8. Close your PC case and re-attach the AC power cord. Ready for Use Your SeriTek/2SE2-E host adapter is now installed.
III. Connecting External Enclosures Introduction This section describes how to connect external hard drive enclosures. Connecting the SeriTek/2SE2-E to an External Enclosure 1. The SeriTek/2SE2-E host adapter is compatible with a wide range of external enclosures. Enclosures must meet basic requirements which include: Adequate power and cooling to support the hard drives (dedicated power supply).
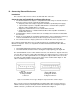
Figure 3: Using SeriTek/2SE2-E with a drive enclosure that has I-shaped eSATA connectors; both cable connectors will be identical. Making the SATA Connections: Caution: Be sure to connect the cable using the proper orientation to your SeriTek host adapter and external enclosure. It should easily snap into place. Please do not force the cable connector onto the host adapter and hard drive or peripheral interface.
IV. Installing Windows Drivers Introduction This section describes how to install Windows NT/2000/XP/2003 drivers. This section assumes the Windows operating system has already been on installed on the PC. Windows Driver Installation Windows 2000/XP Systems Boot up Windows after the Serial ATA PCI Express Host Adapter is installed and attached to external drives/enclosures. Log into the system using an account with administrator privileges.
Verifying Proper Installation for Windows NT Double click on My Computer icon, select Control Panel, and click on the SCSI Adapters icon. The Silicon Image SiI 3132 SATALink Controller should be displayed under the Device and Driver tabs. To view information about the devices attached to the controller, double click on the Silicon Image ATA Controllers applet icon in the Control Panel. Select the controller from the list at the top of the dialog.
V. Formatting Hard Drives Introduction If the hard drive(s) connected to the SeriTek/2SE2-E are not formatted for use with Windows, they will not be recognized. This procedure explains how to format your hard drives. Be careful not to inadvertently delete partitions you use with other systems, such as a Macintosh computer. Caution: Please make sure your data is backed up before attempting to format or change the partition layout of your hard drives.
VI. Product Support Technical Support For additional information on how to use SeriTek/2SE2-E, download the latest firmware updates, or for technical assistance, please visit us at www.firmtek.com, or email us at support@firmtek.com. Please provide the following information when contacting us: Product model and serial number Driver version (You may use Windows Device Manager to determine the driver version).
VIII. Regulatory Compliance Statements Federal Communications Commission Radio Frequency Interference Statement WARNING: Changes or modifications to this unit not expressly approved by the party responsible for compliance could void the user’ s authority to operate the equipment. This equipment has been tested and found to comply with the limits for a Class B digital device, pursuant to Part 15 of the FCC rules.