
Installation Guide


11
(x2)
1
2
4
4
3
3
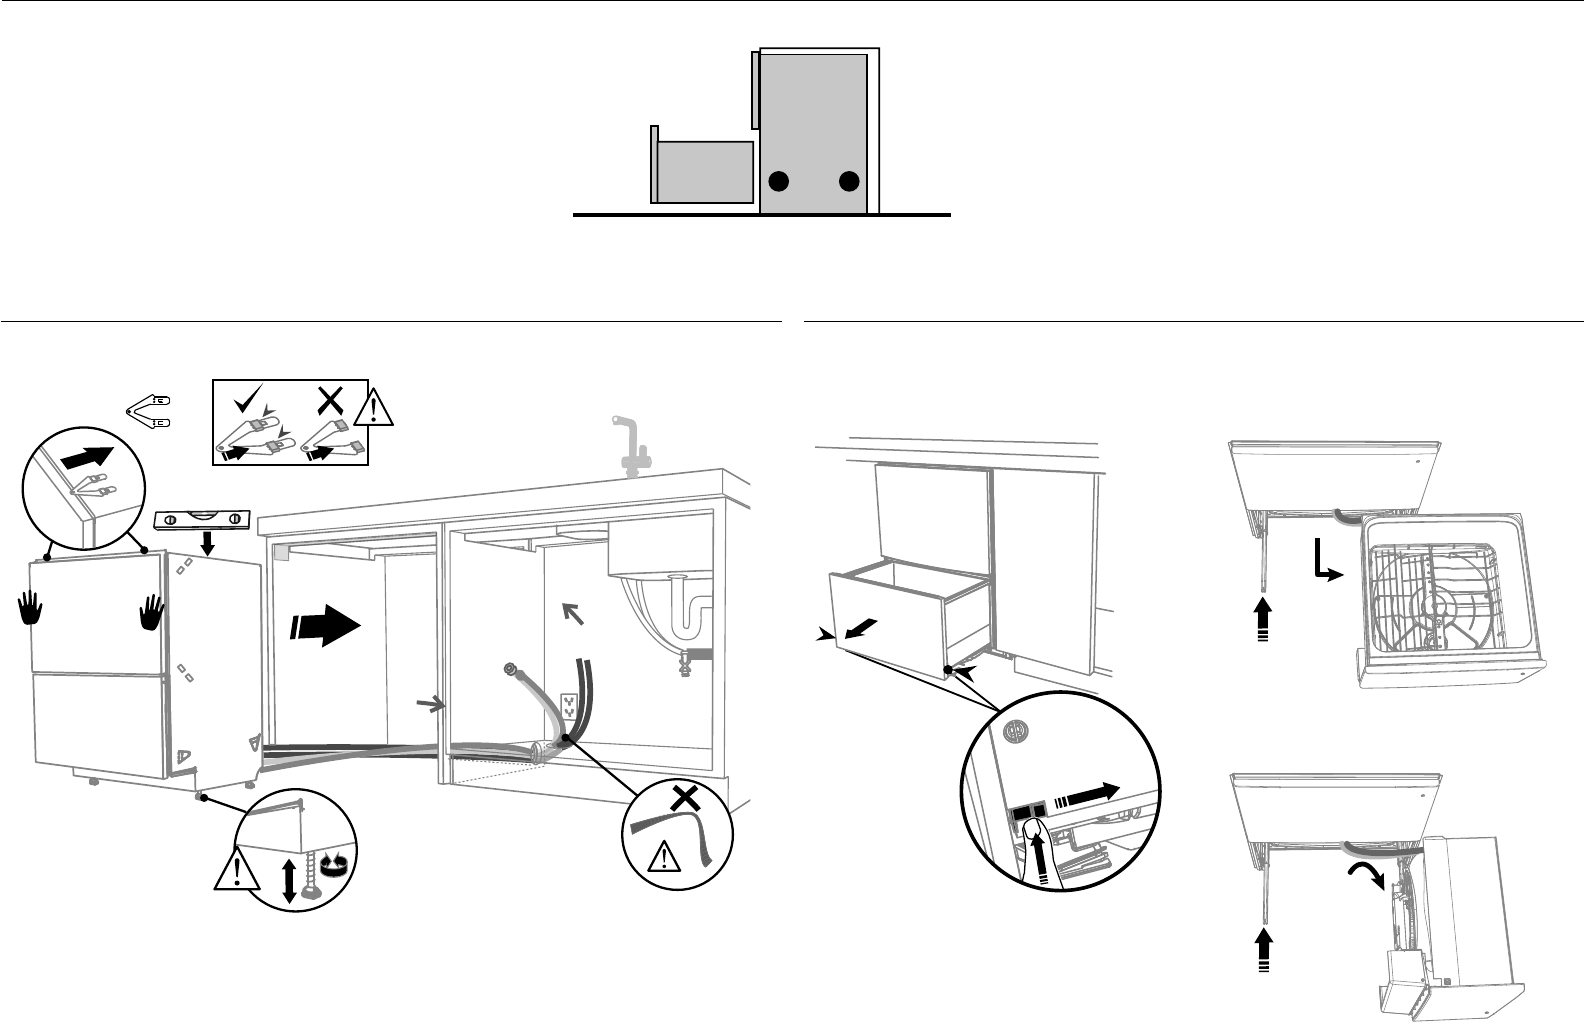
8 ALTERNATIVE METHOD (B) - SECURE BY DRAWER REMOVAL
As you push product
in, pull through hoses
and cord, ensuring
they don’t get kinked
or twisted.
optionally attach the
two top mounting
brackets
Initially level the product
You can raise or lower the
product by twisting the
feet. Then take care when
pushing the product into
the cavity that you do not
bend the feet.
8-B PULL THROUGH HOSES & PUSH INTO THE CAVITY 9-B REMOVE THE LOWER DRAWER
To prevent kinked hoses
Either sit the drawer down on the left hand
side (recommended) or rotate the drawer
clockwise, resting it on its side after removal.
Press the release tabs
in on either side and
push back to release
drawer from runners.
Lift drawer off runners.
Push drawer
runners back in
on either side.
Push drawer
runners back in
on either side.
Sit the drawer down
Rotate the drawer
clockwise (max. 90
o
)
and rest on side.
When fitting brackets,
ensure the ends are
not pushed down into
the chassis.
4” (100mm)