INSTALLATION INSTRUCTIONS USER GUIDE Heat pump clothes dryer DH8060P model NZ AU
CONTENTS Introduction 2 Safety and warnings 3 Installation instructions 6 Getting started quickly 12 Dryer controls 14 Sorting and loading 15 Drying cycles 18 Drying cycle options 19 Caring for your dryer 23 Before you call for service 26 Fault codes 27 Troubleshooting 28 Manufacturer’s Warranty 34 Customer Care 36 IMPORTANT! SAVE THESE INSTRUCTIONS The models shown in this user guide may not be available in all markets and are subject to change at any time.
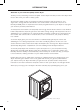
INTRODUCTION Welcome to your new heat pump clothes dryer Thank you for purchasing a Fisher & Paykel clothes dryer. We are proud of this dryer and trust it will serve you well for many years. At Fisher & Paykel we aim to provide innovative products that are simple to use, ergonomic, energy efficient and kind to the environment. Thousands of tonnes of laundry and 80 years of experience have been programmed into your dryer to help give you the best possible performance.
SAFETY AND WARNINGS Meaning of symbols on the dryer Warning: Risk of fire/Flammable materials Read the instructions ! WARNING! Fire Hazard ●● Only dry fabrics that have been washed with water. ●● Do not use heat to dry articles containing foam rubber or similarly textured rubber–like materials, dry on ‘Air Dry’. ●● Do not stop a tumble clothes dryer before the end of the drying cycle unless all items are removed and spread out in order to dissipate the heat.
SAFETY AND WARNINGS ●● ●● ●● ●● ●● ●● ●● ●● ●● This dryer is not intended for use by persons (including children) with reduced physical, sensory or mental capabilities, or lack of experience and knowledge, unless given supervision or instruction concerning the use of the dryer by a person responsible for their safety. Children should be supervised to ensure they do not play with the dryer. Unplug the machine from the power supply when it is not in use. Do not swing or put weight on the door.
SAFETY AND WARNINGS ●● ●● ●● ●● ●● Items that have previously been cleaned in, washed in, soaked in or spotted with flammable liquids or solids, eg petrol/gasoline, kerosene, dry cleaning solvents, vegetable or cooking oil, acetone, denatured alcohol, some brands of spot removers, turpentine, waxes and wax removers or other flammable or explosive substances should not be placed in a tumble dryer. Do not dry unwashed items in the tumble dryer.
INSTALLATION INSTRUCTIONS Please read and follow the ‘Safety and warnings’ and ‘Installation instructions’ sections carefully before using your dryer! Moving your appliance If the dryer needs to be placed at an angle for moving, only tip towards the right hand side (when viewed from the front). If the dryer has not been transported as described, leave it standing upright for at least one hour before turning on.
INSTALLATION INSTRUCTIONS Installation options Your dryer can be installed one of two ways, either freestanding, or stacked on top of a Fisher & Paykel front loading washer. 1 Free standing The dryer stands on the floor and can easily be moved into position. 2 Stacking Your dryer has been designed to be able to be stacked on top of a Fisher & Paykel front loading washer.
INSTALLATION INSTRUCTIONS Draining The dryer is equipped with a condenser unit which accumulates water during the drying cycle. This water is collected in the removable water tank located at the top left of the dryer. The accumulated water must be emptied after each drying cycle. However you can also set up your dryer to drain automatically using the drain hose provided. A B Connecting the drain hose: 1 Remove the black hose from the connection at the back of the dryer (A).
INSTALLATION INSTRUCTIONS Electrical connection 1 This appliance must be connected to a 220 V – 240 V, 50 Hz, sinusoidal, 10 A electrical supply. 2 Uncoil the power cord, remove and discard the plastic pin cover and plug into a power socket. 3 Connect the appliance to an earthed outlet protected by a fuse of suitable capacity. ●● ●● Check the power cord for damage and make sure it is not squashed or twisted when installing the dryer.
INSTALLATION INSTRUCTIONS Completing the installation Installation test cycle IMPORTANT! Ensure the installation test cycle is completed before you dry any items in your dryer. This is to check that your dryer is installed correctly and that it is functioning properly prior to use. button. 1 Turn your dryer on by pressing the ‘POWER’ 2 Select the ‘Time Dry’ cycle for 30 minutes. Ensure the drum is empty and the door is closed (you will hear it click shut). button. The drum will start rotating.
INSTALLATION INSTRUCTIONS Machine specifications DH8060P Capacity (kg)* 8 DIMENSIONS (mm) Width 595 Depth 650 Height** 845 Length of drain hose 1300 ELECTRICAL Volts 220 – 240 HZ 50 Amps (maximum) 10 Heating Power (W) 900 * Capacity refers to the maximum dry weight of items the machine can dry at any one time. Note: some cycles have a lower maximum capacity (see the ‘Drying cycles’ section).
GETTING STARTED QUICKLY ●● ●● Check the lint filter is clean and the water tank is empty before every load. Ensure both are replaced correctly before using your dryer. The lint filter indicator will be on when the machine is on as a reminder to check the lint filters. Sort and load items into the dryer drum, ensuring no items are in the way of the door. Close the door (you will hear it click shut). to activate your dryer. 1 Press ‘POWER’ 2 Your dryer will default to the ‘Everyday’ cycle.
GETTING STARTED QUICKLY ●● ●● ●● If you make an invalid selection the dryer will beep to alert you. When the cycle finishes, your dryer will beep and then turn off automatically. If the ‘Wrinkle Free’ option has been selected the machine will rotate the drum periodically blowing cool air into the drum to help minimise wrinkling and creasing of your load. If you wish to change a cycle or select a different option once a drying cycle has started, touch the button then select the new cycle or option.
DRYER CONTROLS SmartTouch™ Control Dial The SmartTouch™ Control Dial provides easy and efficient drying cycle selection. As you rotate the dial, the icon of the drying cycle selected will be illuminated, along with the default settings for that cycle on the right side of the control panel. SmartTouch™ Control Dial SmartTouch™ buttons The smooth, easy clean buttons enable simple selection of options with lights clearly showing the selections you are making.
SORTING AND LOADING When preparing your load there are some important things to consider: Sorting ●● ●● ●● ●● ●● ●● It is recommended that you sort your garments before placing them into the dryer. Sort into loads of similar items, and loads that will likely take similar times to dry. Heavier items (eg towels, and flannelette sheets) are best dried separately from lightweight items (eg synthetics, polyester-cotton sheets and shirts).
SORTING AND LOADING Before you load ●● ●● ●● Check pockets for items that could damage your clothes or get caught in the dryer. Close zippers, hooks and eyes, and other fastenings (ie fasten the openings of duvet/ doona covers), and remove loose bra wires. These may damage both your dryer and your clothes. Check the lint filter is clean and the water tank is empty (if the dryer is not set up to drain automatically).
SORTING AND LOADING Drying times ●● ●● ●● Drying very small loads is inefficient. Try to dry medium to large loads. Heavier items (towels, flannelette sheets) will take longer to dry than light items (synthetics and polyester cotton sheets and shirts). Drying times can be reduced by spinning the wash load at the highest spin speed suitable for the load type in your washing machine.
DRYING CYCLES Your dryer has a number of drying cycles to suit your laundry needs. Selecting the most appropriate cycle for each particular load will help ensure you get the best result. MAX. LOAD SIZE (KG) DEFAULT DRYNESS LEVEL* DEFAULT DRYING TEMP High heat cycle for rapid drying of everyday clothing. 8 Dry High Heavy durable garments, eg work sweatshirts/ jerseys, rugby shorts, jeans, tea towels. A longer, high heat cycle for heavy fabrics and denim.
DRYING CYCLE OPTIONS Timed programmes (Time Dry, Rack Dry, Wool) Timed programmes of 10 to 150 minutes can be selected using the ‘More’ ‘Less’ buttons. and The machine dries for the selected time regardless of the level of moisture in the load. It is important to check the clothes throughout the timed programmes to avoid over drying. Default options All drying cycles default to the recommended options for that cycle based on the average expected load to be dried using that cycle.
DRYING CYCLE OPTIONS Dry Temp ●● ●● ●● ●● There are four drying temperatures you can choose from: ‘High’ – clothes temperatures may reach up to 70°C. ‘Medium’ – clothes temperatures may reach up to 65°C. ‘Low’ – clothes temperatures may reach up to 60°C. ‘No Heat’ – cool air is blown through the dryer for the period selected. Touch the ‘Dry Temp’ button until the light next to your desired drying temperature is illuminated.
DRYING CYCLE OPTIONS Indicators There are a number of indicators to alert you when you need to attend to your dryer, either to clean the lint filter, empty the water tank or to clean the condenser filter (refer to the ‘Caring for your dryer’ section for more information). Indicators Keylock This option enables you to deactivate the buttons on the display panel, except for the ‘POWER’ and buttons. This option helps prevent accidental button touches.
DRYING CYCLE OPTIONS Customising dryer cycles After using your dryer a few times you may discover there are some drying options you prefer for some cycles. You can programme your dryer to remember the drying options you prefer for each drying cycle. For instance, you may want to set the ‘Easy Iron’ cycle to a lower drying temperature or programme the ‘Everyday’ cycle so it automatically has the ‘Wrinkle Free’ option selected. To customise a cycle: to turn the machine on.
CARING FOR YOUR DRYER When you have finished using your dryer ●● ●● ●● Unplug the machine from the power socket. Wipe around the door to remove any remaining condensation and foreign matter. Clear the lint filter and empty the water tank (if not set up to automatically drain). Cleaning your dryer Before you start cleaning your dryer, ensure that it is disconnected from the power (ie unplug the machine from the power socket).
CARING FOR YOUR DRYER Emptying the water collection tank During the drying cycle steam condenses into water and is collected in the water tank, located at the top left of the dryer. It is important to empty the water tank after every load. There is an indicator light that will illuminate when the water tank needs emptying. A user warning will also be displayed on the screen (refer to the 'Before you call for service' section).
CARING FOR YOUR DRYER Cleaning the condenser filter If the ‘Condenser’ indicator light starts to flash this indicates that the condenser filter needs to be cleaned. The condenser filter should be cleaned after every five cycles. The light illuminates when you first turn the machine on, then turns off once the button has been touched. To clean the condenser filter: 1 Switch off the power supply and remove 2 3 4 5 6 7 the power plug before cleaning the condenser. Open the condenser filter cover.
BEFORE YOU CALL FOR SERVICE User warnings Your dryer is capable of diagnosing a number of its own problems. It will sound a continuous series of beeps and display a code when it has a problem that you can correct yourself. All control panel lights will turn off and a code will be displayed to inform you what the problem is. To stop the beeps sounding, press any button on the control panel. Do not try to continue your drying cycle once you stop the noise.
FAULT CODES When a continuous series of beeps is sounded, all the lights turn off on the control panel and a number appears on the display, a fault has occurred. The dryer will automatically enter this mode if a fault occurs. The fault code will be displayed as followed by a number on the digital display. To stop the beeps, touch any button then perform the following steps: 1 2 3 4 5 6 7 Turn your machine off at the power point. Wait one minute and turn it back on.
TROUBLESHOOTING The following is a list of problems you may encounter when using this appliance and some suggestions that may help to correct the problem. If you still have problems, please contact your Fisher & Paykel Authorised Repairer. PROBLEM POSSIBLE CAUSES WHAT TO DO Pressing ‘POWER’ does not turn on the dryer. Fault with household power supply. Try plugging in and turning on another electrical appliance. Dryer does not heat. Dryer set to ‘Air Dry’ cycle.
TROUBLESHOOTING PROBLEM POSSIBLE CAUSES WHAT TO DO Dryer is taking too long/results were not satisfactory. Drying cycle selected not appropriate for the load. Select an appropriate cycle for the load. Refer to pages 15 and 18. Dryness level selected not appropriate for the load. Select a higher dryness level. Refer to page 19. Selected drying temp, not appropriate for the load. Select a higher drying temp. Refer to page 20. Dryer overloaded for the cycle. Some cycles have a lower max load size.
TROUBLESHOOTING PROBLEM POSSIBLE CAUSES WHAT TO DO Clothes getting too hot or damaged. Cycle selected not appropriate for the load. Ensure the cycle selected is appropriate for items in the load. Refer to pages 15 and 18. Items removed from dryer before the end of cycle cool down had finished. Removing items before cool down may damage clothing if it is not spread out and exposed to air to cool once removed from the dryer.
TROUBLESHOOTING PROBLEM POSSIBLE CAUSES WHAT TO DO Noises. Dryer is overloaded. Remove some items from the dryer. Dryer has a fault. Continuous beeping or a musical series of beeps with a message displayed on digital display. Refer to pages 26 and 27. Beeps signalling the end of a drying cycle. End of cycle beeps can be turned off refer to page 20. Dryer has not been levelled properly. Refer to page 7. Dryer makes unfamiliar noises.
TROUBLESHOOTING PROBLEM POSSIBLE CAUSES WHAT TO DO Linting. Lint filter not cleaned or replaced. Ensure the lint filter is cleaned after every cycle and replaced correctly. Refer to page 23. Loads not sorted correctly. Dry lint givers separately from lint receivers. Also, dry similar colours together eg light coloured items with light coloured items, dark items with dark items. Refer to page 17. Clothes over dried. Over drying clothes in the dryer can cause them to attract lint.
TROUBLESHOOTING PROBLEM POSSIBLE CAUSES WHAT TO DO Dye transfer. White/light and coloured items not separated before drying. Remember to separate white/light and coloured items before placing them in the dryer. Wet items left sitting in the dryer for long periods of time before drying. Do not leave wet items sitting in the dryer for long periods of time before drying, if they may be prone to colour run.
MANUFACTURER’S WARRANTY For New Zealand and Australia only. You automatically receive a 2 year Manufacturer’s Warranty with the purchase of this Heat pump clothes dryer covering parts and labour for servicing within the country of purchase. Fisher & Paykel undertakes to: Repair or, at its option, replace without cost to the owner either for material or labour any part of the product, the serial number of which appears on the product, which is found to be defective within TWO YEARS of the date of purchase.
MANUFACTURER’S WARRANTY Service under this Manufacturer’s Warranty must be provided by a Fisher & Paykel Authorised Repairer (refer to the ‘Customer Care’ section at the back of this book). Such service shall be provided during normal business hours. This Manufacturer’s Warranty certificate should be shown when making any claim. For Australian Customers This Manufacturer’s Warranty is an extra benefit and does not affect your legal rights.
CUSTOMER CARE Before you call for service or assistance... Check the things you can do yourself. Refer to your user guide and check: 1 Your product is correctly installed. 2 You are familiar with its normal operation. 3 You have read the ‘Before you call for service’, ‘Fault codes’ and ‘Troubleshooting’ sections at the back of the book.
CUSTOMER CARE Registration Register your product with us so we can provide you with the best service possible. To register your product visit our website: www.fisherpaykel.com Complete and keep for safe reference: Model Serial No.
www.fisherpaykel.com Copyright © Fisher & Paykel 2015. All rights reserved. The product specifications in this booklet apply to the specific products and models described at the date of issue. Under our policy of continuous product improvement, these specifications may change at any time. You should therefore check with your dealer to ensure this booklet correctly describes the product currently available. NZ AU 428104 A 08.