Installation instructions and user guide Ice & Water refrigerator E402B, E442B and E522B models NZ AU US CA UK AE HK SG MY
Introduction Thank you for buying a Fisher & Paykel Active Smart™ refrigerator with automatic ice dispensing and chilled water through the door. At Fisher & Paykel we are very proud of this refrigerator. We feel we have achieved water dispensing through the door without compromising the storage space or access in the fridge. During our testing we have enjoyed the health benefits of having cool filtered water so accessible, while minimising the number of door openings.
Contents Important safety instructions Installation instructions All about the display Using your water dispenser Using your ice maker Fridge options Measured Fill Freezer Chill and Bottle Chill The temperature of your refrigerator and freezer Settings/User warnings Water filter Measured Fill Calibration Trouble shooting Cleaning and caring for your refrigerator On vacation/holiday Manufacturers warranty Performance data sheet 1 2 4 8 10 11 13 13 14 15 16 18 20 21 23 23 24 26 Important! This Ice & Water
2 Important safety instructions To reduce the risk of fire, electric shock, or injury to persons read the IMPORTANT SAFETY PRECAUTIONS before operating this appliance. Use this appliance only for its intended purpose as described in this User Guide. Important safety precautions Warning When using this appliance always exercise basic safety precautions including the following: Danger This appliance is not intended for use by young children or infirm persons without supervision.
Important safety instructions 3 Storing food and drinks Never store volatile or flammable materials in your refrigerator or freezer as they may explode. Never freeze liquids in glass containers. Liquid expands during freezing, which may cause the container to explode. Never freeze carbonated drinks. They may explode. Do not consume food if it is too cold. Food removed from the freezer compartment may be cold enough to cause damage when brought into contact with bare skin e.g. frozen ice cubes.
4 Installation instructions Contents of kit 1 2 3 4 5 6 7 4 m (13 ft) white 6 mm (¼”) tubing 1 x 200 mm (8”) blue tubing 1 x pressure reducing valve (PRV) 1 x double sided foam 2 x locking keys 1 x water filter cartridge and head 1 x tap connection – USA market – ⁄” UNS – All other markets – 15 mm (½”) BSP 1 Important! 2 3 4 5 6 7 Fig.3 Water connection kit It is imperative the pressure reducing valve (PRV) is fitted prior to the filter.
Installation instructions 5 Installation instructions: Ensure that refrigerator is not plugged into a power supply. Remove the compressor compartment cover from the rear of the refrigerator (USA market only). 3 Locate isolation tap for water connection – cold water feed only (dishwasher or sink mixer taps) – if you can’t find the connection tap, contact an authorised plumber in your state or town to fit your water connection.
6 Installation instructions 12 Attach double sided foam to the back of the water filter head as shown 13 14 15 16 in Diagram 5. Write the date to be replaced on the filter (date installed + 6 months). Remove double sided foam backing and attach filter to the desired position as located in step 11 (refer to previous page). Run the 6 mm (¼”) tubing to back of the fridge ensuring there is enough tubing to pull out the refrigerator for service.
Installation instructions 7 Important! All connections must be checked for leaks. If unsure of connection process and/or leaks then contact your local plumber to install and check the system for you. Ensure white 6 mm (¼”) tubing is routed away from sharp objects, sharp corners (beware of kinking tube as this will stop water flow), clear of the refrigerator unit compartment and not in a location where it can be squashed. Ensure all push-fit connections are firmly pushed into place.
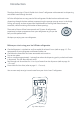
8 All about the display The display screen enables you to view and modify all the features and options on your fridge. For example, you can change the temperature in your fridge or freezer, and select the Freezer Chill function when you want to quickly freeze meat. You may want a measured amount of chilled water when you are cooking, or want to quickly chill a bottle of wine when friends arrive unexpectedly. 4 5 6 1 7 2 8 9 3 Fig.
All about the display Display features 4. Measured Fill (see page 13) A pre-measured volume of water can be selected and dispensed automatically. 5. Dispensing water (see page 10) Animation shows you water is being dispensed. 6. Chill (see pages 14 – 15) Freezer Chill When activated this feature boosts cooling in your freezer, optimising the rate at which your foods are frozen. Bottle Chill Your drinks can be chilled more rapidly using this function. An alarm will alert you when they are ready. 7.
10 Using your water dispenser Dispensing pad Your water dispenser has been designed for one handed operation. Simply push your glass up against the dispenser pad found at the back of the dispenser area. This pad requires only a gentle press to activate. Please remember that pressing very hard against the dispensing pad will not make the dispenser operate faster or produce greater quantities of water.
Using your ice maker 11 Ice maker Your ice maker is designed to automatically dispense ice until it senses that the bin is fill. So the more ice you use, the more it makes. It is even clever enough to sense when there is nothing there to catch the ice. First use When you first turn your refrigerator on, the ice maker will be off. button to scroll to the To turn your ice maker on use the screen. Use the or button to turn the ice maker on or off. Shows the ice maker is on. Shows the ice maker is off.
12 Using your ice maker Information about your ice maker Your automatic ice maker will produce approximately eight cubes of ice every 2 – 3 hours, depending on freezer compartment temperature and number of door openings. The ice cube tray will fill with water after the freezer has reached the correct temperature. First cubes will normally freeze after several hours. When cubes are frozen, they will be ejected from the mould into the ice storage bin. Ice making will continue until the storage bin is full.
Fridge options 13 Measured Fill One useful feature of your water dispenser is it’s ability to dispense a pre-measured amount of water. This comes in handy when cooking or preparing drinks. Press the quantities. button to highlight the screen and again to cycle through the preset Fig.13 Metric display Fig.14 US display Push the dispensing pad to receive the pre-selected quantity of chilled water.
14 Fridge options Freezer Chill We know that the faster food is frozen, the better the overall quality of the food, so we have created the Freezer Chill feature. The Freezer Chill feature drops the freezer to it’s coldest temperature for a 12 hour period and then returns to its normal mode. You may wish to use this when freezing a quantity of meat or when you are making frozen desserts. button to scroll to the screen. Then use the button until To activate, use the is displayed.
Fridge options 15 Bottle Chill contd... Important! Do not leave the bottle inside the freezer longer than the time needed for chilling. button to scroll to the To deactivate manually, use the and buttons until there is no icon in the screen. screen, then use the Note: The freezer chill and bottle chill option cannot be used at the same time.
16 Fridge options Settings Water unit conversion You can change the units your refrigerator uses between US and metric units. To change the units press the button to scroll to the screen option and press one of the or buttons until the desired units are displayed. Key Silent Mode The Key Silent Mode allows you to silence all key presses. button for four seconds. It can be activated or deactivated by holding the When Key Silent Mode is on will appear. When this function is off no symbol will appear.
Fridge options 17 Settings Once in Sabbath Mode: The interior light will not turn on when the refrigerator is opened. The door alarm will not operate. The display will not be illuminated. Electronic control panel will not work. Note: If power is turned off the refrigerator will automatically continue in Sabbath Mode once power is restored. Sabbath Mode will automatically de-activate after 80 hours. User warnings Your refrigerator is clever enough to diagnose it’s own problems.
18 Water filter All the water to your fridge is filtered to remove impurities through a cartridge located in a position of your choice outside the refrigerator. Of course, this will need changing approximately every 6 months or up to 2800 L depending on the quality of the incoming water and how much you use the dispenser. icon on the control panel which will appear when the filter There is a replacement indicator needs replacing. It will flash, when dispensing water, as a reminder.
Water filter 19 To reset filter indicator Important! We recommend the water filter is used from installation. Do not reset monitor before filter is changed or filter monitoring will be inaccurate. Press and hold If present the and buttons for 4 seconds to reset the filter indicator. icon in the screen will disappear when reset. To disable filter indicator Note: if disabled, you will not be reminded to change your filter. When no filter is to be fitted, you can disable the filter indicator.
20 Measured Fill Calibration Measured Fill Calibration The accuracy of your Measured Fill function can be affected by variations in the incoming water pressure. The Measured Fill Calibration Mode allows you to fine-tune the amount of water dispensed from the preselected volumes on your cabinet. The calibration mode is worked out as a percentage. You can measure the amount the refrigerator is under filling or over filling and increase or decrease the calibration to get the exact amount you want.
Trouble shooting 21 Problem Possible Causes What to Do Ice maker makes unfamiliar sounds or seems too loud. Normal ice maker operation. Refer to ice maker noises (see page 11). Automatic ice maker does not work. Ice maker has not been switched on. Switch on ice maker (see page 11). Bin is in the wrong way or no bin at all. Place bin so scoop is on the right side. Water supply turned off or not connected. Connect water supply. Freezer compartment not working. Contact Customer Care.
22 Trouble shooting Problem Possible Causes What to Do Water has poor taste/odour. Refrigerator not used for an extended period. Dispense 3 L or 3 qt water so fresh water supply is replenished. Water dispenser does not work and/or icon flashing. Water supply turned off or not connected. Turn water on. Supply line may be blocked. Check supply for kinks or leaks. On first installation there may be air in water system. To remove air, run a litre or a quart of water through the dispenser.
Cleaning and caring for your refrigerator 23 Water dispenser pad and interface We have incorporated a Dispenser and Key Lock function in your refrigerator to make cleaning easier. This will help you to avoid accidental water dispensing while you clean. Clean the pad and interface panel with a soft damp cloth. Automatic ice dispenser We do not recommend you clean the ice maker componentry, but it is important to clean the bins occasionally.
24 Manufacturers warranty Before you call for service or assistance ... Check the things you can do yourself. Refer to the installation instructions and your user guide and check that: 1 2 Your product is correctly installed. You are familiar with its normal operation. If after checking these points you still need assistance please refer to the following... In New Zealand If You Need Assistance...
Manufacturers warranty 25 In Ireland If You Need Assistance...* Phone: 01800 625 174 Fax: 01800 635 012 Email: customer.care@fisherpaykel.ie Postal Address: Fisher & Paykel Appliances Limited, Unit 3, North Park, North Road, Dublin 11 For the Rest of the World…* Call your Fisher & Paykel retailer/dealer from whom you purchased the product. They are trained to provide information on your appliance.
Replacement Elements 836848 Rated Ser vice Flow: 0.78 gpm Asbestos Lead Mercury Inor ganic/Radiological Contaminants Conditions of Cer tification: Do not use where water is microbiologically unsafe or with water of unknown quality, except that systems certified for cyst reduction may be used on disinfected waters that may contain filterable cysts.
To a capacity of 2,838 liters (750 gallons) Note that while the testing was performed under standard laboratory conditions, actual performance may vary. USEPA MCL INSTR7069 0706 © 3M Company. All rights reserved. Install on cold water line only. EPA Establishment Number 070595-MN-001 NSF is a registered trademark of National Sanitation Foundation. Important: Failure to follow instructions may result in voidance of warranty. Follow any and all local plumbing codes and requirements.
Copyright © Fisher & Paykel 2006. All rights reserved. The product specifications in this booklet apply to the specific products and models described at the date of issue. Under our policy of continuous product improvement, these specifications may change at any time. You should therefore check with your Customer Care Centre to ensure this booklet correctly describes the product currently available. www.fisherpaykel.