QuickSmart™ and WashSmart™ Clothes washer Installation instructions and User guide NZ AU PAC SG
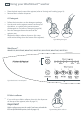
Intelligence working for you Your washer is born from 75 years of Fisher & Paykel laundry innovation. Unlike conventional machines, Fisher & Paykel clothes washers, through SmartDrive™ technology adapt the wash action and water levels to save on water and electricity use; making it kinder on your wallet and the environment. Intelligent electronics A powerful microprocessor controls every aspect of your machine, allowing it to continually monitor and respond to each wash.
Contents Installation Instructions Getting started Before you do your first wash Using your WashSmart™ washer Using your QuickSmart™ washer Lid lock Wash cycles and options Wash cycles Selecting wash options and advancing the cycle Water levels Saving water & time – Eco & Quick Wash options Wash options - Soak, Spin Hold, Delay Start options Washing bulky items, Washing woollens Favourite cycle Customising the wash cycles Before you wash Sorting, Loading Detergent Fabric softener, Scrud Changing pre
2 Installation instructions Unpacking To ensure the best performance from your new washer please follow the instructions below. 1 2 3 4 5 6 Removing the packaging Remove the outer packaging. Tilt the machine backwards and walk it off the bottom packer one foot at a time. Remove the bottom packer from under the machine by pulling it out the front. Lift the lid and remove the bowl packer from the bowl. Remove the hoses and accessories.
Installation instructions 3 Inlet hoses 1 2 Note: new hose sets provided with the machine are to be used to connect the washer to the water mains. Old hose sets should not be re-used. Connect the straight ends of the inlet hoses to the taps (there are washers fitted in both ends). Connect the red connector hose to hot, and the white connector hose to cold (if your hoses are colour-coded). Connect the elbow ends of the inlet hoses to the corresponding machine Tap end Machine end inlet valves. Fig.
4 Installation instructions Water supply ■■ ■■ ■■ ■■ ■■ Your cold water should not exceed 35°C and your Hot ‘N’ Safe Valves available are: hot water should not exceed 65°C. Temperatures RMC TVA 50HF above these may cause the machine to fault or cause damage to the machine. RMC TVA 75HFS If you have an uncontrolled water heating source Adjustable between 35°C – 55°C (eg a wet back or solar heating system) you should RMC TVA 50HP fit a Safe Valve (sold separately).
Getting started 5 Thank you for buying a Fisher & Paykel washing machine. We are very proud of this washer and trust it will serve you well for many years. At Fisher & Paykel we aim to provide innovative products that are simple to use, ergonomic and energy efficient. Thousands of tonnes of washing and 75 years of laundry experience have been programmed into your washing machine to help give you the best possible performance. We hope you enjoy your new washing machine.
6 ■■ ■■ Using your WashSmart™ washer Place the load evenly around the agitator (refer to ‘Sorting’ and ‘Loading’, page 19). Remove fabric softener dispenser. A. Detergent ■■ ■■ ■■ ■■ Follow the instructions on the detergent package. Use the mark on the agitator, nearest to the top of the clothes, as a guide to the correct amount of detergent to use (refer to ‘Detergent’, page 20). Pour the detergent down the centre of the agitator stem.
Using your WashSmart™ washer ■■ ■■ ■■ ■■ ■■ ■■ C. POWER Press POWER to turn the machine on. Fig.11 POWER button D. Wash cycles Select the desired wash cycle by pressing the button. E. Wash options Select the WASH TEMP, WATER LEVEL, SPIN SPEED and other wash options (refer to pages 12 – 15). F. Advance Use to advance through to the desired part of the wash cycle (refer to page 12). G. DELAY START Press DELAY START to delay the start of your wash cycle by 1, 3 or 9 hours. H.
8 ■■ ■■ Using your QuickSmart™ washer Place the load evenly around the agitator (refer to ‘Sorting’ and ‘Loading’, page 19). Remove fabric softener dispenser. A. Detergent ■■ ■■ ■■ ■■ Follow the instructions on the detergent package. Use the mark on the agitator, nearest to the top of the clothes, as a guide to the correct amount of detergent to use (refer to ‘Detergent’, page 20). Pour the detergent down the centre of the agitator stem.
Using your QuickSmart™ washer ■■ ■■ ■■ ■■ ■■ C. Power Press POWER to turn the machine on. Fig.15 POWER button D. Wash cycles Select the cycle you want by pressing the WASH CYCLES button located below the REGULAR cycle indicator. Scroll through the cycles until the light for the one you want is lit. E. Wash options Select the WASH TEMP, WATER LEVEL, SPIN SPEED and other wash options (refer to pages 12 – 15). F. Advance Use to advance through to the desired part of the wash cycle (refer to page 12).
10 Lid lock Your washer has a lid lock, which locks when your machine is spinning. This ensures the lid cannot be opened during hazardous parts of the cycle, providing added safety for you and your family. The LID LOCKED light (above the START/PAUSE button) comes on when the lid is locked to tell you when you cannot open the lid. In short it means you can open the lid while your washer is filling, agitating and draining, but not while it is spinning.
Wash cycles and options 11 Default settings WashSmart™ model REGULAR HEAVY DUTY HAND WASH ALLERGY EASY IRON 12 min 15 min 6 min 12 min 9 min Wash action REGULAR HEAVY DUTY HAND WASH REGULAR REGULAR Wash temp* WARM/COLD WARM WARM/COLD HOT WARM/COLD Spray rinse + cold deep rinse Spray rinse + cold deep rinse 2 cold deep rinses 2 cold deep rinses 2 cold deep rinses Spin speed FAST FAST SLOW FAST SLOW Spin time 6 min 6 min 4 min 6 min 2 min Wash time Rinse *For users i
12 Wash options and advancing the cycle To select the wash options 1 2 3 1 2 3 WashSmart™ model Select the wash cycle, temperature, water level and spin speed (refer to page 7). Press the OPTIONS button if you want to choose ECO, SOAK or QUICK WASH (refer to pages 14 and 15). Press START/PAUSE. WashSmart™ QuickSmart™ model Select the wash cycle, temperature, water level and spin speed (refer to page 9). If you wish to save water press the ECO option button (refer to page 14). Press START/PAUSE.
Water levels Manual water level selection The agitator has five levels marked on its stem that can be used to help you select the correct water level for your load. Select the correct water level by using the lowest visible mark on the agitator. ■■ ■■ ■■ ■■ The levels marked on the agitator do not correspond exactly to the level of the water. They indicate the level of dry clothes suitable for the water level. Your washer may occasionally add water during agitation.
14 Wash options – saving water and time Eco WashSmart™ and QuickSmart™ models Use the ECO option to save water. The ECO option uses an Eco Spray rinse which has been specially designed to use at least 25% less water than a traditional rinse. Use this option when you want to use less detergent and less water. However, if you have low water pressure or sensitive skin it is better to use a traditional rinse.
Wash options 15 Soak WashSmart™ model only Use the SOAK option to soak clothes at the end of the wash phase or when you wish to re-use the wash water. When you select SOAK your washer will soak for a period of 2 hours before completing RINSE and SPIN. During SOAK your washer will agitate for a few seconds every minute. Note: when both the SOAK and QUICK WASH options are selected, the soak time will be halved. Nappy sanitisers/bleach WashSmart™ Fig.
16 Wash options Washing bulky items Forcing large items into the machine may result in them being damaged during washing. Make sure there is enough room in the machine for items to move when being washed. Some items float up during the wash (eg duvets/ doonas and pillows). If they sit too high they may touch stationary parts of the machine during agitate or spin.
Favourite cycle 17 FAVOURITE cycle WashSmart™ model only The FAVOURITE cycle lets you programme your ideal wash cycle. It can be any wash cycle with any of its wash options and it can start from any point in the cycle. For instance, it may be a cycle to wash your gym gear or it may be a rinse and spin to finish washing the nappies. To set your favourite cycle 1 2 3 4 5 6 Press POWER. Press the FAVOURITE cycle button. Hold down for 2 seconds.
18 Customising the wash cycles To customise a cycle WashSmart™ model only You can program your washer to remember the wash options you prefer for each wash cycle. For instance, you may want to set the REGULAR cycle to a COLD wash or set HEAVY DUTY to include a SOAK. 1 2 3 4 Press POWER. Press the wash cycle button. Hold down for 2 seconds. You will hear 2 quick beeps and the wash cycle light will flash. Select your wash options, eg COLD wash, SOAK.
Before you wash 19 Sorting To get the best wash results it pays to sort your clothes before washing. Machine Washable Warm 40°C maximum Warm Rinse Well Normal Spin Care labels The care label will tell you about the fabric of the garment and how it should be washed. Do not bleach Soil Sort clothes according to the type and amount of soil. Some soils suit warmer washes, eg oily soils, while others are best washed in cold water, eg mud, blood.
20 Detergent Choosing the right detergent ■■ ■■ ■■ We recommend using domestic detergent. You can use powder or liquid. Soap flakes should not be used in your washer. When washing wool items, remember to use a detergent specifically recommended for woollens. How much detergent? Use the instructions on the detergent packet as a guide to the correct amount of detergent to use. The correct amount of detergent will vary, depending on the amount of soil in your clothes and the size of your load.
Fabric softener 21 How the fabric softener is dispensed The fabric softener is placed into the dispenser on the top of the agitator. During the rinse the machine spins to release the fabric softener, delivering it down the agitator stem as the machine fills for the final deep rinse. Note: ECO and QUICK WASH options are not designed to be used with fabric softener. Cycles using these options do not use a deep rinse so the machine cannot dispense fabric softener correctly.
22 Changing pre-set options Option adjustment mode After using your washer a number of times you may want to fine tune some of the options to suit your wash needs. There are a number of pre-set options, which can be altered. ■■ ■■ ■■ ■■ ■■ ■■ ■■ ■■ ■■ In the WashSmart™ model the following pre-set options can be changed: The wash temperatures. The RINSE option on HEAVY DUTY and REGULAR cycles. The COLD wash to CONTROLLED COLD. The number of beeps at the end of the cycle.
Changing pre-set options 1 2 Enter the option adjustment mode (refer to page 22). The diagram below shows how the lights relate to the options you can change. It also shows what lights will be on when you first enter the option adjustment mode. Use this diagram to help you adjust the options on the WashSmart™ model. Fig.34 Option adjustment on the WashSmart™ model Use this diagram to help you adjust the options on the QuickSmart™ model. Fig.
24 Changing pre-set options Wash temperatures ■■ ■■ On the QuickSmart™ model the WARM temperature can be adjusted if you think it is too hot or too cold. On the WashSmart™ model all wash temperatures can be individually adjusted. Note: the hot and cold temperatures will be the same as the respective water supply temperatures. 1 2 When in option adjustment mode, select the WASH TEMP you want to adjust. The wash progress lights show the temperature adjustment possible for that temperature.
Changing pre-set options 25 Controlled cold WashSmart™ model only If your cold water temperature is very low you will not get a very effective wash. The CONTROLLED COLD option solves this problem by adding a small amount of hot water to raise the temperature of the wash to approximately 20°C. We have called this “CONTROLLED COLD”. 1 2 When in option adjustment mode, select COLD wash temperature. The wash progress lights show the temperature adjustment possible.
26 Changing pre-set options Out of balance recovery routine When your washer is spinning it can sense if the wash load is out of balance. If an out of balance load is detected, the machine will stop and re-try spinning up to three times. If it still senses an unbalanced load there are two options the machine can take. Automatic recovery option Your washer will try to automatically correct the out of balance load. It will fill with water and agitate to redistribute the load before trying to spin up again.
Machine information 27 Caring for your washer When you have finished ■■ ■■ Turn off the taps to prevent the chance of flooding should a hose burst. Turn off the power at the wall. Cold water washing If you always use cold water, we recommend that a WARM or HOT wash be used at regular intervals, eg every 5th wash should be at least a warm one. Cleaning your washer ■■ ■■ ■■ ■■ Clean with a soft damp cloth and wipe dry.
28 Machine information Additional information Products that might damage your washer ■■ ■■ ■■ Concentrated bleaches, nappy sanitisers and hydrocarbon solvents (eg petrol and paint thinners) can cause damage to the paintwork and components of your washer. Be careful when washing garments stained with solvents as they are flammable. Also, DO NOT put them in your dryer. Do not use pre-treatment sprays or liquids on or near your washer as they can damage your machine’s control panel and plastic surfaces.
Saving water 29 Water saving tips ■■ ■■ ■■ ■■ Full loads are more efficient than part loads. Use the ECO option (refer to page 14). Adjust the RINSE option on REGULAR and HEAVY DUTY cycles (WashSmart™ model), and REGULAR, HEAVY DUTY and WOOL cycles (QuickSmart™ model) to one deep rinse (refer to page 24). Adjust AUTO water level to fill with less water (WashSmart™ model only, page 25).
30 Saving water Manual suds save with syphon back If you have a large tub near your washing machine and a separate drain outlet, you can set up another method of reusing the water. The tub should hold a minimum of 100 litres or have an overflow. Select SOAK on the first wash cycle. At the end of the wash phase place the drain hose in the tub. 3 Cancel SOAK (press ADVANCE button). The suds water will be pumped into the tub. Do not leave your machine until pump out is completed.
If your washer beeps for help 31 Your washer is capable of diagnosing its own problems. If your washer gives a musical series of beeps every 5 seconds it is telling you that it has a problem which you can solve using the checklist below. Musical series of beeps* every 5 seconds and... possible solutions HOT water temperature light is flashing. Hot water supply is not hot enough to maintain the wash temperature you have selected. Select a lower wash temperature. Inlet hose filters may be blocked.
32 If your washer beeps for help LID LOCKED light is flashing. Make sure the lid is closed. Press START/PAUSE (refer to page 10). If the symptom persists call your Fisher & Paykel Dealer or Authorised Repairer. First RINSE or SPIN progress light is flashing as well as the SPIN SPEED light. Wash load is out of balance. Ensure the machine is stationary. Manually redistribute the load. Check the machine is level (refer to page 3). Single beep every second and...
Operating problems 33 Pressing POWER does not turn the machine on. Is the power switched on at the wall? Switch the power off at the wall and wait 60 seconds before turning the power on again. Could your household power supply be at fault? Try plugging in another electrical appliance. Pressing START/PAUSE does not start the fill. Are both hot and cold taps turned on? Are the inlet hose filters blocked? Is DELAY START on? Filling continuously.
34 Wash problems Listed below are possible causes and solutions to some common wash problems. Creasing. Overloading the washer. Choose an EASY IRON or HAND WASH cycle (WashSmart™ model), or a DELICATE cycle (QuickSmart™ model) as these cycles have been designed to minimise creasing. Try selecting a slower spin speed. Do not leave wet clothes to sit in the washer or laundry basket. Poor soil removal. Warm wash water is too cold. Refer to ‘Changing pre-set options’, page 24.
Wash problems 35 Dye transfer. Wash and dry non-colourfast clothes separately. Non-colourfast clothes left sitting in a washer or laundry basket can transfer dye to other clothes. Tangling. Washing with too much water (ie underloading) can cause the clothes to tangle around one another. Do not load the washer by wrapping clothes around the agitator.
36 Manufacturer’s Warranty You automatically receive a 2 year Manufacturer’s Warranty with the purchase of this Product covering parts and labour for servicing within the country of purchase. Fisher & Paykel undertakes to: Repair or, at its option, replace without cost to the owner either for material or labour any part of the product, the serial number of which appears on the product, which is found to be defective within TWO YEARS of the date of purchase.
Manufacturer’s Warranty 37 E Normal recommended maintenance as set out in the product’s user guide. F Repairs when the appliance has been dismantled, repaired or serviced by other than a Fisher & Paykel authorised repairer or the selling dealer. G Pick-up and delivery. H Transportation or travelling costs involved in the repair when the product is installed outside the Fisher & Paykel Authorised Repairer’s normal service area.
38 Customer Care Before you call for service or assistance… Check the things you can do yourself. Refer to your User Guide and check: 2 3 Your appliance is correctly installed. You are familiar with its normal operation. You have read the problem solving section at the back of the book. If after checking these points you still need assistance, please refer to your nearest Fisher & Paykel Authorised Repairer, or contact us through our local website listed on the back cover.
Customer Care Product details Fisher & Paykel Appliances Model Serial no.
www.fisherpaykel.com Copyright © Fisher & Paykel 2013. All rights reserved. The product specifications in this booklet apply to the specific products and models described at the date of issue. Under our policy of continuous product improvement, these specifications may change at any time. You should therefore check with your Dealer to ensure this booklet correctly describes the product currently available. NZ AU PAC SG F&P PN - 424675 A 08.