FREESTANDING COOKER OR90SCG2, OR90SCG4 & OR90SDG4 models USER GUIDE NZ AU GB IE
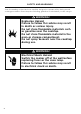
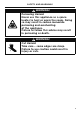
! WARNING! If the information in this manual is not followed exactly, a fire or explosion may result causing property damage, personal injury or death. Do not store or use gasoline or other flammable vapours and liquids in the vicinity of this or any other appliance. NEVER use this appliance as a space heater to heat or warm the room. Doing so may result in carbon monoxide poisoning and overheating of the appliance. WHAT TO DO IF YOU SMELL GAS y y y y y Do not try to light any appliance.
CONTENTS Safety and warnings Introduction 2 10 First use 12 Cooking guide 19 Oven functions 21 Cooking charts 25 Setting the timer 31 Auto Cook 33 Locking the oven controls 36 User preference settings 37 Sabbath Mode 39 Using your gas cooktop 41 Cooking guidelines and cookware 44 Using the storage space 46 Care and cleaning 47 Troubleshooting 67 Alert codes 71 Warranty and service 72 Energy guidelines (GB IE only) 74 IMPORTANT! SAVE THESE INSTRUCTIONS The models shown in
SAFETY AND WARNINGS Your freestanding cooker has been carefully designed to operate safely during normal cooking procedures. Please keep the following guidelines in mind when you are using it: WARNING! Explosion Hazard Failure to follow this advice may result in death or serious injury. Do not store flammable materials such as gasoline near the cooktop. Do not store flammable material in the oven or storage compartment. Do not spray aerosols near the cooktop during use.
SAFETY AND WARNINGS WARNING! Poisoning Hazard Never use this appliance as a space heater to heat or warm the room. Doing so may result in carbon monoxide poisoning and overheating of the appliance. Failure to follow this advice may result in poisoning or death. WARNING! Cut Hazard Take care – some edges are sharp. Failure to use caution could result in injury or cuts.
SAFETY AND WARNINGS WARNING! Fire Hazard Never leave the cooktop unattended when in use. Boilover causes smoking and greasy spillovers that may ignite. Do not place aluminium foil, dishes, trays, water or ice on the oven floor during cooking, as doing so will irreversibly damage the enamel; lining the oven with aluminium foil may even cause fire. Never use your appliance for warming or heating the room. Persons could be burned or injured or a fire could start.
SAFETY AND WARNINGS WARNING! Hot Surface Hazard Accessible parts may become hot when this cooker is in use. To avoid burns and scalds keep children away. Do not touch hot surfaces inside the oven. Use oven mitts or other protection when handling hot surfaces such as oven shelves or dishes. Take care when opening the oven door. Let hot air or steam escape before removing or replacing food. Do not touch the cooktop components, burners, trivets/pan supports or the base when hot.
SAFETY AND WARNINGS IMPORTANT SAFETY INSTRUCTIONS! z z z z z z z z z z 6 Read all the instructions before using the appliance. Use the appliance only for its intended purpose as described in these instructions. Proper installation: be sure your appliance is properly installed and earthed by a qualified technician. A risk of tip-over exists when the appliance is not installed in accordance with the installation instructions. Do not operate the appliance if it is damaged or not working properly.
SAFETY AND WARNINGS IMPORTANT SAFETY INSTRUCTIONS! z z z z z z z z z z Do not store things children might want above the oven. Children could be burned or injured while climbing on the oven to retrieve items. Safe food handling: leave food in the oven for as short a time as possible before and after cooking. This is to avoid contamination by organisms which may cause food poisoning. Take particular care during warmer weather.
SAFETY AND WARNINGS IMPORTANT SAFETY INSTRUCTIONS! z z z z z z z 8 cooktop burners. Do not let large saucepans or frying pans overlap the bench as this can deflect heat onto your benchtop and damage the surface. Do not let large saucepans, frying pans or woks push any other pans aside. This could make them unstable or deflect heat onto your benchtop and damage the surface. Saucepan handles may be hot to touch. Ensure saucepan handles do not overhang other gas burners that are on.
SAFETY AND WARNINGS IMPORTANT SAFETY INSTRUCTIONS! z z z z z hanging garments when using the appliance. They could ignite or melt if they touch an element or hot surface and you could be burned. Always keep oven vents unobstructed. Use only dry oven mitts or potholders. Moist or damp potholders on hot surfaces could result in burns from steam. Do not let potholders touch hot areas or heating elements. Do not use a towel or a bulky cloth for a potholder. It could catch fire. Caution.
INTRODUCTION 90cm models OR90SCG2 OR90SCG4 OR90SDG4 10
INTRODUCTION Before you start 1 Make sure that the anti-tip bracket at the right rear of the cooker has been properly installed. 2 Make sure that the installer has completed the ‘Final checklist’ in the Installation instructions. 3 Read this guide, taking special note of the ‘Safety and warnings’ section. 4 Remove all accessories and packaging from the oven and cooktop. Recycle items that you can. If any adhesive residue is left on surfaces, remove this using dishwashing liquid on a soft cloth.
FIRST USE Control panel layout 1 2 1 2 3 4 5 3 4 5 Oven display Oven controls Function dial Temperature dial Cooktop control dials Clock display and controls Timer (see ‘Setting the timer’) End time (see ‘Auto Cook’) Cook time (see ‘Auto Cook’) Lock (see ‘Locking the oven controls’) 8888 Timer Menu Timer button z Press to set the timer Minus Plus o % pm Accept Accept button z Press to accept Cancel Cancel/back button z z 12 Press to go back Press and hold to cancel
FIRST USE Setting the clock When your oven is first turned on, or after a power cut, the display will flash. You will need to set the clock in order to use the oven. 24hr 24hr 1 The display will flash 24 hr. 2 Press or to scroll between 24 hr and 12 hr. z The display will stop flashing. 3 3 Press to confirm. 19 35 00 00 4 Press z or to adjust the time. Pressing the cancel clock at 00:01. 5 Press and to set the time.
FIRST USE Positioning the shelves z z z Shelf positions are numbered from the bottom. Position the shelves you will need before turning the oven on. For advice on which shelf position to use, see sections ‘Oven functions’, ‘Oven cooking guidelines’, and ‘Cooking charts’. IMPORTANT! Always position the oven shelves before turning the oven on. Remove any unused shelves and baking utensils from the oven.
FIRST USE To insert the sliding shelves (some models only) Guard rail 1 Make sure the guard rail is at the back, facing up and the slides are not extended. 2 Hold the shelf firmly with both hands, making sure you grip the wire shelf too to stop it sliding forward. 3 4 3 Hook the rear tags over the wires of the desired shelf position on both side racks. 4 Push the shelf all the way into the oven, ensuring the front and rear tags either side are securely locked behind the side rack wires.
FIRST USE To insert the wire shelves Guard rail 1 Make sure the guard rail is at the back, facing up. 2 Position the shelf: it should rest on the side rack wires, as shown. Safety stop 3 Tilt the front up slightly to help the safety stops clear the side rack wires. 4 Lower the shelf back onto the side rack wires and slide all the way into the oven. To remove the shelves 1 2 3 4 16 Wait for the oven to cool down completely. Pull the shelf forward about ¾ of the way.
FIRST USE Conditioning the oven It is important to condition your oven before using it for cooking and baking. Conditioning will burn off any manufacturing residues and ensure that you get the best results right from the start. Before you start: 1 Make sure you have removed all packaging and any cable ties used to secure the shelving during transit. 2 Make sure all shelves are fitted in the oven. 3 Make sure all oven control dials are turned to O (OFF). ---> 1 Select the Bake function.
FIRST USE FUNCTION TEMPERATURE 5 After 20 minutes turn both the function and temperature dials to O (OFF). The halos will go out. z z There will be a distinctive smell and a small amount of smoke during the conditioning process as manufacturing residue is burnt off. This is normal, but make sure the kitchen is well ventilated during the conditioning. Once cooled, wipe out the oven and warmer drawer with a damp cloth and mild detergent, and dry thoroughly.
COOKING GUIDE Oven cooking guidelines IMPORTANT! z z z z z z z Use all the oven modes with the oven door closed. Never use aluminum foil to cover the oven shelves or to line the floor of the oven. The trapped heat can irreversibly damage the enamel and may even cause fire. Do not place water, ice, or any dish or tray directly on the oven floor, as this will irreversibly damage the enamel. Do not cover the roasting dish with aluminum foil. This will catch the grease and could cause fire.
COOKING GUIDE Oven cooking guidelines Roasting z z z z z z z z z The Roast function is designed to brown the outside of the meat but still keep the inside moist and juicy. Boneless, rolled or stuffed roasts take longer than roasts containing bones. Poultry should be well cooked with the juices running clear and an internal temperature of 74°C. If using a roasting bag, do not use the Roast function. The initial searing stage is too hot for roasting bags.
OVEN FUNCTIONS IMPORTANT! z Use all the functions with the oven door closed. Bake Upper outer and lower elements z z z Heat comes from both the upper and lower elements. The fan is not used in this function. Ideal for cakes and foods that require baking for a long time or at low temperatures. This function is not suitable for multi-shelf cooking. Ideal for moist foods that take a longer time to cook eg rich fruit cake, or bread.
OVEN FUNCTIONS Grill Upper inner and outer elements z z z z Intense radiant heat is delivered from both top elements. You can use Grill on Low OR High (100% power). For best results allow 5 minutes of preheat before placing food in the oven. The temperature halo will remain white while using the grill function. The most suitable function for ‘finishing off’ many meals, for example browning the top of potato gratin and frittata. Ideal for toasting bread or for top browning to ‘finish off dishes’.
OVEN FUNCTIONS Pastry Bake + Pizza Fan plus lower element z z z The fan circulates heat from the lower element throughout the oven. Excellent for cooking pizza and flatbreads as it crisps the base beautifully without overcooking the top. Set the temperature to for optimum pizza cooking temperature. Ideal for foods such as sweet and savoury pastry foods and delicate foods that require some top browning eg frittata, quiche. Roast Fan plus upper and lower elements z z z A two-step program.
OVEN FUNCTIONS Rapid Proof (some models only) This is not a cooking function z z z z Gentle heat is generated from the upper and lower elements. Provides the optimum warm and draft-free environment for proving yeast dough. This method provides a faster proof time than at room temperature. To prevent overproofing we recommend you check the dough every 30mins. Proving dough 1 Place dough in a lightly oiled bowl and cover with plastic wrap and/or a clean damp cloth.
COOKING CHARTS z z z z z Shelf positions are counted from the base up (1 is the lowest, 7 is the highest). Position shelves before you turn the oven on. For best results always preheat the oven to the required temperature. The grill element may come on while the oven is heating up. The temperature indicator light will go out when the oven has reached the selected temperature. Oven accessories may temporarily deform slightly when they become hot. This is normal and does not affect their function.
COOKING CHARTS FUNCTION SHELF POSITION TEMP (°C) TIME (MIN) Single Fan Bake 3 185 15-20 Multi Fan Forced 1 and 4 or 2 and 5 170 20-25 Single Fan Bake 3 170 25-30 Multi Fan Forced 1 and 4 or 2 and 5 170 25-30 SCONES Single Bake 3 215-230 10-15 MERINGUES Single Bake 3 120-130 60-70 Single Bake 3 200-220 40-50 Single Bake 3 200-220 35-45 Soft Bread Rolls Single Bake 3 190 15-18 Dough Proof Single Rapid Proof 3 PrF 30 Single Pastry Bake 2 or 3 175 15
COOKING CHARTS BAKING SHELVES FUNCTION SHELF POSITION TEMP (°C) TIME (MIN) PIES Apple pie Single Pastry Bake or Fan Bake 3 190-200 25-30 Lemon meringue Single Pastry Bake or Fan Bake 3 175-180 30-40 Single Classic Bake 3 160 50-60 Single Classic Bake 3 175-150 15-30 Single Classic Bake 3 135 35-45 Single Classic Bake 3 175 35-45 SHELF POSITION TEMP (°C) TIME (MIN) Baked cheesecake (in water bath) Custard tart (blind bake, then add filling) DESSERTS Crème brulee (i
COOKING CHARTS ROASTING BEEF, BONELESS SHELVES FUNCTION SHELF POSITION TEMP (°C) TIME (MIN) MEAT PROBE (°C) (times per 450g) Rare Single Roast 2 or 3 160-170 18-32 54-59 Medium Single Roast 2 or 3 160-170 25-40 60-74 Well done Single Roast 2 or 3 160-170 30-55 74-79 PRIME RIB ROAST (times per 450g) Rare Single Roast 2 or 3 160-170 15-30 54-59 Medium Single Roast 2 or 3 160-170 20-35 60-74 Well done Single Roast 2 or 3 160-170 25-40 74-79 Single Roast 3
COOKING CHARTS ROASTING PORK, BONELESS SHELVES FUNCTION SHELF POSITION TEMP (°C) TIME (MIN) MEAT PROBE (°C) (times per 450g) Medium Single Roast 2 or 3 170-175 25-40 63-68 Well done Single Roast 2 or 3 170-175 30-45 74-79 Single Fan grill 4 220 5-10 n/a PORK CRACKLING Crisp (watch closely) VENISON (times per 2.5cm thickness1) Rare Single Fan grill 4 225 7 49-54 Medium Single Fan grill 4 225 9 55-60 Brown in frying pan first.
COOKING CHARTS GRILLING SHELVES FUNCTION SHELF POSITION TEMP (°C) TIME (MIN) BEEF Steak, rare Single Grill 6 or 7 HI 8-10 Steak, medium Single Grill 6 or 7 HI 10-15 Burgers Single Grill 6 or 7 HI 12-15 Meatballs Single Grill 6 or 7 HI 12-15 Chops, medium Single Grill 6 or 7 HI 15-20 Chops, well done Single Grill 6 or 7 HI 20-25 Chops, well done Single Grill 6 or 7 HI 15-20 Ham steak Single Grill 6 or 7 HI 15-20 Bacon Single Grill 6 or 7 HI 4-7 Bone
SETTING THE TIMER z z z You can use the timer at any time, even if you are not using the oven. If the time is more than an hour, the display will count down in minutes (h:m). If it is less than an hour, it will count down in seconds (m:s). You can set the timer for up to 23 hours 59 minutes. IMPORTANT! The timer does NOT turn the oven off. To set the timer 0 00 1 Press to access the timer. The timer indicator will appear on the display. z The display will flash. z Press to return to the time of day.
SETTING THE TIMER To edit the timer 19 35 1 Press to access the timer. 2 Follow the steps on the previous page to adjust the timer. To cancel the timer 17 59 19 35 1 Press to access the timer. 2 Press and hold to zero the countdown timer. The display will revert to showing the time of day. 3 The timer icon will disappear. When the set time is up z z z 32 A tone will sound every few seconds. Press any control to stop the tone sounding.
AUTO COOK Use Auto Cook to z z z z Turn off the oven automatically after a set period of time. Set the oven for food to be ready at a specific time. If you start cooking manually and only want the oven to turn off automatically after a set period of time: simply set the cook time following steps 1 to 3 below and select a function and temperature. The oven will automatically turn off when the cook time is over. Alternatively you can simply set the time of day you wish to the oven to turn off.
AUTO COOK 0 15 5 Press to confirm the cook time. To set the end time 19 56 6 Press to scroll between cook time and end time. z The end time indicator will appear and the display will flash. 2015 8 Press 34 to confirm the end time. 20 15 7 Press or to set the time you would like your food to be ready (ie end time).
AUTO COOK When Auto Cook is set z z z z The oven and the lights will stay off, the halos will be unlit, but your oven is now set for automatic cooking. It will automatically turn on at the required time. You can modify the function and temperature while the oven is waiting to start cooking. If setting Delayed Cook you will need to put the food in the oven before starting. For safety reasons opening the door while the oven is waiting to start will cancel Delayed Cook.
LOCKING THE OVEN CONTROLS This function is to prevent accidental use of the oven (eg by children). When locked, the controls are unresponsive and the oven will not turn on. IMPORTANT! This does not lock the cooktop controls. To lock: 19 35 1 Press and hold until there is a beep. The lock indicator will appear on the display. z The oven controls are now locked. z To unlock: 19 35 2 Press and hold until there is a beep and the lock indicator disappears. z The oven controls are now unlocked.
USER PREFERENCE SETTINGS Adjust the user settings to suit your personal setup preferences. You can set your oven to: z z z z z give audio feedback (tones and beeps) or operate quietly display time as 12-hr or 24-hr operate with the display off have its lights on or off during cooking operate in Sabbath Mode (see ‘Sabbath Mode’ following). Note: you cannot change the user preference settings when you oven is operating or set for automatic cooking.
USER PREFERENCE SETTINGS SETTING DEFAULT OPTION ALTERNATIVE OPTION(S) CLOCK DISPLAY 24H 12H DISPLAY OFF** 24Hr 12Hr oFF AUDIO FEEDBACK BEEPS/TONES ON* BEEPS/TONES OFF* Turn the oven beeps and tones on or off.* bPon bPoF OVEN LIGHTS LIGHTS ON LIGHTS OFF Have the light off during cooking if you want to save power or want the food you cook to be a surprise for others.
SABBATH MODE This setting is designed for religious faiths that observe a ‘no work’ requirement on the Sabbath. While your oven is in Sabbath Mode z z z z z The display, dial halos and indicators will be unlit, the controls will be unresponsive. No tones or beeps will sound. No alert codes or temperature changes will be displayed. The oven lights will stay on.
SABBATH MODE 23 00 23 00 6 Press or to set the time (hrs). You may set the time up to 48 hours. 7 Press to confirm. The display, indicators and dial halos will remain unlit and unresponsive, but the oven will bake until you quit Sabbath Mode. To quit Sabbath Mode Press and hold until the time of day appears in the display and the oven turns off, or turn the function and temperature dials back to O (OFF).
USING YOUR GAS COOKTOP OR90 models – cooktop 1 2 1 3 3 1 Semi-rapid burner 2 Dual wok burner 3 Triple-ring wok burner Burner Controls The dials control the flow of gas through the valve. Using the single burners 1 Identify the dial of the burner you want to use. 2 Starting from the O (OFF) position, push the dial in and turn it anticlockwise to HI. z The ignitor on the burner will spark. 3 After the burner has lit keep the dial held in for a few more seconds before releasing.
USING YOUR GAS COOKTOP 5 When you have finished cooking, turn the clockwise back to O (OFF). If you are using LP gas, there may be a slight ‘extinction pop’ or flash at the flame spreader a few seconds after the burner has been turned off. This is normal for LP gas. z Using the dual burner 1 Starting from the O (OFF) position, push the dial in and turn it anticlockwise to either HI to light both the inner and outer rings or HI to light the inner ring only.
USING YOUR GAS COOKTOP If a burner does not light Turn the control dial to O (OFF) and wait at least one minute before trying again, to all the gas to disperse. If the burner still does not light, check that: z z z z z z the cooker is plugged in and the power supply is switched on there is no power failure in your home or neighborhood the gas is turned on the gas bottle is not empty (if you use bottled gas) the flame spreaders are clean and the holes are not clogged the ignitors are sparking.
COOKING GUIDELINES AND COOKWARE Cooking guidelines IMPORTANT! Never leave the cooktop unattended when in use. Boilover causes smoking and greasy spills that may ignite. Take care when deep-frying: oil or fat can overheat very quickly, particularly on a high setting. Start cooking on a high setting. When food comes to the boil, reduce the setting and maintain a steady heat to cook your food thoroughly. Doing this will reduce the cooking time.
COOKING GUIDELINES AND COOKWARE Wok stand The wok stand fits over the triple-ring wok or dual burner trivet. IMPORTANT! z z z z Using a wok without the stand may cause the wok to tip or the wok or dual burner to operate incorrectly. Do not use the stand for ordinary, flat-bottomed saucepans. The wok stand MUST ONLY BE PLACED over the trivet for the triple-ring wok or dual burner. The cooktop becomes very hot during operation. Keep children well out of reach.
USING THE STORAGE SPACE Storage compartment Your cooker is equipped with a storage compartment below the oven. z z Use this to store bakeware, oven trays and shelves when not in use. Do not store flammable items in the compartment. To access the storage compartment (OR90SCG2 models only): Pull down the compartment door from the top to flip it open.
CARE AND CLEANING DOS • • • • • • • • Read these cleaning instructions and the ‘Safety and warnings’ section before you start cleaning your cooker. Before cleaning or removing any part, make sure that everything on the cooker has been turned off. Unless suggested otherwise in the chart following, allow any part to cool to a safe temperature before cleaning. If you do need to handle a warm or hot part, take extreme care. Wear long protective mitts to avoid burns from steam or hot surfaces.
CARE AND CLEANING Manual cleaning chart WHAT? HOW? IMPORTANT! 1 Soften any stubborn stains under a hot soapy cloth. • COOKER EXTERIOR Door frame exterior, Control panel, Cooktop base Back trim Storage compartment door After every use Dials Oven handles 2 Clean with a solution of mild detergent and hot water, then wipe dry with a microfibre cloth.
CARE AND CLEANING Manual cleaning chart WHAT? HOW? IMPORTANT! 1 Wipe with a damp cloth and a solution of hot water and mild detergent. • To prevent soiling from becoming ‘baked on’ and stubborn, we recommend removing any easy-toreach spills, food or greasy stains from the enamel after each use. 1 Remove everything from the oven: shelves, side racks, all utensils.
CARE AND CLEANING Manual cleaning chart WHAT? HOW? IMPORTANT! OVEN PARTS Oven door glass (interior) • After every use • Oven door gasket Use a soft cloth and a mixture of warm water and dishwashing liquid to remove light soiling after every use. For stubborn stains, try using a mixture of baking soda and warm water with a non-abrasive scrubbing pad, then wipe dry with a soft, lint-free cloth. Avoid cleaning this part.
CARE AND CLEANING Manual cleaning chart WHAT? HOW? IMPORTANT! 1 Check that the burner is turned OFF and allow it to cool. • COOKTOP PARTS Aluminum and enamelled burner caps and flame spreaders 2 Lift off the burner cap and brass flame spreader. 3 Wash them in hot soapy water, rinse, and dry. • Use a stiff nylon brush or straight-ended paper clip to clear the notches of the flame spreader. • • 4 Replace the flame spreader and burner cap correctly. See ‘Replacing the burner parts’.
CARE AND CLEANING Removing and replacing the oven door IMPORTANT! z z z z z Switch the oven off at the wall before removing the door. Do not lift the oven door by its handle. Doing so may damage the door. Make sure the oven and the door are cool before you begin to remove the door. Before removing the door, make sure there is a large enough clear, protected surface in the kitchen to rest the door on. Take care, the oven door is heavy! To remove the oven door Lever 1 Open the door fully.
CARE AND CLEANING Removing and replacing the door glass panes for cleaning Once you have removed the oven door, you can remove the inner and middle panes of glass for cleaning if needed. Make sure you follow the precautions and instructions below very carefully. Replacing the glass panes and the door incorrectly may result in damage to the oven and may void your warranty. Your oven door has 3 panes of glass. The inner and middle panes may be removed for cleaning.
CARE AND CLEANING To remove the door glass for cleaning Latch Latch Open the latches securing the lower trim to the base of the oven door: 1 Loosen the inner and outer screws securing each of the latches by two turns. z Do not loosen the middle screw. z Do not fully remove the screws. Inner screw 2 Slide the latches inwards so that the lower trim can be removed.
CARE AND CLEANING Tab1 Lower trim 2 3 Press down on the tabs to release the lower trim and remove it. 2b. 1a. 4 Remove the inner pane of glass Lift the lower end slightly (a). z Gently slide the glass out (b). z 3c. 2b. 5 Remove the middle pane of glass: Pull the pane slightly towards you so that the edges are clear of the support brackets at the base of the door (a). z Lift the lower end (b) and gently slide the glass out (c). z 1a.
CARE AND CLEANING To replace the door glass after cleaning When replacing the glass panes, make sure that: z z z z 56 You replace all panes correctly, as show on the following page. Each pane must be in the position described below in order to fit into the door and to ensure that the oven operates safely and correctly. You take extra care not to bump the edges of the glass against any object or surface. You do not force any of the panes into place.
CARE AND CLEANING a. 2 a. b. 3 3 c. 1 Middle pane Empty grooves 1 Replace the middle pane of glass: Insert the glass into the middle set of grooves in the bracket at the top of the door (a). z Pull the pane slightly towards you (b). z Gently lower into place (c). z IMPORTANT! z z Make sure the glass is facing the same way as when you removed it from the door. Use the middle set of grooves. The set of grooves closest to the outer pane must remain empty.
CARE AND CLEANING b. Angle-cut corner a. PG W 2 c. b. EC O a. Angle-cut corner 3 d. 1 2 Replace the inner pane of glass. Ensure the angle cut corners are positioned at the bottom of the door (a). z Insert the the glass into the top set of grooves in the bracket at the top of the door (b). z Pull the pane slightly towards you (c). z Gently lower into place (d). z IMPORTANT! z z 58 Make sure the glass is facing the same way as when you removed it form the door.
CARE AND CLEANING Clamp Clamp Lower trim 3 Align the lower trim with the door glass as shown. It should sit on the bottom edge of the outer door glass. z Check that clamp in the centre is not damaged or misshapen. “Click” Lower trim 4 Gently push the lower trim back onto the door glass until it clicks into place. IMPORTANT! Make sure the lower trim is fitted correctly and firmly in place and that the glass panes are secure.
CARE AND CLEANING 5 Slide the two latches back into place on the base of the lower trim. 6 Re-tighten the screws so that the latches and the lower trim are firmly secured. Outer screw Inner screw Latch Latch 7 Replace the door following the instructions in the following section.
CARE AND CLEANING To replace the oven door Notch 1 Hold the door firmly in an approximately halfway open position. 2 Insert the hinge tongues into the slots, making sure that the notches on both sides drop into place as shown. 3 Open the door fully. 4 Fully close the levers on the left and right hinges, as shown, then close the door.
CARE AND CLEANING Removing and replacing the oven side racks IMPORTANT! Always turn off the cooker at the wall first. Ensure the oven has cooled down completely before starting. Remove all shelves 1 Slide out all shelves and remove. For easier access we recommend removing the oven door, see ‘Removing and replacing the oven door’. Remove all shelves To remove the side racks 2 Use a small coin or a flat-head screwdriver to loosen and remove the fixing screws.
CARE AND CLEANING Removing and replacing the storage drawer (some models only) IMPORTANT! z z z z Do not remove the drawer while the oven is in operation. Do not remove the drawer while the oven is hot. Ensure the drawer is completely empty before removing it. Always position your hand at the bottom of the drawer to open and close it. To remove the storage drawer 1 Open the drawer completely.
CARE AND CLEANING Burner parts z z z z z You can remove and clean these parts with hot soapy water or non-abrasive detergents. Clean spills regularly before they become burnt on. Do not wash these parts in a dishwasher. After cleaning, check that the burners and their flame spreaders are dry before replacing correctly. It is very important to check that the burner flame spreader and the cap have been correctly positioned. Failure to do so can cause serious problems.
CARE AND CLEANING Replacing the triple-ring wok and dual burners Correct positioning of flame spreader – triple-ring wok burner Correct positioning of flame spreader –dual burner S Ignitor Ignitor Probe T S T Probe Correct positioning of cap and ring – triple-ring wok and dual burner Incorrect and correct positioning of cap and ring – triple-ring wok and dual burner A Cap Ring B 65
CARE AND CLEANING Replacing an oven light bulb IMPORTANT! Use a 25W, 220-240V 50Hz G9 halogen bulb for replacement. Do not use a standard light bulb in any oven, the heat will break it. 1 2 3 4 Allow the oven (including the lamp cover and the bulb) to cool completely. Remove any shelves that may get in the way. Remove the door if the lamp will be hard to reach. Turn the power supply to the cooker off at the main fuse or circuit breaker panel. If you don’t know how to do this, contact an electrician.
TROUBLESHOOTING If there is a problem, check the chart below to see if you can fix it. If the problem cannot be fixed or persists, call your Authorized Repairer or Customer Care. General PROBLEM POSSIBLE CAUSES WHAT TO DO The oven does not work. No power. Check that the mains power supply (wall switch) is turned on, the fuse has not tripped and there is no power outage in your area. The clock has not been set The oven will not work unless the clock is set. See ‘Setting the clock’.
TROUBLESHOOTING General 68 PROBLEM POSSIBLE CAUSES WHAT TO DO I can feel hot air blowing out of the vents after I have turned the oven off. This is normal. For safety reasons the cooling fans will continue to run even when you have turned the function dial to ‘OFF’. The fans will switch off automatically when the oven has cooled. The oven fan comes on when I select a function that does not use a fan (eg bake). This is normal. The fan comes on while the oven is preheating.
TROUBLESHOOTING Oven PROBLEM POSSIBLE CAUSES WHAT TO DO Condensation around oven (eg on control panel or top of oven door). Food has high moisture content or local climate (temperature, humidity) is contributing to condensation. Condensation is normal. You can wipe the drops off the control panel. If there is frequent or excessive condensation, make sure that cabinetry around the cooker is moisture-proofed. Condensation building up in the oven while cooking .
TROUBLESHOOTING Cooktop burners PROBLEM POSSIBLE CAUSES WHAT TO DO There is a power failure – can I still use the cooktop burners? Power outage in your area. The cooktop burners can still be used. To light them: 1 Holding a lighted match to the flame spreader, push in on the control dial and turn anticlockwise to LITE. 2 When the flame is burning all the way around the burner, you may adjust the heat.
ALERT CODES If there is a problem with the oven, the cooker will: z z z automatically suspend all oven functions beep five times display an alert code. IMPORTANT! Do not turn off the mains power supply to the cooker (wall switch) if you get an alert code, unless the instructions in the chart following specifically instruct you to. There are cooling fans within the cooker which are needed to cool the cooker components.
WARRANTY AND SERVICE Before you call for service or assistance Check the things you can do yourself. Refer to the installation instructions and your user guide and check that: 1 Your product is correctly installed. 2 You are familiar with its normal operation. If after checking these points you still need assistance or parts, please refer to the Service & Warranty book for warranty details and your nearest Authorised Service Center, Customer Care, or contact us through our website www.fisherpaykel.com.
WARRANTY AND SERVICE This oven has been designed and constructed in accordance with the following codes and specifications: In New Zealand and Australia z z z AS/NZS 60335-1 General Requirements for Domestic electrical appliances AS/NZS 60335-2-6 Particular Requirements for Domestic electrical cooking appliances AS/NZS CISPR 14.1 2010 Electromagnetic Compatibility Requirements.
ENERGY GUIDELINES (GB IE ONLY) SPECIFICATIONS OR90SCG4B1 OR90SDG4X1 WEIGHT (KG) 123 123 NUMBER OF OVEN CAVITIES 1 1 CAVITY VOLUME (LITRES) 120 120 Conventional 1.46 1.46 Slow Cook 1.00 1.00 Conventional 138.4 138.4 Slow Cook 95.5 95.
ENERGY GUIDELINES (GB IE ONLY) Reducing the environmental impact – Electric Reducing energy consumption will reduce the impact of cooking on the environment. The following tips can help you to reduce your energy consumption: z z z z z z z z z z Do not preheat the oven too early. Aim to have the oven hot at the same time as the food is ready to be placed in it. Maximise the use of your preheated oven – cook or bake in batches.
ENERGY GUIDELINES (GB IE ONLY) OR90SDG4X1, OR90SDG4B1 L1 / L2 L3 L4 1) 2) 3) 4) 5) 60,5 55,8 53,5 60,5 55,8 5 / % % % % % / 57,2 % / L1 L2 L3 L4 *Energy consumption for gas cooking appliances are calculated using the following Standard: BS EN 30-2-1-Rational use if energy -Domestic cooking appliances burning gas.
ENERGY GUIDELINES (GB IE ONLY) Reducing the environmental impact – Gas Reducing energy consumption will reduce the impact of cooking on the environment. The following tips can help you to reduce your energy consumption: z z z z z z z z z z z z Thawing frozen food in the refrigerator first Using a moderate setting to conserve gas Having your burners adjusted by a qualified technician if the flame is yellow Ensuring burner parts are clean and dry, as clogged ports will reduce efficiency.
FISHERPAYKEL.COM © Fisher & Paykel Appliances 2019. All rights reserved. The product specifications in this document apply to the specific products and models described at the date of issue. Under our policy of continuous product improvement, these specifications may change at any time. You should therefore check with your Dealer to ensure this booklet correctly describes the product currently available. NZ AU GB IE 591512C 06.