
Installation Guide


WARMING DRAWER INSTALLATION GUIDE|11
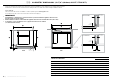
!1FINAL CHECKLIST
TO BE COMPLETED BY THE INSTALLER
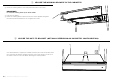
F Make sure the warming drawer is level and securely fitted to the cabinetry.
F Make sure any internal packaging has been removed from the drawer.
F Make sure that the isolating switch is accessible by the customer.
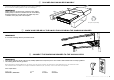
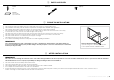
F Make sure the anti-tip bracket has been fitted correctly if it is required.
F If installing an oven directly on top of the warming drawer, make sure the supplied oven support brackets have been fitted to the warming drawer.
TEST OPERATION:
F Open the drawer and press the button to turn the warming drawer on.
The on/off halo and temperature setting 2 ( ) halo should glow red.
Shut the drawer.
After 5–10 minutes open the drawer. The internal surfaces of the drawer should feel slightly warmed.
Press the button to turn the warming drawer off and shut the drawer.
Complete and keep for safe reference:
Model
Serial No.
Purchase Date
Purchaser
Dealer Address
Installer’s Name
Installer’s Signature
Installation Company
Installation Date
Copyright © Fisher & Paykel Appliances 2017. All rights reserved.
The product specifications in this booklet apply to the specific products
and models described at the date of issue. Under our policy of continuous
product improvement, these specifications may change at any time. You
should therefore check with your Dealer to ensure this booklet correctly
describes the product currently available.
FISHERPAYKEL.COM