ACTIVESMART™ REFRIGERATOR ICE & WATER, AUTOMATIC ICE AND NON-ICE & WATER MODELS RF605Q models USER GUIDE / INSTALLATION GUIDE NZ AU UK
CONTENTS Introduction 3 Safety and warnings 4 Installation instructions 13 ActiveSmart™ special features SmartTouch control panel External display (Water dispensing models only) Variable Temperature Zone 21 21 22 23 ActiveSmart™ operating instructions Humidity control system Door alarms Alarm Mute Key Mute Key Lock Sabbath mode activation Using your water dispenser (Water dispensing models only) Water filter (Ice & Water and Automatic Ice models only) Using your ice maker (Ice & Water and Automatic
INTRODUCTION Thank you for buying a Fisher & Paykel ActiveSmart™ refrigerator. At Fisher & Paykel, we are very proud of this refrigerator. It offers a combination of size and storage space with the latest features and functions. Thousands of hours of food care research and refrigeration experience has been programmed into your refrigerator to give you the best possible performance. We hope you enjoy your new refrigerator.
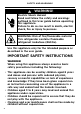
SAFETY AND WARNINGS ! WARNING! Electric Shock Hazard Read and follow the safety and warnings outlined in this User guide before operating this appliance. Failure to do so can result in death, electric shock, fire or injury to persons. WARNING: Risk of fire/flammable material This refrigerator contains flammable refrigerant isobutane (R600a). Use this appliance only for the intended purpose as described in the user guide.
SAFETY AND WARNINGS • The manufacturer’s installation instructions for product and cabinetry ventilation must be followed when installing the appliance. • To avoid hazard due to instability of the appliance, it must be fixed in accordance with installation instructions. • WARNING: Keep ventilation openings, in the appliance enclosure or the built-in structure, clear of obstruction.
SAFETY AND WARNINGS • • • • • • • • • • 6 Electrical WARNING This appliance must be installed in accordance with the installation instructions before use. To allow disconnection of the appliance from the supply after installation, incorporate a switch in the fixed wiring in accordance with the wiring rules. Never unplug your refrigerator by pulling on the power cord. Always grip the plug firmly and pull straight out from the outlet.
SAFETY AND WARNINGS IMPORTANT! Your refrigerator is designed to operate for many years without the need for service checks. However, if your refrigerator is malfunctioning, have it attended to by your Fisher & Paykel trained and supported service technician as soon as possible. All electrical repairs must be carried out by an adequately trained service technician or qualified electrician.
SAFETY AND WARNINGS • Your Fisher & Paykel trained and supported service technician will be able to give advice on environmentally friendly methods of disposing of your old refrigerator or freezer. Food Safety • Regularly clean accessible draining systems and surfaces that come in contact with food. • Store raw meat and fish in suitable containers in the refrigerator, so that it is not in contact with or drip onto other food.
SAFETY AND WARNINGS • Never freeze carbonated drinks. They may explode. • Do not consume food if it is too cold. Food removed from the freezer compartment may be cold enough to cause damage when brought into contact with bare skin, eg frozen ice cubes. Power failure — food safety • Do not refreeze frozen foods that have thawed completely. The food may be dangerous to eat.
SAFETY AND WARNINGS • • • • • • • 10 Water filter IMPORTANT! The water connection to your Ice & water refrigerator must be installed by a qualified plumber or Fisher & Paykel trained and supported service technician and comply with all state and local laws. Installation and use MUST comply with all state and local plumbing codes. Check with your local public works department for plumbing codes. You must follow their guidelines as you install the water filtration system.
SAFETY AND WARNINGS • If the water has not created ice for some time or ice has an unpleasant taste or odour dispose of ice and refer to ‘Before you start using the Ice & Water or Automatic Ice function’ for flushing instructions. If unpleasant taste or odour persists, you may wish to fit a new filter cartridge. • Use new tubing supplied with the refrigerator. DO NOT reuse old tubing from old water and ice connections. • Your water filtration system can withstand up to 120psi (827kPa) of water pressure.
SAFETY AND WARNINGS Ice making IMPORTANT! • Avoid contact with the moving parts of the ice maker ejector mechanism, and do not place your fingers on the automatic ice-making mechanism while the appliance is in operation. • Do not use ice cubes that may have become discoloured, usually with a green-blue colour. If such discolouration is noted, discard the ice cubes and contact your Fisher & Paykel trained and supported service technician.
INSTALLATION INSTRUCTIONS Please follow the installation steps below to ensure your appliance operates correctly. Before installation ●● ●● ●● ●● ●● ●● ●● ●● Power Install your appliance where the plug is easily accessible. Connect your refrigerator to a separate power point. Avoid sharing the power point with other appliances. Do not use extension cords and double adaptors as the combined weight of two power cords can pull the double adaptor from the power outlet.
INSTALLATION INSTRUCTIONS PLAN VIEW Product and cabinetry dimensions FLUSH WITH REFRIGERATOR CHASSIS – FULL DO I R S O O J S T S PLAN VIEW FLUSH WITH REFRIGERATOR DOOR – FULL DOO PLAN VIEW FG R S B S I R O O E C PLAN VIEW FLUSH WITH REFRIGERATOR DOOR – FULL DOOR ROTATION O FLUSH W K FG O U PROFILE VIEW PLAN VIEW R P T FLUSH WITH REFRIGERATOR CHASSIS – FULL DOOR ROTATION I P L J S FRONT VIEW HA K FLUSH WITH REFRIGERATOR CHASSIS – FULL DOOR ROTATION HA R P P R P
INSTALLATION INSTRUCTIONS PRODUCT DIMENSIONS mm A Overall height of product 1790 B Overall width of product 905 C Overall depth of product (excludes handle) D Depth with door open — from rear of fridge — 90° rotation E Depth with door open — from flush with door — 90° rotation 695 1084 396 F Height to top of chassis 1754 G Height to top of hinge cover 1775 CABINETRY DIMENSIONS (including minimum air clearances) H Inside height of cavity 1810 Flush with refrigerator chassis — full door rotatio
INSTALLATION INSTRUCTIONS Connecting water (Water dispensing and Automatic Ice models) 1 Ensure the refrigerator is NOT plugged into a power supply. Locate the isolation tap for cold water connection. (Tee and tap fitting not supplied). 2 Locate the water fitting kit to complete water connection installation. 3 Uncoil tubing from the back of the refrigerator and connect the quick fitting (A). 4 Connect one end of the long tubing (3.
INSTALLATION INSTRUCTIONS Positioning your refrigerator Your Fisher & Paykel ActiveSmart™ refrigerator is fitted with front and rear rollers to allow you to easily move your refrigerator forward and backward. Avoid moving your refrigerator sideways to prevent damaging the rollers or the floor covering surface.
INSTALLATION INSTRUCTIONS What to do if your product is unstable A Gently push the refrigerator back until the rear rollers contact the floor. ●● Measure the gap under the front foot, which has come off the floor. ●● Obtain some solid packing material (hardwood, plastic, etc) which fits firmly into the gap under the foot. Example only Note: do not use metallic materials that may corrode, stain and/or damage floor coverings. B Wind both front feet up and roll the product out of position.
INSTALLATION INSTRUCTIONS Before you start using the Ice & Water or Automatic Ice function Before first use, you need to flush water through the filter to remove impurities or trapped air in the water tank and filter system. ●● ●● ●● ●● ●● For Ice & Water Press the water dispenser pad to dispense 4L of water. – Wait for 4 minutes before dispensing again. Dispense 4L of water and then wait for another 4 minutes. – There may be carbon residue dispensed together with water.
INSTALLATION INSTRUCTIONS Before placing food in the fresh food or freezer compartments ●● ●● ●● ●● Remove all internal packaging. Ensure that all transit clips are removed from the refrigerator. These are small rubber stoppers located at the back of the shelves. Clean the inside of the appliance with a mix of warm water and a small amount of liquid detergent. Use a soft cloth to remove dust collected during manufacture and transport.
ACTIVESMART™ SPECIAL FEATURES SmartTouch control panel The control panel is located in the inside front of the refrigerator. It enables you to view and modify all the features and options of your refrigerator. SmartTouch control panel variants for ActiveSmart™ refrigerators. Special features available only on selected models. SmartTouch CONTROL PANEL FEATURES Compartment Allows you to select which compartment to adjust the temperature. Alarm Mute Deactivates the door alarm for 20 minutes.
ACTIVESMART™ SPECIAL FEATURES External display (Water dispensing models only) This display enables you to lock the water dispenser; indicates to you when ‘Bottle Chill’ is activated and when your water filter requires changing. Electronic external display EXTERNAL DISPLAY FEATURES 22 Dispenser lock button and LED light Locks/unlocks the water dispenser. Bottle Chill indicator Icon will illuminate indicating when ‘Bottle Chill’ is activated and flashes when beverage is ready.
ACTIVESMART™ SPECIAL FEATURES Variable Temperature Zone Variable Temperature Zone control panel FOOD MODES CONTROL PANEL Freezer (-18°C) ‘Freezer’ mode is for general frozen food items that require storage between 1 – 12 months. Meat, poultry, seafood, pre-cooked foods and leftovers, some fruits and vegetable, ice cream, and other frozen desserts. Soft Freeze (-7°C) ‘Soft Freeze’ mode is an extension of your refrigerator, extending the shelf life of perishable items while maintaining the quality.
ACTIVESMART™ OPERATING INSTRUCTIONS Variable Temperature Zone Selecting the Food Mode: ‘Food Mode’ enables you to change the setting of the Variable Temperature Zone — Freezer, Soft Freeze, Chill, Fridge.
ACTIVESMART™ OPERATING INSTRUCTIONS Humidity control system ●● ●● ●● Humidity control lids The control lids are fitted to the fruit and vegetable bins of your refrigerator. These lids provide a humid microclimate to extend the storage times of fruit and vegetables. The lids have specially designed grooves that retain moisture to prevent condensation from dripping onto the fruit and vegetables at times of high humidity.
ACTIVESMART™ OPERATING INSTRUCTIONS Door alarms ●● ●● ●● If the fresh food compartment door is left open, the alarm will beep after 90 seconds, if the freezer door is left open the alarm will beep after 60 seconds. If either of the doors remains open, subsequent beeps will sound every 30 seconds for 5 minutes If either door remains open for 5 minutes or longer, an alarm will sound continuously and the interior compartment light(s) will turn off. Alarm Mute ●● ●● ●● ●● ●● ●● To activate, press once.
ACTIVESMART™ OPERATING INSTRUCTIONS Sabbath mode activation In Sabbath mode, alarms, lights and displays are deactivated for 80 hours. ●● ●● ●● ●● ●● ●● ●● To activate Sabbath mode, press , and together for 4 seconds. – The icon on the internal control panel will illuminate. Once in Sabbath mode: The interior light will not turn on when you open the refrigerator. The door alarms will not operate. The display will not illuminate, except the Sabbath mode icon.
ACTIVESMART™ OPERATING INSTRUCTIONS Water filter (Ice & Water and Automatic Ice models only) The water supplied to your refrigerator is filtered to remove impurities through a filter located internally at the top right corner of the refrigerator. Replace your filter cartridge every 6 months. ●● ●● There is a replacement indicator icon on the internal control panel (Ice & Water and Automatic Ice models) and external display (Ice & Water models only) which will appear when the filter needs replacing.
ACTIVESMART™ OPERATING INSTRUCTIONS Using your ice maker (Ice & Water and Automatic Ice models only) Ice On/Off Your ice maker is designed to automatically dispense ice into the ice storage bin below until it detects the bin is full. The more ice you use, the more it makes. First use ●● 1 2 3 4 5 ●● The ice maker will be off when you turn your refrigerator on for the first time after installation. The light above the ‘Ice On/Off’ icon will be off.
ACTIVESMART™ OPERATING INSTRUCTIONS ●● ●● ●● Turn your ice maker off if: There is no water supply for several hours. You are removing the ice storage bin for a period of time. You are going on holiday/vacation. Information about your ice maker ●● ●● ●● ●● ●● ●● ●● ●● ●● ●● ●● Your automatic ice maker will produce approximately eight cubes of ice every 3 – 4 hours, depending on the freezer compartment temperature and the number of door openings.
ACTIVESMART™ OPERATING INSTRUCTIONS Bottle Chill This function allows you to rapidly chill your beverages in the freezer for a set time of 15 minutes. The time taken to chill depends on the size of your beverage. If your beverage is not cold enough after 15 minutes, return it to the freezer and reset the ‘Bottle Chill’ function. ●● ●● ●● ●● To activate, press on the internal display. The ‘Bottle Chill’ light will illuminate when the function is activated.
ACTIVESMART™ OPERATING INSTRUCTIONS Manual ice system (selected models only) An ice storage bin which sits inside the upper top freezer bin provides storage for and gives you access to clean, clear ice cubes. Ice tray Ice scoop Information about your manual ice system ●● ●● ●● ●● ●● ●● ●● 32 To make ice: Take the ice tray and lid from the top of the ice storage bin. Remove the lid from the ice tray and fill the tray with water.
ACTIVESMART™ OPERATING INSTRUCTIONS Bottle holder (where fitted) ●● ●● ●● ●● The bottle holders can be used to store a variety of bottles. To position the bottle holder in your refrigerator, slot the back edge of the bottle holder onto the back trim of any shelf in the fresh food compartment. Unused bottle holders can be stacked up on top of one another so they do not take up unnecessary shelf space. Bottles are best stored with the neck of the beverage facing the front of the refrigerator.
ACTIVESMART™ OPERATING INSTRUCTIONS Glass shelves – Freezer Some models have glass shelving under the freezer bins. These can be removed if required. To remove 1 Remove the bin above the glass shelf (refer to ‘Fixed bins’) 2 Push on the clips below the bin runners on both sides of the shelf (A) 3 Lift the shelf up to remove from the supports A Drip tray (Water dispensing models only) ●● ●● ●● ●● 34 The drip tray is designed to fit into the bottom of the water dispenser panel.
CLEANING AND CARE Exterior Stainless exterior doors ●● ●● ●● Clean the exterior door with liquid dishwashing detergent dissolved in warm water and a soft cloth. Dry the door with a lint-free cloth. Do not use any abrasive, stainless steel cleaners or solvents on the door surface. Other exterior surfaces ●● ●● Clean all other exterior surfaces with a mix of warm water and liquid dishwashing detergent, and a soft cloth. Rinse with clean water and dry with a clean, lint-free cloth.
CLEANING AND CARE External display and water dispenser (Water dispensing models only) ●● ●● Activate the ‘Dispenser Lock’ function to prevent water from dispensing when cleaning refer ‘Dispenser Lock’ section for details. Clean the pad and interface panel with a damp, soft lint-free cloth. Drip tray (Water dispensing models only) ●● ●● ●● ●● ●● ●● To clean, remove the drip tray from the dispenser panel. Pull the two halves of the tray apart.
CLEANING AND CARE Ice storage bin ●● ●● ●● ●● ●● ●● Clean your ice bin and discard any old ice in the bottom of the bin(s) regularly Use only liquid detergent dissolved in warm water and a soft lint free cloth when cleaning. Rinse with clean water and dry with a clean, lint-free cloth. Ensure that the ice scoop is placed in correct position in the bin, right hand side or at the front of the bin (model dependent).
CLEANING AND CARE Cleaning the support lugs 1 Remove all shelving, follow the steps in ‘How to remove shelving and bins for cleaning’ on page 37. 2 Clean the support lugs with liquid detergent dissolved in water and a tube brush or a clean lint-free cloth. Humidity control lid To remove: 1 Remove the shelf directly above the bins, follow the steps above. 2 Hold the lid firmly and lift the outside edge of the lid up vertically (refer to A).
CLEANING AND CARE Fixed bins 1 2 3 4 To remove: For ease of removal, empty food from the bin first. Hold the centre front of the bin handle. Lift vertically to unclip from the runners and pull bin towards you to remove (refer to A). Push both runners back into refrigerator (refer to B). To replace: 1 Extend the runners out from your refrigerator. 2 Place the bin on top of the runners. 3 Push the bin down slowly until you feel it clip.
FOODCARE For best food care ●● ●● ●● ●● ●● ●● ●● ●● ●● Store only high-quality, fresh food in your appliance. Store perishable foods in the appliance immediately after purchase. Storing at room temperature increases the rate of deterioration and can allow harmful microbial growth. Foods such as meat, poultry and seafood should be well wrapped or sealed in suitable packaging to prevent dehydration, color deterioration, loss of flavor, and transfer of odor.
MOVING OR STORING YOUR APPLIANCE If your refrigerator is turned off for any reason, wait 10 minutes before turning it back on. This will allow the refrigeration system pressures to equalise before restarting. Moving your refrigerator ●● ●● ●● ●● Turn off the refrigerator and unplug from the power point. Remove all food. Turn the adjustable feet to the right as far as they will turn. Ease the refrigerator out of its position. Tuck the power cord away, tape the shelves in place and tape the doors closed.
ACTIVESMART™ SOUNDS Normal refrigerator sounds Your refrigerator is designed with innovative ActiveSmart™ features that can produce sounds that may be different from your old refrigerator. ●● ●● ●● ●● ●● ●● ●● 42 Normal operational sounds include: Fan air flow sound. ActiveSmart™ refrigerators have fans which change speed depending on demand.
TROUBLESHOOTING If there is a problem with your appliance, please check the following points before contacting your local Fisher & Paykel trained and supported service technician or the Customer Care Centre. Product parts and accessories can be purchased through Fisher & Paykel Customer Care Centre or online at fisherpaykel.com (this service is available to selected markets only). All models PROBLEM POSSIBLE CAUSES WHAT TO DO Appliance does not operate. No electricity at power outlet.
TROUBLESHOOTING All models PROBLEM POSSIBLE CAUSES WHAT TO DO Water in the vegetable bins. Condensation is formed by the water produced by fruit and vegetables. A small amount of condensation is beneficial for fruit and vegetable storage. Exterior of cabinet is warm. This is normal. Warm spot on central door seal. (French door models only). You may feel a warm spot at times on the central seal between the two refrigerator doors.
TROUBLESHOOTING Ice & Water and Automatic Ice models only PROBLEM POSSIBLE CAUSES WHAT TO DO Automatic ice maker does not work. Ice maker has not been turned on. Switch on ice maker. Bin is in the wrong way or there is no bin in place. Place bin so scoop is on the left side. Ice bin sits directly under ice maker on top left side of freezer. Ice cubes have odour/taste. Water supply turned off or not connected. Connect water supply. Freezer compartment not working. Contact Customer Care.
TROUBLESHOOTING Ice & Water and Automatic Ice models only PROBLEM POSSIBLE CAUSES WHAT TO DO Wet ice/ ice clumping. Low water pressure. Check water pressure. Filter blocked. Replace filter. Long freezer door openings. Gently tap ice with scoop to unstick or, if large clumps occur, empty ice bin and make new ice. High ambient temperature. Ice bin left out of freezer compartment for a length of time. Ice will stick together over time. Filter warning is light flashing. Filter needs replacing.
TROUBLESHOOTING Ice & Water models only PROBLEM POSSIBLE CAUSES WHAT TO DO Water has poor taste/odour. Refrigerator not used for an extended period. Dispense 4L of water so fresh water supply is replenished. New filter installed Water dispenser does not work. Water in first glass is warm. Drips overflow drip-shelf. Water flow rate has slowed down. Water supply turned off or not connected. Turn water on. Supply line may be blocked. Check supply for kinks or leaks.
MANUFACTURER’S SERVICE & WARRANTY For details of your Manufacturer’s Warranty and contacts for servicing, please refer to your separate ‘Service & Warranty’ book provided with your refrigerator. This product has been designed for use in a normal domestic (residential environment). This product is not designed for any commercial use. Any commercial use by the customer will affect this products Manufacturer’s Warranty. Complete and keep safe for reference: Model Serial No.
EUROPEAN DIRECTIVE 2012/19/EU ON WASTE ELECTRICAL AND ELECTRONIC EQUIPMENT (WEEE) GB This appliance is marked according to the European directive 2012/19/EU on Waste Electrical and Electronic Equipment (WEEE). By ensuring this product is disposed of correctly, you will help prevent potential negative consequences for the environment and human health, which could otherwise be caused by inappropriate handling of this product.
FISHERPAYKEL.COM © Fisher & Paykel Appliances 2019. All rights reserved. The product specifications in this document apply to the specific products and models described at the date of issue. Under our policy of continuous product improvement, these specifications may change at any time. You should therefore check with your Dealer to ensure this document correctly describes the product currently available. NZ AU UK 847365C 06.