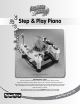
Step & Play Piano Product features may vary from picture above. Model Number: 79029 Please read these instructions before assembly and use of this product. Keep this instruction sheet for future reference, as it contains important information. With seat in place, for use by children who have the neck control to hold their head upright. To prevent falls, never use with an active child who may be able to climb out of the seat. Adult assembly is required.
Warning Consumer Information Occasionally a consumer may experience a problem with one of our products. If this should happen, please call us toll-free, rather than return this product to the store. Usually, we can solve the problem over the telephone or send you replacement parts. Please call Fisher-Price® Consumer Relations, toll-free at 1-800-432-5437, 8 AM - 6 PM EST Monday through Friday. Hearing-impaired consumers using TTY/TDD equipment, please call 1-800-382-7470.
Parts Seat Base Seat Ring Pad 4 Rollers 1 1 1 3 3 3 4 4 4 Upper Rail Leg with ● Detail 2 Legs with ▲ Detail Upper Rail with Leg 2 2 2 Mirror Tray Bell 4 4 4 4 4 4 1 1 1 1 1 1 3 3 3 3 3 3 Trumpet Maraca 2 2 2 2 2 2 Tambourine Base Note: The legs and base sockets have been coded with tape. Do not remove the tape until you have completed assembly of this product.
Assembly IMPORTANT! Before each use or assembly, inspect this product for damaged hardware, loose joints, missing parts or sharp edges. DO NOT use if any parts are missing or broken. Contact Fisher-Price® for replacement parts and instructions if needed. Never substitute parts.
Assembly PUSH Bell Upper Rail Upper Rail Slot PUSH PUSH 4 4 3 3 4 1 1 1 3 7 2 2 2 5 • At an angle, fit the single tab on the bell into the slot in the upper rail. • Now, push and “snap” the other two tabs on the bell into the slots in the upper rail. • Fit the upper rail onto the legs, as shown. • Push down firmly above each leg until, you hear the upper rail “snap” into place on each end. • Pull up on the upper rail to be sure it is secure.
Assembly Roller Tray Roller Clip 11 Clip Seat Base • Turn the seat base upside down on a flat surface. • Insert and “snap” a roller into each clip on the edge of the seat base, as shown. • Repeat this procedure to assemble the remaining two rollers to the other side of the seat base. 9 Track • Fit the tray underneath the mirror, into the upper rail, as shown.
Assembly Seat Ring PUSH 13 Pad • While pushing a seat lock button on one of the upper rails, slide the seat base over it. • Now, push the seat lock button on the other upper rail and slide the seat base over it. • Push the seat base so that it is positioned in the center of the product. You should hear a “snap” on each side. Seat Ring Seat Ring Ribbed Side Pad 15 Red Slot Marking Red Slot • Pull the pad through the seat ring and wrap the pad around the outside of the seat ring.
Assembly Peg 3 Roller Roller Peg 5 Peg 2 Peg 1 16 Peg 4 Roller Peg 6 Roller • Fit the other six slots on the seat pad to the corresponding pegs on the seat ring. • Tuck the seat pad behind all four rollers. Connectors 18 Seat with Pad • Tip the end of the product up and locate the wire connectors. • Fit the connectors together. If they will not go together easily, do not force them together. Turn one or the other connectors over, and try again! One-time assembly is now complete.
Battery Installation Battery Safety Information Hint: We recommend the use of alkaline batteries for longer battery life. Battery Compartment Door 1.5V x 3 “C” (LR14) SHOWN ACTUAL SIZE Batteries may leak fluids that can cause a chemical burn injury or ruin your product. To avoid battery leakage: • Do not mix old and new batteries or batteries of different types: alkaline, standard (carbon-zinc) or rechargeable (nickel-cadmium). • Remove batteries during long periods of non-use.
Set-Up & Use IMPORTANT! Before each use or assembly, inspect this product for damaged hardware, loose joints, missing parts or sharp edges. DO NOT use if any parts are missing or broken. Contact Fisher-Price® for replacement parts and instructions if needed. Never substitute parts. WARNING To prevent serious injury or death: • When seat is in place, use only for a child who is able to hold head upright unassisted and who is not able to walk. • Never leave child unattended.
Set-Up & Use Dial Upper Keyboard Drum Stage 1 Spinning seat with 12 musical activities. Power and Mode Switches Stage 2 Sliding seat lets baby “walk”back and forth, with music and lights. Lower Keyboard • Slide the power switch to on with low volume ; or on with high volume • Slide the power switch to O to turn power off power. • Slide the mode switch to: . Listen to an entire song when baby taps the lower keyboard. Listen to a portion of a tune each time baby taps the lower keyboard.
Care FCC Note (United States Only) The pad is machine washable. Wash the pad separately in cold water on the gentle cycle. Do not use bleach. Tumble dry separately on low heat and remove promptly. The frame, seat base, seat ring and toys may be wiped clean using a mild cleaning solution and a damp cloth. Do not immerse the frame. Note: This equipment has been tested and found to comply with the limits for a Class B digital device, pursuant to Part 15 of the FCC Rules.