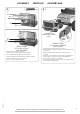
Owner’s Manual Manual del usuario Guide de l’utilisateur with Assembly Instructions con instrucciones de montaje incluant les instructions d’assemblage Product features may vary from the picture above. Las características del producto pueden variar de las mostradas arriba. Le produit peut varier par rapport à l’illustration ci-dessus. 12V Please read this manual and save it with your original sales receipt. Leer este manual y guardarlo con el comprobante de venta original.
CONSUMER INFORMATION INFORMACIÓN AL CONSUMIDOR RENSEIGNEMENTS POUR LES CONSOMMATEURS • Leer detenidamente este manual antes de usar el vehículo, ya que incluye información de seguridad de importancia e instrucciones de uso. Guardar estas instrucciones para futura referencia, ya que contienen información de importancia acerca de este producto. • Las páginas de piezas e instrucciones de montaje empiezan en la página 6. • Edades: 3-7 años. Capacidad máxima: 59 kg (130 lb).
VEHICLE USE USO DEL VEHÍCULO UTILISATION DU VÉHICULE ADVERTENCIA WARNING Prevent injuries and deaths • Direct adult supervision required. • Never ride at night. • Keep children within safe riding areas. These areas must be: - away from swimming pools and other bodies of water to prevent drownings. - generally level to prevent tipovers. - away from steps, steep inclines, cars, roads and alleys. • Riding rules - Make sure children know and follow these rules for safe driving and riding.
BATTERY USE USO DE LA BATERÍA UTILISATION DE LA BATTERIE WARNING To prevent injury. • Do not make direct contact between battery terminals, as this can cause an explosion or fire. • Only adults should charge batteries. • The battery contains chemicals known to the State of California to cause cancer and reproductive harm. Wash hands after handling. • Battery can fall out and injure a child if vehicle tips over. Always use battery retainer. • The battery must be handled by adults only.
BATTERY CHARGING CARGAR LA BATERÍA CHARGE DE LA BATTERIE Adults note: Periodically examine this battery charger for damage to the cord, housing or other parts that may result in the risk of fire, electric shock or injury. If the battery charger is damaged, do not use it. Atención padres: Revisar periódicamente que el cargador no presente daños en el cable, compartimento u otras piezas que pueden resultar en riesgo de incendio, descargas eléctricas o lesiones. No usar el cargador si está dañado.
PARTS • If you are missing a part, please call us at 1-800-348-0751 (US and Canada), 59-05-51-00 Ext. 5206 ó 01-800-463-59-89 (México) rather than return this product to the store. • Please identify all parts before assembly and save all packaging material until assembly is complete to ensure that no parts are discarded. • Metal parts have been coated with a lubricant to protect them during shipment. Wipe all metal parts with a paper towel to remove any excess lubricant.
PARTS PIEZAS Front End Extremo delantero Devant Bumper Defensa Pare-chocs PIÈCES “Chrome” Trim Vestidura de “cromo” Bordure «chromée» Grille Support Soporte de la rejilla Support de la calandre Tailgate Puerta trasera Hayon Grille Rejilla Calandre 2 Long Seat Belts 2 cinturones de seguridad largos 2 ceintures de sécurité longues 2 Short Seat Belts 2 cinturones de seguridad cortos 2 ceintures de sécurité courtes 12 Volt Charger Cargador de 12V Chargeur de 12 V 12 Volt Battery Batería de 12V Batte
ASSEMBLY MONTAJE WARNING • Children can be harmed by small parts, sharp edges and sharp points in the vehicle’s unassembled state, or by electrical items. Care should be taken in unpacking and assembly of the vehicle. Children should not handle parts, including the battery, or help in assembly of the vehicle.
ASSEMBLY MONTAJE 3 x11 ASSEMBLAGE 4 Front End Assembly Unidad del extremo delantero Devant BACK VIEW VISTA DE ATRÁS VUE ARRIÈRE • Carefully turn the front end assembly over. • Insert 11 screws into the front end assembly and tighten. • Voltear cuidadosamente la unidad del extremo delantero. • Insertar 11 tornillos en la unidad del extremo delantero y apretarlos. • Retourner soigneusement le devant du véhicule. • Insérer 11 vis dans le devant et les serrer.
ASSEMBLY MONTAJE 5 x6 ASSEMBLAGE 6 x2 Front Wheel Well Hueco de la rueda delantera Passage de roue avant • Insert six screws into the top of the front end and tighten. Hint: You may need to push the ends of the front end to insert and tighten the outer screws and push the center of the front end to insert and tighten the middle screws. • Insertar seis tornillos en la parte de arriba del extremo delantero y apretarlos.
ASSEMBLY 8 MONTAJE Steering Wheel Large Opening Orificio grande del volante Grande ouverture du volant ASSEMBLAGE 9 0,6 cm x 7,2 cm Pin Clavija de 0,6 cm x 7,2 cm Tige de 0,6 cm x 7,2 cm Steering Column Columna de mando Colonne de direction • Align the hole in the steering wheel with the hole in the steering column. • Insert the 0,6 cm x 7,2 cm pin all the way through the hole in the side of the steering wheel and through the steering column, as shown.
ASSEMBLY 11 MONTAJE Steering Wheel Large Opening Orificio grande del volante Grande ouverture du volant 12 ASSEMBLAGE PRESS PRESIONAR APPUYER Steering Column C Columna de mando Colonne de direction Co • Press the steering wheel down to “snap” into place. • Presionar el volante hacia abajo para que se ajuste en su lugar. • Appuyer sur le volant pour bien l’enclencher.
ASSEMBLY MONTAJE 14 x2 ASSEMBLAGE 16 x4 Rear Wheel Well Hueco de la rueda trasera Passage de roue arrière • Insert a screw up through both rear wheel wells and into the cargo bed. Tighten each screw. Hint: You may need the help of another adult to hold the cargo bed in place if you need to tip the vehicle slightly to tighten each screw. • Insertar un tornillo en ambos huecos de rueda trasera y en el cajón de carga. Apretar los tornillos.
ASSEMBLY MONTAJE 18 x1 ASSEMBLAGE 20 x4 • Insert a screw through the large opening in the fastener cap and the hole in the steering column. Tighten the screw. • Insertar un tornillo en el orificio grande de la tapa y el orificio de la columna de mando. Apretar el tornillo. • Insert four screws into the grille support and tighten. • Insertar cuatro tornillos en el soporte de la rejilla y apretarlos.
ASSEMBLY MONTAJE 22 ASSEMBLAGE 23 2 Fastener Cap Tapa de sujeción Capuchon de fixation • Fit a fastener cap onto the end of the rear axle. • Ajustar una tapa de sujeción en el extremo del eje rasero. • Fixer un capuchon de fixation à l’extrémité de l’essieu arrière. Rear Wheel Rueda trasera Roue arrière Rear A R Axle Eje trasero Essieu arrière 24 x1 BOTTOM SIDE VIEW VISTA INFERIOR DEL LADO VUE LATÉRALE DE DESSOUS • Slide a rear wheel onto the rear axle.
ASSEMBLY MONTAJE 25 ASSEMBLAGE 27 Upper “T” “T” superior « T » supérieur • With Power Wheels™ facing you, pinch the lower “T” on each end of the belt and insert them into the slots in the seat. Note: Do not insert the upper “T” into the slots. • Repeat this process to attach the remaining short and long seat belts. Hubcap Tapón Chapeau de moyeu • Align the tabs on a hubcap with the slots in a rear wheel. “Snap” a hubcap into the center of the rear wheel.
ASSEMBLY MONTAJE 29 x2 ASSEMBLAGE 31 Hood Cofre Capot • Insert two screws through the back of the seat and into the vehicle. Tighten the screws. • Insertar dos tornillos en la parte trasera del asiento y en el vehículo. Apretar los tornillos. FRONT VIEW VISTA DEL FRENTE VUE AVANT • Insérer deux vis dans le dossier de la banquette, jusque dans le véhicule. Serrer les vis. • Fit the long tabs on the hood into the slots in the front end of the vehicle. • Pull the hood forward and lower.
ASSEMBLY 32 MONTAJE 1,5V x 3 AA (LR6) DASH VIEW VISTA DEL TABLERO VUE DU TABLEAU DE BORD • Locate the sound box on the dash. • Loosen the screws in the sound box cover and remove it. • Insert three AA (LR6) alkaline batteries into the battery compartment. Hint: We recommend using alkaline batteries for longer battery life. • Replace the sound box cover and tighten the screws. • When sound box become faint or stop, it’s time for an adult to change the batteries.
DECORATION DECORACIÓN • Place the labels exactly as shown in the illustrations. For best results, avoid repositioning a label once it has been applied to the vehicle. • Colocar las etiquetas exactamente como se muestra en las ilustraciones. Para mejores resultados, evitar reposicionar las etiquetas. DÉCORATION • Apposer les autocollants exactement comme indiqué dans les illustrations. Pour de meilleurs résultats, éviter d’apposer un autocollant plus d’une fois sur le véhicule.
DECORATION DECORACIÓN 2 DÉCORATION 3 LEFT SIDE VIEW VISTA DE LA IZQUIERDA VUE DU CÔTÉ GAUCHE RIGHT SIDE VIEW VISTA DE LA DERECHA VUE DU CÔTÉ DROIT 1 25 17 FRONT VIEW VISTA DEL FRENTE VUE AVANT 20 ¡Te mostramos aquí cómo pegar las calcomanías decorativas como todo un experto! • Llena la botella rociadora con una taza de agua. Después, añade unas cuantas gotas de jabón líquido para trastes. Agita la botella para mezclar el contenido.
BATTERY INSTALLATION COLOCACIÓN DE LA BATERÍA INSTALLATION DE LA BATTERIE 2 1 Power Wheels® 12 Volt Battery Batería Power Wheels de 12V Batterie Power Wheels de 12 V Battery Retainer Abrazadera de la batería Dispositif de retenue de la batterie • First, lift and then slide the battery retainer toward you. • Then, place the battery in the battery compartment. Make sure the battery retainer slides over the top of the battery. • Close the hood.
SAFE DRIVING RULES NORMAS DE SEGURIDAD PARA CONDUCIR RÈGLES POUR UNE CONDUITE EN TOUTE SÉCURITÉ WARNING Prevent injuries and deaths • Direct adult supervision required. • Never ride at night. • Keep children within safe riding areas. These areas must be: - away from swimming pools and other bodies of water to prevent drownings. - generally level to prevent tipovers. - away from steps, steep inclines, cars, roads and alleys.
VEHICLE OPERATION FUNCIONAMIENTO DEL VEHÍCULO FONCTIONNEMENT DU VÉHICULE Beginner Use – Low Speed (2,5 mph-4 km/h) Advanced Use - High Speed (5 mph/8 km/h) Principiantes – Velocidad lenta (4 km/h) Avanzados – Velocidad rápida (8 km/h) Débutants – Vitesse réduite (4 km/h) Conducteurs expérimentés – Vitesse élevée (8 km/h) • Help your child practice steering to learn how far and how quickly to turn the steering wheel when driving, and knows how to stop.
VEHICLE OPERATION FUNCIONAMIENTO DEL VEHÍCULO FONCTIONNEMENT DU VÉHICULE PRESS PRESIONAR APPUYER Volume Buttons Botones de volumen Boutons du volume Main Reset Button Botón Restablecer principal Bouton de réinitialisation principal Voice Change Dial Botón de cambio de voz Bouton Son de la voix Sounds Sonidos Sons Music and Sounds • Press the volume buttons to change the volume level. Press and hold a volume button to turn the volume all the way up or down.
12V BATTERY CARE AND DISPOSAL MANTENIMIENTO Y ELIMINACIÓN DE LA BATERÍA DE 12V ENTRETIEN ET MISE AU REBUT DE LA BATTERIE DE 12 V BATTERY CARE • If a battery leak develops, avoid contact with the leaking acid and place the damaged battery in a plastic bag. See next section for proper disposal. • Do not allow the battery to run down completely before charging. • Charge the battery before storing the vehicle, and at least once per month, even if the vehicle has not been used.
LIMITED WARRANTY GARANTÍA LIMITADA GARANTIE LIMITÉE One Year limited warranty from the date of purchase on the Power Wheels® vehicle. Six month limited warranty from the date of purchase on the 6 or 12 volt battery. Mattel Canada Inc. warrants to the original purchase, this one year limited warranty covers the Power Wheels® ride-on vehicle (purchased from an authorized dealer of Power Wheels® vehicles) against defects in materials and workmanship.
CONSUMER INFORMATION INFORMACIÓN PARA EL CONSUMIDOR RENSEIGNEMENTS POUR LES CONSOMMATEURS VEHICLE CARE • Check all screws, fasteners and their protective coverings regularly and tighten as required. Check plastic parts on a regular basis for cracks or broken pieces. • During snowy or rainy weather, store the vehicle inside or under a protective cover. Charge the battery at least once per month while your vehicle is not in regular use.
Before first-time use, you must charge the battery 18 hours! Charge the battery immediately after each use. Charge the battery once a month, even if the vehicle is not used or stored. Do not return your vehicle to the store, we can help! Visit us online for our Troubleshooting Guide - service.fisher-price.com ¡Cargar la batería por 18 horas antes de usar el vehículo por primera vez! Cargar la batería inmediatamente después de cada uso.