GPW33 OWNER’S MANUAL MANUAL DEL USUARIO GUIDE DE L’UTILISATEUR
INDEX ÍNDICE SOMMAIRE BEFORE YOU BEGIN • ANTES DE EMPEZAR • AVANT DE COMMENCER ........................... 3 DANGERS AND WARNINGS • PELIGROS Y ADVERTENCIAS DANGERS ET AVERTISSEMENTS ............................................................................................... 5 CHARGING • CARGAR • CHARGEMENT ..................................................................................10 PARTS • PIEZAS • PIÈCES ............................................................................................
BEFORE YOU BEGIN ANTES DE EMPEZAR AVANT DE COMMENCER Read this manual carefully for important safety information and operating instructions before using your vehicle. Keep these instructions and your original sales receipt for future reference, as they contain important information. Product features may vary from the images. Lee detenidamente este manual antes de usar el vehículo, ya que incluye información de seguridad importante e instrucciones de uso.
Age: 3-7 years. Weight Limit: 59 kg (130 lb). Edades: 3-7 años. Capacidad máxima: 59 kg (130 lb). Âge : 3 à 7 ans. Poids maximal : 59 kg (130 lb). Use this vehicle ONLY outdoors. Most interior flooring can be damaged by riding this vehicle indoors. Fisher-Price® will not be responsible for damage to the floor if the vehicle is used indoors. Usar este vehículo SÓLO al aire libre. La mayoría de pisos interiores se pueden dañar si se usa el vehículo bajo techo.
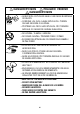
DANGER/POISON PELIGRO/ VENENO DANGER/POISON • SHIELD EYES. EXPLOSIVE GASES. CAN CAUSE BLINDNESS OR INJURY. • CUBRIRSE LOS OJOS. GASES EXPLOSIVOS. PUEDEN CAUSAR CEGUERA O LESIONES. • PROTÉGER LES YEUX. GAZ EXPLOSIFS. PEUT RENDRE AVEUGLE OU CAUSER DE GRAVES BLESSURES. • NO SPARKS / FLAMES / SMOKING • NO CREAR CHISPAS / PRENDER FUEGO / FUMAR • ÉLOIGNER DES ÉTINCELLES / ÉLOIGNER DES FLAMMES / NE PAS FUMER • SULFURIC ACID. CAN CAUSE BLINDNESS OR SEVERE BURNS. • ÁCIDO SULFÚRICO.
WARNING To prevent injury. • Do not make direct contact between battery terminals, as this can cause an explosion or fire. • Only adults should charge batteries. • Battery can fall out and injure a child if vehicle tips over. Always use battery retainer. • The battery must be handled by adults only. The battery is heavy and contains sulfuric acid (electrolyte). Dropping the battery could result in serious injury. To prevent fire.
ADVERTENCIA Para evitar lesiones: • No hacer contacto directo entre terminales de batería, ya que esto puede causar un incendio o explosión. • Solo un adulto debe cargar una batería. • La batería se puede caer y lastimar a un niño si el vehículo se voltea. Siempre usar el sujetador de la batería. • Se recomienda que sólo un adulto cargue la batería. La batería es pesada y contiene ácido sulfúrico (electrolito). Si se llega a caer una batería podría causar lesiones graves.
AVERTISSEMENT Pour prévenir les blessures : • Ne pas mettre les bornes de la batterie en contact direct car cela pourrait provoquer une explosion ou un incendie. • La batterie ne doit être chargée que par un adulte. • La batterie peut tomber et blesser un enfant si le véhicule bascule. Toujours utiliser le dispositif de retenue de la batterie. • La batterie doit être manipulée uniquement par un adulte. Elle est lourde et contient de l’acide sulfurique (électrolyte).
WARNING ADVERTENCIA AVERTISSEMENT Prevent injuries and deaths • Direct adult supervision required. • Never ride at night. • Keep children within safe riding areas. These areas must be: - away from swimming pools and other bodies of water to prevent drownings. - generally level to prevent tipovers. - away from steps, steep inclines, cars, roads and alleys. • Riding rules - Make sure children know and follow these rules for safe driving and riding. - Always sit on the seat. - Always wear shoes.
CHARGING CARGAR • Before first time use, you must charge the battery at least 18 hours. • Charge the battery for at least 14 hours after each use of the vehicle. • Never charge the battery longer than 30 hours. Failure to follow these instructions may damage your battery and will void your warranty. • Before charging the battery, examine the battery case for cracks and other damage which may cause sulfuric acid (electrolyte) to leak during the charging process.
18 hour first time charge 18 horas para la primera carga La première fois, charger la batterie pendant 18 heures. 14 hour charge after each use 14 horas después de cada uso Après chaque utilisation, la charger pendant 14 heures. • Avant de charger la batterie, s’assurer qu’elle est debout et dans un endroit bien aéré. • Brancher le connecteur du chargeur sur la prise de la batterie. Brancher le chargeur sur une prise de courant standard. • Brancher le chargeur uniquement sur une prise murale.
PARTS PIEZAS PIÈCES Left and Right izquierda y derecha Gauche et droit Left and Right izquierda y derecha Gauche et droit Left and Right izquierda y derecha Gauche et droit 12
x4 x4 x2 x2 Left and Right izquierda y derecha Gauche et droit x4 Left and Right izquierda y derecha Gauche et droit x2 Left and Right Izquierdo y Derecho Gauche et droit Front and Back Delantera y trasera Avant et arrière x2 Left and Right izquierda y derecha Gauche et droit 13
x2 x2 x2 M4,5 x 1,9 cm Screw Tornillo M4,5 x 1,9 cm Vis M4,5 de 1,9 cm 0,4 cm x 3,8 cm Pin Clavija de 0,4 cm x 3,8 cm Tige de 0,4 cm x 3,8 cm x 62 x1 x4 1,1 cm Washer Arandela de 1,1 cm Rondelle de 1,1 cm x2 14 1 cm Lock Nut Tuerca ciega de 1 cm Écrou de sécurité de 1 cm
The battery is located inside the battery compartment. Remove the battery from the vehicle before assembly. La batería se localiza dentro del compartimento de la batería. Sacar la batería del vehículo antes de ensamblarlo. La batterie a été placée dans le compartiment. Retirer la batterie du véhicule avant de l’assembler. Identify all parts before assembly and save all packaging material until assembly is complete to ensure that no parts are discarded.
ASSEMBLY MONTAJE ASSEMBLAGE Protective caps have been added to the threaded metal parts to prevent damage during shipping. Please remove and throw the caps away. Se han incluido tapas protectoras en las piezas de metal enroscadas para evitar daños durante el envío. Quitar y desechar las tapas. Des bouchons protecteurs ont été placés sur les pièces métalliques filetées afin de ne pas les endommager au cours de la livraison. Veiller retirer les bouchons et les jeter.
There is a left and right front fender. If a fender does not seem to fit, try the other one. Hay un guardabarros delantero izquierdo y uno derecho. Si un guardabarros no se ajusta, intentar con el otro. Il y a un garde-boue gauche et un garde-boue droit. Si le gardeboue ne semble pas s’insérer correctement, essayer l’autre. 3 You may want to turn the vehicle on its side to complete this step. x4 Es posible que desee girar el vehículo a un lado para completar este paso.
There is a left and right rear fender. If a fender does not seem to fit, try the other one. Hay un guardabarros trasero izquierdo y uno derecho. Si un guardabarros no se ajusta, intentar con el otro. Il y a un garde-boue arrière gauche et un garde-boue arrière droit. Si le garde-boue ne semble pas s’insérer correctement, essayer l’autre. 5 You may want to turn the vehicle on its side to complete this step. Es posible que desee girar el vehículo a un lado para completar este paso.
Carefully turn the vehicle over onto a protected surface. Lift and rotate the front axle outward on each side of the vehicle. Voltear cuidadosamente el vehículo y colocarlo sobre una superficie protegida. Subir y girar hacia afuera el eje delantero. Retourner soigneusement le véhicule sur une surface protégée. Redresser et déplier l’essieu avant.
9 x2 Using the included assembly tools fully tighten the lock nuts. Usando las llaves incluida, aprieta por completo las tuercas ciega. À l’aide des clés hexagonales (fournies), serrer complètement les écrous de sécurité.
Slide the rear axle through both gearboxes on the back end of the vehicle. You may need to lift the gearboxes to insert the rear axle. Introducir el eje trasero en ambas cajas de engranajes en la parte de atrás del vehículo. Quizá sea necesario levantar las cajas de cambios para insertar el eje trasero. Faire traverser l’essieu arrière dans les deux boîtes de vitesses à l’arrière du véhicule. Il faudra peut-être relever les boîtes de vitesses pour insérer l’essieu arrière.
13 x2 Fit a lock nut onto each end of the rear axle and hand tighten. Ajustar una tuerca ciega en cada extremo del eje trasero y apretarlas con la mano. Fixer un écrou de sécurité à chaque extrémité de l’essieu arrière et le serrer à la main.
While holding one lock nut with an included assembly tool, fully tighten the other lock nut. You may need help from another adult. Next, fully tighten the other lock nut. Mientras sujetas una tuerca ciega con una llave incluida, aprieta por completo la otra tuerca ciega. Quizá sea necesaria la ayuda de otra persona. Luego, aprieta por completo la otra tuerca ciega. Tout en retenant un écrou de sécurité en place avec une clé hexagonale (fournie), serrer complètement l’autre écrou de sécurité.
Turn the vehicle upright. Fit the front bumper to the front end of the vehicle. Colocar el vehículo en posición vertical. Ajustar la defensa delantera en la parte delantera del vehículo. Remettre le véhicule à l’endroit. Fixer le pare-chocs à l’avant du véhicule. 17 x3 Insert screws here. Insertar los tornillos aquí. Insérer les vis ici.
Lift the grille to “snap” in place. Subir la rejilla para ajustarla en su lugar. Redresser la calandre et l’enclencher en place. 19 x2 Insert screws here.. Insertar los tornillos os aquí. Insérer les vis ici.
x7 21 Place the label exactly as shown in the illustration and avoid repositioning a label once it has been applied. Pega las calcomanías tal como se muestra en la ilustración y evita reposicionarlas después de pegarlas. Apposer l’autocollant exactement comme illustré. Éviter de repositionner un autocollant une fois qu’il a été collé.
Each door is designed to fit one way. If a door does not fit, try the other door. Cada puerta está diseñada para ajustarse de una manera. Si la puerta no cabe, intentar con la otra puerta. Les portières sont conçues pour être fixées d’un côté précis. Si la portière ne semble pas s’insérer correctement, essayer l’autre. 23 Each hinge is designed to fit one way. If a hinge does not fit, try the other hinge. x6 Cada bisagra está diseñada para ajustarse de una manera.
x2 25 Fit the end of the steering column into the slot underneath the dashboard. Introduce el extremo de la columna de mando en el orificio abajo del tablero. Insérer l’extrémité de la colonne de direction dans la fente sous le tableau de bord.
Turn the vehicle over or on its side. Insert the end of the steering column through the hole in the steering linkage. Turn the vehicle upright. Voltear el vehículo o ponerlo de lado. Introducir el extremo de la columna de mando en el orificio de la conexión de mando. Colocar el vehículo en posición vertical. Mettre le véhicule à l’envers ou sur le côté. Insérer l’extrémité de la colonne de direction dans le trou de la tringlerie de direction. Remettre le véhicule à l’endroit.
Insert the 0,4 cm x 3,8 cm pin through the hole in the steering column. Lower the steering column so the pin fits inside the center of the steering wheel. x1 Insertar la clavija de 0,4 cm x 3,8 cm en el orificio del lado de la columna de mando. Bajar la columna de mando de modo que la clavija se ajuste adentro del centro del volante. Insérer la tige de 0,4 cm x 3,8 cm dans le trou de la colonne de direction. Abaisser la colonne de direction de façon que la tige s’insère au centre du volant.
Turn the vehicle over or on its side. Fit the steering column cap onto the end of the steering column. x1 Voltear el vehículo o ponerlo de lado. Ajustar la tapa de la columna de mando en el extremo de la columna de mando. Insert a M4,5 x 1,9 cm screw through the large hole in the steering column cap and steering column. Tighten the screw. Mettre le véhicule à l’envers ou sur le côté. Fixer le capuchon de la colonne de direction sur l’extrémité de la colonne de direction.
34 The side view mirrors are designed to fit the windshield one way. x4 Los espejos laterales están diseñados para ajustarse en el parabrisas de una sola manera. Les rétroviseurs s’assemblent au pare-brise d’un seul côté.
36 x3 Insert screws here. Insertar los tornillos aquí. Insérer les vis ici.
Rotate the ends of the roll bar outward. Girar hacia afuera los extremos de la barra protectora. Déplier les bras de l’arceau.
x8 40 Fit the roll bar into the sockets in the top side of the vehicle. Ajustar la barra protectora en los orificios de la parte de arriba del vehículo. Insérer l’arceau dans les trous du véhicule.
While holding the roll bar in place, turn the vehicle on its side. x4 Mientras sujeta la barra protectora en su lugar, poner el vehículo de lado. Tout en retenant l’arceau en place, mettre le véhicule sur le côté. 42 Turn the vehicle upright. First, fit the pegs on the front portion of the light bar to the roll bar. Then fit the back portion of the light bar to the rollbar. Colocar el vehículo en posición vertical. Primero, ajustar las clavijas del frente de la barra de luces en la barra protectora.
x8 44 x2 45 37
AA (LR6) BATTERIES PILAS AA (LR6) PILES AA (LR6) We recommend using alkaline batteries for longer battery life. Se recomienda usar pilas alcalinas para una mayor duración. Il est recommandé d’utiliser des piles alcalines car elles durent plus longtemps. Locate the sound box on the dash. Loosen the screws in the battery compartment door. Remove the battery compartment door. Insert three, new AA (LR6) alkaline batteries. Replace the battery compartment door and tighten the screws.
Battery Safety Information In exceptional circumstances, batteries may leak fluids that can cause a chemical burn injury or ruin your product. To avoid battery leakage: • Do not mix old and new batteries or batteries of different types: alkaline, standard (carbon-zinc) or rechargeable. • Insert batteries as indicated inside the battery compartment (+ and -). • Remove batteries during long periods of nonuse. Always remove exhausted batteries from the product. Dispose of batteries safely.
DECORATION DECORACIÓN DÉCORATION For best results, avoid repositioning a label once it has been applied to the vehicle. Note: The label sheet includes 4 extra labels that are not numbered. First, place all numbered labels on the vehicle as shown. Then, use the extra labels anywhere else on the vehicle. Para mejores resultados, evitar reposicionar las etiquetas. Nota: La hoja de calcomanías incluye 4 calcomanías extra que no están numeradas.
12V BATTERY INSTALLATION COLOCACIÓN DE LA BATERÍA DE 12 V INSTALLATION DE LA BATTERIE DE 12 V Lower the hood latches. Lift the hood to access the battery compartment. Bajar los seguros del cofre. Abrir el cofre para lograr acceso al compartimento de la batería. Baisser les verrous. Ouvrir le capot pour avoir accès au compartiment de la batterie. 1 Lift and pull the battery retainer forward. Place the battery in the battery compartment. Levantar y jalar hacia adelante la abrazadera de la batería.
Plug the motor harness connector into the battery. Release the battery retainer. Make sure the battery retainer slides over the top of the battery. Enchufar el conector del arnés del motor en la batería. Soltar el sujetador de la batería. Asegurarse de que la abrazadera de la batería se ajuste sobre la batería. Brancher le connecteur du câble du moteur sur la batterie. Relâcher le dispositif de retenue. S’assurer que le dispositif de retenue de la batterie glisse sur le dessus de la batterie.
SAFE DRIVING RULES NORMAS DE SEGURIDAD PARA CONDUCIR RÈGLES POUR UNE CONDUITE EN TOUTE SÉCURITÉ • Un niño que no esté sentado en el asiento podría caerse, causar que se voltee el vehículo o bloquear la vista del conductor. • Usar el vehículo sólo durante el día o en áreas bien iluminadas. • Ayúdale al niño a practicar el viraje para que aprenda cuánto y cuán rápido virar el volante al manejar, y a frenar. Para hacer alto, simplemente quita el pie del pedal.
VEHICLE OPERATION FUNCIONAMIENTO DEL VEHÍCULO FONCTIONNEMENT DU VÉHICULE • Mettre le levier de vitesse à la position de vitesse réduite. Appuyer sur la pédale pour avancer. • Quand l’enfant maîtrise parfaitement le fonctionnement du véhicule en marche avant, lui apprendre la marche arrière. • IMPORTANT! Pour éviter d’endommager le moteur et les engrenages, arrêter le véhicule avant de passer de la marche avant à la marche arrière. • Mettre le levier de vitesse à la position de marche arrière.
• Antes de desconectar el tornillo bloqueador de velocidad rápida, asegúrese de que el niño sepa cómo virar, arrancar y detener el vehículo y que sepa las reglas para manejar de manera segura. Con el tornillo bloqueador de velocidad rápida desconectado, el vehículo puede ser manejado marcha adelante a velocidad lenta o rápida. • Cerciorarse de que la palanca esté en la posición de reversa. • Aflojar y retirar el tornillo en la base de la palanca.
Sounds Buttons Botones de sonidos Boutons de sons Reset Restablecer Réinitialisation • Press the buttons for sounds. IMPORTANT! If the sound box functions erratically, press the main reset button with the point of a pen (or similar object). • Appuyer sur les boutons pour activer les sons. IMPORTANT! Si le boîtier des sons fonctionne de façon irrégulière, appuyer sur le bouton de réinitialisation avec la pointe d’un stylo (ou d’un objet similaire). • Presionar los botones para oír sonidos.
CARE MANTENIMIENTO ENTRETIEN • En condiciones de lluvia o nieve, guardar el vehículo bajo techo o cubrirlo totalmente. Cargar la batería por lo menos una vez al mes mientras el vehículo no esté en uso normal. • Evitar usar el vehículo en condiciones mojadas o de nieve y no rociar el vehículo con una manguera. No lavar el vehículo con agua y jabón. El agua o humedad en los motores o interruptores eléctricos puede causar corrosión y falla de los mismos.
BATTERY DISPOSAL ELIMINACIÓN DE LA BATERÍA MISE AU REBUT DE LA BATTERIE • CONTAINS SEALED LEAD BATTERY. BATTERY MUST BE RECYCLED. • Recycle or dispose of the battery in an environmentally sound manner. • Do not dispose of a lead acid battery in a fire. The battery may explode or leak. • INCLUYE UNA BATERÍA DE PLOMO SELLADA. RECICLAR LA BATERÍA. • Debe ser reciclada o eliminada de manera que no afecte al medio ambiente. • No quemar la batería de plomo-ácido. La batería podría explotar o derramar líquido.
WARRANTY GARANTÍA GARANTIE One Year limited warranty from the date of purchase on the Power Wheels® vehicle. Six month limited warranty from the date of purchase on the 6 or 12 volt battery. Mattel Canada Inc. warrants to the original purchase, this one year limited warranty covers the Power Wheels® ride-on vehicle (purchased from an authorized dealer of Power Wheels® vehicles) against defects in materials and workmanship.
*Garantie limitée de un (1) an à partir de la date d’achat pour le véhicule Power Wheels®. Garantie limitée de six (6) mois à partir de la date d’achat sur la batterie de 6 ou 12 V. Mattel Canada Inc. octroie à l’acheteur d’origine la présente garantie limitée de un (1) an qui couvre le véhicule porteur Power Wheels® (acheté d’un détaillant autorisé de véhicules Power Wheels®) contre les défauts de matériel et de fabrication.
INFORMATION INFORMACIÓN RENSEIGNEMENTS Este dispositivo cumple con la Parte 15 del reglamento FCC. El uso está sujeto a las dos condiciones siguientes: (1) este dispositivo no debe causar interferencia dañina y (2) este dispositivo debe aceptar cualquier interferencia recibida, incluyendo interferencia que pueda causar que el dispositivo no funcione correctamente.
UNITED STATES Fisher-Price, Inc., 636 Girard Avenue, East Aurora, NY 14052. Consumer Services: 1-800-348-0751. CANADA Mattel Canada Inc., 6155 Freemont Blvd., Mississauga, Ontario L5R 3W2 Consumer Services/Service à la clientèle : 1-800-348-0751. MÉXICO Importado y distribuido por Mattel de México, S.A. de C.V., Miguel de Cervantes Saavedra No. 193, Pisos 10 y 11, Col. Granada, Alcaldía Miguel Hidalgo, C.P. 11520, México, Ciudad de México. R.F.C. MME-920701-NB3. Tels.: 59-05-51-00 Ext.