
Instructions / Assembly

3
Assembly (continued)
Tips for Installing the Pedals:
1. Make sure the pedal is straight when
you screw it in.
2. Rotate the shaft with your ngers to get
the threads started.
3. If you can’t get the threads started with
your ngers then it is cross threaded.
Unscrew the pedal, make sure the pedal
is straight, and then try again.
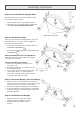
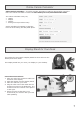
• Screw the Left Pedal into the Left Pedal Arm
COUNTER-CLOCKWISE.
• Screw the Right Pedal into the Right Pedal Arm
CLOCKWISE.
Step 4: Install the Pedals
MAKE THE PEDALS AS TIGHT AS POSSIBLE!!!
Using the bike with loose pedals will damage
the pedal arm threads!
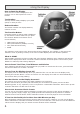
Step 6: Install the LCD Display
• Plug the Connector into the Display.
• Carefully slide the Display onto the
Display Bracket as shown in the
picture.
Step 5: Insert the Battery into the Display
• There is a door on the back of the Display. It
snaps in and out. The latch is at the top. Pry the
top of the door out with your index nger.
• Remove any plastic wrapping from the Battery.
• Insert the Battery. Pay attention to the polarity.
• Press the door back into the display. Insert the
bottom edge rst.
There is a Left Pedal and a Right Pedal. They are
marked with an L for Left or an R for Right on
the end of the pedal shaft.
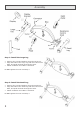
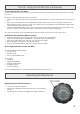
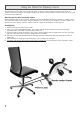
Step 3: Level the Bike & Tighten Nuts
At this point the four nuts that attach the legs
to the Bike should be loose.
• Place the Bike onto a smooth at surface.
• Tighten the four leg nuts using the supplied
Tool. Do not over-tighten the nuts!