
Owner manual

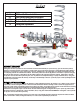


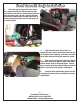

Rear Smooth Body Installation
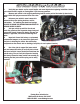
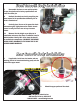
3. Mount the lower portion of the shock to the
rear end housing. There should be little or no modifica-
tions necessary.
4. Make certain that everything is mounted se-
curely then, if necessary jack the rear end housing into
the chassis. If applicable, make sure that the springs
are realigned.
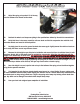
5. Verify everything has been torqued to the
specifications defined by the vehicle’s manufacturer.
6. Carefully place the car on the ground to check
clearances again. Lightly bounce the vehicle at each
corner to verify that there are not any clearance issues.
7. Measure the ride height as you did prior to installation and ensure that there is sufficient travel in both
directions. Ideally, 60% of the shock stroke will be available for compression.
INCORRECT RIDE HEIGHT COULD
RESULT IN DAMAGE TO THE SHOCK THAT IS NOT COVERED UNDER WARRANTY.
Custom Coil Over Installation
1. Verify that your shocks are the correct lengths and mount style before beginning installation.
2. Measure your vehicle’s ride height by measuring from the center point of the fender lip down to the
ground. Mark the spot you measured to for later reference.
3. Reference your vehicle’s owner’s manual to determine the proper jacking locations, and the instructions
for removing the shocks and springs. FAILURE TO FOLLOW THE INSTRUCTIONS CAN RESULT IN SERIOUS INJURY OR
DEATH.
4. Jack your vehicle up until the tires do not touch the ground and the suspension hangs freely and remove
the wheels. Remove the shocks and springs and retain all mounting hardware.
5. Test fit your shocks into the chassis without mounting the springs. Move the suspension through the
entire travel range to ensure that it does not bind at any point.
6. Fully extend the piston rod and ensure that the jam nut under the bearing housing is secure.
8
Flaming River Industries,Inc.
800 Poertner Dr. Berea, Ohio 44017
1-800-648-8022 • www.amingriver.com