
Owner manual


1. Verify that your shocks are the correct lengths and mount style before beginning installation. Contact
your chassis builder, supplier or Flaming River if you have any questions.
2. Measure your vehicle’s ride height by measuring from the center point of the fender lip down to the
ground. Mark the spot you measured to for later refer-
ence.
3. Reference your vehicle’s owner’s manual to
determine the proper jacking locations, and the
instructions for removing the shocks and springs.
FAILURE TO FOLLOW THE INSTRUCTIONS CAN RESULT IN
SERIOUS INJURY OR DEATH.
4. Jack your vehicle up until the tires do not
touch the ground and the suspension hangs freely and
remove the wheels. Remove the shocks and sway bar
mounts, if applicable, and retain all mounting hard-
ware.
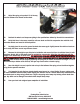
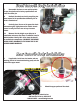
5. Important: Ensure that factory or replacement
compression bumpers are in place and in good condi-
tion prior to installing the shocks. Also check other
components on the chassis such as bushings, ball joints, etc. and replace if needed.
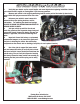
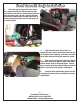
6. Use a floor jack to support the lower control
arm and remove the cotter pin and ball joint nut from
the lower ball joint. Loosen the ball joint stud from the
spindle using a tie rod / ball joint separator. Carefully
and slowly release the lower control arm assembly by
lowering the floor jack until the spring can be safely
removed
1
Flaming River Industries,Inc.
800 Poertner Dr. Berea, Ohio 44017
1-800-648-8022 • www.amingriver.com
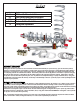
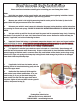
GM Front Coil Over Installation