
Owner manual


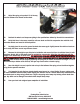
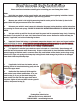

7. Remove the hardware that retained the stock
shock in the lower control arm. Clean the mounting
bolt holes thoroughly. You may need to slightly open
them using a file or 3/8” drill bit.
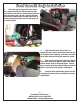
8. Install one stud washer and one bushing (half
of the shock stud bushing pack) onto the stud.
9. Fully extend the piston rod.
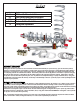
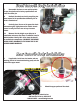
Lock Nut
Spring Nut
Apply
Anti-Seize
on Threads
10. Screw the lock nut (shoulder up) and the spring
nut (shoulder up) down to the last thread only.
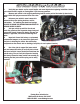
11. Apply anti-seize to the threads on the nuts and
the shock. If the Flaming River thrust bearing kit is
used
(recommended)
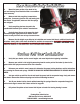
, coat both washers with anti-
seize. Install the spring seat washer, then the bearing,
then the second washer. If you do not use the thrust
bearing kit, then coat one side of the washer supplied
with the shock with anti-seize and place it coated
side down on the spring nut.
THE WARRANTY IS VOID
AND DOES NOT COVER DAMAGE TO THE SHOCK RESULT-
ING FROM THE FAILURE TO APPLY ANTI-SEIZE PRIOR TO
MAKING RIDE HEIGHT ADJUSTMENTS.
Apply
Anti-Seize on Bearings
2
Flaming River Industries,Inc.
800 Poertner Dr. Berea, Ohio 44017
1-800-648-8022 • www.amingriver.com
GM Front Coil Over Installation