
Owner manual

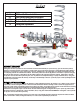


5
Flaming River Industries,Inc.
800 Poertner Dr. Berea, Ohio 44017
1-800-648-8022 • www.amingriver.com
Please read these instructions carefully prior to installing your new Flaming River shocks.
Notes:
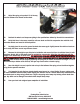
1. Verify that your shocks are the correct lengths and mount style before beginning installation. Contact
your chassis builder, supplier or Flaming River if you have any questions.
2. Measure your vehicle’s ride height by measuring from the center point of the fender lip down to the
ground. Mark the spot you measured to for later reference.
3. Reference your vehicle’s owner’s manual to determine the proper jacking locations, and the instructions
for removing the shocks and springs. FAILURE TO FOLLOW THE INSTRUCTIONS CAN RESULT IN SERIOUS INJURY OR
DEATH.
4. Jack your vehicle up until the tires do not touch the ground and the suspension hangs freely. Removing
the wheels is not required in all cases, but it does allow for easier access. Remove the shocks and sway bar
mounts, if applicable, and retain all mounting hardware.
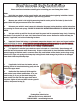
5. Important: Ensure that factory or replacement compression bumpers are in place and in good condition
prior to installing the shocks.
IF THE FACTORY BUMPERS OR EQUIVALENT ARE DAMAGED OR ARE NOT PRESENT,
DAMAGE TO THE SHOCK MAY OCCUR THAT IS NOT COVERED UNDER WARRANTY.
6. It is important to note that your shocks are never to be used as a travel limiter. Severe damage will
result that will not be covered under the warranty. Straps or cables made for travel limitation should be used
prevent topping out. Vehicles used in a manner where they could bottom out the shocks (such as drag racing)
should use a higher rate spring and a bump stop to help prevent shock damage. Any shock can be damaged
from wheel stands despite bump stops.
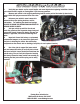
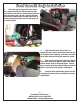
Front Smooth Body Installation
1. If applicable, install one stud washer and one
bushing (half of the shock stud bushing pack) onto the
stud on the upper mount.
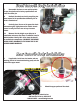
2. Confirm that the shocks will fit through the
lower control arms without modifications. If no, con-
tinue to step (3). If yes, put the shock through the
lower control arm and slide the upper shock mount
into place, tighten all nuts and bolts to factory specifi-
cations, and proceed to step (8).