
Installation Guide

Required Tools
Helpful Tools
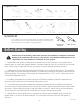
Your shower surround kit includes eight cartridges of adhesive and
two cartridges of color-tinted 100% silicone. Refer to section 2B of
these instructions for adhesive usage guidelines.
Installation Kit
Consult your local building codes with questions on installation compliance standards.
Building and plumbing codes may vary by location, and FlexStone Bath Systems is not
responsible for code compliance standards for your project.
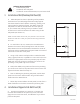
Before Starting
x 2
100% Silicone
x 8
Construction
Adhesive
– 2 –
1. The FlexStone wall system is designed to be installed over a solid substrate such as green board,
cement board, or other water resistant backers. Substrate should be clean, dry, and free of dust or loose
paint. Unless using our Remodel Trim Kit, any existing surround material should be removed.
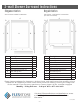
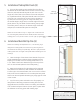
2. The Remodel Trim Kit (sold separately) allows FlexStone to be used over existing tile. Tile should be
in good shape, and wall surfaces should be at (i.e. remove any accessories that would interfere with the
FlexStone panels.) The 4 pieces of 96" length would replace Items C, D, E, F, and G. Follow instructions
included with Remodel Trim Kit.
3. If installing a new bathtub or shower base prior to FlexStone installation, follow the manufacturer’s
instructions, and install the tub or base level and square to walls.
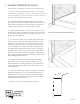
4. Turn o the water supply and complete any plumbing modications prior to installing your FlexStone
surround. Leave plumbing handles o until surround is installed. Plan the placement of the shower head
such that it is either above the height of the wall panels or at least 2" below the top of the wall panels.
This will keep the trim moldings from interfering with the pipe and escutcheon plate.
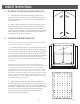
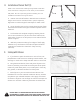
5. Review Section 6 and decide how the vertical trim moldings will be installed, either outside the
shower base, or on top of the base threshold. This will impact the width of the side wall panels in
Section 3.
!
V.4 03/2022