
Installation Guide
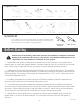
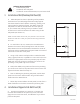

9. Sealing with Silicone
A. If you desire to paint the walls now or in the future, use
paintable latex caulk where trim moldings meet sheetrock. Use
wet nger or caulk tool to shape the latex caulk to a nice nish.
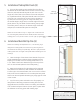
B. Using denatured alcohol, clean and prime all joints in the
surround, including vertical and horizontal joints where panel
meets tub, panel meets panel, or trim meets panel. Clean any
oils, greases, or adhesive residues from these joints.
C. Seal all joints in your surround with 100% silicone. Our
installation kit has color-matched translucent silicone, tinted to
complement your selected FlexStone color. Apply a ne bead
of silicone to all joints. Use wet nger or caulk tool to shape the
silicone to a nice nish. Follow any directions on sealant tube.
PLEASE WAIT 24 HOURS BEFORE INSTALLING FINISH
PLUMBING OR USING YOUR NEW TUB/SHOWER SURROUND.
REMOVE REMAINING PROTECTIVE MASKING PRIOR TO USE.
NOTE: Corner shelf includes a folding-triangle metal bracket with
screw holes which is designed to mount directly to the FlexStone
wall panels. Be sure to peel away protective masking from the
installation area before securing the bracket.
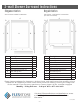
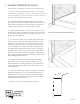
8. Installation of Corner Shelf (I)
A. Position corner shelf bracket in desired corner at desired
height. Use a level to mark level lines in pencil. Adjust the
alignment to include a slight forward slope for water runo.
B. Using drywall screws or other coarse-thread screws, fasten
each side of the bracket through the FlexStone panels and the
sheetrock.
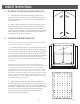
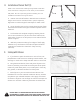
C. Fold bracket and complete triangle by bending the tab
over to secure bracket. Dry t the corner shelf material over
the bracket. If corner is out of square, trim one side of shelf to
achieve a tight t.
D. Peel back protective masking from edges of shelf, apply
adhesive to top and bottom of bracket and place FlexStone
material over bracket like a clamshell. Clamp until dry
(24 hours).
– 7 –
!
V.4 03/2022