
User manual


Table Of Contents
- 1 Disclaimers
- 2 Safety information
- 3 Notice to user
- 4 Customer help
- 5 Quick Start Guide
- 6 Description
- 7 Operation
- 7.1 Charging the battery
- 7.2 Turning on and turning off the camera
- 7.3 Saving an image
- 7.4 Recalling an image
- 7.5 Deleting an image
- 7.6 Deleting all images
- 7.7 Measuring a temperature using a spotmeter
- 7.8 Hiding measurement tools
- 7.9 Changing the color palette
- 7.10 Changing the image mode
- 7.11 Changing the temperature scale mode
- 7.12 Setting the emissivity
- 7.13 Changing the reflected apparent temperature
- 7.14 Changing the distance
- 7.15 Performing a non-uniformity correction
- 7.16 Using the camera lamp
- 7.17 Changing the settings
- 7.18 Updating the camera
- 8 Technical data
- 9 Mechanical drawings
- 10 CE Declaration of conformity
- 11 Cleaning the camera
- 12 Application examples
- 13 About FLIR Systems
- 14 Glossary
- 15 Thermographic measurement techniques
- 16 History of infrared technology
- 17 Theory of thermography
- 18 The measurement formula
- 19 Emissivity tables
Application examples12
12.5 Draft
12.5.1 General
Draft can be found under baseboards, around door and window casings, and above ceil-
ing trim. This type of draft is often possible to see with an infrared camera, as a cooler
airstream cools down the surrounding surface.
NOTE
When you are investigating draft in a house, there should be sub-atmospheric pressure in the house.
Close all doors, windows, and ventilation ducts, and allow the kitchen fan to run for a while before you
take the infrared images.
An infrared image of draft often shows a typical stream pattern. You can see this stream pattern clearly
in the picture below.
Also keep in mind that drafts can be concealed by heat from floor heating circuits.
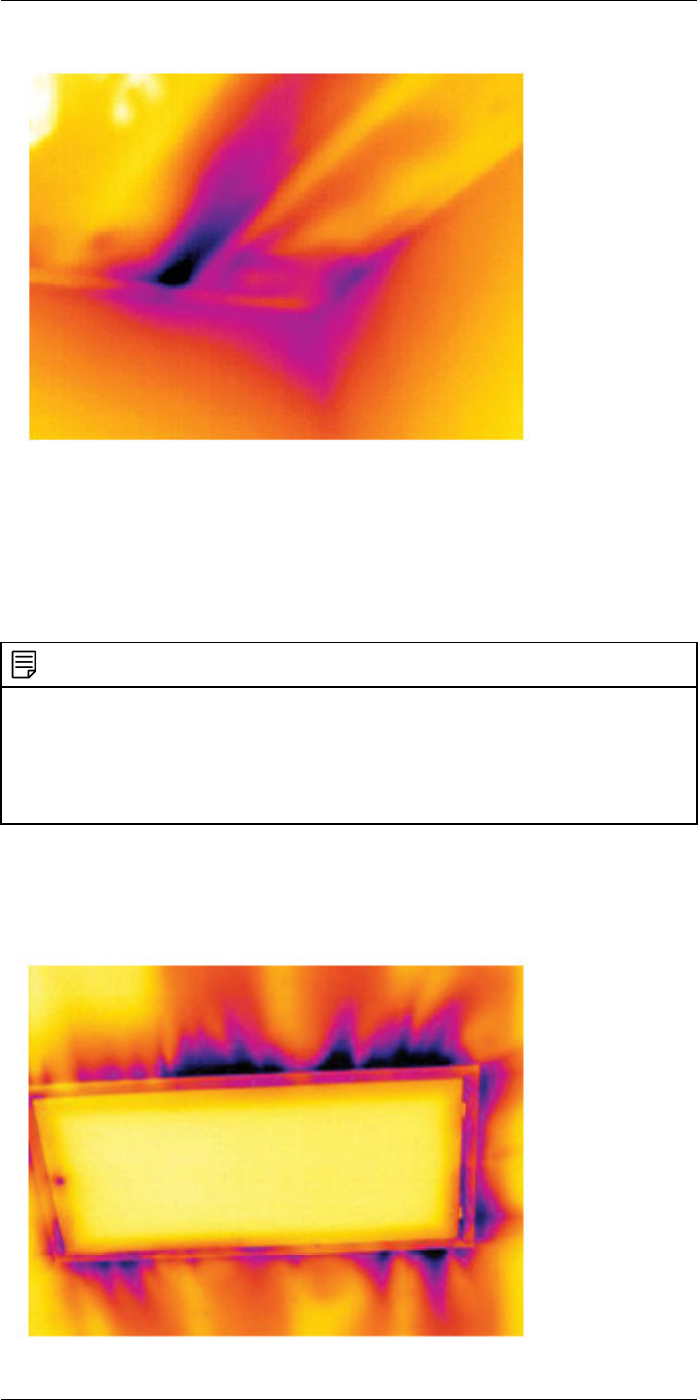
12.5.2 Figure
The image below shows a ceiling hatch where faulty installation has resulted in a strong
draft.
#T559918; r. AE/23547/23547; en-US
31