
Instruction Manual


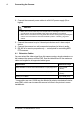

Table Of Contents

Connecting the Camera
4
2. Connect the camera’s power cables to a 24V AC power supply (3A or
higher).
CAUTION
• Make sure to disconnect the power adapter before installing the camera. The cam-
era will begin moving immediately when the power adapter is connected.
• Make sure to remove the foam ring inside the camera housing before powering the
camera on for the first time. See 5.2 Installation (Indoor / Outdoor), page 6 for
details.
3. Connect the camera to up to 2 alarm input devices and 1 alarm output
device.
4. Connect the camera to a self-powered microphone for listen-in audio.
5. RS-485 is for service purposes only — not required for controlling MPX
PTZ cameras.
4.1 Extension Cables
You can extend the video signal from this camera using a single extension ca-
ble between the camera and the DVR. See the table below for the maximum
cable run lengths for all supported cable types:
Specification Maximum Length
RG59 20AWG Conductor 95% Braid CSA/UL or C(UL) Approved Up to 1500ft
(455m)*
RG6 20AWG Conductor 95% Braid CSA/UL or C(UL) Approved Up to 2300ft
(700m)*
Analog CCTV Balun Up to 300ft (91m)
* Long cable runs over 1000ft may be affected by electro-mechanical interfer-
ence (EMI), which can increase the amount of noise in the picture in some
installations.
#LX400046; r. 2.0/22386/22410; en-US
5