
Instruction Manual


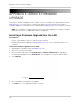
Table Of Contents
- Basic Setup
- Front Panel
- Rear Panel
- Getting Started
- Remote Control
- Using the System
- Setting the Time
- Recording
- Search (Playback)
- Backup
- Using the Main Menu
- FLIR SyncroIP NVR Central Management Software
- System Requirements
- Prerequisites
- Installing FLIR SyncroIP NVR CMS
- Adding a NVR from the local area network (LAN)
- Adding a NVR using a DDNS address
- Using Alarm Rec (Event Search)
- Using Playback Mode
- Configuring Monitoring Tasks and Projects
- Using E-Map
- Configuring the CMS
- Adding User Accounts to the CMS
- Multi-Monitor Support
- Remote Viewing on Internet Explorer
- Mobile Connectivity
- Appendix A: System Specifications
- Appendix B: Setting up Remote Viewing
- Appendix C: Auto Port Forwarding Wizard
- Appendix D: Setting Up DDNS Service
- Appendix E: Remote Firmware Upgrade
- Appendix F: Hard Drive Installation
- Appendix G: Connecting an External Monitor
- Troubleshooting

94
Appendix C: Auto Port Forwarding Wizard
Step 3: Update the Router Settings
1. Click the Update Router button.
• You will see your router window open. The Aut
o Port Forwarding Wizard automatically
populates your router with the relevant information. This will take a few moments.
2. Close the update window when the update finishes.
Step 4: Test your Connection
1. Click the Test Your Connection button.
• Your system’s default browser opens and connects to your devi
ce.
NOTE: Ensur
e that Internet Explorer is your system’s default internet browser.
NOTE: A windo
w opens that prompts you to enter in your NVR’s user name and password (do
not enter your DDNS log in information).
NOTE: Activ
eX warnings may appear. Accept all ActiveX installation warnings to connect to your
system.
Configuring Multiple Routers
Your network may have two or more connected routers. During the initial launch of the auto port
forwarding wizard, the program scans the network to detect the number of connected routers.
To check for multiple routers:
1. Click the Detect Multipl
e Routers button ( ).
• A list of connected routers populates in the window.
• The "Possible 1st Router" refers to the router directly connected to your system. This is the
router that requires the port forward information.
Update Router button