
Data Sheet


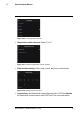


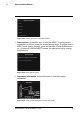
Table Of Contents
- 1 Advisories
- 2 Introduction
- 3 Safety
- 4 Descriptions
- 5 User Interface Menus
- 6 Powering the MR277
- 7 Moisture Measurement Operation
- 8 Thermal and Visible Camera Operation
- 9 Ambient Temperature and Humidity Measurements
- 10 Capturing and Working with Screen Captures
- 11 Bluetooth® Communication and FLIR Tools™
- 12 Field Firmware Updates
- 13 Maintenance
- 14 Specifications
- 15 Appendices
- 16 Limited 10–Year Warranty
- 17 Customer Support

User Interface Menus
5
• MR12 mode: Select this mode when using the optional MR12 Ball Mois-
ture probe accessory. The MR12 attaches to the RJ jack on the bottom of
the MR277. See Section 7.7 External Ball Moisture Probe for more
information.
Figure 5.20 Selecting the MR12 (optional moisture probe) mode
• Set Reference mode: This utility is only available when using the built-in
pinless sensor (rear of MR277) or the remote MR12 Ball Moisture probe.
After selecting the pinless mode (or the MR12 mode) and while taking a
moisture measurement, select the ‘Set Reference’ utility to zero the current
measurement value (the delta symbol will appear to inform you that the Set
Reference mode is active). Now, subsequent moisture measurements can
be made relative to the original ‘Set Reference’ value. To release the Set
Reference utility, select the pin mode. See Section 7.8 Set Reference
Mode for additional information.
Figure 5.21 Selecting the reference value in which to compare subsequent
measurements
5.7 Color Menu
The color menu allows you to select from five display palettes. Iron, Rainbow,
White hot, Black hot, and Arctic.
#NAS100005; r. AG/62027/62027; en-US
16