
Instruction Manual


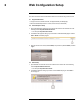
Table Of Contents
- 1 Overview
- 2 Web Configuration Setup
- 3 Live View
- 4 Playback (Cameras with microSD only)
- 5 Setup
- 6 Firmware Upgrade Tool
- 7 Connecting to Cameras with FLIR Cloud™ CMS
- 8 Using FLIR Cloud™ Client for PC or Mac
- 9 Smartphone and Tablet Apps
- 9.1 iPhone
- 9.1.1 Prerequisites
- 9.1.2 Connecting to your IP camera on an iPhone
- 9.1.3 Live View Interface
- 9.1.4 Controlling PTZ Cameras
- 9.1.5 Viewing Snapshots and Videos with Local Files
- 9.1.6 Using Playback Mode on iPhone
- 9.1.7 Enabling Push Notifications
- 9.1.8 Using the Event List
- 9.1.9 Using Favorites
- 9.1.10 Using the E-Map
- 9.1.11 Device Manager
- 9.2 iPad
- 9.2.1 Prerequisites
- 9.2.2 Connecting to your IP Camera on an iPad
- 9.2.3 Live View Interface
- 9.2.4 Controlling PTZ Cameras
- 9.2.5 Using Playback Mode on iPad
- 9.2.6 Using Local File to View Manual Recordings
- 9.2.7 Enabling Push Notifications
- 9.2.8 Using the Event List
- 9.2.9 Using Favorites
- 9.2.10 Using the E-Map
- 9.2.11 Using the Device Manager
- 9.3 Android
- 9.3.1 Prerequisites
- 9.3.2 Connecting to your IP camera on Android
- 9.3.3 Live View Interface
- 9.3.4 Controlling PTZ Cameras
- 9.3.5 Viewing Snapshots and Videos with Local Files
- 9.3.6 Using Playback Mode on iPhone
- 9.3.7 Enabling Push Notifications
- 9.3.8 Using the Event List
- 9.3.9 Using Favorites
- 9.3.10 Using the E-Map
- 9.3.11 Device Manager
- 9.1 iPhone
- 10 Appendix A — Camera Conditions (Select models only)

Web Configuration Setup
2
The camera includes a built-in web interface that can be accessed using a web browser.
2.1 Supported Browsers
• Google Chrome™, Mozilla Firefox®, and Apple Safari® (via Webplugin)
• Microsoft Internet Explorer® 8.0 or later, 32-bit version (via ActiveX®)
2.2 Internet Explorer Setup
1. Open Internet Explorer® and enter the camera’s IP address in the address bar in the
following format: http://IP address:HTTP Port.
• For example: http://192.168.0.100:80
2. A notification bar appears asking if you would like to install ActiveX® plugins. Click In-
stall or Allow to install the plugins.
3. Enter the camera user name (default: admin) and password (default: admin) and click
Login.
2.3 Safari Setup
1. Open Safari® and enter the camera’s IP address in the address bar in the following
format: http://IP address:HTTP Port.
• For example: http://192.168.0.100:80
2. A notification appears asking if you want to use the NPMedia plug-in. Click Trust to
use the plug-in.
#LX400038; r. 1.0/18537/18537; en-US
2