TM U SE R G U I D E Second Generation For Apple iOS
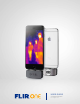
FLIR ONE QUICK START STEP 1 Charge the FLIR ONE with the included USB power cable connected to a 1A power source. The Charge Indicator LED next to the USB connection blinks on and off while the FLIR ONE is charging and stays on continuously when it is fully charged. Once the FLIR ONE is charged, attached it to the phone. TM Note (iOS) model: The power cable for the iPhone (with a Lightning connector) will not work with the FLIR ONE . Ensure the FLIR ONE is fully charged before using it the first time.
STEP 4 Once an image is displayed, tap the color palette icon in the lower right to change how the image is displayed. Select one of the displayed color or grayscale palettes. APP OVERVIEW The camera is in photo mode as indicated just below the image. Tap the round blue icon at the bottom of the screen to save a photo image. On the display, swipe left or right to select a different mode (Video, Pano, or Time-Lapse). These modes are described in a later section of the manual.
FLIR ONE USER GUIDE The FLIR ONE allows you to see the world in a whole new way, with a unique blend of thermal and visible imaging. This user guide provides brief information on how to use the FLIR ONE. Additional information is available directly from the FLIR ONE app in the Settings Menu.
FLIR ONE APP The latest version of the FLIR ONE app is available on the Apple App Store. Download and install the app, then start it. If the FLIR ONE is turned off, the app will prompt you to attach your FLR ONE camera and turn it on. The iPhone iOS version must be 8.2 or higher. APP OVERVIEW APP OVERVIEW At the top of the screen there is a black bar with icons for the Control Panel, Spot Meter, and Calibration.
TIME-LAPSE VIDEO At the top of the bottom bar, swipe right or left to select Time-Lapse mode. Then tap on the red button to display the Time-Lapse options. Adjust the options as needed, and then tap the red button to begin video capture. Tap on the red button again to stop the video capture. FLIR LIBRARY SCREEN Edit Image FLIR LIBRARY Captured images and video may be viewed and edited by selecting the thumbnail image in the lower left corner of the screen.
AUTOMATIC CALIBRATION The camera has a mechanical shutter inside that periodically activates and allows the thermal camera to do a calibration or image refresh. When the shutter activates, the image will freeze for a brief period. The purpose of the shutter is to allow the camera to provide an improved image. When the camera first turns on, and periodically thereafter, the app will perform an automatic calibration to provide an optimal image.
LOCK SPAN Ordinarily, the camera uses an Automatic Gain Control (AGC) process to automatically adjust the image based on the range of temperatures that are in the scene. The camera detects the range or span of temperatures, and maps the temperatures to colors in the color palette dynamically. As a result, the color of an object at a certain temperature can vary, depending on the other temperatures in the scene.
SETTINGS MENU The Settings Menu allows the user to configure additional features on the FLIR ONE, as described below. EMISSIVITY When the Spot Meter is enabled, the temperature displayed is affected by many factors, including a property of the target material known as Emissivity. This property is a relative rating of how well a material emits or radiates thermal energy. Some materials are more emissive than others; glossy or reflective materials like metals tend to be poor emitters.
TROUBLESHOOTING FLIR ONE NOT DETECTED If the FLIR ONE app is not able to detect the FLIR ONE camera, make sure the iPhone is properly attached to the FLIR ONE and fully engaged. Make sure the FLIR ONE is turned on with the power switch. When the FLIR ONE is turned on, the power indicator should be flashing green.
LEGAL DISCLAIMER FCC Interference Statement This equipment has been tested and found to comply with the limits for a Class B digital device, pursuant to Part 15 of the FCC Rules. These limits are designed to provide reasonable protection against harmful interference in a residential installation. This equipment generates, uses, and can radiate radio frequency energy and, if not installed and used in accordance with the instructions, may cause harmful interference to radio communications.