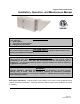
Compact Direct Fired Heater Installation, Operation, and Maintenance Manual FOR YOUR SAFETY If you smell gas: 1. Open windows. 2. Don’t touch electrical switches. 3. Extinguish any open flames. 4. Immediately call your gas supplier. FOR YOUR SAFETY The use and storage of gasoline or other flammable vapors and liquids in open containers in the vicinity of this appliance is hazardous.
TABLE OF CONTENTS WARRANTY ...................................................................................................................................................................................... 4 INSTALLATION ................................................................................................................................................................................. 5 Mechanical ................................................................................................
WARRANTY This equipment is warranted to be free from defects in materials and workmanship, under normal use and service, for a period of 12 months from date of shipment. This warranty shall not apply if: 1. The equipment is not installed by a qualified installer per the MANUFACTURER’S installation instructions shipped with the product, 2. The equipment is not installed in accordance with federal, state and local codes and regulations, 3. The equipment is misused or neglected, 4.
INSTALLATION It is imperative that this unit is installed and operated with the designed airflow, gas, and electrical supply in accordance with this manual. If there are any questions about any items, please call the service department at 1-866-784-6900 for warranty and technical support issues. Mechanical WARNING: DO NOT RAISE VENTILATOR BY THE INTAKE HOOD, BLOWER OR MOTOR SHAFT, OR BEARINGS, THE USE OF A SLING IS ADVISED. Site Preparation 1.
Curb and Ductwork This fan was specified for a specific CFM and static pressure. The ductwork attached to this unit will significantly affect the airflow performance. Flexible ductwork and square elbows should not be used. Also, transitions and turns in ductwork near the fan outlet will cause system effect and will drastically increase the static pressure and reduce airflow. The minimum fan outlet duct size is 12 inches x 12 inches with a recommended minimum straight duct length of 36 inches.
Installation with Exhaust Fan Indoor (INLINE) Installation 7
Gas Installation of gas piping must conform with local building codes, or in the absence of local codes, with the National Fuel Gas Code, ANSI Z223.1 (NFPA 54) – latest edition. In Canada, installation must be in accordance with CAN/CGA-B149.1 for natural gas units and CAN/CGA-B149.2 for propane units. WARNING: INLET GAS PRESSURE MUST NOT EXCEED PRESSURE INDICATED ON NAMEPLATE. SEE UNIT NAMEPLATE FOR PROPER GAS SUPPLY PRESSURE AND GAS TYPE. 1. Always disconnect power before working on or near a heater.
Electrical Before connecting power to the heater, read and understand this entire section of this document. As-built wiring diagrams are furnished with each fan by the factory, and are attached to the door of the unit. WARNING!! Electrical wiring and connections should be done in accordance with local ordnances and the National Electric Code, ANSI/NFPA70. Be sure the voltage and phase of the power supply and the wire amperage capacity is in accordance with the motor nameplate.
PSC (Permanent Split Capacitor) Motor Speed Control Some single phase direct drive fans contain speed controls that regulate the amount of voltage going to the motor. Specific PSC motors must be used in conjunction with speed controls. The speed control has a knob with an off position, and high to low range. At high speed, the speed control allows all of the line voltage to pass right to the motor. A minimum speed adjustment is provided to allow independent control of the minimum speed setting.
Motorized Intake Damper On units shipped with the optional motorized intake damper, a power transformer is supplied with the unit if the main incoming voltage is greater than 120V. The damper motor is automatically energized when the main disconnect switch is in the ON position. No external wiring to the damper motor is required.
Fan to Building Wiring Connection OPERATION Prior to starting up or operating the heater, check all fasteners for tightness. In particular, check the set screw in the wheel hub, bearings and the fan sheaves (pulleys). With power and gas to the heater OFF or prior to connecting ventilator to power, turn the fan wheel by hand to be sure it is not striking the inlet or any obstacles. Re-center if necessary.
Pilot Adjustment 1. Restart the fan and check the gas supply pressure at the inlet gas tap upstream of all electronic valves. The inlet pressure should be 5 in. - 14 in. w.c. If the inlet pressure is too high, install an additional pressure regulator external to the unit. 2. Open the field installed manual gas shut-off valve and the manual main gas valve on the combination gas control valve. 3.
Main Burner Adjustment Mod Valve Voltage Summary Volts DC Firing Mode 0 to 5 VDC Low Fire 5 to 15 VDC Modulation 15 to 20 VDC High Fire Manifold Pressure (in. w.c.) 1. Once the pilot has been properly established, the manifold gas pressure or temperature rise should be adjusted to jobsite conditions. The gas pressure regulator integral to the combination gas control is adjusted at the factory for average gas conditions.
Heater Start Up Summary Is incoming gas pressure 5"-14"? No Adjust incoming gas pressure. Yes Adjust pilot flame. Setting incoming pressure: Presure must be measured at first "T" in supply gas line before the first gas valve. Adjusting the pilot: To adjust the pilot flame, remove the cap from the pilot adjustment screw on the combination gas valve. Increase the pilot gas flow by turning the screw counterclockwise. Decrease the pilot gas flow by turning the screw clockwise. Lock unit into high fire.
Final Start Up Procedure 1. With the air and burner systems in full operation and all ducts attached, measure the system airflow. Motor sheave (pulley) is variable pitch, and allows for an increase or decrease of the fan RPM to adjust the airflow, as shown in the illustration below. For your convenience, a RPM chart is included in the following pages. 2. Once the proper airflow is achieved, measure and record the fan speed with a reliable tachometer.
Pulley Combination Chart Pulley Combination Chart Motor RPM 1725 1/3 to 1-1/2 HP AX BELTS MOTOR PULLEY 1VP50 Dd1 3.4 Dd2 4.4 Pd1 3.6 Pd2 4.6 Open BLOWER PULLEY 7 IN. BLOWER AK32H PITCH DIAMETER 5 4 1/2 4 3 1/2 3 2 1/2 2 1 1/2 1 1/2 0 3 3.2 1941 1995 2048 2102 2156 2210 2264 2318 2372 2426 2480 Dd1 2.8 Dd2 3.
Air Flow Switch There are both high and low airflow switches contained within one housing measuring the pressure drop across the burner. This is to insure that there is proper airflow (.15 in. w.c. to .80 in. w.c.) across the burner and proper combustion at all times. Both switches are wired in series and have single pole double throw (one common contact, one normally open contact, and one normally closed contact) switches that are ‘switched’ by air pressure.
High Temperature Limit One of the back up safety device is the high temperature limit switch. This switch is a mechanical thermostat that measures the temperature inside the unit downstream of the burner. If the factory-set temperature of 180°F is exceeded, it will signal the FSC to turn off the burner. This requires a manual reset of the high temperature limit. This insures that the discharge does not exceed 185°F.
Optional Remote Panel Circuit Power Supply From Heater "Power" Light Off No Power to Panel On Panel is Powered Blower Switch "Off" Position (3-Position Panels Only) "Auto" Nothing Happens No Power is Sent to Heater "Manual" Power is Sent to Heater to Open Damper (if provided) and Start Blower "Blower On" Light Power is Sent to Heater to Open Damper (if provided) and Start Blower Off Damper is not Open or FreezeStat has Detected Low Temperature Operation "Blower On" Light On Nothing Happens
Components The following image and list outlines the typical direct fired heater components and their functions. 11 12 10 18 2 3 9 19 23 8 20 4 13 5 21 16 6 14 1 22 15 7 17 1. Gas Inlet – Main gas supply connection 2. Motor Starter – Contactor with overload protection to start and protect motor. 3. Freeze-Stat Thermostat (Optional) – De-energizes blower motor if the discharge air temperature falls below the set point. 4.
Remote Panel Option The Remote Panel is a device used to control the operation of the heater from a remote location. This unit is available in both a “2 Position” or “3 Position” configuration and with or without a cooling output. It also will accommodate both the Maxitrol discharge temperature dial and the Maxitrol space sensing Selectrastat. It is important to understand the following Remote Panel controls and uses: 1 4 3 2 1.
Troubleshooting The following tables list causes and corrective actions for possible problems with direct fired heater units. Review these lists prior to consulting manufacturer.
Burner Troubleshooting Chart Problem Pilot Does Not Light/Stay Lit Potential Cause Main gas if off Air in gas line Dirt in pilot orifice Gas pressure out of range Pilot valve is off Pilot orifice fitting leak Excessive drafts Safety device has cut power Dirty flame sensor Remote panel in “Vent” mode No spark at igniter Main Burner Does Not Light (Pilot is Lit) Defective valve Loose valve wiring Defective pilot sensor Shut off valve closed Defective flame safety controller Pilot fails as main gas valves o
Remote Panel Troubleshooting Chart Light Indication No Lights Condition Power not available to Remote Panel POWER Light Only Proper unit Off Operation No power to motor starter POWER Light and BLOWER ON Light Proper Ventilation Operation No Power to Flame Safety Controller Improper Airflow POWER Light and BLOWER ON Light and BURNER ON Light Proper Heating Operation 25 Possible Cause Bad voltage to unit Main disconnect in “OFF” Position Circuit breaker tripped Bad main transformer No problem Manual
Troubleshooting Flowcharts Nothing Happens Is Overload tripped on starter? YES Reset & measure FLA of motor. Is it higher than rating? YES Adjust or change Pulley YES Check airflow across the burner, there should be between .15 and .65 differential pressure (in. w.c. NO YES Is outside air cooler than intake air thermostat setting? NO Is Freeze-Stat open? Blower runs but there is no heat Adjust or Replace NO Adjust pulley to achieve proper airflow.
MAINTENANCE To guarantee trouble free operation of this heater, the manufacturer suggests following these guidelines. Most problems associated with fan failures are directly related to poor service and maintenance. Please record any maintenance or service performed on this fan in the documentation section located at the end of this manual. WARNING: DO NOT ATTEMPT MAINTENANCE ON THE HEATER UNTIL THE ELECTRICAL SUPPLY HAS BEEN COMPLETELY DISCONNECTED AND THE MAIN GAS SUPPLY VALVE HAS BEEN TURNED OFF.
2 weeks after startup 1. Belt tension should be checked after the first 2 weeks of fan operation. Belts tend to stretch and settle into pulleys after an initial start-up sequence. Do not tension belts by changing the setting of the motor pulley, this will change the fan speed and may damage the motor. To retension belts, turn the power to the fan motor OFF. Loosen the fasteners that hold the blower scroll plate to the blower. Rotate the motor to the left or right to adjust the belt tension.
Start-Up and Maintenance Documentation START-UP AND MEASUREMENTS SHOULD BE PERFORMED AFTER THE SYSTEM HAS BEEN AIR BALANCED AND WITH THE HEAT ON (Warranty will be void without completion of this form) Job Information Job Name Address City State Zip Phone Number Fax Number Contact Purchase Date Service Company Address City State Zip Phone Number Fax Number Contact Start-Up Date Heater Information Refer to the start-up procedure in this manual to complete this section.
August 2013 Rev.
August 2013 Rev.
August 2013 Rev.