
Installation Guide

Carefully read these instructions before you start
work. Check whether the floor panels are
undamaged and fault-free, since the guarantee only
applies to hidden defects
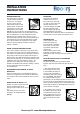
Important note: Place the
material in the room in which the
installation is to be done, without
opening the packing, and allow
it to acclimatise for at least 48
hours. The material should be
placed flat on the floor in the
horizontal position, at a distance
of at least 50 cm from the wall.
(see 1).
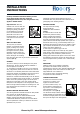
WHAT YOU WILL NEED
The only tools you need is a
Complaints concerning visible deviations will not be
entertained after floor panels have been installed. Ensure
good lighting when installing the floor.
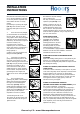
SKIRTING BOARDS
You may remove the existing
skirting boards and
reinstall them after installation
(see 3).
To enable the floor to shrink and
expand freely under the skirting
boards, end-piece and transition
skirting boards should be fixed on
the walls. Flat skirting boards can be glued to the floor
panels. Because wood naturally expands when it gets wet
and shrinks when it is dry, you should always leave a (an
expansion) gap between the wall and your Solidfloor, which
gap is equal to the thickness of your floor panel. For that
reason, floors with a thickness of
15 mm require an expansion gap of 15 mm.
These expansion gaps can be created by using special
spacer blocks, which should be placed every 40 cm. This
expansion gap is also needed for possible columns,
heating pipes and other fixed objects in the room in which
the installation will be done. Remove the spacers after 24
hours and replace them by resilient cork or rubber blocks/
strips.
SUBFLOORS
Solidfloor panels can be installed on practically
any subfloor. This subfloor should, however, be
permanently dry, hard, flat, clean, and have adequate load-
bearing capacity. A floor is flat if there is less than 2 mm
height difference over a distance of
one continuous meter. Unevenness exceeding
2 mm/meter should be levelled out.
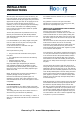
CONCRETE SUBFLOORS
A concrete floor should not contain
more than 2 % moisture (your
supplier can measure this for
you with a moisture meter). You
should install an underlayment on
top of this. A 3 mm underlayment
will be adequate from the
technical point of view (see 4).
You should also always install a moisture insulation foil (for
example building foil) underneath the subfloor. Joints
should be thoroughly sealed. The foil should extend behind
and up the full height of the skirting board.
> 0,2mm > 2mm
hammer, a fine-toothed (hand or > 1/16”
jig)saw, a folding ruler, a pencil,
a tensioning wire (cord) along
the length of the room, and an
installation set that consists of a
stop block, a stop iron and spacer
blocks. Wood glue for a floating
floor. Glue and a glue comb to glue the floor (consult your
supplier) (see 2).
STORAGE
The room in which you will be installing the floor panels
should be dry. The floor panels should be installed at a
room temperature of at least 16
°C. The relative air humidity in the room, to be measured
using a hygrometer, should not be less than 40 % and not
exceed 65 %. The humidity should also remain within these
limits during and after the installation. When the level of air
humidity is too high you should ensure that there is
sufficient air circulation and add humidity to the air with the
help of a humidifier during long dry periods, i.e. the heating
season. If the floor panels are going to be stored (in the
packing) for long periods of time, such storage should
always be at room temperature. The storage space should
have an average relative humidity not exceeding 65 %. The
floor panels should not be stored in a room with a high
level of humidity.
BEFORE STARTING INSTALLATION
Your flooring has been manufactured with the best possible
care. However, we would still advise you
to check the floor panels for visible deviations such as
damage, extreme color differences and shape
or dimensional deviations, if these are not in accordance
with the specification. Contact your dealer for the correct
specifications of your floor.
2
1
3
4
Flooors by LTL - www.ltlhomeproducts.com
INSTALLATION
INSTRUCTIONS