
Instructions / Assembly


Instructions for Use | 7
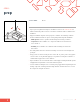
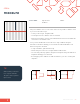
STEP 4:
attach & cut
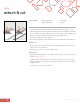
• Each tile has adhesive applied to the back during the manufacturing process. The
adhesive has a protective liner that has to be removed prior to installing the carpet tile.
• Once you have your design finalized and the tiles are ready to install, simply peel the
protective liner from the back and position snugly to the adjacent tile.
• Tiles must fit snugly, but not be compressed.
• We recommend cutting your tiles first before you remove the liner from the adhesive.
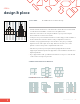
SIMPLE CUT?
• Measure and cut tiles from the back using a metal straight edge. Ensure arrows are
pointing in the correct direction.
• Be sure to cut your tiles on a protected hard surface.
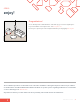
TRICKY CUT?
• We have plenty of helpful tips on floorigami.com if you are stuck. You can also call us
anytime at 1.844.742.7429.
• Looking for a little tip to skip tricky cuts altogether? Feel free to leave some of your
hard floor peaking out for a modern, trendy look to eliminate the need to go right up
against the wall.
• To finish up, just vacuum any loose fibers.
YOU’LL NEED: Metal straight edge
Sharp carpet knife
Safety gloves
Vacuum