
Operation Manual


62
GB
4. Hold the electric chainsaw rmly
with both hands, with the right
hand on the rear handle (
A
1)
and the left hand on the front
handle (8). Thumb and nger
must close securely over the han-
dles.
5. Turn on the electric chainsaw.
6. Activate the chain braking lever
(3), with running motor, with
the left hand. Chain should stop
abruptly.
7. Once the chain brake is work-
ing properly, release the on/off
switch (10) and the chain brake.
If the chain brake does not
function correctly, you must
not use the electric chainsaw.
A slack saw chain leads to
danger of injury.
Return the electric chainsaw
to our Service-Center for re-
pair.
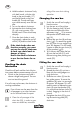
Checking the chain
lubrication
Check the oil level and the chain lubrica-
tion system before commencement of work.
• Switch on the chainsaw and hold it
above a bright background. The saw
must not touch the ground.
If an oil trace can be seen, the chainsaw is
working trouble-free.
If no oil trace can be seen clean the
oil passages or turn the chainsaw
to our Service-Center for repair.
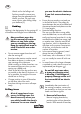
J
4. Clean the oil passages of the
chain bar (25), in order to guar-
antee a trouble-free, automatic
oiling of the saw chain during
operation.
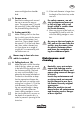
Changing the saw bar
F
1. Switch the saw off and unplug it
from the mains.
2. Lay the saw on a at surface.
3. Turn the fastening bolt (14) anti-
clockwise and loose the chain
adjustment ring (
A
13) to remove
the sprocket chain wheel cover-
ing (15).
4. Remove the saw bar (4) and saw
chain (
A
5). To remove the guide
bar (4), raise it to an angle of ap-
prox. 45 degrees. This will make
it easier to take the saw chain (5)
off the sprocket
(
G
23).
5. To t the new bar, place the bar
(4) onto the bar bolt (21) with
the tensioning plate pointing out-
wards (22).
Fitting the saw chain
G
1. Switch the saw off and unplug it
from the mains.
2. Spread the chain (5) out into a
loop with the cutting edges run-
ning clockwise .
3. Slide the saw chain (5) into the
bar guide groove. To mount the
guide bar (4), raise it to an angle
of approx. 45 degrees. This will
make it easier to replace the saw
chain (5) onto the sprocket (23).
It is normal that the saw chain (5)
is slack. Sagging in the chain is
normal.
4. Pre-tighten the chain (5) by turn-
ing the tensioning plate (22)
clockwise.