
Product Manual


Before You Start
Quick Guide
1
1-19
Note
All buttons can be used for multiple functions
triggered either by:
• half or full pressing: and and/or
• short or long press: , , , and .
The button function can be changed by changing
the settings in menu "Settings"
"Buttons".
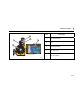
Preparation
You will need the following equipment:
• thermal imager
• rechargeable lithium-ion battery or ac adapter with
LEMO connector
• SmartView
®
software
• SD card
• card reader for SD-/SDHC cards
Start
To get started:
1. Provide for power supply by inserting the charged
rechargeable lithium-ion battery or by connecting the
ac adapter to the thermal imager (plug the 14-pin
connector into the right LEMO socket with the red dot
pointing to the top).
2. Remove the cover of the SD card slot, insert the SD
card into the card slot, and replace the cover.
3. Remove the protective cap from the lens.
4. Push . The imager turns on and the Fluke logo
displays during the boot process. At system
initialization the power-on LED initially flashes green
and then illuminates as steady green to indicate that
the thermal imager is ready-to-operate in Live mode.