DSP-4000 Series CableAnalyzer Getting Started Guide July 2001, Rev. 1, 5/03 © 2001-2003 Fluke Corporation. All rights reserved. Printed in USA. All product names are trademarks of their respective companies.
Accessing the Users Manual The DSP-4000 Series Users Manual is available on the DSP-4000 Series Manual CD included with your test tool. Contacting Fluke Networks Visit the Fluke Networks web site at www.flukenetworks.com. Send email to support@flukenetworks.com.
Table of Contents Title Introduction .................................................................................................................... Registration.................................................................................................................... Standard Accessories .................................................................................................... Safety and Operational Information .......................................................................
Setting Up Cable IDs ................................................................................................. Auto Increment ..................................................................................................... Auto Sequence ..................................................................................................... Selecting a List of Downloaded IDs (DSP-4300) .................................................. Testing Cabling ...............................................
DSP-4000 Series CableAnalyzers Introduction Registration The Fluke Networks DSP-4000 Series CableAnalyzers™ (hereafter referred to as “the test tool”) are hand-held instruments used to certify, test, and troubleshoot coaxial and twisted pair cabling in local area network (LAN) installations. The test tool combines test pulses with digital signal processing to provide fast, accurate results and advanced testing capabilities up to 350 MHz.
DSP-4000 Series Getting Started Guide • 2 NiMH battery packs (installed) • 2 Headsets • 1 DSP-4000 Calibration Module • 1 RJ45 to BNC adapter 1 DSP-4000SR, DSP-4100SR, or DSP-4300SR remote unit • 1 PC serial interface (EIA-232C) cable • 2 Carrying straps The following link interface adapters: • 1 LinkWare software CD ◊ With the DSP-4000 and DSP-4100: 2 DSP-LIA011 Basic Link Adapters for Cat 5E and 2 DSP-LIA012 Channel Adapters for Cat 6 • 1 DSP-4000 Series Manual CD (includes complete us
Safety and Operational Information Warning Safety and Operational Information To avoid possible fire, electric shock, personal injury, or damage to the test tool The international electrical symbols used on the instrument or in this manual are described in Table 1. • If this product is used in a manner not specified by the manufacturer, the protection provided by the product may be impaired.
DSP-4000 Series Getting Started Guide • • • Always turn on the test tool before connecting it to a cable. Turning the test tool on activates the tool’s input protection circuitry. Except when monitoring network activity, never connect the test tool to an active network. Doing so may disrupt network operation. • Never attempt to insert any connector other than an RJ45 connector into the RJ45 jack. Inserting other connectors, such as RJ11 (telephone) connectors, can permanently damage the jack.
Safety and Operational Information • Never operate portable transmitting devices during a cable test. Doing so might cause erroneous test results. • To avoid false test results, recharge the battery as soon as the low battery message appears. • When using the channel/traffic link interface adapter (DSP-LIA013), never run tests with cables connected to both the cable jack and the monitor jack. Doing so might cause erroneous test results.
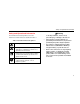
DSP-4000 Series Getting Started Guide Main Unit Features 12 DSP-4000 Side Plate DSP-4100/4300 Side Plate 14 13 6 17 18 7 1 5 4 2 2 4 FAULT INFO 3 8 EXIT TEST TALK ENTER 9 16 SAVE MONITOR SINGLE TEST AUTO TEST OFF 1 3 15 SETUP PRINT 10 SPECIAL FUNCTIONS 11 ank05f.eps Figure 1.
Main Unit Features Table 2. Main Unit Features Item A Feature Rotary Switch Description Selects the test tool’s modes. B T C F Automatically provides more specific information on the cause of an Autotest failure. D e Exits the current screen without saving any changes you made. E !@ #$ F G Display L R U D Starts the highlighted test or restarts the test last run. Provide functions related to the concurrent display. Softkey functions are shown in the display area above the keys.
DSP-4000 Series Getting Started Guide Table 2. Main Unit Features (cont.) Item O 8 Feature AC power indicator Description LED off, unit turned off Battery is not charging. The charger is not plugged in. LED off, unit turned on Battery is not charging. The charger is not plugged in or the test tool is running a test. When the test is finished, charging resumes unless the battery is already charged (>80%). LED flashing red Fast charge pending. Charging is beginning.
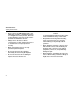
Remote Features Remote Features 5 2 1 PASS 6 7 8 9 10 TESTING FAIL 3 TALKING LOW BATTERY 4 TALK 11 ON 12 OFF ank06f.eps Figure 2.
DSP-4000 Series Getting Started Guide Table 3. Remote Connectors and Features Item Feature Description 1 RS-232C serial port A DB9P connector for loading software updates. 2 2.5 mm phone jack Connection for the headset supplied with the test tool. AC adapter/ charger jack Connection for the ac adapter/charger supplied with the test tool. AC power indicator LED off, unit turned off Battery is not charging. The charger is not plugged in. LED off, unit turned on Battery is not charging.
Remote Features Table 3. Remote Connectors and Features (cont.) Item Feature Description 5 LIA connector and latch Connector and latch for attaching link interface adapters. 6 Pass LED A green LED that turns on at the end of a test if no faults were detected. 7 Test LED A yellow LED that turns on when a test is in progress. 8 Fail LED A red LED that turns on at the end of a test if one or more faults were detected. 9 Talking LED A LED that turns on when the Talk mode is active.
DSP-4000 Series Getting Started Guide Permanent Link Interface Adapters (DSP-4000PL/4300) Caution To avoid damaging the adapter and to ensure maximum accuracy of test results, never pinch, kink, or crush the adapter’s cable. Never use the cable as a handle to pick up the DSP test tool. Follow the handling guidelines given in Figures 3 and 4. • Tighten the screw snugly with your fingers only. Do not overtighten. Doing so can damage the module or the end of the cable.
Setting Up the Test Tool Setting Up the Test Tool Powering the Test Tool Static sensitive device Personality module Before powering the test tool or remote with the NiMH battery pack, charge the battery for about 3 hours. To charge the battery, connect the ac adapter/charger to the test tool or remote and to ac line power. You can operate the unit on ac power while the battery charges. A fullycharged battery typically lasts at least 8 hours.
DSP-4000 Series Getting Started Guide Turning On the Test Tool Selecting a Language To turn on the test tool, turn the rotary switch from OFF to any one of the available modes. The power-up screen, which appears for about 3 seconds, shows the software, hardware, and test standards versions for the main and remote units. (The remote information is shown only if the remote is on and connected to the main unit.
Setting Up the Test Tool Table 4. Quick Configuration Settings SETUP Setting Description Test Standard and Cable Type Select the test standard and cable type you are using. Fiber optic cable testing requires a Fluke Networks DSP-FTA Fiber Test Adapter or a Fluke Networks DSP-FOM (Fiber Optic Meter; comes with the DSP-FTK). Report Identification Enter your company’s name, operators’ names, and site names. These names appear in the Autotest reports you save.
DSP-4000 Series Getting Started Guide Using the Link Interface Adapters The link interface adapters provide the correct connectors and interface circuitry for testing different types of LAN cabling. The adapters also allow for upgrades when new types of cable are developed. If your test tool includes the DSP-LIA101 Permanent Link Adapters, see “Permanent Link Interface Adapters” on page 12 for important handling information.
Setting Up the Test Tool Checking the Memory Auto Increment To check the available memory space, turn the rotary switch to AUTOTEST; then press $ Memory. The auto increment function generates IDs by incrementing the last alphanumeric character in the cable ID. To enable this function, select Enable under AUTO INCREMENT in SETUP. Formatting the Memory Card (DSP-4100/4300) Autotest results you save on a DSP-4100 or DSP-4300 test tool are stored on a removable memory card.
DSP-4000 Series Getting Started Guide Selecting a List of Downloaded IDs (DSP-4300) Diagnosing Cabling Problems On a DSP-4300 test tool you can select cable IDs from lists created with LinkWare software and saved on a memory card. See “Getting Started” under Help on the LinkWare toolbar for details on creating ID lists. If an Autotest fails, you can press F to see more specific information on the cause of the failure.
Saving Autotest Results Saving Autotest Results To save the Autotest results, press S. Depending on which cable ID function is enabled in SETUP, you can either create a cable ID or select an ID from a preconfigured list. Press S again after creating or selecting an ID. DSP-4000 A DSP-4000 test tool can store the results of 500 or more Autotests, depending on the test standard used. Results are stored in text-based format.
DSP-4000 Series Getting Started Guide LIMITED WARRANTY & LIMITATION OF LIABILITY Each Fluke Networks product is warranted to be free from defects in material and workmanship under normal use and service. The warranty period is one year and begins on the date of purchase. Parts, accessories, product repairs and services are warranted for 90 days.