
user manual
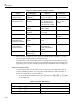
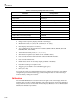

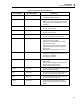
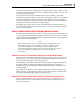
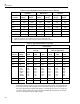
Table Of Contents
- 45 Dual Display Multimeter
- 1. Introduction
- 2. Getting Started
- 3. Operating the Meter From the Front Panel
- 4. Applications
- 5. Operating the Meter Using the Computer Interface
- Introduction
- Preparing the Meter for Operations via the RS-232 Interface
- Preparing the Meter to be Operated via IEEE-488 Interface
- Getting Started With An Installation Test
- How the Meter Processes Input
- How the Meter Processes Output
- Triggering Output
- Service Requests (IEEE-488 Only and Status Registers
- Computer Interface Command Set
- IEEE-488 Capabilities and Common Commands
- Function Commands and Queries
- Function Modifier Commands and Queries
- Range and Measurement Rate Commands and Queries
- Measurement Queries
- Compare Commands and Queries
- Trigger Configuration Commands
- Miscellaneous Commands and Queries
- RS-232 Remote/Local Configurations
- Sample Program Using the RS-232 Computer Interface
- Sample Programs Using the IEEE-488 Computer Interface
- 6. Maintenance
- Appendices
45
Users Manual
3-18
Table 3-11. Options Available Through List Editor
To Set Pushbuttons Options Annunciator
Touch Hold Minimum
Response Level
S then H
(THRESH)
"1" (5 % of range);
"2" (7 % of range); or
"HOLD"
"3" (8% of range)
Decibel Reference
Impedance in Ohms
S then I
(REF e)
2, 4,8,16,50,75,93,
110,124,125,135,150,
250, 300,500,600, 800,
900,1000,1200, or 8000
"dB" and “e“;
also "V" when
1000Ω
RS-232 Baud Rate S then R
(BAUD)
300,600,1200,2400,
4800, or 9600
"baud"
Parity options list
displayed
"E" (even), "O" (odd),
"no" (none)
"PAR" for parity
Echo Mode On or Off "Echo" and "On"
or "OFF"
IEEE-488 Address(If
IEEE-488 Interface
Installed and selected.)
S then J
(ADDR)
Valid addresses between
0-30
"IEEE"
RS-232 PrintOnly
Mode (If RS-232
Interface Selected)
S then T
(ADDR)
1,2,5,10,20,50,100, 200,
500,1000,2000,
5000,10000,20000, or
50000
"PRINT"
Trigger Type E and T
simultaneously
1,2,3,4, 5 (See Table 5-
14.)
"tri"
3. When you have scrolled to 16, press E to set the dB reference impedance. "16" now
becomes bright, indicating that it is the selected value.
This dB reference will remain selected until you change it (as described above), turn the
meter off, or reset the meter to the power-up configuration by pressing and holding down
E during power-up. (See "Changing the Power-Up Configuration" later in Chapter 3.)
Using the Number Editor
Use the number editor to set the relative base, or the low (LO) and high (HI) points for
compare (COMP) operations (see "Using the Compare Function" earlier in Chapter 3).
To use the number editor, proceed as follows:
1. To invoke the desired number editor, press S then press U , T , or K (REF
#). See Table 3-12
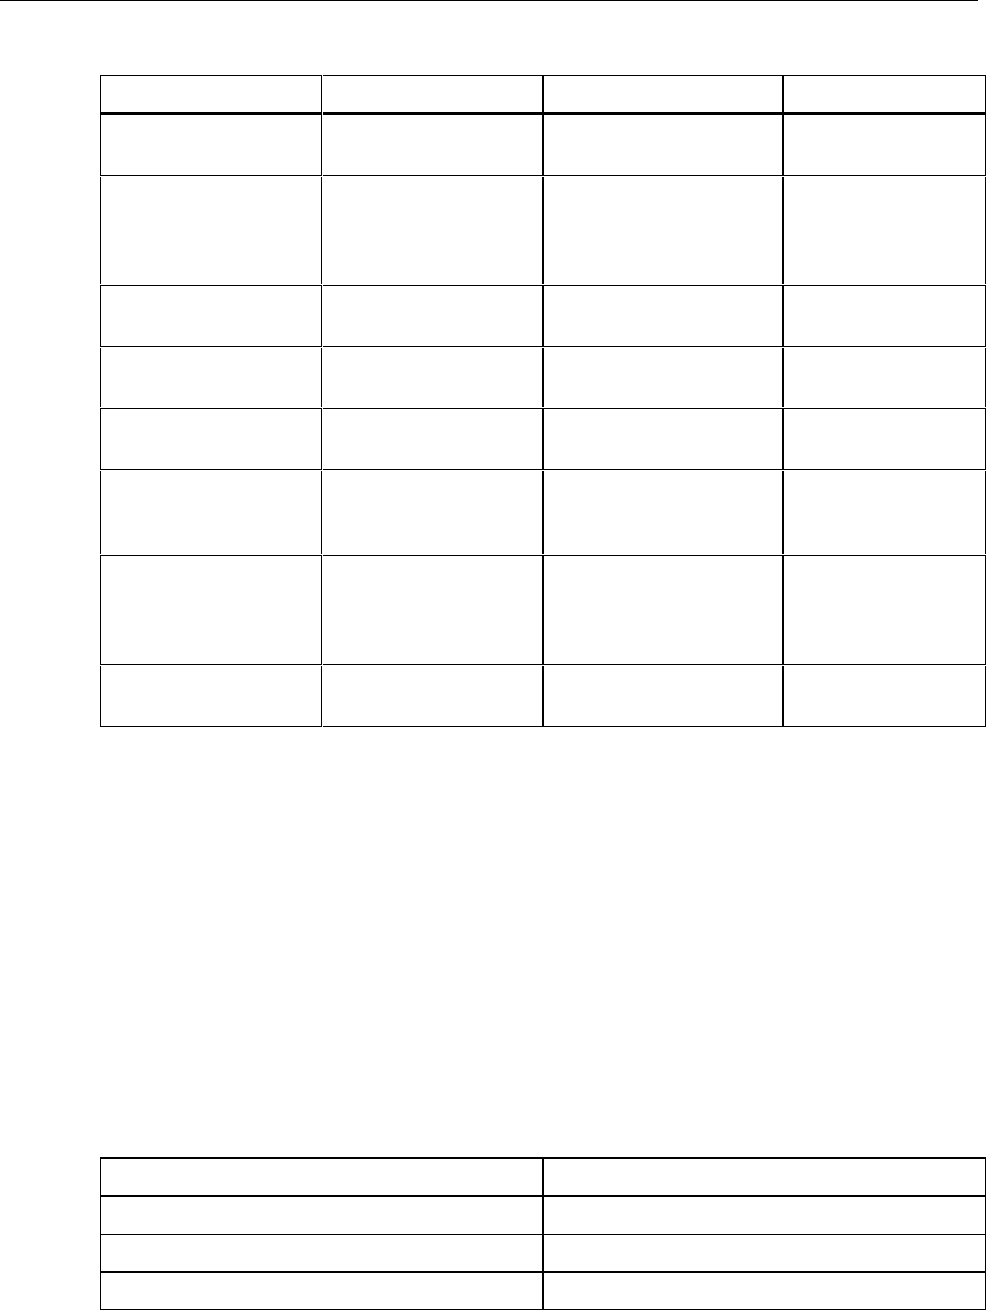
Table 3-12. Number Editor Options
Pushbuttons Number Editor Invoked On
S then T (LO) Low Point for Compare Mode
S then U (Hi) High Point for Compare Mode
S then K (REF #) Relative Base