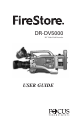
DR-DV5000 DV Video Disk Recorder USER GUIDE
FireStore DR-DV5000 User Guide FireStore DR-DV5000 User Guide WARNING: TO PREVENT FIRE OR SHOCK HAZARD, DO NOT EXPOSE THIS EQUIPMENT TO RAIN OR MOISTURE. which the receiver is connected. • Consult the dealer or an experienced radio/TV technician for help. IMPORTANT NOTICE (For U.S.Model) The serial number for this equipment is located on the bottom of the unit. Please write this serial number on your enclosed warranty card and keep it in a secure area. This is for your security.
FireStore DR-DV5000 User Guide IMPORTANT CAUTION RISK OF ELECTRIC SHOCK DO NOT OPEN CAUTION: TO PREVENT THE RISK OF ELECTRIC SHOCK, DO NOT REMOVE COVER (OR BACK). NO USER SERVICEABLE PARTS INSIDE.REFER SERVICING TO QUALIFIED SERVICE PERSONNEL. IMPORTANT SAFETY INSTRUCTIONS READ INSTRUCTIONS – All the safety and operating instructions should be read before the product is operated. RETAIN INSTRUCTIONS – The safety and operating instructions should be retained for future reference.
FireStore DR-DV5000 User Guide PAGE 3
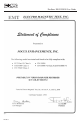
FireStore DR-DV5000 User Guide FOCUS Enhancements, Inc. warrants this product against defects in materials or workmanship as follows: For a period of TWO years from the date of purchase, FOCUS Enhancements, Inc. will repair or replace the unit, at our option, without charge for parts or labor. After the period of TWO years, you must pay all parts and labor charges. The limited warranty is extended only to the original purchaser.
FireStore DR-DV5000 User Guide Table of Contents . . . . . . . . . . . . . . . . . . . . . . . . . . . . . . . . . . . . . . . . .PAGE Warning and Safety Information . . . . . . . . . . . . . . . . . . . . . . . . . . . . . . . . . . . . . . . . . . . . . . . .1 Statement of Compliance . . . . . . . . . . . . . . . . . . . . . . . . . . . . . . . . . . . . . . . . . . . . . . . . . . . . .3 Statement of Warranty . . . . . . . . . . . . . . . . . . . . . . . . . . . . . . . . . . . . . . . . . . . . . . . .
FireStore DR-DV5000 User Guide SETUP MENU . . . . . . . . . . . . . . . . . . . . . . . . . . . . . . . . . . . . . . . . . . . . . . . . . . . . . . . . . . . .25 HDD Port . . . . . . . . . . . . . . . . . . . . . . . . . . . . . . . . . . . . . . . . . . . . . . . . . . . . . . . . . . . . . .26 Date Format . . . . . . . . . . . . . . . . . . . . . . . . . . . . . . . . . . . . . . . . . . . . . . . . . . . . . . . . . . . .26 Set Date & Time . . . . . . . . . . . . . . . . . . . . . . . . . . . . . . . .
FireStore DR-DV5000 User Guide INTRODUCTION • One (1) 3.5mm to DB9 Serial Cable Thank you for purchasing the Focus Enhancements FireStore DR-DV5000 DTE DV Video Disk Recorder for JVC full-size DV camcorders. DR-DV5000 adds a digital disk recorder/player for a powerful acquisition combination.
FireStore DR-DV5000 User Guide • Capture clips to hard disk at the acquisition stage - there is no need to capture later. • Simultaneously record to disk while recording to your camcorder's tape • Record clips to disk in DTE Technology based “edit-ready” file formats such as Raw DV, AVI Type 1, AVI Type 2, Matrox AVI, Canopus AVI, QuickTime and Avid DV-OMF. This means clips are immediately available to your NLE system without first having to transfer or convert the clips.
FireStore DR-DV5000 User Guide FireStore DR-DV5000 to any DV video device such as a mixer, camcorder or deck. Use FireStore’s random access capabilities to navigate quickly from clip to clip without having to spool forward and backward through tape. Use FireStore DR-DV5000’s trick playback modes such as multi-speed fast forward, incremental 1 frame per second slow motion and reverse play to present DV video in industrial, presentation or scientific applications.
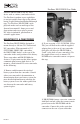
FireStore DR-DV5000 User Guide If you are using a digital battery system that passes battery life status to the camcorder, and are using a camcorder that is compatible with these systems, connect the following cables between DR-DV5000 and camcorder: Anton/Bauer Digital Battery System - Grey and Orange Cable IDX Syncron Digital Battery System - Blue and Red Cable 5) Once mounted, secure the two captive screws at the base of DR-DV5000 to the camcorder.
FireStore DR-DV5000 User Guide INSERTING AND REMOVING FIRESTORE FSHDD-1 FIREWIRE DRIVES The best way to get to know the FireStore FSHDD-1 FireWire HDD is by studying the supplied manual. The manual provides detailed instructions and illustrations. 7) Finally, connect a 6-pin to 4-pin FireWire cable from the 6-pin FireWire port on DRDV5000 marked “DV I/O” to the 4-pin FireWire port on the rear of the camcorder marked “DV”.
possible, hold the latch while at the same time grasping the FSHDD-1 drive handle and pulling the HDD out from DR-DV5000. USING EXTERNAL FIREWIRE DISK DRIVES In addition to using FireStore FSHDD-1 FireWire HDDs in the internal slot on DRDV5000, it is also possible to connect any FireWire disk drive to the HDD I/O port on DR-DV5000. Power a single FireWire disk drive on DR-DV5000 at any given time (either internal or external).
When used with a JVC GY-DV5000 series camcorder, DR-DV5000 communicates with the camcorder first before power up or shutdown. In cases where the camera power is switched to off when DR-DV5000 is connected and ON, the camcorder will wait until DR-DV5000 is powered down first before powering both down. Again, this prevents errors occurring on particular files. 3. Infrared Remote Sensor The DR-DV5000 infrared remote sensor is for use with the DR-DV5000 infrared remote commander.
FireStore DR-DV5000 User Guide 2. Record/Play Status Indicator In this space, DR-DV5000 will display a character that notifies the user what record or playback mode they are in. The characters displayed and their respective modes are listed on page 41 of this User Guide. Insert a FireStore FSHDD-1 FireWire HDD to the internal drive slot or connect a FireWire disk drive to the HDD I/O port. If a FSHDD-1 FireWire HDD comes from the factory, it should be configured and ready to use.
FireStore DR-DV5000 User Guide • SMPTE NTSC (or PAL) - Displays the external timecode value being generated by a camcorder or other device during a record session. Timecode mode has to be set to EXT TC for this function to operate (see page 28 of this User Guide). In playback mode, this displays the embedded SMPTE timecode value in a particular track. • UB NTSC (or PAL) - Displays the set user bit value in a particular clip.
FireStore DR-DV5000 User Guide Soft Key 2 Dedicated soft key for triggering mode/function that appears immediately above key in the DR-DV5000 LCD display. REVERSE : -30X, -10X, -2X, -1X (reverse play), -1/2X(-15fps), Still. FORWARD: Still, +1/2X (+15fps), +1X (play), +2X, +10X, +30X Forward Search Key Soft Key 3 and SHIFT Key Dedicated soft key for triggering mode/function that appears immediately above key in the DR-DV5000 LCD display. This key is also commonly used to enter the SHIFT mode.
FireStore DR-DV5000 User Guide REAR CONNECTOR PANEL Play Key Starts playback of the selected clip. By pressing and holding the SHIFT key plus the play button, DR-DV5000 will immediately go into reverse play mode. The rear connector panel features a 6-pin FireWire port for DV video I/O (A), a 6-pin FireWire port for connection of external FireWire drives or a computer (B), a 4-pin XLR DC power input (C) and a 3.5mm control cable input for RS232C or GPI (D).
FireStore DR-DV5000 User Guide item. If a sub-menu is available, that will open. If a sub-menu is not available, this command simply enables or selects the menu item. DR-DV5000 MENUS AND FUNCTIONS FireStore DR-DV5000 features a comprehensive menu system which allows a number of features to be initiated and setup. To enter the DR-DV5000 MAIN MENU, press SOFT KEY 1 while in STOP mode. Available items in the MAIN Menu are: 5. Scroll Arrow This command allows for scrolling through menu items.
FireStore DR-DV5000 User Guide Normal Record Standard and default record mode. When REC is triggered, DR-DV5000 begins standard recording. A single press of a STOP trigger will put DR-DV5000 into REC PAUSE mode. A second press puts DR-DV5000 into STOP mode. Retro Disk Record Mode RETRO DISK Record Constantly buffers video in a loop to a determined amount of space on the HDD so that when record is triggered, a retro time period can be added to the beginning of any clip.
FireStore DR-DV5000 User Guide Once RETRO DISK time is set, the user can exit the Menus and return to the Main Screen. An “L” will now appear next to the record symbol on DR-DV5000’s display. Pressing the REC trigger once will put DR-DV5000 immediately into RETRO DISK RECORD. Clips are being recorded to disk for X number of minutes in one minute increments (each as a separate track). The tally light will flash (as if the unit is in pause).
Snap When SNAP is selected and REC is triggered, a single frame is grabbed. SNAP can be used with LOCAL, and SPLIT SLAVE RECORD control modes. If SNAP is the RECORD MODE when power is cut to the unit or it is turned off, on re-boot, DR-DV5000 will be in NORMAL REC mode. Time Lapse is in CAM mode. To initiate, user simply inserts tape to the DR-DV5000 transport and ensures a disk is inserted with footage. If DRDV5000 is unable to perform DUMP TO TAPE, the DR-DV5000 LCD will display “DUMP INHIBIT”.
FireStore DR-DV5000 User Guide PLAY MODE MENU clips) in order from start to finish. At the end of the last clip, DR-DV5000 will begin to play from the beginning of the first clip again without a pause. It will stay in this state until stopped. Play All The DR-DV5000 PLAY MODE MENU allows different playback functions to be enabled. User simply selects the mode. Pressing EXIT will exit back to the menu screen.
FireStore DR-DV5000 User Guide AV/C AV/C is utilized in PLAYBACK and other situations where DR-DV5000 is controlled by an external FireWire device (such as a DV NLE system), connected to the “DV I/O port on DR-DV5000. NOTE: AV/C is NOT for use in DR-DV5000 RECORD MODES. Syncro Slaved In SYNCRO SLAVED mode, the camcorder and DR-DV5000 share the same REC trigger and DR-DV5000 is slaved to the camcorder. Once set and the user exits the CONTROL MENU, they will return to the default splash screen.
In SERIES RECORD mode, user simply selects the particular length tape they are using in the camcorder by pressing the down button. OFF disables the feature. EXIT will exit back to the default splash screen if SERIES RECORD is enabled. An “F” will appear in the camcorder’s viewfinder (GY-DV5000 series only) as well as the DRDV5000 front panel LCD. RETRO DISK RECORD and RETRO CACHE RECORD are not possible with SERIES RECORD.
Once in HDD Bypass mode, the following LCD display will appear: User simply selects the format. Highlighted format is current format after exit. Pressing EXIT will exit back to the menu screen. Selected format will stay set until user selects a different format (even if the power is cycled). SETUP MENU To Exit this mode, simply press the EXIT key. Be sure to properly dismount the FireWire drive from the computer system first before exiting HDD Bypass mode on DR-DV5000.
FireStore DR-DV5000 User Guide HDD Port The HDD Port setting allows the user to assign a function to the DR-DV5000 “HDD I/O” port. BYPASS mode is for making the internal disk drive available to an external device (such as a computer). HDD Mode is used when the “HDD I/O” port is used for connecting external FireWire disk drives. Pressing EXIT will exit back to the menu screen. Set Date and Time Allows for setting date and time for file naming purposes. Date and Time are set in different menus.
FireStore DR-DV5000 User Guide The Date and time form the basis of the DRDV5000 file naming structure for use of clips on a computer. On DR-DV5000, files are identified by TRACK and VOLUME (disk drive) number on the LCD. For instance, a file on the DRDV5000 LCD identified as 1-043 is clip number 43 on Volume (disk) 1. On a computer, files are identified by their base file name made up of DATE and TIME. For instance, a clip named 20030615-21094301.mov is a clip that began recording at 9:09:43PM on June 15th.
FireStore DR-DV5000 User Guide will display “OS UPGRADE ERROR”. It is necessary to restart your system once an OS upgrade is complete. Cam Type Allows user to select different timecode options for use when DR-DV5000 is recording. User simply selects the mode. Highlighted mode is current mode after exit. Pressing EXIT will exit back to the menu screen. EXT TC Mode - Whatever the incoming DV timecode, DR-DV5000 records it.
FireStore DR-DV5000 User Guide FREE RUN Mode - When the user enables FREE RUN mode, DR-DV5000 begins counting from the value stored. If the user uses the TC PRESET function, when the number is entered and the TC PRESET menu is exited, DR-DV5000 begins counting. NOTE: When the DR-DV5000 timecode mode is set to EXT TC and the camcorder time code mode is set to PRST/REC or REGEN, it is not possible to record timecode continuously when recording to disk only.
FireStore DR-DV5000 User Guide This menu allows the user to ENABLE or DISABLE the IR sensor on DR-DV5000. User simply selects the Menu Item. Highlighted mode is current mode after exit. Pressing EXIT will exit back to the menu screen. LCD Backlight Settings GPI Settings This menu allows the user to enable or disable the DR-DV5000 LCD back-light. Highlighted state is current after exit. Pressing EXIT will exit back to the menu screen. This menu allows the user to change the setting of the GPI port.
FireStore DR-DV5000 User Guide User simply selects the Mode. Highlighted mode is current mode after exit. Pressing EXIT will exit back to the menu screen. UTILITIES MENU Audio Correction Settings This menu allows the user to change the AUDIO CORRECTION setting on DRDV5000. User simply selects the Mode. Pressing EXIT will exit back to the menu screen. AUDIO CORRECTION modes is an advanced feature of DR-DV5000.
FireStore DR-DV5000 User Guide Organize OMF When files are recorded in the AVID OMF file format, this command automatically takes all the OMF and AIF audio files at the end of a recording session and places them into a folder on the disk drive named “OMFI MediaFiles”. When the disk is connected to a computer, this folder is recognized by Avid Xpress DV’s Media Tool feature enabling direct import of files into the Avid timeline. Delete Clip With this function, it is possible to delete the selected clip.
FireStore DR-DV5000 User Guide To exit from partition, press either NO or EXIT. To continue with partition, press the YES key. WARNING: PARTITION ERASES ALL DATA ON THE DISK DRIVE! To exit from the warning screen, press either NO or EXIT. To begin the format, press the YES key. Once complete, the disk drive is ready for use with DR-DV5000. Repair Disk FireStore DR-DV5000 utilizes a FAT32 format type. If you are using a non-FAT32 formatted drive, see the section on Partitioning a volume.
Factory Reset If an error is found, the user will be prompted to repair the file. File repair only takes a few moments to complete in most cases. When this function is selected, DR-DV5000 will revert all settings and values back to their factory default state. Pressing YES will start factory reset. Pressing EXIT or NO will exit from menu. Warning: Factory Reset is not un-doable!!! The following screen will display when complete: CURRENT CLIP does a similar function, but on the selected clip only.
FireStore DR-DV5000 User Guide Rec Format: • DEFAULT REC FORMAT: AVI TYPE 2 Setup: • HDD PORT -> HDD • DATE FORMAT -> MM/DD/YY • SET DATE&TIME : GETTING FIRESTORE RECORDED CLIPS ONTO A COMPUTER SYSTEM Once you have recorded clips to your FireWire disk drive using FireStore, it is possible to use those clips in most computer based DV NLE systems. • DATE: 07/24/03 • TIME: 12:00:00 • OS VERSION NO.
FireStore DR-DV5000 User Guide Mounting FireWire Disk Drives to Windows XP, 2000, 98SE and ME Computer Systems On a Windows based computer system, simply double click the My Computer icon on the top left hand corner of the desktop. You will see the following window: Locate your FireWire disk drive. This will probably be labeled (E:), (F:), (G:) etc. (drive C: is usually your computer’s main disk drive). Once located, double click on the FireWire disk drive.
FireStore DR-DV5000 User Guide files simultaneously; an OMF video file and two separate AIF audio files. On the computer’s desktop, the files will look like this... On the FireStore DR-DV5000, the video file (OMF) and the audio files (AIF) appear as one track. If you delete an Avid DV OMF file, FireStore will delete the audio and video portions at the same time.
FireStore DR-DV5000 User Guide Dismounting FireWire Disk Drives from Windows XP, 2000, 98SE and ME Computer Systems drive’s documentation for more information). When mounted, your FireWire disk drive should appear on the computer’s desktop: Once you have completed working with your disk drive on a Windows XP, Windows 2000, Windows 98SE or Windows ME computer system, you must first dismount the drive before unplugging it.
FireStore DR-DV5000 User Guide you must first dismount the drive before unplugging it. To do this, simply select the disk drive on the computer’s desktop. It will be marked with a PC symbol. Once selected, drag the drive into the trash. This will then dismount the particular disk drive. See Below: They both feature the following keys DR-DV5000 REMOTE CONTROL COMMANDERS Two remote control commanders came with your DR-DV5000.
FireStore DR-DV5000 User Guide TECHNICAL SPECIFICATIONS Input/Outputs • DV Video I/O - 25Mb/s (1 x 6pin IEEE- 1394a) • External HDD I/O - up to 400Mb/s (1 x 6pin IEEE-1394a) • Slot Internal HDD I/O - up to 400Mb/s (1 x 6pin IEEE-1394a) • GPI & RS232C Control (1 x 3.5mm mini jack) Power • 2-wire AMP Connection (from Battery-Camera) • Anton/Bauer Digital Battery and IDX Syncron Pass Thru • 4-pin XLR DC input • 10V to 17V, 7.5W Physical Specification • 2.5lbs (1.
FireStore DR-DV5000 User Guide DR-DV5000 RECORD AND CONTROL LCD AND CAMCORDER VIEWFIDER DISPLAY MODES When used with a JVC GY-DV5000 series camcorder, it is possible to monitor DR-DV5000 status in the camcorder’s viewfinder (EVF) and on the LCD display. When DR-DV5000 is connected to a GY-DV5000 and powered, a small “DD” or “CF” icon will appear in the top right side of the camcorder EVF and LCD. Next to this will be four characters which will appear like “092S”.
FireStore DR-DV5000 User Guide NOTES PAGE 42
FOCUS Enhancements, Inc. 1370 Dell Ave. Campbell, CA. 95008 USA MANL-0908-02 Telephone: 408 866-8300 Fax:408 866-4859 www.FOCUSinfo.