Washing machine WE 1400 Operating Instructions
Dear customer, Please read this User Information carefully and keep it to refer to at a later date. Pass this User Information on to any subsequent owner of the appliance. The following symbols are used in the text: 1 Safety instructions Warning: Notes that concern your personal safety. Attention: Notes that show how to avoid damage to the appliance.
Contents Operating Instructions . . . . . . . . . . . . . . . . . . . . . . . . . . . . . . . . . . . . . . . . . . . . . . . . . . . . . . . . . . . . . 5 Safety . . . . . . . . . . . . . . . . . . . . . . . . . . . . . . . . . . . . . . . . . . . . . . . . . . . . . . . . . . . . . . . . . . . . . . . . . . . . . . . 5 Switching on the appliance for the first time – setting the language . . . . . . . . . . . . . . . . . . . . . . . . . . . 6 Description of the appliance . . . . . . . . . . . . . . .
Installation and connection instructions . . . . . . . . . . . . . . . . . . . . . . . . . . . . . . . . . . . . . . . . . . . . 33 Safety information for the installation. . . . . . . . . . . . . . . . . . . . . . . . . . . . . . . . . . . . . . . . . . . . . . . . . . . . . 33 Installing the appliance . . . . . . . . . . . . . . . . . . . . . . . . . . . . . . . . . . . . . . . . . . . . . . . . . . . . . . . . . . . . . . . . Transporting the appliance . . . . . . . . . . . . . . . . . . . . . . . .
Operating Instructions 1 Safety Prior to using for the first time • Follow the ”Instructions for installation and connection”. • If the appliance is delivered in the winter months when there are minus temperatures: Store the washing machine at room temperature for 24 hours before using for the first time. Correct use • The washing machine is only designed for the washing of normal domestic laundry at home. • Additions or modifications to the washing machine are not permitted.
Switching on the appliance for the first time – setting the language When switching on the appliance for the first time you should be sure to set the language in which you want the indicators in the display to appear. 1. Press the control knob. The appliance is now switched on. The languages that can be chosen will appear in the display. In the factory the language is pre-set to German. Important: If the display is not showing any languages, the appliance has been switched on before.
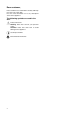
Description of the appliance Control panel with display Drawer for detergent and conditioner Rating plate (behind door) Door Three screw feet (height adjustable); rear left: Automatic foot Drain pump cover 7
Control panel with display LINEN-EASY-C. 60°C 1400 RPM START 60° 1400 OPTIONS 10:17-12:16 Fî LINEN-EASY-C.) ENERGY SAVING COTTONS DELICATES WOOLENS H Control knob Display Buttons Indicators in the display Symbol row shows options selected and extras Information panel shows programme, temperature and spin speed Current time end time of selecLINEN-EASY-C. 60°C ted programme 1400 RPM 10:17-12:16 START 60° 1400 OPTIONS 8 Fî LINEN-EASY-C.
Main control features Control knob Switching the appliance on and off Press the control knob to switch the appliance on and off. Highlighting You can highlight the entries on the right of the display by turning the control knob. WOOLENS 40°C 1200 RPM START 40° 1200 OPTIONS 10:17-10:54 î LINEN/EASY-C. ENERGY SAVING COTTONS DELICATES WOOLLENS H( Cancelling settings If you would like to cancel settings that have been made by mistake, switch the appliance off and on again using the control knob.
Programme overview Options Spin speed TIME SAVING 2,5kg RINSE HOLD DELICATES 40, 30, COLD • 1000/800/ 600/400 5kg 1200 COTTONS 95 1400 5kg PRE WASH ENERGY SAVING3) STAIN • GENTLE WASH 5kg DELAY START QUICK LINEN/EASY-CARES 60, 50, 40, 30, COLD VERY QUICK max.
Use/Features General programme for coloured and easy-care items made of cotton/linen as well as for easycare mixed fibres and synthetics. The wash programme is adjusted according to the different fabric types and load sizes. If loading only with easy-care washing, do not load more than 3 kg. Energy-saving and water-saving programme which washes at 60°C for lightly to normally soiled whites/coloureds made of cotton/linen. Programme for normally to heavily soiled whites made of cotton/linen.
Options Spin speed SPIN 5kg • STARCH 5kg • DRAIN 1) A 10 litre bucket contains approximately 2.5 kg of dry washing (cotton). 12 • • • • • • • • RINSE HOLD • 1400 PRE WASH 1000/800/ 600/400 • STAIN DELAY START VERY QUICK 2,5kg 1200 SHORT SPIN QUICK max.
Use/Features Drain and short spin after a rinse hold, or separate short spin of handwashed delicates, woollens, silk. Drain and spin, e.g. after a rinse hold, or separate spin for hand-washed cottons/linens and easycares. Separate starching, conditioning, stiffening, treating of damp washing. Caresymbols1) IKN QLH JMO JMO IKN Draining of the water after a rinse hold. 1) The figures in the care symbols indicate the maximum temperatures.
Before the first wash Setting the time So that the current time and the end of the programme are correctly displayed, please check the display and set the current time, if necessary. (See “Setting extra options: Timer”.) Carrying out a wash programme prior to first use Before doing your first wash, run a washing cycle without any washing in the machine (programme LINEN/EASY-C. 60°, option TIME SAVING/VERY QUICK, use approx. 1/4 measuring cup of washing powder).
Running a washing cycle Switching on the appliance Press the control knob. The appliance is now switched on. Setting a programme 1. Highlight the desired programme, e.g. DELICATES. DELICATES 40°C 1200 RPM 11:25-12:36 î START 40° 1200 OPTIONS LINEN/EASY-C. ENERGY SAVING COTTONS DELICATES( WOOLLENS H Changing the temperature 2. Press the temperature key repeatedly, until the desired temperature appears, e.g. 30°C. DELICATES 30°C 1200 RPM 11:25-12:36 î START 30° 1200 OPTIONS LINEN/EASY-C.
Selecting options You can select different options on top of the programme that has been selected. Only options that can be combined with the programme that has already been selected will be offered. TIME SAVING Q DELAY START GENTLE WASH S STAIN F PRE WASH V Shortened wash programme for more lightly soiled washing. The start of a programme can be delayed in steps of 30 minutes to a max. of 20 hours.
GENTLE WASH/STAIN/PRE WASH 1. Press the OPTIONS key. 2. Use the control knob to highlight PRE WASH. 3. Press the SELECT key. The V symbol appears in the display. DELICATES 40°C 1000 RPM START SELECT BACK 11:25-12:36 ç TIME SAVING DELAY START STAIN PRE WASH( EXTRAS Opening the door/Loading the washing 1. To open the door: carefully pull the handle on the door. 2. Unfold the washing and load it loosely into the machine. Mix large and small items.
Adding detergent/ conditioner Important: Only use detergents/conditioners that are suitable for use in domestic washing machines. Add detergent/conditioner in accordance with the detergent/conditioner manufacturer’s instructions. Observe instructions on the packaging. The amount of detergent used depends on: – the washing’s degree of soiling, – the load size – the hardness of the tap water. Water softener should be used from water hardness range 2 (=medium).
Starting a programme 1. Check that the water tap is open. 2. Press the START key. The wash cycle is started. DELICATES 30°C 1200 RPM START 30° 1200 OPTIONS 11:25-12:36 î LINEN/EASY-C. ENERGY SAVING COTTONS DELICATES( WOOLLENS H Programme progress While the programme is running, the display shows among other things: – each stage of the programme as it progresses, e.g.
Washing cycle complete/ Removing the washing At the end of the programme PLEASE TAKE OUT THE CLOTHES appears in the display. As soon as the O§ symbol appears, the door can be opened. 1. Open the door using the handle. 2. Remove the washing. 3. Switch off the appliance. If Rinse Hold has been selected: 1. Press the START key. The washing will be spun. (Reduce spin speed if required.) DELICATES 30°C RINSE HOLD 11:25-11:29 N§ START RINSE HOLD ###################### RINSE H.
Setting extra options Independent of any programme you can set different basic settings. These basic settings will permanently remain active until they are deselected again. MEMORY 1, 2, 3, 4 ADD RINSE P GENTLE SPIN LANGUAGE TIMER VOLUME Frequently used programme settings can be stored. The stored programme setting can then be selected like a normal programme. There are a total of four memory positions available.
If MEMORY 1 is highlighted: 8. Press the SAVE key. The programme setting is stored as M1: LINEN/ EASY-C. 9. Then press the BACK key 3 times. MEMORY LINEN/EASY-C. 40°C §§§§ §§§§§§ 1200 Sé SAVE MEMORY 1( MEMORY 2§ MEMORY 3§ MEMORY 4§ BACK Clearing a stored programme setting 1. Press the OPTIONS key. 2. Press the EXTRAS key. MEMORY is highlighted: 3. Press the SELECT key. EXTRAS ì SELECT BACK 4. Use the control knob to highlight MEMORY 1. 5. Press the CLEAR key.
LANGUAGE 1. Press the OPTIONS key. 2. Press the EXTRAS key. 3. Use the control knob to highlight LANGUAGE. 4. Press the SELECT key. 5. Use the control knob to highlight the desired language, e.g. ENGLISH. 6. Use the SELECT key to store the selected language. 7. Press the BACK key 3 times. EXTRAS LANGUAGE Í SELECT DEUTSCH ENGLISH( ITALIANO FRANÇAIS BACK TIMER 1. Press the OPTIONS key. 2. Press the EXTRAS key. 3. Use the control knob to highlight TIMER. 4. Press the SELECT key. 5.
Child safety device When the child safety device is set, the door can no longer be closed. Setting the child safety device: Use a coin to turn the knob (on the inside of the door) in a clockwise direction as far as it will go. 1 Warning! The knob must not be sunk-in after being set, otherwise the child safety device is not active. The knob must stand proud as shown in the illustration. Releasing the child safety device: Turn the knob anti-clockwise as far as it will go.
Cleaning and maintenance Important! Do not use furniture care products or aggressive cleaners to clean the appliance. Wipe control panel and body with a damp cloth. Detergent dispenser drawer The detergent dispenser drawer should be cleaned regularly. 1. Remove the detergent dispenser drawer by pulling it firmly. 2. Remove the conditioner insert from the middle compartment. 3. Clean all parts with water. 4. Put the conditioner insert in as far as it will go, so that it is firmly in place. 5.
What to do if... Remedying small malfunctions yourself If one of the following fault messages is shown in the display during operation: – ATTENTION/PLEASE CLOSE THE DOOR – ATTENTION ERROR CODE (C1)/PLEASE OPEN THE TAP – ATTENTION ERROR CODE (C2)/PLEASE CHECK THE WATER DRAINAGE please have a look at the following table. After you have rectified the error, press the START key. If ATTENTION/PLEASE CALL YOUR LOCAL SERVICE FORCE together with an error code (e.g.
Problem Water is leaking out from under the washing machine. Possible cause Remedy The screw connection on the inlet hose is leaking. Screw the inlet hose in firmly. The drainage hose is leaking. Replace drain hose. The drain pump cover is not closed properly. Close the cover properly. Washing was caught in the door. Load washing carefully for the next wash. Emergency drain hose is leaking. Close off emergency drain hose properly. Softener was not washed in.
If the wash results are not satisfactory Washing is grey and scale is being deposited in the drum • • • • Too little detergent is being used. The right detergent was not used. Special soiling was not pre-treated. Programme or temperature was not correctly set. There are grey stains on the washing. • Washing soiled with ointment, grease or oil was washed with too little detergent. • It was washed at too low a temperature.
Carrying out an emergency drain 1 Warning! Before emergency draining, switch off the washing machine and remove the mains plug from the socket. Warning! The water that comes out of the emergency drain hose may be hot. There is a risk of scalding. Let the water cool before performing an emergency drain. 1. Open the plinth flap and remove it. 2. Take out the emergency drain hose. 3. Place a shallow container underneath it.
Drain pump The drain pump is maintenance-free. It is only necessary to open the pump cover if there is a malfunction and water is no longer being pumped out, e. g. if the pump wheel is blocked. Please make sure before loading the washing that there are no foreign bodies in the pockets or caught between the washing. Paperclips, nails, etc. that may have got into the washing machine with the washing remain in the pump housing (foreign body trap that protects the pump wheel).
Disposal 2 Packaging material 2 Old appliance The packaging materials are environmentally friendly and can be recycled. The plastic components are identified by markings, e.g. >PE<, >PS<, etc. Please dispose of the packaging materials in the appropriate container at the community waste disposal facilities. W The symbol on the product or on its packaging indicates that this product may not be treated as household waste.
Technical data 5 This appliance conforms with the following EU Directives: – 73/23/EEC dated 19.02.1973 Low Voltage Directive – 89/336/EEC dated 03.05.1989 EMC Directive inclusive of Amending Directive 92/31/EEC – 93/68/EEC dated 22.07.1993 CE Marking Directive Height x Width x Depth 850 x 598 x 603 mm Depth when door is open 980 mm Height adjustment approx. +10/-5mm Load (depending on programme) Max.
Installation and connection instructions 1 Safety information for the installation • This washing machine cannot be built-in. • Before using for the first time, check the appliance for damage sustained while it was being transported. Do not under any circumstances connect an appliance that is damaged. In the case of damage, please contact your supplier. • Before using for the first time, all parts of the transit packaging must be removed.
Installing the appliance Transporting the appliance 1 Warning! The washing machine is very heavy. Risk of injury. Be careful when lifting. • Do not lay the appliance on its front nor on its right side (as seen from the front). Electrical components may get wet. • Never transport the appliance without its transit packaging. Only remove the transit packaging when the appliance is in its place of installation. Transporting the appliance without its transit packaging can lead to damage to the appliance.
Removing the transit packaging Important! Before using the appliance for the first time, all parts of the transit packaging must be removed! Keep the transit packaging in a safe place, in case it is needed at a later date when the appliance is to be moved (e.g. moving house). 1. At the back of the appliance, open both hose clips and remove both hoses and mains cable. 2. Remove both hose clips from the appliance by jerking them hard.
6. Unscrew and remove two screws E using special spanner A. 7. Unscrew and remove four screws F using special spanner A. 8. Remove transit bar G. 9. Screw in the four screws F again. 10.Seal the two big holes using sealing caps B. Important! Press all sealing caps B (2 off) and C (1 off ) in firmly, so that they snap into place. (Splash protection). Where to install Important! The appliance must not be used in a room where there is a danger of frost.
Making the appliance level 3 Automatic foot: The rear foot on the left-hand side of your washing machine is built as a shock absorbing foot, which is why the appliance gives in the back left-hand corner if put under load. The automatic foot guarantees that the appliance does not move even at high spin speeds. Basically the automatic foot does not need to be set. The four feet of the appliance are pre-adjusted.
Electrical connection Details about the voltage, type of supply and the fuses required are to be found on the rating plate. The rating plate is next to the doorway. Connecting to the water supply Important! • This appliance must not be connected to the hot water system. • When connecting it, use only new hose kits. • Only connect the appliance to the drinking water supply. Rain water or water for industrial use may only be used if it fulfils the requirements of DIN1986 and DIN1988.
Water inflow A 1.50 m long pressure hose is supplied with the appliance. If a longer water inlet hose is required, only original hoses are to be used. The Customer Care Department stocks hose kits of different lengths. 3 Sealing rings are either inserted in the plastic nuts of the threaded hose fitting or are included as spare parts . Do not use any other seals. Important! All threaded hose fittings must only be tightened by hand. 1. Connect the hose with the right-angle connector to the machine.
Water drainage The maximum permitted difference between the height of the surface on which the appliance is installed and the water outlet is 1 metre. Only original hoses may be used to extend hoses. (A maximum of 3 m laid on the floor and then 80 cm vertically). The Customer Care Department stocks outlet hoses of different lengths. Draining water into a sink outlet Secure the outlet/sink outlet joint with a hose band clip (available from your dealer).
Guarantee Conditions 2 year warranty covering household appliances We would like to congratulate you on your purchase of a FORS product. You have made a good choice and selected a product of extremely high quality, which also rates excellently in the area of ecobalance. We provide a two-year warranty covering the operating ability and operational safety of this appliance insofar as we guarantee that the appliance is free from material defects and manufacturing defects.
Customer Service Centre FORS AG/SA Schaftenholzweg 10 2557 STUDEN Telefon: 032 374 26 26 Telefax: 032 374 26 70 www.fors.
Service In the event of technical faults, please first check whether you can remedy the problem yourself with the help of the operating instructions (section “What to do if…”). If you were not able to remedy the problem yourself, please contact the Customer Care Department or one of our service partners. In order to be able to assist you quickly, we require the following information: – Model description – Product number (PNC) – Serial number (S No.
105 176 614-01-210105-01 Subject to change without notice