Privilege Monitor User Guide FortiDB Version 3.2 www.fortinet.
FortiDB Privilege Monitor User Guide Version 3.2 December 19, 2008 15-32000-81364-20081219 © Copyright 2008 Fortinet, Inc. All rights reserved. No part of this publication including text, examples, diagrams or illustrations may be reproduced, transmitted, or translated in any form or by any means, electronic, mechanical, manual, optical or otherwise, for any purpose, without prior written permission of Fortinet, Inc.
Table of Contents Table of Contents What is Privilege Monitor? ...................................................................................... 3 Steps to Use PM ....................................................................................................... 4 Logging In........................................................................................................................... 4 Audit vs. No Audit...................................................................................
Table of Contents Exporting User-Defined Rules ..........................................................................................30 Importing User-Defined Rules ..........................................................................................31 Changing the Number of Violations Shown.................................................................32 Activating Privilege Checking and Checking Status .......................................... 33 Activating Privilege Checking ...............
What is Privilege Monitor? What is Privilege Monitor? FortiDB MA Privilege Monitor (PM) examines, on a near real-time basis, privilegesetting changes in selected databases.
Logging In Steps to Use PM Steps to Use PM Using PM generally involves these steps: 1 Logging in. For details about login, refer to the next section. 2 Creating a database connection. To create a database connection, refer to Administration Guide. 3 Connecting to your database. To connect to your database, refer to Administration Guide. 4 Setting a monitoring schedule To set a monitoring schedule, refer to Setting Schedules section. 5 (Optionally,) enabling email-report recipients.
Steps to Use PM Audit vs. No Audit In order to login to Privilege Monitor, take the following steps: 1 Enter your assigned user name. 2 Enter your assigned password. 3 Click the Login button. You will be presented with the application screen that gives access to the modules you are assigned. 4 Click the Go button on the Privilege Monitor line to proceed into the PM module. By default, if you stop using PM for 30 minutes or more, you will need to login again in order to use the system.
Audit vs. No Audit Steps to Use PM Audit vs. No Audit (snapshot) Method of Data Retrieval No Audit Method of Data Retrieval No Audit (snapshot) method takes snapshots of system tables in order to alert you about any activity which results in changes to these tables. For this method, target-database access is limited to a defined interval or 'guard cycle'. Access within this interval is not captured by FortiDB MA and, consequently, does not generate alerts.
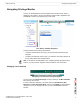
Steps to Use PM Navigating Privilege Monitor Navigating Privilege Monitor You can use Privilege Monitor via the Graphical User Interface (GUI), which is explained in this Guide, or via the command-line interface that is explained in the FortiDB MA Command Line Interface (CLI) User Guide. Tree, Button, and Menu Navigation The GUI consists of two side-by-side windows: • Located on the left side of the screen, you will a find hierarchical tree-style navigator.
Navigating Privilege Monitor Steps to Use PM Figure 40: Password Change Dialog Box Please refer to the Accoun and Password Management in the Administration Guide for further information about User Administration. ABOUT FortiDB MA Button The ABOUT FortiDB MA button takes you to a web page with FortiDB MA contact information, including that for technical support. This button is on most FortiDB MA screens.
Steps to Use PM Navigating Privilege Monitor Database Contact Information Database Contact Info Screen You can invoke the Database Contact Info screen from the Help -> Database Contact menu. The database details given are: • Database Connection Name • Server Name/IP Address • Database Name • Region • Division • Application Name • Database Location • Business Unit • Usage • Contact Information for two DBAs. FortiDB Version 3.
Setting Schedules Configuring PM Configuring PM There are three general parts of Privilege Monitor to configure: • Schedules • Receivers for Alert Email • Guarded Items Setting Schedules Scheduling is configured based upon two criteria: • The type of time source to use for scheduling: timer- or calendar-based. For a timer-based schedule, you set a time interval for the monitoring. For a calendar-based schedule, you choose to have the monitoring run at a specific day and/or time.
Configuring PM Setting Schedules Setting the Scope for a Schedule In order to configure a module- or database-level schedule, use the Set Defaults -> Module Schedule Settings menu or Set Defaults -> Database Schedule Settings menu. In order to configure a Guarded Item-level schedule, click on the Set Policies -> Schema Objects menu. (Alternatively, the Set Policies -> User-Defined Rule menu), and then click on the Guarded Item-level Schedule icon in the row which contains the Guarded Item of interest.
Setting Schedules Configuring PM 3 Click the Delete Timer button in order to delete either the Interval or Time to start scanning settings. Setting a Randomized Interval Setting a Randomized Interval In order to make it difficult to predict your monitoring times, you can also set a monitor-reporting schedule that, while dependent on your chosen Interval value, will not run exactly that often.
Configuring PM Configuring Receivers for Alert Emails Setting a Calendar-based Schedule Set Module Schedule Setting Screen For a Calendar-based Schedule: 1 Click on the [Add Schedule] button at the bottom of the Module Schedule Settings screen. 2 Specify the monitoring days and/or times you want. In the example shown, we are setting up a schedule for the monitoring to occur each week on Saturday at 2 am.
Setting Guarded Items Configuring PM Setting Guarded Items This section explains how to enable/disable Guarded Items, and change Guarded Item specific settings. This section also explains two types of Guarded Items: • System Views • User-Defined Rules (UDR) Enabling Guarded Items You can enable or disable your Guarded Items and their associated settings either together or on a Guarded Item specific basis.
Configuring PM Setting Guarded Items Enabling and Disabling rules Clicking the [Enable Item(s)] or [Disable Item(s)] buttons at the button will then affect the Guarded Items you have chosen. Changing a Guarded Item-Specific Schedule Setting Schedule The process for setting schedules at the module-, database-, and item- level is the same. Please see Setting Schedules for a discussion of this topic.
Setting Guarded Items Configuring PM Changing a Guarded Item-Specific Severity Level Changing a rule Severity Level In order to change a Severity level: 16 1 Click on the arrow to the right of the drop-down box in the Severity column for the particular Guarded Item of interest. 2 Choose a different Severity level. FortiDB Version 3.
System Views Setting Guarded Items System Views System Views (SQL Server example) System Views vary by RDBMS. Each database type will display a different list. For example, you can monitor Column Privileges as shown in the SQL Server screenshot above. The following tables describe RDBMS specific System Views. Note: There are also RDBMS-specific Database Connection parameters. FortiDB Version 3.
Oracle System Views System Views Oracle System Views System View Name Contents Description SYS.DBA_COL_PRIVS Column-level privilege granting SYS.DBA_PROFILES Resources (I/O, etc.) assigned to users Database roles Gives you the ability to monitor column-level privilege changes. For example, user SCOTT can grant SELECT privileges on a column of a table to a user, without letting that user SELECT on other columns in the same table. Lists all resources and their limits.
System Views Oracle System Views SYS.PROXY_USERS Users who can assume the identity of other users Contains information about which user can assume the identity of another. Proxy users are typically employed in an environment with a middle tier, such as a firewall. Note: SYS.DBA_TS_QUOTAS and SYS.PROXY_USERS always run with the snapshot (or No Audit) Data Retrieval Method, even if the database connection was defined with the Data Retrieval Method set to Audit.
DB2 (NT/Unix) System Views System Views DB2 (NT/Unix) System Views System View Name SYSIBM.SYSCOLAUTH SYSIBM.SYSDBAUTH SYSIBM.SYSINDEXAUTH SYSIBM.SYSPACKAGEAUTH Contents Column privileges Database system privileges Index privileges Package privileges Description Privileges Involved A package is a database object grouping related procedures, functions, associated cursors, and variables together. This view contains the right to DROP the index.
System Views DB2 (NT/Unix) System Views Table privileges SYSIBM.SYSTABAUTH CONTROL: Provides the privilege to DROP the table or view and GRANT table or view privileges to somebody else. ALTER: Provides the privilege to add columns, comments, primary key or unique constraint, in order to create triggers, and create or drop check constraints. DELETE: Provides the privilege to delete rows. INDEX: Provides the privilege to CREATE INDEX. INSERT: Provides the privilege to INSERT rows.
SQL Server System Views System Views SQL Server System Views System View Name Contents Column Privileges Members syscolumns sysmembers Object Privileges sysprotects Roles1/Groups sysobjects Server Roles sp_helpservrolememb er (a view) sysusers Users Description Privileges Involved Column-level privileges Role- and groupmembership assignments Column- and table-and other object-level privileges All objects that are accessible by the current user Default server roles assigned to users.
System Views Changing System Views Settings System Views are predefined views, created by the various RDBMS vendors, for viewing metadata objects and privileges without affecting the underlying system tables or catalogs. In general, System Views refer to user-related1 metadata objects. You can invoke the System Views screen from the Set Policies -> System Views menu.
Changing System Views Settings User-Defined Rules User-Defined Rules The User-Defined Rules (UDRs) feature allows you to write and manage rules specific to your organization. They can be written with SQL, or with a procedural language such as: • PL/SQL (Oracle) • Transact-SQL (SQL Server and Sybase) • SQL Procedural Language (PL) (DB2) You can access the User-Defined Rule Configuration screen with the Set Policies -> User-Defined Rule menu.
User-Defined Rules Adding or Creating a UDR Adding or Creating a UDR Adding a New UDR In order to create a UDR, select Set Policies -> User-Defined Rule, and then click on the [Add Item] button. UDR Item Settings Tab Form (Oracle example) In order to configure your UDR, you must fill in the following on the Item Settings tab: • The Name of this query • The Please type the SQL query below field.
Changing UDR Settings User-Defined Rules • PLSQL UDR Policy Settings Tab Form After you have entered values in the Item Settings tab fields: 1 Check the Policy Settings tab to insure you are getting number of violating records per alert you want. 2 Click the Save button. 3 If you would like to enable the UDR immediately, check the Enable this guard item checkbox. Note: After configuring the necessary UDR settings, Privilege Checking must be activated for alerts to be sent.
User-Defined Rules User-Defined Rules by RDBMS • Item Status (is it Enabled, and therefore to be monitored). • Guarded Item Description (the name of the item) For details on changing UDR (Guarded Item) Settings, please refer to Changing UDR Settings. User-Defined Rules by RDBMS This section explains User-Defined Rules by Oracle PL/SQL, Transact SQL for MS SQL Server, and SQL Procedural Language for DB2.
User-Defined Rules by RDBMS User-Defined Rules v_number := test; update scott.emp set sal=8000 where empno= v_number; end; Note: Oracle users must specify if they wish to use SQL or PL/SQL statements by selecting the appropriate button prior to saving and enabling this guarded policy.
User-Defined Rules User-Defined Rules by RDBMS end SQL Procedural Language User-Defined Rules (DB2) Adding a Procedural SQL Rule Note: FixPak 4 for DB2 UDB 7.2 AIX client must be installed in order to support this feature. Example select count(*) from mytable;@ begin atomic declare i int; set i = 100; if i > 1000 then signal sqlstate 'IPERR' Something is \1 set message_text = ' wrong'; end if; insert into mytable values(10); end@ select count(*) from mytable;@ 1.
Exporting User-Defined Rules User-Defined Rules Exporting User-Defined Rules Exporting a UDR PM allows you to export your UDRs to an XML file, permitting you to transfer UDRs from one FortiDB MA installation to another. From the User-Defined Rule Configuration screen, select one or more rules to Export and click the [Export Item(s)] button. Exporting Dialog Box You will then be asked if you would like to Open or Save the XML file. 30 FortiDB Version 3.
User-Defined Rules Importing User-Defined Rules XML File Containing a UDR (seen after clicking Open) If you elect to save, a standard Save As dialog box will appear Importing User-Defined Rules Import Item(s)] Button for Importing a UDR You can import UDR definitions from an XML file to utilize UDRs developed on another FortiDB MA system. From the User-Defined Rule Configuration screen, click the [Import Item(s)] button. FortiDB Version 3.
Importing User-Defined Rules User-Defined Rules Importing a UDR You will then be prompted to enter (or Browse to find) the name of the XML file, which contains your rule definition(s). Changing the Number of Violations Shown This feature is available for User-Defined Rules, but not System Views. Guarded Item Description Rule Policy Settings Tab In order to change the number of violations shown per alert message: 32 1 Click on the Guarded Item Description 2 Go to the Policy Settings tab.
Activating Privilege Checking and Checking Status Activating Privilege Checking Activating Privilege Checking and Checking Status In order to generate alerts for System Views, UDRs, Privilege Checking must be activated. Furthermore, your database must be Open and Running, not just Open.
Checking Status Activating Privilege Checking and Checking Status Checking Status The Status screen only displays information about databases that are Open, or Open and Running, but not those that are closed. The selected database is listed on the right end of the menu. You can invoke the Status screen from the Analysis -> Status menu.
Analyzing Alerts Alert Messages Analyzing Alerts Alerts warn you of potential security weaknesses in your database. Privilege Monitor offers three ways of detecting weakness: • Alert Messages • Privilege Summary • UDR Results Alert Messages The specific alerts you receive depend upon which System Views, and UDRs you have enabled. (Alternately, you can also get alert information via email. See Configuring Receivers for Alert Emails.
Alert Messages Analyzing Alerts If you want to delete only certain alerts, first check the Delete checkbox in the row of interest and then click on the Delete button. In order to delete all alerts at once, click on the Delete All button.
Analyzing Alerts Privilege Summary Privilege Summary Privilege Summary Screen (Oracle example) A Privilege Summary enables you to see, in one place, the Users and Roles/Groups that exist in a particular database, with the privileges assigned to each. You can invoke the Privilege Summary screen from the Analysis -> Privilege Summary menu. There are slight differences by RDBMS type: • Users is a distinction used for all RDBMS types. • Roles are used for all RDBMS types except DB2.
Privilege Summary Analyzing Alerts Assigned Privileges Screen (Oracle example) If you click on an individual user, role, or group on any Privilege Summary screen, you can get a list of the specific Object and System Privileges assigned—both directly and indirectly1. For example, when clicking on the AQ_ADMINISTRATOR_ROLE while connected to an Oracle database, you would see the screen above, populated by having used Directly Assigned Privileges setting.
Analyzing Alerts Oracle Privilege Summary • DB • Table • Index • Column • Package • Tablespace • Schema Oracle Privilege Summary Privilege Summary Screen (Oracle) The Oracle Privilege Summary screen shows the Roles and Users that have been granted privileges within the currently connected database. DB2 Privilege Summary Privilege Summary Screen (DB2) The DB2 Privilege Summary screen shows the Groups and Users that have been granted privileges within the currently connected database.
SQL Server Privilege Summary Analyzing Alerts SQL Server Privilege Summary Privilege Summary Screen (SQL Server) The SQL Server Privilege Summary screen shows the Roles and Users that have been granted privileges within the currently connected database. Sybase Privilege Summary Privilege Summary Screen (Sybase) The Sybase Privilege Summary screen shows the Roles and Users that have been granted privileges within the currently connected database. 40 FortiDB Version 3.
Analyzing Alerts UDR Results UDR Results UDR Results Screen (Oracle example) The purpose of this feature is to test individual User-Defined and Pre-Defined Rules. You can invoke the UDR/PDR Results screen from the Analysis -> UDR/PDR Results menu. PDR Violation Details (DB2 example) Clicking on the name of the rule will take you to another screen with more detailed violation information. FortiDB Version 3.
Server-Level PM Monitoring Appendix A: Server-Level Assessment, Reporting, and Policy Management for MSSQL Databases Appendix A: Server-Level Assessment, Reporting, and Policy Management for MSSQL Databases See the FortiDB MA Installation and Administration Guide for information on connection to your target database at the server, as well as, the database, level.
Appendix A: Server-Level Assessment, Reporting, and Policy Management for MSSQL Databases Server-Level PM Privilege Summary Server-Level PM Privilege Summary Server-Level Database Selection in Privilege Summary Once you have established a Server Level connection, you can then select which database, within that server, you are interested in monitoring. Note: In the figure above, the master database was not in the dss.serverlevel.excluded.mssql list.
Server-Level PM Privilege Summary Appendix A: Server-Level Assessment, Reporting, and Policy Management for MSSQL Databases Once you have selected a particular database within your server, you can get specific privilege information such as Directly Assigned user privileges for that database. Note: In the figure above, the northwind database was not in the dss.serverlevel.excluded.mssql list.
Appendix B: DB2-Audit-Based Auditing for DB2 UDB V8 Different Data Retrieval Methods Appendix B: DB2-Audit-Based Auditing for DB2 UDB V8 Specifying the Use of DB2 Audit on Database-Connection Screen This feature use of the DB2's DB2 Audit functionality, which insures capturing all transactions on the target-database machine, albeit at the expense of requiring an agent.1 With the previous FortiDB MA implementation, only a ‘snapshot’ methodology of capturing data for Privilege Monitor was possible.
Different Data Retrieval Methods Appendix B: DB2-Audit-Based Auditing for DB2 UDB V8 2 Define, and Open and Run, a database connection, which specifies the Audit method of data retrieval. 3 Configure guarded items 4 Get and analyze alerts. Setting Up and Starting the Agent See the Monitoring DB2 Chapter in the FortiDB MA Administration Guide. DB2 Audit-Based Agent Responsibilities See the DB2 Audit-Based Agent Responsibilities of “Monitoring DB2” in the FortiDB MA Administration Guide.
Appendix B: DB2-Audit-Based Auditing for DB2 UDB V8 Different Data Retrieval Methods Get and Analyze Alerts PM Alert Generated Using Audit-Based Data Retrieval When used with the Audit Data Retrieval method, PM generates alerts with the above format. SQL Statements Possibly Causing PM Alert If Fetch SQL Statements is also checked when creating your database connection, you can analyze a list of possible SQL statements that possibly caused the alert, as shown above.
Different Data Retrieval Methods 48 Appendix B: DB2-Audit-Based Auditing for DB2 UDB V8 FortiDB Version 3.
Index Index A ABOUT FortiDB MA button 8 Alert Messages 35 Alerts analyzing 35 Audit 5 Audit vs.
Index 50 FortiDB Version 3.