
Network Router User Manual

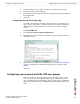
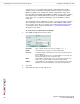
Table Of Contents
- Contents
- Introduction
- Configuring a FortiGate SSL VPN
- Comparison of SSL and IPSec VPN technology
- SSL VPN modes of operation
- Topology
- Configuration overview
- Configuring the SSL VPN client
- Configuring SSL VPN settings
- Enabling SSL VPN connections and editing SSL VPN settings
- Specifying a port number for web portal connections
- Specifying an IP address range for tunnel-mode clients
- Enabling strong authentication through security certificates
- Specifying the cipher suite for SSL negotiations
- Setting the idle timeout setting
- Setting the client authentication timeout setting
- Adding a custom caption to the web portal home page
- Adding WINS and DNS services for clients
- Redirecting a user group to a popup window
- Customizing the web portal login page
- Configuring user accounts and SSL VPN user groups
- Configuring firewall policies
- Configuring SSL VPN event-logging
- Monitoring active SSL VPN sessions
- Configuring SSL VPN bookmarks and bookmark groups
- SSL VPN host OS patch check
- Granting unique access permissions for SSL VPN tunnel user groups
- SSL VPN virtual interface (ssl.root)
- SSL VPN dropping connections
- Working with the web portal
- Index

FortiOS v3.0 MR7 SSL VPN User Guide
32 01-30007-0348-20080718
Configuring the SSL VPN client Configuring a FortiGate SSL VPN
4 Select v3.0 and then MR7.
This takes you to the page with firmware images for MR7.
5 Select SSL VPN Clients.
6 To download the SSL VPN MacOS client application, double-click on the client file
forticlientsslvpn_macosx_3.0.384.dmg.
The Mac mounts the disk image as ‘forticlientsslvpn’.
7 Double-click the forticlientsslvpn.pkg file inside the disk image and follow the
instructions.
The application installs the program ‘forticlientsslvpn’ in the Applications
folder
8 Unmount the disk image by selecting the disk image file
‘forticlientsslvpn_macos_3.0.nnn.dmg’ and dragging it into the Trash
(nnn refers to the build number).