DVD MULTITRACK RECORDER Owner’s Manual
DVD Multitrack Recorder DV824 CAUTION: CAUTION TO PREVENT ELECTRIC SHOCK, MATCH WIDE BLADE OF PLUG TO WIDE SLOT, FULLY INSERT. RISK OF ELECTRIC SHOCK DO NOT OPEN ATTENTION: POUR EVITER LES CHOCS ELECTRIQUES, INTRODUIRE LA LAME LA PLUS LARGE DE LA FICHE DANS LA BORNE CORRESPONDANTE DE LA PRISE ET POUSSER JUSQU' AU FOND. CAUTION: TO REDUCE THE RISK OF ELECTRIC SHOCK, DO NOT REMOVE COVER (OR BACK). NO USER - SERVICEABLE PARTS INSIDE. REFER SERVICING TO QUALIFIED SERVICE PERSONNEL.
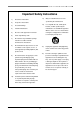
DVD Multitrack Recorder DV824 Important Safety Instructions 1) Read these instructions. 2) Keep these instructions. 3) Heed all warnings. 4) Follow all instructions. 5) Do not use this apparatus near water. 6) Clean only with dry cloth. 7) Do not block any ventilation openings. Install in accordance with the manufacturer's instructions. 8) Do not install near any heat sources such as radiators, heat registers, stoves, or other apparatus (including amplifiers) that produce heat.
DVD Multitrack Recorder DV824 Table of contents About this manual ...................................................................................................9 Precautions ..............................................................................................................9 Precautions of installation ...................................................................................10 Chapter-1: Introduction .................................................................................
DVD Multitrack Recorder DV824 Other connection ..............................................................................................................41 USB keyboard connection ..................................................................................................41 Chapter-5: Recording/playback ..........................................................................43 Basic audio recording ................................................................................................
DVD Multitrack Recorder DV824 Viewing linked audio files ..................................................................................................70 Locating to the beginning of the play list .........................................................................70 Locating to the end of the play list ....................................................................................70 Controlling the unit from a video editor ....................................................................
DVD Multitrack Recorder DV824 Chapter-7: Creating and editing ALE files (EDIT EDL FILE menu) ................99 Creating a new ALE file ..................................................................................................100 Adding audio file entries to an ALE file ........................................................................103 Viewing and editing audio file entries ..........................................................................105 Viewing audio file entries ............
DVD Multitrack Recorder DV824 Chase mode selection [Chase mode] ..............................................................................135 Chase offset setting [Chase offset] ..................................................................................136 Chase offset editing ...............................................................................................136 Chase offset trimming ...........................................................................................
DVD Multitrack Recorder DV824 About this manual This manual intends to be used as a guide for using the Fostex DV824 DVD multitrack recorder. This manual is written assuming that you have experience of using professional digital recorders and basic knowledge of digital recording. By reading "Chapter 1: Introduction" and "Chapter 3: Names and functions", you may roughly understand the outline of the DV824 and how to use the DV824.
DVD Multitrack Recorder DV824 • Do not drop the unit or give it a strong shock. The internal circuits, display, panels may be damaged. Handle the unit with great care because it is a precision machine. • To prevent possible electric shock and damage to the unit, do not remove the cover or reach the inside of the unit. • Do not give a strong shock to the LCD display. The liquid used inside the LCD display is toxic. If the liquid is spilled, do not suck it in.
DVD Multitrack Recorder DV824 Chapter-1: Introduction 11
DVD Multitrack Recorder DV824 Main features/functions • Equipped with an E-IDE 12-centimeter DVD-RAM drive. This drive ensures high-speed access and reliability, which only the optical disk system can afford. • The DVD-RAM disk format is conformed to "UDF Rev1.5", which ensures compatibility with personal computers. • The recording file format is conformed to the BWF interleave 1 file specification. When a file is imported to a DAW from the DV824, it can be separated to multiple mono files.
DVD Multitrack Recorder DV824 What is in the box Make sure that the box contains the following. If any of them are missing, please contact your dealer. • DV824 (x 1) • 12-centimeter DVD-RAM disk ( 4.7GB/Type 2) (x 1) • AC adaptor (Model AD-15C) (x 1) • Operation manual (this manual) (x 1) DV824 options and related Fostex products The following DV824 options and related products are available. Ask your local Fostex dealer or sale office for details about them such as prices, specifications, etc.
DVD Multitrack Recorder DV824 14
DVD Multitrack Recorder DV824 Chapter-2: Preparation before using the DV824 This chapter explains what you should do before using the DV824 for the first time, including power connection, internal clock setting and initial formatting of the DVD-RAM disk supplied with the unit. Table of contents Power (AC adaptor) connection .............................................................................................................16 Turning on the power ...................................................
DVD Multitrack Recorder DV824 Power connection Connect the supplied AC adaptor as shown below. : Only use the AC adaptor provided. Using another AC adaptor may cause damage of the unit due to the mismatch of the power voltage or polarity. Also make sure that the power of the unit is off when plugging or unplugging the AC adaptor connector.
DVD Multitrack Recorder DV824 Realtime clock setting The realtime clock is built in the DV824. The realtime clock data is used for date/time of creation of a file. By default, the realtime clock is set according to local date/time of the factory. Therefore, set the clock correctly according to your local date/time before using.
DVD Multitrack Recorder DV824 About recommended disks DVD-RAM disks used with the DV824 4.7GB Type 2 single-sided or 9.4GB Type 4 double-sided DVD-RAM disks can be used with the unit. When the unit is shipped, a 34.7GB Type 2 single-sided disk is supplied as standard. 4.7 9.4 GB GB SINGLE SIDED TYPE 2 DOUBLE SIDED 3X TYPE 4 3X REWRITABLE REWRITABLE PROTECT PROTECT : Use only DVD-RAM disks recommended by Fostex. For details about handling a disk, see the instructions of the disk.
DVD Multitrack Recorder DV824 The DVD-RAM drive of the unit can load following types of disks. Depending on the type of a disk loaded, the unit starts up differently as described below. If you set a disk with the type other than the following types, the unit automatically rejects it and opens the disk tray.
DVD Multitrack Recorder DV824 Initial format of a DVD-RAM disk To make recording/playback by the unit, you have to format a DVD-RAM disk in the UDF Rev 1.5 format. When loading an unused DVD-RAM disk, the unit recognizes the disk is not formatted and automatically goes to the second level of the "Format" menu item. On the "Format" second level screen, you can set the following four items before executing formatting. Drive Selects a drive for formatting.
DVD Multitrack Recorder DV824 The following description shows how to UDF-format an unused 4.7GB/Type2 DVDRAM disk which is supplied with the unit, leaving the four items above as their default settings. 1) Use the [MENU] dial to select "[EXECUTE]" and press the [ENTER/YES] key. The display changes to show the warning message (i.e. all disk data are gone by formatting the disk) and flashing "Are you sure?". 2) Press the [ENTER/YES] key again. The unit starts formatting the disk.
DVD Multitrack Recorder DV824 Adjusting display contrast The display contrast of the unit is adjusted suitably when shipped. If you want to change the contrast, follow the procedure described below. The following is assumed that the power of the unit is turned on and "--No disk--" is shown on the display. 1) Press the [SHIFT] key to turn on the [SHIFT] indicator, followed by the [TIME SEL/ CONTRAST ] key. The popup message as shown below appears on the display and you can now adjust the display contrast.
DVD Multitrack Recorder DV824 Chapter-3: Names and functions Front panel DVD RECORDER 0L 0 QUICK SET LTC 4 ACCESS 1 space 8 HD TC IN 12 SLATE TONE ABS 18 20 30 4 GHI POWER MIN USB (KYBD ONLY) EXIT/NO SHIFT CHASE LIST PLAY 2 3 4 60 GEN TIME SEL 5 6 7 PUSH MENU/ENTER/YES 6 MNO ALL INPUT SAFE/RDY DF 8 H -dB TR3 TR4 TR5 5 JKL EDIT EDL 40 1 SOLO TR2 TR1 PRE REC 3 DEF 16 DVD TR ODD- MONO EVEN TR7-8 TR5-6 TR3-4 MAX TR1-2 FILE SEL 2 ABC DRV/PAT M S 7 PQRS F 8 TUV 9
DVD Multitrack Recorder DV824 Front panel 9 1 2 3 4 DVD RECORDER 7 6 5 8 0L 0 QUICK SET LTC 4 ACCESS 1 space 8 HD TC IN 12 SLATE TONE ABS 18 20 30 4 GHI POWER USB (KYBD ONLY) MIN 27 2 3 4 60 GEN TIME SEL 5 6 7 CHASE LIST PLAY 5 JKL PUSH MENU/ENTER/YES 6 MNO H M S 7 PQRS F ALL INPUT 8 TUV SAFE/RDY 9 WXYZ CONTRAST REC END ABS 0 MARK/CUE LOCATE SKIP/CURSOR CLEAR 0 symbol OPEN/CLOSE 26 EXIT/NO SHIFT DF 8 -dB TR3 TR4 TR5 TR6 TR7 TR8 PHONES PRE REC 3 DEF
DVD Multitrack Recorder DV824 6) LCD display Shows audio file information, menu setting screens, etc. (see page 33 for details). 7) Time mode indicators The indicator of the current time mode is lit. 8) [QUICK SET/1, Space] key Pressing this key enters the quick setup mode. In this mode, you can directly select the setting items (INPUT, FRAME, CLK, FS/BIT, TC GEN, UP/DW and TRACK) shown on the Home screen (see page 44 for details). If SAFE/RDY is set to ON, you can also edit the NEXT file name.
DVD Multitrack Recorder DV824 12) [PRE REC/3, D, E, F] key Pressing this key turns on or off the Pre rec mode. While the Pre rec mode is on, the indicator lights and you can starts recording from the audio data stored in the buffer (see page 54 for details). When the display shows a screen for alphanumerical character entry, this key is used for entering "3", "D (d)", "E (e)" or "F (f)". 13) [CHASE/6, M, N, O] key Pressing this key turns on or off the Chase mode (see page 92 for details).
DVD Multitrack Recorder DV824 18) [SAFE/RDY/9, W, X, Y, Z] key Pressing this key switches the unit between the “record safe” and “record ready” modes. When recording status, a new audio file is created and the unit records an audio signal from the beginning of the file (ABS 0). The indicator flashes in the record ready mode, while it lights during recording (see page 52 for details).
DVD Multitrack Recorder DV824 When SHIFTed: Pressing this key enters the contrast adjustment mode and you can adjust the display contrast (see page 22 for details). 23) [MARK/CUE/0, symbol] key Pressing this key during recording marks a cue on-the-fly (see page 56 for details). While the unit is not recording, pressing this key brings up the "CUE LIST" menu screen and you can edit time data and cue label of a cue point.
DVD Multitrack Recorder DV824 • While stopped, pressing this key while holding down the [STOP] key locates to the last recording position (REC END) of the current audio file. The maximum cueing speed depends on the FS and the number of tracks of a file. : [RECORD] key • While the [SAFE/READY] indicator is lit, pressing this key automatically creates a new file and starts recording (see page 52 for details).
DVD Multitrack Recorder DV824 Rear panel 2 1 7 8 6 5 4 3 PARALLEL REMOTE 1 2 3 4 6 5 7 P2/ES BUSS THRU INPUT 100Ω ON OFF WORD INPUT ANALOG INPUT BALANCED [+4dBu] 1:GND 2:HOT 3:COLD 8 7 6 ANALOG OUTPUT BALANCED [+4dBu] 5 4 2 DC-IN 12V 1 ETHERNET TX/RX LINK DIGITAL I/O AES/EBU 1:GND 2:NC 3:NC 4:12V 12 11 10 9 13 1) WORD OUTPUT 75Ω ON OFF 3 6 8 [ANALOG INPUT BALANCED] connectors These XLR-3-31 type balanced connectors receive analog audio signals for channels 1 through 8 (+
DVD Multitrack Recorder DV824 3) [P2/ES BUSS/INPUT] connector This connector is used for controlling the unit from an external video editor, etc. The hardware specification is conformed to RS-422A. The connector type is D-sub 9-pin, female.
DVD Multitrack Recorder DV824 9) [ETHERNET] port This port is used to connect to the Ether network. The connector type is RJ45 (conformed to 100/10BASE-T FTP). The LINK and TX/RX indicators light in the following conditions. • The LINK indicator lights when the unit recognizes the network. • The TX/RX indicator flashes when the unit is sending or receiving data. 10) [WORD IN]/[WORD OUT] connector The [WORD IN] connector receives a word clock signal. The [WORD OUT] connector feeds word clock signal.
DVD Multitrack Recorder DV824 Display Home screen The Home screen is shown after turning on the unit, or during recording or playback. The screen example below shows the Home screen when a DVD-RAM disk is set to the DVD-RAM drive. On the Home screen, various information about the current setting and status is shown, as described below.
DVD Multitrack Recorder DV824 Status information The current settings of menu items are shown. The current clock reference setting is shown (the default is "INT"). You can set the clock reference via the quick setup mode (see page 47) or the "Sync Clock" menu item of the "TC SETUP" menu (see page 127). If the optional TC/SYNC card is installed and the unit does not lock to the external clock reference, the selected option flashes quickly.
DVD Multitrack Recorder DV824 Screen examples When no disk is set to the DVD-RAM drive When no disk is set to the DVD-RAM drive, "--No disk--" is shown in the "File name" area on the Home screen. When a formatted unused disk is set to the DVDRAM drive When formatted unused DVD-RAM disk is loaded, "-No files!-" is shown in the "File name" area on the Home screen. When a recorded disk is set When a recorded DVD-RAM disk is loaded, a file name is shown in the "File name" area on the Home screen.
DVD Multitrack Recorder DV824 TCP/IP SETUP menu screen This menu screen is shown when selecting "TCP/IP SETUP" from the MENU list screen in the MENU mode and pressing the [ENTER/YES] key. Six menu items regarding TCP/IP settings for using the unit in the Ethernet are available in the "TCP/IP SETUP" menu. RS422 SETUP menu screen This menu screen is shown when selecting "RS422 SETUP" from the MENU list screen in the MENU mode and pressing the [ENTER/YES] key.
DVD Multitrack Recorder DV824 Chapter-4: Connection Table of contents Basic connection ........................................................................................................................38 Analog audio input connection ....................................................................................38 Digital audio input connection .....................................................................................38 External parallel controller connection .........................
DVD Multitrack Recorder DV824 Basic connection Controller Analog audio device Video editor Digital audio device 8 7 6 5 4 3 2 1 PARALLEL REMOTE P2/ES BUSS THRU INPUT 100Ω ON OFF WORD INPUT ANALOG INPUT BALANCED [+4dBu] 1:GND 2:HOT 3:COLD 8 7 6 WORD OUTPUT 75Ω ON OFF ANALOG OUTPUT BALANCED [+4dBu] 5 4 3 2 DC-IN 12V 1 DIGITAL I/O ETHERNET TX/RX LINK 1:GND 2:NC 3:NC 4:12V Digital audio device Digital audio device Personal computer/LAN Analog audio device Digital audio device Analog
DVD Multitrack Recorder DV824 : The FS of the receiving digital input signal must match the FS setting of the unit. You can make the FS setting using the "Record FS/BIT" menu item of the "SYS SETUP" menu in the MENU mode or the quick setup mode (see pages 47 and 117 respectively). External parallel controller connection The DV824 provides the [PARALLEL REMOTE] connector (8-pin mini DIN), which is used for connecting to an external controller.
DVD Multitrack Recorder DV824 Connection for optional cards External time code Digital device Film machine 8 7 6 5 4 3 2 1 PARALLEL REMOTE P2/ES BUSS THRU INPUT 100Ω ON OFF TIME CODE INPUT WORD INPUT ANALOG INPUT BALANCED [+4dBu] 1:GND 2:HOT 3:COLD 8 7 6 ANALOG OUTPUT BALANCED [+4dBu] 5 4 LEVEL SEL 75Ω ON OFF 3 2 OUTPUT WORD OUTPUT BI-PHASE INPUT 5V 24V DC-IN 12V 1 DIGITAL I/O ETHERNET TX/RX LINK USB IEEE 1394 1:GND 2:NC 3:NC 4:12V Personal computer Time code input/output con
DVD Multitrack Recorder DV824 Other connection USB keyboard connection The DV824 provides the [USB] port on the front panel, which is dedicated to a USB keyboard. By connecting a USB keyboard to this connector, you can enter file and label names, as well as carry out some of menu operations, from the keyboard.
DVD Multitrack Recorder DV824 ALT key + F key Acts the same as the [FILE SEL] key on the panel. ALT key + D key ALT key + C key Acts the same as the [MARK/CUE] key on the panel. ALT key + S key Enters the "SYS SETUP" menu. ALT key + U key Enters the "DISK UTILITY" menu. ALT key + Q key Enters the "Quick setup" mode. ALT key + E key Enters the "EDIT EDL FILE" menu. ALT key + T key Enters the "TC SETUP" menu. CTRL key + L key Acts the same as the [LOCATE] key on the panel.
DVD Multitrack Recorder DV824 Chapter-5: Recording/playback Table of contents Basic audio recording ................................................................................................................44 Setup for recording in quick setup mode ..........................................................44 Entering the quick setup mode ..................................................................45 Input signal selection .........................................................................
DVD Multitrack Recorder DV824 Basic audio recording Before making basic analog or digital audio recording, you need to make some settings. If you set a blank disk and start up the unit, "-No files!-" is shown on the display, while the indicators shown below are lit. "20" of the reference marker is lit. [LTC] indicator is lit.
DVD Multitrack Recorder DV824 Entering the quick setup mode You can enter the quick setup mode by following the procedure below. 1) While "-No files!-" is shown on the Home screen, press the [QUICK SET] key. By default, " INPUT " in the status information area flashes. flashing In this condition, rotating the [MENU] dial (or pressing the [SKIP/CURSOR ] key) moves the flashing position in the following order.
DVD Multitrack Recorder DV824 : The INPUT section in the status information area shows as below depending on the selection between "Analog" and "Digital". The left screen example shows when “Analog” is selected here. All channels (1 through 8) can record analog audio signals, regardless of the “Setup digital in” setting in the “SYS SETUP” menu. When selecting "Analog" When selecting "Digital" When selecting "Digital" The left screen example shows when “Digital” is selected here.
DVD Multitrack Recorder DV824 System clock reference selection (" CLK " of the status information area) You can select the system clock reference. By selecting " CLK " and pressing the [ENTER/YES] key, you can select the clock reference from among the following (the default is "INT"). To make recording with internal clock reference, select "INT" (default). To make the unit locked to an external digital or word clock, select "Digital" or "Word".
DVD Multitrack Recorder DV824 : The LTC start time is set to "01h00m00s00f" by default. You can edit it via the "Default LTC start" menu item in the "TC SETUP" menu of the MENU mode (see page 131 for details). For details about the TC generator mode when the optional TC/SYNC card is installed, see page 77. You can also select a TC recording mode via the "Gen mode" menu item in the "TC SETUP" menu of the MENU mode (see page 132 for details).
DVD Multitrack Recorder DV824 : You can make the pull up/down setting only when the clock reference is set to “INT”. If you select “UP/DW” when any external clock reference (“WORD”, “VIDEO” or “DIGITAL”) is selected, “Void!” is shown and you cannot make setting. Next file name setting (“ NEXT ” of the status information area) You can set the next file name while the unit is in the record ready mode (i.e. the [SAFE/ READY] key is set to ON).
DVD Multitrack Recorder DV824 Other settings There are some settings besides those made in the quick setup mode. Reference level setting The reference level is set to "-20dB" by default. You can change to set this level to "-18dB" or "-12dB" via the "Ref.level" item in the "SYS SETUP" menu of the MENU mode (see page 122 for details). In the level meter section, the associated level indicator with the selected level is lit. 0L 0 4 8 Lit when "-12dB" is selected. 12 16 Lit when "-18dB" is selected.
DVD Multitrack Recorder DV824 Time display mode selection The 7-segment time display shows time data in the currently selected time mode. You can select the time mode between the following using the [TIME SEL/ CONTRAST] key. By default, time data is shown in the "LTC" mode when the unit is turned on. ABS TC IN LTC H M GEN S F LTC The time display shows LTC currently being played back or recorded in "h:m:s:f" format.
DVD Multitrack Recorder DV824 Starting recording After making the necessary settings for recording appropriately, you can start recording. The DV824 automatically creates a new audio file (BWF) on the disk each time you make recording. In the following description, it is assumed that a formatted blank DVD-RAM disk is set to the disk tray and the unit is receiving correct analog or digital audio signals. 1) Press the [SAFE/RDY] key to make the unit record ready.
DVD Multitrack Recorder DV824 3) To stop recording, press the [STOP/HOME] key. When recording ends, the Home screen changes as shown below left. By pressing the [SAFE/RDY] key to exit the record ready mode, the file name and disk remaining time are dismissed from the Home screen as shown below right. From the Home screen above left, you can see that the "SCENE_001.wav" audio file has been created and the next file name is "SCENE_002.wav". In the "REP.
DVD Multitrack Recorder DV824 Canceling recording (False Start) If your recording take is not successfully made, you can cancel the take after recording and clear the file from the disk by executing the "False start". • You can cancel only the take most recently recorded, even though you play it back or switch to another audio file after recording. Once you cancel the take and clear the file, you cannot restore it anymore.
DVD Multitrack Recorder DV824 : If you execute pre recording at 88.2k or 96k FS, the pre recording time automatically reduces to half the selected value. For example, if the pre recording time is set to ten seconds, the buffer stores only five seconds of audio data. When you stop recording in the Pre rec mode, the unit will stop after executing "post recording" which records audio data currently stored in the buffer.
DVD Multitrack Recorder DV824 Cue point setting The DV824 provides the following two ways of setting a cue point. 1. During audio recording, you can set a cue point "on-the-fly" at the desired point. 2. During playback or while stopped, you can set a cue point using the cue point list on the screen. Setting a cue point on the fly during audio recording You can set a "cue point" at the point you press the [MARK/CUE] key during recording. Up to 99 cue points can be set.
DVD Multitrack Recorder DV824 On this list screen, you can not only view cue points but also locate to a cue point, edit a cue point and add a new cue point to the list. Editing a cue point By selecting a desired cue point in the CUE LIST screen, you can edit its label or point (time data) or delete it. By highlighting a desired cue point and press the [ENTER/YES] key, the display changes to show the screen for editing the selected cue point (by default, "Label" flashes on the screen).
DVD Multitrack Recorder DV824 Editing cue point data To edit cue point data, use the [MENU] dial to select "Position" while "Label" is flashing and press the [ENTER/YES] key. The subframe value of the current time data flashes, showing that you can now edit it. flashing Select the edit point using the [SKIP/CURSOR ] key, edit the value using the [MENU] dial, and confirm the setting by pressing the [ENTER/YES] key (the display returns to the CUE LIST screen).
DVD Multitrack Recorder DV824 Basic playback Normal playback : The DV824 provides the list play function. Using the list play function, you can link multiple audio files which have the same number of tracks and FS, and play them back continuously. See "List play function" in "Advanced operations" on page 66 for details. : When the system clock is set to "DIGI" or "WORD", the FS of a file to be played back must match the FS setting of the unit. Otherwise, you cannot play back the file.
DVD Multitrack Recorder DV824 3) Press the [ PLAY] key to start playback of the selected audio file. See page 51 for details about how to monitor the sound. 4) To stop playback, press the [STOP/HOME] key. The unit automatically stops if it runs to the end of the file. 5) If you want to play back the file from the beginning again, press the REWIND] key while holding down the [STOP/HOME] key to skip back to [ "ABS 0" ("LOCATE ABS 0" function), and press the [ PLAY] key.
DVD Multitrack Recorder DV824 Skip/locate functions The DV824 offers comprehensive skip/locate functions. Skipping through files When more than one audio file is recorded on the current DVD-RAM disk, you can quickly skip to the beginning (ABS 0) of a desired audio file. By pressing the [ ] or [ ] ([SKIP/CURSOR]) key while the unit is stopped, you can skip forward or backward a file. Therefore, pressing the [ ] or [ ] key as many times as required skips to the beginning of the desired file.
DVD Multitrack Recorder DV824 Locating to a desired time point You can locate the unit to any desired point by specifying the time value. 1) While the unit is stopped (or playing back), press the [SHIFT] key to light the [SHIFT] indicator, followed by the [LOCATE/ EDIT TIME ] key. The DV824 enters the time edit mode and the popup window for entering time data appears on the display. flashing : The time value can be specified according to the time mode selected before entering the time edit mode.
DVD Multitrack Recorder DV824 Chapter-6: Advanced operations Table of contents Audio CD playback ...................................................................................................................................64 Setting CD stop mode .....................................................................................................................65 List play function .......................................................................................................................
DVD Multitrack Recorder DV824 Audio CD playback The DV824 can play back audio CDs (in the CD-DA format), as well as play back files on a DVD-RAM disk. You can operate the DV824 for playing back an audio CD in a similar way to an ordinary CD player. : The DV824 can play back CD-DA format audio CDs including commercially available audio CDs. Note that, however, it may not be able to play back some CDs such as copy-controlled CDs which are disc-protected.
DVD Multitrack Recorder DV824 Track selection in the FILE SEL mode: While an audio CD is loaded, pressing the [FILE SEL] key brings up the screen for selecting a track of the audio CD, as shown right (the time at the beginning of each track is also shown). By using the [MENU] dial to select the desired track and pressing the [ENTER/YES] key, the display shows the Home screen for the selected track. Setting CD stop mode You can select the CD stop mode which determines how audio CD playback stops.
DVD Multitrack Recorder DV824 List play function The LIST PLAY function allows linking multiple audio files recorded with the same FS on the disk and play back them continuously. : To execute list play by linking audio file entries in an ALE file, you must add the desired audio files to the ALE file created using the "EDIT EDL FILE" menu item. See page 99 for details about the "EDIT EDL FILE" menu item. There are four "link modes" for playing back linked audio files continuously, as below.
DVD Multitrack Recorder DV824 Let's assume that the current DVD-RAM disk contains six audio files (including a deleted file, "005") recorded with the same FS, and each audio file has the LTC start time as shown below. File No. 001 002 003 004 005 (deleted) 006 LTC start time 01h00m00s00f 01h01m00s00f 01h01m25s00f 01h02m00s00f - 01h03m00s00f Recording time 30 seconds 30 seconds 30 seconds 30 seconds - 30 seconds If you execute list play of these files, they are played back as below.
DVD Multitrack Recorder DV824 Setting list play mode/Executing list play Before executing list play, you must set the maximum number of tracks of a file which can be linked and the link mode appropriately. : Before making setting for list play, select the FS of audio files to be linked via the quick setup mode or the "Record FS/Bit" menu item in the "SYS SETUP" menu of the MENU mode. 1) While the unit is stopped, press the [LIST PLAY/ EDIT EDL ] key.
DVD Multitrack Recorder DV824 : The selected number is the maximum. You can link any file whose number of tracks is equal to or less than the selected number. For example, if you set "Link Track (max)" to "4trk", you can link 2-track and 1-track files, as well as 4-track files. • "Link Mode" setting By using the [MENU] dial to select "Link Mode" and pressing the [ENTER/YES] key, the current setting starts flashing.
DVD Multitrack Recorder DV824 : When playing back a file while the link mode is set to "Song-Link", if "CUE 01 (BC$START)" and "CUE 02 (BC$END)" are set in a linked file, the unit only plays back the file within the range between "CUE 01 (BC$START)" and "CUE 02 (BC$END)". If you want to play back all data of the file, delete the cues labeled "BC$START" and "BC$END" or edit "BC$START" and "BC$END" to other labels. 4) Highlight "EXECUTE" and press the [ENTER/YES] key.
DVD Multitrack Recorder DV824 Controlling the unit from a video editor The following describes necessary settings for controlling the DV824 from an external video editor via P2/ES BUSS (RS-422).
DVD Multitrack Recorder DV824 Device type setting (Selection of the DV824 device type) You can select between "DVD" (default) and "BVW-75". Use the [MENU] dial to select the desired device type and press the [ENTER/YES] key to confirm your selection. DVD BVW-75 The device type is set to DV824. The device type is set to BVW-75.
DVD Multitrack Recorder DV824 File data transfer using FTP server function By connecting the [ETHERNET] port on the DV824 to your personal computer using a LAN cable, the DV824 acts as an FTP (File Transfer Protocol) server, allowing transferring audio file data between the DV824 and your personal computer via TCP/IP. The FTP client application is used when transferring file data.
DVD Multitrack Recorder DV824 Setting example of PC connection The following shows the typical example of connecting a PC to the DV824. It is assumed that a LAN card is installed to the PC and set to work correctly. Note that there may be some difference between the description below and your actual setting. : The IP address and sub net mask value shown below are those used in a typical environment.
DVD Multitrack Recorder DV824 4) Open the connection with the setting above, and transfer a file. Before transferring a file, select "Binary" or "Auto" from among "ASCII", "Binary" and "Auto" shown in the center of the window. Before transferring a file, set "Mode" to "Auto" and "Format" to "RawData". Connecting DV824 to LAN To connect the DV824 to a LAN, use a straight cable to connect the DV824 to a hub.
DVD Multitrack Recorder DV824 TCP/IP SETUP menu setting To connect the DV824 [ETHERNET] port to a PC. make settings of the "TCP/IP SETUP" menu in the MENU mode appropriately. See below for details of how to make "TCP/IP SETUP" menu settings. 1) While the unit is stopped, press the [ENTER/YES] key to enter the MENU mode. 2) Use the [MENU] dial to select "TCP/IP SETUP" and press the [ENTER/YES] key. The display now shows the screen for selecting the menu item.
DVD Multitrack Recorder DV824 • Anonymous on/off setting The "Anonymous" menu item sets the anonymous On/Off. By selecting "Anonymous" and pressing the [ENTER/YES] key, the current setting is shown (by default, "On"). While the DV824 is connected to a PC and used as an FTP server, if "Anonymous" is set to "On", you do not need to set the login name and password. After selecting "On" or "Off" using the [MENU] dial, press the [ENTER/YES] key to confirm the setting.
DVD Multitrack Recorder DV824 File transfer example between the DV824 and a PC The following shows the procedure example of transfer an audio file using the "WS FTP" Windows FTP client application (see the instructions of the FTP application for details). 1) Start up the "WS FTP" application. The "Session Properties" dialog box in which current settings such as "IP address" are shown appears. 2) Click on "OK" in the "Session Properties" dialog box.
DVD Multitrack Recorder DV824 4) Click on the "bwf" folder. As shown in the window example below, audio files recorded in the selected partition are shown under the Info. folder. You can now transfer an audio file from the DV824 to the PC or vice versa. • Transferring an audio file from the DV824 to the PC Highlight an audio file in the right window (for the DV824) and click on "<-". The selected audio file is transferred from the DV824 (right window) to the PC (left window).
DVD Multitrack Recorder DV824 Time code recording/playback (the optional Model 8348 required) Recording time code By installing the optional TC/SYNC card (Model 8348) to the DV824, you can record time code generated by the internal TC generator along with audio signals, or record incoming external time code. Furthermore, you can record internal generator time code which jams to external time code. : You can make settings for time code recording/playback via the "TC SETUP" menu on the MENU mode.
DVD Multitrack Recorder DV824 Playing back time code During playback, time code recorded on an audio file is played back together with audio signals and output from the [TIME CODE OUTPUT] connector provided with the optional TC/SYNC card. The playback time code value is shown on the display when the time mode is set to "LTC". Time code output setting You can select the time code source fed from the [TIME CODE OUT] connector between "Repro" (playback time code) or "Gen" (generator time code) via the "Sel.
DVD Multitrack Recorder DV824 : If you are going to jam the external time code into the generator while the frame rate of external time code does not match the DV824 frame rate, "Illegal Frame!" is shown on the display for warning. If you are going to initiate the jam function while external time code is not normally fed to the DV824, "Void LTC in!" is shown on the display for warning. Executing jam function The following describes how to execute the jam function.
DVD Multitrack Recorder DV824 Auto copy function (the optional Model 9057 required) When recording to an audio file on a partition of the Model 9057 optional hard disk drive, the auto copy function automatically copies the same audio file to a DVD-RAM disk. You can select the auto copy mode between the following two auto copy modes. Immediately mode Copy recording to a DVD-RAM disk is executed simultaneously when recording to a hard disk partition.
DVD Multitrack Recorder DV824 2) While the unit is stopped, press the [ENTER/YES] key to enter the MENU mode. The display now shows the MENU list screen. 3) While "SYS SETUP" is highlighted, press the [ENTER/YES] key. The display now shows the SYS SETUP menu screen. 4) Use the [MENU] dial to select the "Auto copy" menu item and press the [ENTER/ YES] key. The current setting flashes and you can now select the desired auto copy mode. By default, "Off" flashes.
DVD Multitrack Recorder DV824 Making auto copy 1) Press the [SAFE/RDY] key to make the unit record ready (the [SAFE/RDY] indicator flashes). By making the unit record ready while the auto copy mode is active, the copy source (partition) remaining time and copy destination (DVD-RAM disk) remaining time is alternately shown. SAFE/RDY 9 WXYZ 2) BKUP **h**m**s Press the [RECORD] key to start recording to the partition.
DVD Multitrack Recorder DV824 Disk copy function (the optional Model 9057 required) The disk copy function fully copies all audio files recorded on a DVD-RAM disk (or hard disk partition) to another DVD-RAM disk (or hard disk partition). To execute the disk copy function, use the "Disk copy" menu item in the "DISK UTILITY" menu of the MENU mode. Making disk copy The following procedure is assumed that the DVD-RAM drive is selected and an audio file on a DVD-RAM disk is loaded.
DVD Multitrack Recorder DV824 : You cannot select the disk copy destination to the same medium as the copy source. If you do so, the display shows "Void!" and returns to the screen for selecting the copy destination medium. 5) If you are sure, press the [ENTER/YES] key. The DV824 starts disk copy to the selected destination medium. During disk copy, the display shows estimated time and space remaining progress indication for disk copy.
DVD Multitrack Recorder DV824 3) Use the [MENU] dial to select "File copy" and press the [ENTER/YES] key. The display now shows the screen for selecting the copy destination (DVD-RAM drive or partition). 4) Use the [MENU] dial to select the copy destination (DVD-RAM drive or partition) and press the [ENTER/YES] key. The display now shows the screen for selecting the desired audio file from those recorded on the current medium.
DVD Multitrack Recorder DV824 Dual drive recording (the optional Model 9057 required) Dual drive recording is a special function which simultaneously records the same data to a "mirror" DVD-RAM disk (*) while recording audio data to a hard disk partition specially formatted for "dual drive recording". Dual drive recording intends to make a clone disk. Therefore, editing meta data or disk volume label (reel No.) of an audio file recorded to a hard disk partition is reflected to a "mirror" DVD-RAM disk.
DVD Multitrack Recorder DV824 3) Use the [MENU] dial to select "Format" and press the [ENTER/YES] key. The display now shows the screen for format setting. We assume to use the default reel number (volume label) which is "S003", and skip to the format mode selection. (If you want to change the reel number later, you can do it using the "Reel No" menu item in the "DISK UTILITY" menu of the MENU mode.) 4) Use the [MENU] dial to select "Format Mode" and press the [ENTER/YES] key.
DVD Multitrack Recorder DV824 8) Press the [STOP/HOME] key to exit the MENU mode. After exiting the MENU mode, the display returns to the Home screen of the current partition, while the DV824 scans the mirror disk. On the Home screen, you can see " shown below. " beside the name of the partition, as Now you are ready for dual drive recording.
DVD Multitrack Recorder DV824 Chasing external TC (the optional Model 8348 required) The following explains how to chase-sync the unit to time code received from the [TIME CODE INPUT] connector when the optional TC/SYNC card (Model 8348) is installed. In the following connection example, a VTR is a master, while the DV824 (with the Model 8348) is a slave. The DV824 receives time code recorded on the master VTR and chase the master. A word sync reference signal is also fed to the DV824 from the master VTR.
DVD Multitrack Recorder DV824 Data export to PC (the optional Model 8370 required) By installing the optional IEEE1394/USB card (Model 8370) and connecting the DV824 to a personal computer via the [IEEE1394] (or [USB]) connector, audio file data can be transferred between the DV824 and a personal computer. DV824 audio data can be copied to a hard disk on the personal computer, or exported to a software application such as Digidesign Pro Tools.
DVD Multitrack Recorder DV824 Connecting PC to the unit After connecting the cable between the unit and a PC, make the setting below while the PC is on. : In the following operation, we assume that a recorded DVD-RAM disk is set to the unit and an audio file is loaded. If no disk is set, you cannot make the "IEEE1394" menu setting in the "SYS SETUP" menu. 1) Set the "IEEE1394" menu item in the "SYS SETUP" menu of the MENU mode to "CONNECT".
DVD Multitrack Recorder DV824 Example of exporting data to a computer application The procedure example below shows how to export DV824 data to Digidesign Pro Tools for Macintosh. For details about operations of Pro Tools, see the instructions supplied with Pro Tools. Note that the screen examples below may look different from the screen you actually see. Also note that the procedure below is assumed that the DV824 is connected to the PC and the "IEEE1394" menu in the Utility mode is set to "CONNECT".
DVD Multitrack Recorder DV824 4 bwff Select “bwff”. Click on “Convert->”. 5 Convert-> The selected audio file is shown. 5 Done Click on “Done”. 7) Select a saving file and click on "Select" (indicated by an arrow 6). The computer starts saving the file to the selected file. 6 Select Click on “Select”. The saved file is added to the audio region list (indicated by an arrow 7). 7 The saved file is shown.
DVD Multitrack Recorder DV824 8) After making "Spot" active, drag and drop the audio region list to the track area (indicated by an arrow 8). The "Spot Dialog" setting window appears. 8 Spot 9) The Spot Dialog window appears. Click on " " in the "Spot Dialog" setting window, followed by "OK" (indicated by an arrow 9). By clicking on " " , the "original time stamp" time currently shown is set to the "Start" time. Then clicking on "OK" starts importing audio data from the specified position.
DVD Multitrack Recorder DV824 98
DVD Multitrack Recorder DV824 Chapter-7: Creating and editing ALE files (EDIT EDL FILE menu) This chapter describes details about how to create an ALE (Avid Log Exchange) file for exporting audio data of the DV824 to an AVID system, as well as how to edit an existing ALE file. Table of contents Creating a new ALE file ................................................................................................100 Adding audio file entries to an ALE file .................................................
DVD Multitrack Recorder DV824 On a DVD-RAM disk, the DV824 creates the "info" folder under the "bwff" folder. The "Info" folder stores ALE (Avid Log Exchange) files and various information files such as a diagnoses file. About an ALE file An ALE file is an EDL (Edit Decision List) file for exporting audio data created by the DV824 to an AVID system. Because it is a text file, a personal computer easily reads it.
DVD Multitrack Recorder DV824 2) While "" is highlighted, press the [ENTER/YES] key. The display now shows the screen for entering a name of a newly created ALE file. : The display shows the screen for entering a file name when creating a new ALE file, however, it shows the screen on which "Remake ALE" is highlighted if you select an existing ALE file for editing. 3) Use the [MENU] dial (or the alphanumeric keys) to enter the desired name.
DVD Multitrack Recorder DV824 5) While "Video format" is highlighted, press the [ENTER/YES] key. The display changes to show the screen on which you can select the video format. The current option flashes (the default is "PAL"). 6) Use the [MENU] dial to select the video format, and press the [ENTER/YES] key to con firm your setting. You can select the video format from among "PAL", "NTSC" and "SECAM". In the same manner as above, set the other menu items in the following order.
DVD Multitrack Recorder DV824 To create another new ALE file, select "" and follow the same procedure as above. If you want to exit the EDIT EDL FILE menu, press the [EXIT/NO] key to dismiss the "Edit ALE" screen. In the following description, we continue editing operation and add audio file entries. Adding audio file entries to an ALE file You can add audio file entries to an ALE file. The following shows how to add desired audio file entries to the ALE file named "ALLTAKE.
DVD Multitrack Recorder DV824 We recommend setting "Circle Take" to each audio file you want to add to an ALE file later. When "Circle Take" is set to the file, "@" is added to the beginning of the file name , so it is easy to select the file (see below for details). You can set "Circle Take" only when a USB keyboard is connected to the unit. While the desired audio file is loaded and the display shows the Home screen, press [F2] on the USB keyboard.
DVD Multitrack Recorder DV824 Viewing and editing audio file entries You can view audio file entries in an ALE file, as well as add (or delete) an audio file entry to (or from) the ALE file. Viewing audio file entries We assume that you have created an ALE file named "ALL-TAKE.ale", as described in the previous procedure. 1) While the unit is stopped, press the [SHIFT] key to light the [SHIFT] indicator, followed by the [LIST PLAY/ EDIT EDL ] key.
DVD Multitrack Recorder DV824 Adding an audio file entry to an existing ALE file 1) On the entry list screen shown in step 3 of "Viewing audio file entries" in the previous page, use the [MENU] key to select "" and press the [ENTER/YES] key. The display now shows the list, in which available audio files except those already added to the ALE file, as well as "", are listed. 2) Select "" or any desired audio file, and press the [ENTER/YES] key.
DVD Multitrack Recorder DV824 Editing an ALE file You can edit an existing ALE file. The editing functions include: • Editing an ALE file name and resave it. • Remaking an ALE file after its audio file entry is edited. • Deleting an unnecessary ALE file. Editing an ALE file name You can edit an existing ALE file name and resave the edited name. The following example shows how to edit the "ALL-TAKE.ale" ALE file created in the operation example described earlier.
DVD Multitrack Recorder DV824 Remaking an ALE file If you edit the start time, end time, or the description information of an audio file which is listed in the ALE file, the ALE file must be remade. You can also remake the ALE file which contains only audio files whose "Circle take" is set to "On". The following procedure describes how to remake the ALE file named "ALL-TAKE.ale", assuming that any of audio files listed in the ALE file has been edited after it was added to the ALE file.
DVD Multitrack Recorder DV824 5) After "Remake ALE" completes, press the [EXIT/NO] key. The display shows the screen for updating the remade ALE file, on which "Are you sure?" flashes. 6) Press the [ENTER/YES] key. The remade ALE file is updated and the display returns to show the screen on which you can select an editing item. 7) Press the [EXIT/NO] key repeatedly until you exit the EDIT EDL FILE menu. Deleting an ALE file You can delete an ALE file.
DVD Multitrack Recorder DV824 110
DVD Multitrack Recorder DV824 Chapter-8: MENU mode Table of contents About MENU mode ..................................................................................................................................................112 "SYS SETUP" menu ................................................................................................................................................113 Basic procedure for using the "SYS SETUP" menu ................................................................
DVD Multitrack Recorder DV824 About MENU mode In the MENU mode, various essential setting and execution menu items are available. While the unit is stopped, pressing the [ENTER/YES] key enters the MENU mode and the display shows the MENU list screen. There are eleven menus in the MENU list. You can select a desired menu using the [MENU] dial. This chapter describes four of the eleven menus marked by "*" in the table below.
DVD Multitrack Recorder DV824 SYS SETUP menu In the SYS SETUP menu, 23 menu items for settings regarding recording/playback are available. This section explains the following menu items in the table below. For the "Auto copy", "CD stop mode" and "Adjust RTC" menu items in the SYS SETUP menu, see pages shown below. Menu item Details of settings Take File Name Mode Date, Take Default file name Scene Name Max. 247 characters Note: Up to 55 characters are valid for BWF.
DVD Multitrack Recorder DV824 Basic procedure for using the "SYS SETUP" menu The basic procedure for using the "SYS SETUP" menu is as described below. 1) While the unit is stopped, press the [ENTER/YES] key. The unit enters the MENU mode and the MENU list screen as below is shown. When " " is shown, you can scroll the screen downward. The item with " " on the right has the next level screen. 2) While "SYS SETUP" is highlighted, press the [ENTER/YES] key. The display now shows the SYS SETUP menu screen.
DVD Multitrack Recorder DV824 Default file name setting [Default file name] The "Default file name" menu item selects the default name format of an audio file which is created automatically when recording starts. You can give a file name of date information (according to the internal realtime clock) or a scene name with a take number. • Selecting the "File name mode" When you highlight "Default File Name" and press the [ENTER/YES] key on the SYS SETUP menu screen, the second level screen appears.
DVD Multitrack Recorder DV824 Default track name setting [Default track name] The "Default track name" menu item specifies the default track name for each track of a BWF file created when recording is made. The track name specified is automatically added to the track number whenever an audio file is created. The data is recorded to each file as the "fTRKn" information of the BWF BEXT Chunk Description. The default track name is stored in the System ROM of the unit.
DVD Multitrack Recorder DV824 Recording track setting [Record tracks] The "Record tracks" menu item sets the number of recording tracks. You can also set the number of recording tracks via the quick setup mode on the Home screen. The setting is stored to the Flash ROM of the unit. Select the "Record tracks" menu item and press the [ENTER/YES] key. The current track setting starts flashing and you can now select a desired option. You can select from among "1", "2", "4", "6" and "8" (the default is "8".
DVD Multitrack Recorder DV824 Pull up/down setting [Pull Up/Down] The "Pull Up/Down" menu item makes clock pull up/down setting when the unit is referenced to the internal clock. You can also make the setting via the quick setup mode on the Home screen. The setting is stored to the Flash ROM of the unit. : The "Pull Up/Down" menu item is valid only when the optional TC/SYNC card is installed.
DVD Multitrack Recorder DV824 Input selection [Select input] The "Select input" menu item selects the recording source between analog and digital. You can also make this selection via the quick setup mode on the Home screen. The setting is stored to the Flash ROM of the unit. Select the "Select input" menu item and press the [ENTER/YES] key. The current setting starts flashing and you can now select the desired option. You can select between "Analog" and "Digital" (the default is "Analog").
DVD Multitrack Recorder DV824 : The digital input signal format (AES/EBU or S/P DIF) is automatically detected by the unit. Digital output signal format selection [Digital out] The "Digital out" menu item selects the format (AES/EBU or S/P DIF) of the digital signal which is output from the [DIGITAL I/O] connector. Select the "Digital out" menu item and press the [ENTER/YES] key. The current setting starts flashing and you can now select the desired option.
DVD Multitrack Recorder DV824 Auto EE mode selection [Auto EE mode] The "Auto EE mode" menu item selects "On" or "Off" of the auto EE mode. When set it to "On", “All input monitor” automatically turns on except during playback and cueing. The setting is stored to the Flash ROM of the unit. Select the "Auto EE mode" menu item and press the [ENTER/YES] key. The current setting starts flashing and you can now select "On" or "Off". Selectable between "On" and "Off" (the default is "Off”).
DVD Multitrack Recorder DV824 End pop tone On/Off setting Selectable between "On" and "Off" (the default is "Off"). On The 1 kHz pop tone is recorded at the end of recording. Off The 1 kHz pop tone is not recorded at the end of recording. Peak hold time setting [Peak hold] The "Peak hold" menu item sets the peak hold time of the peak level meters. Select the "Peak hold" menu item and press the [ENTER/YES] key. The current setting starts flashing and you can now select the desired option.
DVD Multitrack Recorder DV824 Skip mode setting [Skip mode] The "Skip mode" menu item selects the skip mode ("File" or "CUE") of the [SKIP/CURSOR |<< >>|] keys. Select the "Skip mode" menu item and press the [ENTER/YES] key. The current setting starts flashing and you can now select the desired option. You can select between "File" and "Cue" (the default is "File"). File You can skip between audio files in order of creation date.
DVD Multitrack Recorder DV824 You can select between "US" and "JAPAN" (the default is "US"). US JAPAN A US keyboard can be connected. This is the default. A Japanese keyboard can be connected. Use the [MENU] dial to select the desired option and press the [ENTER/YES] key to confirm your setting. Press the [STOP/HOME] key to exit the MENU mode. Startup disk selection [Startup disk] The "Startup disk" menu item selects the medium started up when turning on the power.
DVD Multitrack Recorder DV824 TC SETUP menu In the TC SETUP menu, 16 menu items for settings regarding time code recording/ playback and synchronization to an external device are available. These settings are valid when the optional TC/SYNC card is installed to the unit. : Details of the "Force JAM" menu item are described in "Advanced operations". See page 81 for details. Setting/function Menu item Default Sync Clock Selects the system clock. Frame Rate Selects the time code frame rate.
DVD Multitrack Recorder DV824 Basic procedure for using the "TC SETUP" menu The basic procedure for using the "TC SETUP" menu is as described below. 1) While the unit is stopped, press the [ENTER/YES] key. The unit enters the MENU mode and the MENU list screen as below is shown. When " " is shown, you can scroll the screen downward. The item with " " on the right has the next level screen. 2) Use the [MENU] dial to select "TC SETUP" and press the [ENTER/YES] key.
DVD Multitrack Recorder DV824 System clock selection [Sync clock] Using the "Sync clock" menu item, you can select the system clock reference. If you connect the DV824 to an external digital or video machine which does not have sync clock output facility, use the DV824 internal clock as the system master clock. You can also set the system clock reference using the quick setup mode. Select the "Sync clock" menu item and press the [ENTER/YES] key.
DVD Multitrack Recorder DV824 Generator mode selection [Gen mode] Using the "Gen mode" menu item, you can select the generator mode of the internal TC generator. You can also select the TC frame rate using the quick setup mode. : In the "Gen mode" menu item setting, the "Free Run" and "24H Run" options are not available when the optional TC/SYNC card is not installed. When the card is not installed, you can set the LTC recording mode and can select the "Rec Run" or "Ext Run" option (see page 47).
DVD Multitrack Recorder DV824 • Under "LOOKUP GEN TC", the current generator mode is shown (in the screen example above, "[Run mode]" is shown). • If no time code is fed to the unit in the "EXT RUN" mode, "<>" is shown. • In the "Rec Run" or "24H Run" mode, user bit is not shown. • In the "Rec Run" mode, the "TC" field shows "--h--m--s--f". If you just view the information and do not make any editing, press the [EXIT/NO] key to exit the TC SETUP menu.
DVD Multitrack Recorder DV824 Jam mode setting [JAM mode] Using the "JAM mode" menu item, you can select the jam mode for the generator "Free Run" mode (You can set which information is jammed). : The "JAM mode" menu item setting is effective only when the optional TC/ SYNC card is installed. When it is not installed, "Void! No TC Card" is shown and you cannot make setting. Select the "JAM mode" menu item and press the [ENTER/YES] key.
DVD Multitrack Recorder DV824 Time code output source selection [Sel. TC Out] Using the "Sel. TC Out" menu item, you can set the time code source (Repro or Gen) fed from the [TIME CODE OUT] connector. : The "Sel. TC Out" menu item setting is effective only when the optional TC/ SYNC card is installed. When it is not installed, "Void! No TC Card" is shown and you cannot make setting. Select the "Sel. TC Out" menu item and press the [ENTER/YES] key.
DVD Multitrack Recorder DV824 3) Edit the time value to the desired value, and press the [ENTER/YES] key to confirm your setting. Use the [MENU] dial (or the alphanumeric keys) to enter a desired value and use the [SKIP/CURSOR ] keys to move the cursor position. The setting is stored to the Flash ROM of the unit. LTC start time editing [Edit LTC start] Using the "Edit LTC start" menu item, you can set the desired LTC start time of a playback audio file.
DVD Multitrack Recorder DV824 UBIT setting of playback time code [RepTC Ubit] Using the "RepTC Ubit" menu item, you can select the desired userbit of time code which is output from the [TIME CODE OUT] connector while the [Sel TC Out] is set to "Repro". 1) Select the "RepTC Ubit" menu item and press the [ENTER/YES] key. The currently selected time code userbit flashes (the default is "EEEEERRR"). You can now select the userbit.
DVD Multitrack Recorder DV824 Time code output while paused [Rep pause TC] Using the "Rep pause TC" menu item, you can select whether time code is output from the [TIME CODE OUTPUT] connector or not while the recorder is paused. : The "Rep pause TC" menu item setting is effective only when the optional TC/ SYNC card is installed. When it is not installed, "Void! No TC Card" is shown and you cannot make setting. Select the "Rep pause TC" menu item and press the [ENTER/YES] key.
DVD Multitrack Recorder DV824 Chase mode selection [Chase mode] Using the "Chase mode" menu item, you can select the chase mode to the reference time code. : The "Chase mode" menu item setting is effective only when the optional TC/ SYNC card is installed. When it is not installed, "Void! No TC Card" is shown and you cannot make setting. Select the "Chase mode" menu item and press the [ENTER/YES] key. The current mode starts flashing and you can now select the option.
DVD Multitrack Recorder DV824 Chase offset setting [Chase offset] Using the "Chase offset" menu item, you can make chase offset editing, chase offset trimming and catch offset. : The "Chase offset" menu item setting is effective only when the optional TC/ SYNC card is installed. When it is not installed, "Void! No TC Card" is shown and you cannot make setting. Chase offset editing 1) Select the "Chase offset" menu item and press the [ENTER/YES] key.
DVD Multitrack Recorder DV824 Chase offset trimming While the unit is chasing and locking to the master, you can trim the chase offset in realtime. : You can trim the chase offset only when the unit is chasing an external machine and locking to the master. In other conditions, you cannot execute the following operation. 1) Use the [MENU] dial to select "Trim" and press the [ENTER/YES] key. Initially, the subframe value flashes and you can now trim the offset value.
DVD Multitrack Recorder DV824 Synchronization to a film machine [Bi-Phase setup] When the optional TC/SYNC card is installed to the unit, you can set the following items for synchronizing the unit to a film machine. 1) Resetting the current film position to the start position 2) Editing the film start time 3) Setting the number of pulses per frame 4) Setting the film leader length and film size : The "Bi-Phase setup" menu item setting is effective only when the optional TC/SYNC card is installed.
DVD Multitrack Recorder DV824 Editing the film start time You can edit the film start time. 1) Use the [MENU] dial to highlight "Edit Start Position" and press the [ENTER/YES] key. The subframe value of the current start time starts flashing and you can now edit the start time. 2) Use the [MENU] dial (or the alphanumeric keys) to enter the desired start time and press the [ENTER/YES] key to confirm your setting. You can move the cursor position using the [SKIP/CURSOR ] keys.
DVD Multitrack Recorder DV824 DISK UTILITY menu In the DISK UTILITY menu, 12 menu items for settings regarding recording media and recorded audio files are available. This section explains the following ten menu items in the table below. For the "File Copy" and "Disk Copy" menu items in the DISK UTILITY menu, see pages shown below. Menu item Setting/function Default Edit File Name Edits the audio file name. - File Info. Views audio file information and edits descriptor information.
DVD Multitrack Recorder DV824 Basic procedure for using the "DISK UTILITY" menu The basic procedure for using the "DISK UTILITY" menu is as described below. 1) While the unit is stopped, press the [ENTER/YES] key. The unit enters the MENU mode and the MENU list screen as below is shown. When " " is shown, you can scroll the screen downward. The item with " " on the right has the next level screen. 2) Use the [MENU] dial to highlight "DISK UTILITY" and press the [ENTER/YES] key.
DVD Multitrack Recorder DV824 Editing a file name [Edit file name] The "Edit File name" menu item edits a file name of the currently loaded audio file. 1) Select the "Edit file name" menu item and press the [ENTER/YES] key. The display now shows the "EDIT FILE NAME" screen. On this screen, you can edit the current file name (the leftmost character of the name flashes). 2) Enter the desired name.
DVD Multitrack Recorder DV824 Viewing a file information and editing descriptor information [File info.] Using the "File info." menu item, you can view audio file information, as well as edit the descriptor information. You can check the following file information.
DVD Multitrack Recorder DV824 The sound sequence information of a BWF file includes items as below and you can edit them if necessary. "" at the bottom is used for adding a new descriptor information. See "Adding descriptor information" for details. The table below shows the details of the descriptor information which Fostex registers by default, as shown on the screen example above.
DVD Multitrack Recorder DV824 Editing descriptor information 1) Use the [MENU] dial to select a desired descriptor information item and press the [ENTER/YES] key. The first character of the selected descriptor information item flashes and you can now edit the item. 2) Use the [SKIP/CURSOR right of "=" and make editing. ] key to move the cursor position to the 3) Use the [MENU] dial (or the alphanumeric keys) to enter characters.
DVD Multitrack Recorder DV824 Deleting an unnecessary audio file [Delete file] The [Delete file] menu item deletes an unnecessary audio file. You can delete only the currently loaded audio file, therefore, you must load the desired audio file before deleting it. : A deleted file is not completely deleted from the disk. It still exists as a "hidden file". You can restore a hidden file by the "Restore Del File" menu item described later.
DVD Multitrack Recorder DV824 Restoring a deleted audio file [Restore Del. file] Using the "Restore Del. file" menu item, you can restore a hidden file which is deleted by the "Delete file" menu. • If you optimize a DVD-RAM disk (or a hard disk partition), the deleted files cannot be restored anymore because the "hidden files" are completely deleted. • A file deleted by computer operation cannot be restored. 1) Select "Restore Del. file" and press the [ENTER/YES] key.
DVD Multitrack Recorder DV824 Optimizing a disk [Optimize disk] Using the "Optimize disk" menu item, you can optimize a current disk (a DVD-RAM disk or hard disk partition). By optimizing a recorded disk (or partition), deleted (hidden) audio files are completely deleted, and the disk free space increases. : If you optimize a DVD-RAM disk (or a hard disk partition), the deleted files cannot be restored anymore because the "hidden files" are completely deleted.
DVD Multitrack Recorder DV824 Formatting a disk [Format] Using the "Format" menu item, you can reformat a DVD-RAM disk or a partition of the optional hard disk drive in the UDF format. For details about how to format an unformatted DVD-RAM disk, see "Initial format of a DVD-RAM disk" on page 20. The following description assumes that a used DVD-RAM disk is set to the DVD-RAM drive. 1) Select "Format" and press the [ENTER/YES] key. The display now shows "Format" screen.
DVD Multitrack Recorder DV824 Volume label setting: While "Reel No" is highlighted, press the [ENTER/YES] key. The first character of the current volume label (by default, "S") flashes and you can now enter the desired label using the [MENU] dial and alphanumeric keys. You can move the cursor position using the [SKIP/CURSOR] keys. Up to eight characters can be entered. After entering the desired label, press the [ENTER/YES] key to confirm your setting.
DVD Multitrack Recorder DV824 Physical format on/off setting Only when selecting "Format Mode" to "Normal", you can select On or Off of the physical format. While "Physical Format" is highlighted, press the [ENTER/YES] key. The current setting (by default, "Off") flashes and you can now select the option between "Off" and "On" using the [MENU] dial. After selecting the desired option, pressing the [ENTER/YES] key automatically highlight "[EXECUTE]".
DVD Multitrack Recorder DV824 Editing the reel number (Volume label) [Reel No.] Using the "Reel No." menu item, you can edit the reel number of the currently selected disk (or partition). Note that the reel number set here is also reflected to the volume label. The following procedure assumes that a disk (or partition) you want to edit the reel number of is loaded.
DVD Multitrack Recorder DV824 Record protection On/Off setting [Rec protect] Using the "Rec protect" menu item, you can select "On" or "Off" of the protection (record inhibit) for the currently loaded audio file. The following procedure assumes that an audio file you want to make protection setting is loaded. : You cannot edit a protected audio file. Select the "Rec protect" menu item and press the [ENTER/YES] key.
DVD Multitrack Recorder DV824 Resume function On/Off setting [Resume] Using the "Resume" menu item, you can select "On" or "Off" of the resume function. By setting it to "On", the current audio file and its playback position is stored to the resume file when a DVD-RAM disk is ejected. Therefore, the unit automatically loads the same audio file at the same position next time you set the same disk to the unit. Select the "Resume" menu item and press the [ENTER/YES] key.
DVD Multitrack Recorder DV824 LOAD SETUP menu Using the "LOAD SETUP" menu item, you can load setup data from among user setup data ("Box No0" through "Box No6") and default setup data. A user setup data can be saved using the "SAVE SETUP" menu (described on next page). 1) While the unit is stopped, press the [ENTER/YES] key. The unit enters the MENU mode and the MENU list screen is shown. 2) Use the [MENU] dial to highlight "LOAD SETUP" and press the [ENTER/YES] key.
DVD Multitrack Recorder DV824 SAVE SETUP menu Using the "SAVE SETUP" menu item, you can save the current data to a user box. The saved data can be loaded using the "LOAD SETUP" menu at any time. : The default file names and track names, as well as event numbers, are not saved. 1) While the unit is stopped, press the [ENTER/YES] key. The unit enters the MENU mode and the MENU list screen is shown. 2) Use the [MENU] dial to highlight "SAVE SETUP" and press the [ENTER/YES] key.
DVD Multitrack Recorder DV824 Chapter-9: Specifications 157
DVD Multitrack Recorder DV824 Inputs/Outputs *0 dBu=0.775 Vrms, 0 dBV=1 Vrms. Reference level : -12 dBFS/-18 dBFS/-20 dBFS (default: -20 dBFS, selectable in the "Ref.
DVD Multitrack Recorder DV824 Recording/playback Recording Medium : 5x DVD-RAM optional internal Hard disk drive. Sampling Frequency/Quantization : : 22.05 / 44.1 / 48kHz 16bit 44.1 / 48 / 88.2 / 96kHz 24bit Recording Track : 8 Track mode (Verify Write: ON) : : : : : : 1track 2track 4track 5track 6track 8track R/P Frequency Response : : 20 Hz to 20 kHz, +/-1 dB (fs 44.1kHz / 48kHz) 20 Hz to 40 kHz +/-2 dB (fs 88.
DVD Multitrack Recorder DV824 Physical dimensions 8 7 6 ANALOG OUTPUT BALANCED [+4dBu] 5 4 2 3 1:GND 2:NC 3:NC 4:12V ETHERNET TX/RX LINK DIGITAL I/O 1 DC-IN 12V 75Ω ON OFF 1:GND 2:HOT 3:COLD WORD OUTPUT WORD INPUT ANALOG INPUT BALANCED [+4dBu] 100Ω ON OFF 8 7 5 6 4 3 2 INPUT PARALLEL REMOTE 1 THRU P2/ES BUSS (321.5) (345) 88 (98.
DVD Multitrack Recorder DV824 Declaration of EC Directive This equipment is compatible with the EMC Directive (89/336/EEC) - Directive on approximation of member nation's ordinance concerning the electromagnetic compatibility and with the Low Voltage Directive (73/23/EEC) - Directive on approximation of member nation's ordinance concerning electric equipment designed to be used within the specified voltage range.
FOSTEX CO. 3-2-35, Musashino, Akishima-shi, Tokyo, Japan 196-0021 FOSTEX AMERICA 15431, Blackburn Avenue, Norwalk, CA 90650, U. S. A. © PRINTED IN JAPAN OCT.