RF-8050 Compact Electronic Organizer User’s Guide
License Agreement.....................................................................................................2 Introduction ...............................................................................................................3 Getting Started ...........................................................................................................4 Key Guide..................................................................................................................
License Agreement READ THIS LICENSE AGREEMENT BEFORE USING THE ELECTRONIC REFERENCE. YOUR USE OF THE ELECTRONIC REFERENCE DEEMS THAT YOU ACCEPT THE TERMS OF THIS LICENSE. IF YOU DO NOT AGREE WITH THESE TERMS, YOU MAY RETURN THIS PACKAGE WITH PURCHASE RECEIPT TO THE DEALER FROM WHICH YOU PURCHASED THE ELECTRONIC REFERENCE AND YOUR PURCHASE PRICE WILL BE REFUNDED. ELECTRONIC REFERENCE means the software product and documentation found in this package and FRANKLIN means Franklin Electronic Publishers, Inc.
Introduction Congratulations! You now own an Electronics Personal Organizer that performs a wide range of functions.
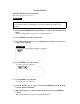
Getting Started Using the Organizer for the First Time You must perform a system reset. WARNING ! A system reset erases any user-entered information and clears all settings. Pressing the reset button with more than light pressure may permanently disable your organizer. 1. Press and hold ON/OFF for approximately 5 seconds to deactivate the sleep mode. The unit is shipped in sleep mode to conserve battery life. 2. Press ON/OFF to turn the organizer off. 3. Use a thin, pointed object (e.g.
! Setting the Clock To learn how to set the clock, see “Using the Clocks”. ! Changing the Language This organizer can display prompts and other messages in six languages. To select a language, do the following: 1. Press (time) (H) indicates Home Time. New York is the default Home City. 2. Press L (language). 3. Press SEARCH or German, Dutch, and Italian. to cycle through English, Spanish, French, 4. When the language you want is displayed on the screen, press ENTER to select it.
Key Guide " Function Keys (phone) Goes to the Telephone (schd) Goes to the Scheduler (memo) (ann) (calendar) SYNC Goes to the Memos Goes to the Anniversary Goes to the Calendar (time) Toggles between Home Time and World Time (alarm) Sets the Alarms and Chimes. (calc) Goes to the Calculator (conv) Goes to the Converter Goes to Data Communication " Other Keys ON/OFF ENTER EDIT Turns the organizer on and off. Stores data in a record, confirms data entries. Allows you to edit information.
V( ) Turns the Keytone on or off. X (am/pm) Toggles time between a.m. and p.m. Z (12/24) Toggles time between 12- and 24-hour time displays. " Calculator Function Keys E (m-) Subtracts the displayed number from the number stored in the memory. G (%) Calculates a percentage. I (÷) Divides a number. Displays as “/”. J (+/-) Changes the sign (+/-) of a number. O (.) Inserts a decimal point. P (=) Performs a calculation. Q (mc) Clears the memory. R (m+) Stores a positive number in the memory.
Using the Clocks The clock allow you to set your Home Time and view different local times around the world. You should set the Home Time before viewing World Times or using the Schedule as the World Times settings are based on the Home Time. ! Setting Home Time 1. Press (time) until the Home Time screen appears. ( H ) indicates Home Time. New York is the default setting. 2. Press M (md/dm) to toggle between the date display of “M/D/Y” and “D/M/Y”. 3. Press D (dst) if you want to see daylight savings time.
! Viewing World Time 1. Press (time) until the < World Time > screen appears. ( W ) indicates World Time. There are 29 built-in cities in different time zones. 2. or to cycle through the list of cities and view their Use SEARCH corresponding times. Note : World Time is based upon hours added to or subtracted from the Home Time zone. It is not a separate clock and cannot be set. 3. Press (time) to return to the Home Time screen. ! Time Format When setting time, press X (am/pm) to toggle between a.m.
Setting the Alarms There are three kinds of alarms: • The Daily Alarm, indicated by • • The Hourly Chime, indicated by The Schedule Alarm indicated by . ! Setting the Daily Alarm 1. Press 2. Press EDIT, and then use the numerical keys to enter a time. For example, enter 1015, and press X (am/pm) to select either a.m. or p.m. Press ENTER to confirm your settings. 3. (alarm) until the Daily Alarm screen is displayed. indicates the Daily Alarm is on. or and follow steps 2-3.
Using the Calendar You can view the current date or browse other dates by moving one day, one week or one month at a time through 200 years (from 1901/1/1 to 2099/12/31). You can also view Schedule events and Memo entries from the Calendar. " To learn how to enter Schedule events, read “Using the Schedule”. " To learn how to enter Memo events, read “Using the Memo Directory”. ! Viewing Dates 1. Press (calendar).
Using the Telephone Directory ! Entering a Phone Record 1. Press 2. Type a name. For example, to enter the name Robert Edwards, type EDWARDS ROBERT. Note : To alphabetize your entries by the last name, you must type the last name first. You can enter a maximum of 64 characters in the name field, including letters, numbers and symbols. 3. 4. 5. 6. 7. 8. (phone). To enter a symbol, press SYM repeatedly to choose the one you want.
Using the Schedule In each schedule record, you can enter the date, time and keywords for the event. ! Entering a Schedule Record 1. Press 2. To type the date and time, press any number key to start the input mode and then type your information. For example, to enter 20-09-1999, 11:30, type 200919991130. Press X to choose a.m. or p.m., if needed. The date format follows the one chosen in the Home Time screen. See “Setting Home Time”. Press ENTER to type keywords for the event. For example, type MEETING.
Using the Memo Directory You can enter a maximum of 96 characters including letters, numbers and symbols in each memo record. ! Entering the Memo Record 1. Press 2. Type your data. Press SPACE to insert spaces in your data. Press RETURN to move the cursor to the next line. Press ENTER to store your data. To learn how to view and edit records, please refer to “Searching for and Editing Records”. 3. 4. (memo) until the Memo screen appears.
Using the Anniversary Directory In each anniversary record, you can enter the date and keywords for the event. ! Entering an Anniversary Record 1. Press 2. 3. Type the date using the number keys and press ENTER. Type keywords for the event. You can enter a maximum of 108 characters, including letters, numbers and symbols. Press ENTER to store your record. 4. (ann). ! Viewing an Anniversary Record 1. Press (ann). 2. Press SEARCH or to cycle through your records. 3.
Searching for and Editing Records You can search for your records either directly or sequentially. You can review your records, edit them or delete them. ! Searching for a Record 1. Press (phone) to search for a Telephone record, press for a Schedule record or press 2. (schd) to search (memo) to search for a Memo record. Press SEARCH or to view records in order.
Using a Password You can lock your organizer so that only the Clock, Calendar, Calculator and Converter can be used without supplying the password. Note : You do not need to set a password to use this organizer. WARNING ! Please keep written records of your data. If you forget your password, you will not be able to recover any of the data stored in your organizer. To use the organizer again, you will have to perform a system reset, which will clear the password and erase all the data stored in memory.
After you enter your correct password, the icon will disappear from the screen and you will be able to enter your data. You can now enter new data or view existing data. To learn how, read “Using the Telephone Directory”, “Using the Scheduler”, “Using the Memo Directory”, or “Viewing a Record respectively. ! Changing or Deactivating the Password 1. 2. Press (time) until Home Time is displayed. Press SPACE ( ). 3. Type your old password and then press ENTER.
Using the Calculator ! Making a Calculation 1. Press 2. Type a number. You can type up to 12 digits. To type a decimal, press O(.). To clear a number, press RETURN (c/ce). Press T (+),Y (-), U (x) or I (÷) to add, subtract, multiply, or divide respectively. Type another number. Press P (=) to calculate. Or press G (%) to calculate the percentage. Press RETURN (c/ce) to clear the calculations. 3. 4. 5. 6. (calc). ! Using the Calculator Memory 1. 2. 3. 4. 5.
Using the Converter ! Using the built-in Conversion Rates Use your organizer to do the following built-in conversions: Yard Inch Mile Centigrade Feet Ounce Pound US gallon UK gallon US$ US$ US$ 1. Press ↔ ↔ ↔ ↔ ↔ ↔ ↔ ↔ ↔ ↔ ↔ ↔ Meter Centimeter Kilometer Fahrenheit Meter Gram Kilogram Liter Liter DM YEN POUND (conv) until the metric conversion screen appears. 2. Press SEARCH or to select a conversion category, if needed. 3. Type the number to be converted.
! Converting Currency You can use one of the three built-in currency exchange rates or enter your own labels. 1. Press (conv). or until you see one of the three built-in currency 2. Press SEARCH exchanges. The built-in Currency Exchanges are: US$-DM, US$-YEN, and US$-POUND. 3. Press EDIT and then press until the cursor moves to the second currency name. 4. Type the new name (e.g., CAND for Canadian dollars) and then press ENTER. You can enter a maximum of 5 characters for each label. 5.
Using the unit as a Card ! Ejecting the Card from the Main Body 1. Press ON/OFF to turn off the organizer. 2. Push the card up as shown below. WARNING ! When removing or inserting the card from the organizer, we strongly recommend that you not touch the LCD display. ! Inserting the Card into the Main Body 1. Press to turn off the card. 2. Insert the card into the organizer in opposite direction from that shown above. ! Power ON/OFF Press to turn the Card on and off.
! Choosing A Directory 1. Press to turn on the card. 2. Move the arrow to a specific directory by pressing . 3. Press to confirm.
Installing the PC Synchronization Program Use the following steps to install the PC Synchronization program on your personal computer.
Transmitting or Receiving Records ! Connecting the Serial Cable Before you can transmit or receive records you need to do the following: 1. 2. 3. Turn your PC off. Connect the 9-pin plug of the provided cable into a free communications (COM) port. Connect the 3-pin plug of the cable into the PC PORT hole on the left side of your organizer.
Note : You cannot send or receive a single directory between your handheld Organizer and PC Synchronization Program. You can send a single record or all the directories. WARNING ! When you transfer all directories, your old records at the receiving end will be overwritten. If you wish to retain records unique to your Organizer or PC Synchronization Program, choose Synchronization instead of Import or Export. ! 1. 2. 3. 4. 5. 6.
! To Receive All Records 1. Click File | Export to Organizer on the menu bar of your PC Synchronization Program. (time) on your handheld Organizer until the Home Time screen 2. Press appears. 3. Press SYNC to enter the data communication mode. 4. Press 3 to select 3-RX? and press ENTER . 5. Click the Export button of your PC Synchronization Program to begin transmission. The record will be added to your Organizer as a new record.
Replacing the Battery This organizer uses two CR 2025 3-volt Lithium batteries. Before you follow these steps you should have a small Phillips screwdriver (one that fits into screws with an “X” notch) and the new batteries at hand. WARNING ! When no batteries are installed, this organizer will save your information for only 30 seconds. So quickly install the new batteries after you remove the old ones. ! Steps to Replacing the Battery 1. 2. 3. 4. 5. 6. 7. Turn on the organizer and enter the alarm mode.
Specifications Size: Length of Open (136)/Fold (70) x Width (108) x Thickness (15) mm Battery: Two CR 2025 Lithium © 2001 Franklin Electronic Publishers, Inc. Burlington, N.J. 08016-4907, USA. All rights reserved. ROLODEX® is a registered trademark of Berol Corporation, a subsidiary of Newell Rubbermaid, Inc. FOR HOME OR OFFICE USE. ISBN: 1-56712-696-0 Cleaning This Product To clean this product, spray a mild glass cleaner onto a piece of cloth use it to wipe the surface.
Limited Warranty (U.S. only) LIMITED WARRANTY, DISCLAIMER OF WARRANTIES AND LIMITED REMEDY (A) LIMITED WARRANTY. FRANKLIN WARRANTS TO THE ORIGINAL END USER THAT FOR A PERIOD OF ONE (1) YEAR FROM THE ORIGINAL DATE OF PURCHASE AS EVIDENCED BY A COPY OF YOUR RECEIPT, YOUR FRANKLIN PRODUCT SHALL BE FREE FROM DEFECTS IN MATERIALS AND WORKMANSHIP. THIS LIMITED WARRANTY DOES NOT INCLUDE DAMAGE DUE TO ACTS OF GOD, ACCIDENT, MISUSE, ABUSE, NEGLIGENCE, MODIFICATION, UNSUITABLE ENVIRONMENT OR IMPROPER MAINTENANCE.
DAMAGES, SO THE ABOVE LIMITATION MAY NOT APPLY TO YOU. IF THE LAWS OF THE RELEVANT JURISDICTION DO NOT PERMIT FULL WAIVER OF IMPLIED WARRANTIES, THEN THE DURATION OF IMPLIED WARRANTIES AND CONDITIONS ARE LIMITED TO THE DURATION OF THE EXPRESS WARRANTY GRANTED HEREIN.