USER MANUAL TOUGH DRIVE SPORT EXTERNAL MOBILE HARD DRIVE / 2.5" / USB 2.0 Rev.
Freecom ToughDrive Sport Dear user! EN Thank you for choosing the Freecom ToughDrive Sport as an external hard drive. For optimal use and performance we advise you to read this manual carefully before using this product. Freecom Technologies • Germany www.freecom.
Table of Contents User manual EN General Information............................................................................................................page 4 Precautionary measures.....................................................................................................page 5 Freecom ToughDrive Sport . ............................................................................................page 6 Chapter 1: Hardware Installation................................................
Freecom ToughDrive Sport General Information EN The following hardware and software requirements must be fulfilled to ensure troublefree operation. System requirements In order to use the Freecom ToughDrive Sport, following components are needed: PC: • Intel Pentium III / AMD Duron 900 MHz or higher • 256 MB RAM (Vista: 512 MB RAM) or higher • Available USB 2.0 or USB 1.
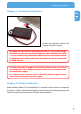
General Information Precautionary measures EN To ensure that your Freecom ToughDrive Sport functions properly, please take note of the following precautions. If these are not followed, you may void your warranty and damage the Freecom ToughDrive Sport. • Safely remove the Freecom ToughDrive Sport via your operating system (the "unplug or eject hardware" option in the Windows taskbar) before disconnecting the USB cable or power cable and before switching off the device.
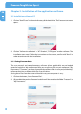
Freecom ToughDrive Sport Freecom ToughDrive Sport EN The hi-speed data transfer through the USB 2.0 interface makes it ideally suitable for data-storage, file sharing, backup, archiving, audio playback and all applications that need fast file access. For your convenience, the Freecom ToughDrive Sport has been partitioned (1 partition) and pre-formatted (FAT32 file system). The FAT32 format ensures maximum interchangeability of the Freecom ToughDrive Sport between different computers.
Hardware Installation Chapter 1: Hardware Installation EN 1 Connect the interface cable to the Freecom ToughDrive Sport. Since USB 2.0 is backwards compatible with USB 1.1, the Freecom ToughDrive Sport can be connected to all USB ports. When connected to a USB 1.1 port, however, the performance (data transfer rate) of the Freecom ToughDrive Sport will be much lower than when the drive is connected to a USB 2.0 port.
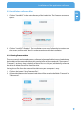
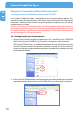
Freecom ToughDrive Sport Chapter 3: Installation of the application software EN 3.1 Installation software PC 3 1. Click on "StartPC.exe" in the main directory of the hard drive. The Freecom start menu opens. 2. Click on "Software Installation" -> "NTI Shadow", "NTI Ripper" or other software. The installation starts now. Follow the instructions on the screen, confirm with "Next" in order to continue with the installation. 3.1.
Installation of the application software 3.2 Installation software Mac EN 1. Click on "Start MAC" in the main directory of the hard drive. The Freecom start menu opens. 3 2. Click on "Install NTI Shadow". The installation starts now. Follow the instructions on the screen, confirm with "Next" in order to continue with the installation. 3.2.1 Saving Freecom data The user manuals and complementary software (when applicable) are pre-loaded onto the hard drive.
Freecom ToughDrive Sport Chapter 4: Freecom Hard Drive Protection Tool EN 4.1 Using the Freecom Hard Drive Protection Tool (PC) Your Freecom ToughDrive Sport is equipped with a password protection feature. This provides the best possible protection. Your data is always protected, even if the internal hard drive is taken out of the enclosure and connected to a computer, you still will not be able to access the data.
Freecom Hard Drive Protection Tool 3. Double-click on the „Password.exe“ symbol to run the Freecom Hard Drive Protection software. The Hard Drive Protection Wizard will open. Click “Next” to proceed. EN 4 4. Enter a password. This password will be required to access the protected partition. Confirm the password in the second field and click “Next”. 5. Your hard drive is now protected with a password. Click “Finish” to exit the wizard.
Freecom ToughDrive Sport Accessing the password-encrypted hard drive EN 1. Open the virtual CD-ROM Drive and double-click on “Password.exe”. The Freecom Hard Drive Protection tool opens. 4 2. Enter your password and click “Finish”. Your password-protected hard drive will now be accessible in “My Computer”. I lost my password, what can I do now? If you lose your password, you will not be able to access your data anymore.
Freecom Hard Drive Protection Tool 2. Click on “Lost your password?” and confirm that you want to start the “Erase and Format Hard Disk Wizard”. EN 4 3. To continue, you have to confirm that all data on your hard disk will be deleted. Click on “Next” to continue. 4. In a final step, you have to confirm once again that you want to erase and format the hard disk. Clicking on “Yes” in this step will irreversibly delete all your data. This might take up to two hours.
Freecom ToughDrive Sport Removing the password encryption EN It is possible to remove the password protection feature, meaning that the data on the drive will always be visible when you connect the drive. 4 1. Make sure you already run the “Password.exe” to have access to your protected data. 2. Once you have access to your protected data, run the “Password.exe” again and select “Remove password encryption”. Click on “Next” to continue. 3. Enter your password and click on “Next”. 4.
Freecom Hard Drive Protection Tool 4.2 Using the Freecom Hard Drive Protection Tool (Mac) EN Your Freecom ToughDrive Sport is equipped with a password protection feature. This provides the best possible protection. Your data is always protected, even if the internal hard drive is taken out of the enclosure and connected to a computer, you still will not be able to access the data.
Freecom ToughDrive Sport 3. Enter a password. This password will be required to access the protected partition. Confirm the password in the second field and click on “OK”. EN 4 Accessing the password-encrypted hard disk 1. Connect your Freecom ToughDrive Sport to your Mac. A window will open, stating that the inserted disk is not readable. Click on “Ignore”. 2. Run “Password” from the CD-ROM drive. You will be prompted to enter your password to access the hard drive.
Freecom Hard Drive Protection Tool I lost my password, what can I do now? EN If you lose your password, you will not be able to access your data anymore. The only way to continue using your ToughDrive Sport is to erase and format the hard drive. 4 Attention! When erasing and formatting the hard drive, all data previously stored on the drive will be erased. All data on the drive will be deleted! Follow these steps to erase and format your hard drive: 1.
Freecom ToughDrive Sport Removing the password encryption EN It is possible to remove the password protection feature, meaning that the data on the drive will always be visible when you connect the drive. 4 1. Make sure you already run “Password” to have access to your protected data. 2. Once you have access to your protected data, run “Password” again and select “Remove password protection”. 3. Enter your password and click on “OK”. 4.
Using Freecom Turbo USB 2.0 (only PC) Chapter 5: Using Freecom Turbo USB 2.0 (only PC) EN By installing the Turbo USB 2.0 driver for your ToughDrive Sport, the data transfer rate can be significantly increased (up to 40% faster transfer speed compared to standard High-Speed USB). 5 Enabling the Turbo USB 2.0 driver 1. Connect the Freecom ToughDrive Sport to your PC. 2. Run “Start.exe” from your ToughDrive Sport and go to Software Installation -> Freecom Turbo USB 2.0. 3. The Freecom Turbo USB 2.
Freecom ToughDrive Sport Chapter 6: Partitioning your Freecom ToughDrive Sport EN 6.1 General information 6 Your Freecom ToughDrive Sport was partitioned and formatted to provide you with the maximum available capacity and compatibility. FAT32 was chosen as file system to assure that you will be able to read your files on any PC. It is recommended not to change the current configuration of your Freecom ToughDrive Sport. For some users another file system might fit better for their needs.
Partitioning your Freecom ToughDrive Sport Example for different partitions with different file systems on one Freecom ToughDrive Sport EN File system Total size of Freecom ToughDrive Sport 160 GB NTFS FAT32 130 GB 30 GB 6 Note: On NTFS formatted hard disks can only be written under Windows 2000 / XP / Vista. Under MacOSX data can only be read. The example above is a good solution for Windows 2000 / XP / Vista users who sometimes exchange data with Macs.
Freecom ToughDrive Sport EN 6 5. Click with the right mouse button on the "unallocated" area and select the option "New Partition" (Windows 2000: "Create Partition Wizard"). The "New Partition Wizard" opens. Click on "Next".
Partitioning your Freecom ToughDrive Sport 6. Select "Primary partition" and click on "Next". EN 6 7. Now you can adjust the size of your partition. Click on "Next" if only one partition is to be created. See next chapter (Creating two or more partitions on the Freecom ToughDrive Sport under Windows 2000 / XP / Vista) how to create more than one partition. 8. Assign a drive letter to your hard disk. Normally you can use the default options. Click on "Next".
Freecom ToughDrive Sport 9. Select the formatting option "Format this partition with the following settings". Choose either "FAT32" or "NTFS", the "Allocation unit size" should remain on "Default". Finally select "Perform a quick format" and click on "Next". EN 6 10. Click on "Finish" to complete the partitioning of your Freecom ToughDrive Sport. Your Freecom ToughDrive Sport will be formatted now and is ready-to-use afterwards.
Partitioning your Freecom ToughDrive Sport 6.3.3 Creating two or more partitions on the Freecom ToughDrive Sport under Windows 2000 / XP / Vista EN 1. Repeat the steps from the previous chapter (Creating a partition on the Freecom ToughDrive Sport under Windows 2000 / XP / Vista) for creating the first partition. 6 2. Click with the right mouse button on the "My Computer" icon on your desktop. 3. Select the option "Manage". 4. Select the option "Storage" -> "Disk Management". 5.
Freecom ToughDrive Sport 8. Click on "Finish" to create the "Extended partition". The unallocated space now changed to "Free space".
Partitioning your Freecom ToughDrive Sport 9. Right-click on "Free Space" and select "New Logical Drive" (Windows 2000: "Create Logical Drive"). The "New Partition Wizard" (Windows 2000: "Create Partition Wizard") opens. Click on "Next". EN 6 10. "Logical drive" is already selected. Click on "Next". 11. Specify the partition size and click on "Next". 12. Assign a drive letter and click on "Next". 13. Select the formatting option "Format this partition with the following settings".
Freecom ToughDrive Sport 6.4 Partitioning your Freecom ToughDrive Sport under Mac OS X EN 1. Open the "Disk Utility". This can be found in "Applications" —> "Utilities". 2. Click on the tab "Partition". 6 Here you can setup the partition settings and partition the drive according to your settings (e.g. Mac OS Extended).
WARRANTY (valid in Europe/Turkey only) We thank you for purchasing this Freecom product and hope you will enjoy using it. In order to avoid unnecessary inconvenience on your part, we suggest reading the quick install guide, instruction manual and any additional electronic and or printed manuals. When problems occur we have a database with Frequently Asked Questions (FAQ) on our Freecom website (www.freecom.com), please check this site before you contact the helpdesk.