freeConnect Smart 2420 24-Port 10/100Mbps + 2-Port Combo-SFP Web Smart Switch USER’S MANUAL P/N: S102411200 Rev. 1.
Copyright and Trademark Information Freedom9 makes no warranty or representation, expressed or implied, with respect to the contents or use of this documentation. Freedom9 reserves the right to modify this documentation at any time without obligation to notify any individual or entity of such modifications. © Copyright 2006, freeConnect Smart and the freedom9 company logo are trademarks or registered trademarks of Freedom9 Inc. All rights reserved.
TABLE OF CONTENTS 1 ABOUT THIS GUIDE........................................................................................................................... 1 1.1 1.2 2 INTRODUCTION ................................................................................................................................. 2 2.1 2.2 2.3 2.4 3 FRONT PANEL ................................................................................................................................. 6 REAR PANEL .................
freeConnect Smart 2420 User’s Manual 1 About This Guide Thank you for purchasing the freeConnect Smart 2420. This device integrates 1000Mbps Gigabit Ethernet, 100Mbps Fast Ethernet and 10Mbps Ethernet network capabilities in a highly flexible package. 1.1 Purpose This guide discusses how to install your freeConnect Smart 2420. 1.
2 Introduction This chapter describes the features of the freeConnect Smart 2420 and some background information about Ethernet/Fast Ethernet/Gigabit Ethernet switching technology. 2.1 Gigabit Ethernet Technology Gigabit Ethernet is an extension of IEEE 802.
freeConnect Smart 2420 User’s Manual Cost Reduction: VLANs can be used to create multiple broadcast domains, thus eliminating the need of expensive routers. Port-based (or port-group) VLAN is the common method of implementing a VLAN, and is the one supplied in the Switch. 2.
3 Unpacking and Installation This chapter provides unpacking and installation information for the Switch. 3.1 Unpacking Open the box and carefully unpacks its contents.
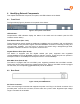
freeConnect Smart 2420 User’s Manual Figure 2: Mount the Switch in the rack 3.4 Connecting Network Cable The Switch supports 1000Mbs Gigabit Ethernet that runs in Auto-negotiation mode and 10Mbps Ethernet or 100Mbps Fast Ethernet that runs both in half and full duplex mode and 1000Mbps Gigabit Ethernet runs in full duplex mode using four pair of Category 5 Cable (Category 5e Cable or better is required for Gigabit Ethernet).
4 Identifying External Components This chapter describes the front panel, rear panel, and LED indicators of the Switch. 4.1 Front Panel The figure below (Figure 3) shows the front panels of the Switch. Figure 3: Front panel of the Switch LED Indicator: Comprehensive LED indicators display the status of the switch and the network (see the LED Indicators section below).
freeConnect Smart 2420 User’s Manual Reset: The Reset button is used to reset all of the settings back to the factory default. Note: Be sure that you record the settings of your Switch before performing a reset, as all settings will be erased after pressing the “Reset” button.
5 Understanding LED Indicators The front panel LEDs provides instant status feedback and helps monitor and troubleshoot when needed (Figure 5). Figure 5: LED indicators of the Switch 5.1 Power and System LEDs Power: Power Indicator On: The Switch is receiving power. Off: The Switch is not receiving power or the power cord has an improper connection. System: CPU Indicator Flashing: The CPU is working. On: The CPU is idling. Off: The unit is off. 5.
freeConnect Smart 2420 User’s Manual 1000Mbp On: The port is connected to a gigabit Ethernet connection. Off: The port is connected to a 10Mbps or 100Mbps Ethernet connection or is disconnected. 100Mbps On: The port is connected to a 100Mbps Ethernet connection. Off: The port is connected to a 10Mbps or 1000Mbps Ethernet connection or is disconnected.
6 Configuration You can configure features such as VLANs, trunking, and QoS using the Switch’s web interface. With the provided Web Management Utility, you can easily discover all the Web Smart Switches on your network, assign IP addresses to them, change the admin password, and upgrade the firmware. 6.1 Installing the Web Management Utility The following gives instructions guiding you through the installation of the Web Management utility. 1. Insert the Utility CD in the CD-ROM Drive. 1.
freeConnect Smart 2420 User’s Manual • Protocol version: The version of the Utility protocol. • Product Name: The Switch’s product name. • System Name: The appointed device system name. • Location: Where the device is located. • Trap IP: The IP where Traps are to be sent. • Subnet Mask: The Subnet Mask of the device. • Gateway: The Gateway of the device. 6.3 Monitor List To monitor a Switch, it needs to be added to the Monitor List.
Figure 8: Trap Information Note: In order to receive Trap information, the Switch has to be configured with the proper Trap IP and Trap Events in the Web browser, which are available in the Trap Setting Menu. Refer to the appropriate section for details. Add Item: Allows you to add a Switch to the Monitor List manually by entering the IP Address of the device that you want to monitor. Delete Item: Allows you to delete the Switch from the Monitor List. 6.
freeConnect Smart 2420 User’s Manual Figure 10: Password Change Firmware Upgrade: If a new firmware becomes available, use this option to perform a firmware upgrade on the device (Figure 11). You will need to enter the location of the file on the local computer, as well as the password for the Switch in order to perform an upgrade. Warning: Do not turn off the Switch or the computer while a firmware upgrade is in process, it may result in corruption of the firmware on the Switch.
6.6 Configuring the Switch The freeConnect Smart 2420 has a web interface to allow for easy configuration of the Switch. A network administrator can manage and monitor the switch from anywhere on the LAN. This section describes how to configure the Switch’s advanced functions, including: • Port setting (Speed/Disable, Duplex mode, Flow Control and Port base QoS) • Virtual LAN Group setting (VLAN) • Trunking • Port Mirroring • System Setting • Device status 6.
freeConnect Smart 2420 User’s Manual Figure 13: Device Status 15
6.8 Main Menu The main menu on the left side of the screen (Figure 14) has the following options: Port Settings, VLAN Settings, Trunk Setting, Mirror Setting, Device Status, Statistic, System Settings, Trap Setting, Password Setting, Backup Setting, Reset Setting. Click on the item that you want to configure to open the respective window. The sections below provide details for each option. Figure 14: Main menu 6.
freeConnect Smart 2420 User’s Manual Figure 15: Port Setting Page After clicking on a port number, the screen below (Figure 16) will open, allowing you to set the Speed/Disable, Flow Control and QoS settings of the port. Figure 16: Port Configuration Speed/Disable: This setting has six modes: 100M Full, 100M Half, 10M Full, 10M Half, Auto, Disable.
Ingress and Egress Rates: This settings determines the port bandwidth control and works only when the port speed is set to Auto. 6.9.2 VLAN Settings (Virtual Local Area Network) A VLAN is a group of ports which act as a small “virtual” network of their own, independent of the other ports. This means that the broadcast domain is restricted to the computers within a VLAN, and computers connected to different VLANs are unable to communicate with each other.
freeConnect Smart 2420 User’s Manual Note: Trunking will only work if the ports are connected to similarly trunked ports on another Switch. There are three groups of ports that can be trunked together. Group 1: Ports 1-12 Group 2: Ports 13-24 Group 3: Ports 25 and 26 For each group, you can select either to disable trunking, or trunk up to 4 ports per group (except group 3). Figure 19: Trunk Setting Page If using VLANs, ensure that the ports being trunked together are in the same VLAN group. 6.9.
Figure 20: Mirror Setting Page 6.9.5 QoS Setting The Switch supports two types of QoS, port-based and 802.1P-based. QoS stands for quality of service, and is used for prioritizing packets which are sensitive to delays such as multimedia streaming and VoIP (voice over IP) applications. For port-based QoS, select Port Based as the QoS type, and select the priority to give packets from each source port (Figure 21).
freeConnect Smart 2420 User’s Manual For 802.1P-based QoS, select IEEE 802.1P Based as the QoS type, and select the priority to give each 802.1P tag level (Figure 22). Figure 22: 802.1P-Based QoS Page 6.10 Maintenance Settings There are six items in the Maintenance Menu: Status, System, Trap, Password, Backup Setting, Restore Setting. 6.10.1 Device Status The Device Status page displays the current status of the device.
6.10.3 Trap Setting The Trap Setting page (Figure 24) allows the device to monitor for events on the Switch, and send an Event Trap to a computer on the network, which can be viewed and received using the Web Management Utility described earlier in the manual. To enable traps, enter the IP Address of the computer that will receive the traps, and select which types of events you want to receive. Figure 24: Trap Setting Page Device Bootup: a trap is sent when the system boots up.
freeConnect Smart 2420 User’s Manual 6.10.5 Backup Setting The Backup Setting page (Figure 26) allows you to back up the current settings of the Switch to a file that can be saved on your computer. It also allows you to restore the settings to the Switch from a backup file. Click the “Backup” button to generate a backup file, and select a location on your computer to save it to.
7 Technical Specifications General Standards IEEE 802.3 10BASE-T Ethernet IEEE 802.3u 100BASE-TX Fast Ethernet IEEE 802.3ab 1000BASE-T Gigabit Copper Ethernet IEEE 802.3z 1000BASE-X Gigabit Fiber Ethernet IEEE 802.3x Full Duplex Flow Control Protocol CSMA/CD Data Transfer Rate Ethernet: 10Mbps (half duplex), 20Mbps (full-duplex) Fast Ethernet: 100Mbps (half duplex), 200Mbps (full-duplex) Gigabit Ethernet: 2000Mbps (full-duplex) Topology Star Network Cables 10BASET: 2-pair UTP Cat.
freeConnect Smart 2420 User’s Manual 8 Certifications FCC This equipment has been tested and found to comply with Part 15 of the FCC Rules. Operation is subject to the following two conditions: (1) This device may not cause harmful interference (2) This device must accept any interference received. Including interference that may cause undesired operation. CE – Certificate This is a Class A product.