802.15.4/Zigbee Embedded Bootloader Reference Manual 802154EBRM/D Rev. 0.
How to Reach Us: USA/Europe/Locations Not Listed: Freescale Semiconductor Literature Distribution Center P.O. Box 5405 Denver, Colorado 80217 1-800-521-6274 or 480-768-2130 Japan: Freescale Semiconductor Japan Ltd. Technical Information Center 3-20-1, Minami-Azabu, Minato-ku Tokyo 106-8573, Japan 81-3-3440-3569 Asia/Pacific: Freescale Semiconductor Hong Kong Ltd. 2 Dai King Street Tai Po Industrial Estate Tai Po, N.T., Hong Kong 852-26668334 Home Page: www.freescale.
Contents About This Book ..................................................................................................................... vi Audience ......................................................................................................................................................vi Organization.................................................................................................................................................vi Conventions ................................
3.2.1 Normal Use Example (Default) ....................................................................................................3-9 3.2.2 Flash Erase Disabled Example......................................................................................................3-9 Chapter 4 Embedded Bootloader Programming................................................................. 4-1 4.1 Programming To An Empty (Erased) Board ..........................................................................
6.3 Porting to a Specific Target ..........................................................................................................6-3 6.3.1 Code and Data Segments ..............................................................................................................6-3 6.3.2 Standard Libraries.........................................................................................................................6-3 6.3.3 Compiler #defines...............................................
About This Book This guide provides a detailed description of Freescale’s Embedded Bootloader and describes how to port Freescale’s Embedded Bootloader to a specific PCB/target.. The Embedded Bootloader is intended for use with the IEEE® 802.15.4 evaluation kits (EVK). However, it is possible to upload applications with the Embedded Bootloader in the development phase, but the Embedded Bootloader will not provide any debug functions.
Conventions This document uses the following notational conventions: • Courier monospaced type indicates commands, command parameters, code examples, expressions, data types, and directives. • Italic type indicates replaceable command parameters. • All source code examples are in C. Definitions, Acronyms, and Abbreviations BDM debugger A debugger using the BDM interface for communication with the MCU. An example is the P&E BDM Multilink debugger for HCS08.
References [1] Freescale 802.15.4 MAC/PHY Software Reference Manual, 802154MPSRM/D [2] Zigbee.hlp (see Test Tool installation directory .\help) [3] Freescale MC908HCS08GB60/GT60 MCU Data Sheet, MC9S08GB60/D [4] Freescale Application Note, Handling MAC Address Erasure, AN2825/D [5] Freescale Application Note, Zigbee/802.15.
Chapter 1 Embedded Bootloader Description The Embedded Bootloader is intended for use with the IEEE® 802.15.4 evaluation kits (EVK). However, it is possible to upload applications with the Embedded Bootloader in the development phase, but the Embedded Bootloader will not provide any debug functions. The Embedded Bootloader provides an easy and inexpensive way to upload new firmware and eliminate the requirements for expensive debug/development tools.
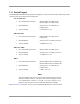
1.1.1 Ported Targets The Embedded Bootloader must be ported (I/O mapped) to a specific PCB for proper functionality and is currently ported to the following Freescale PCBs: Axiom AXM-0308: • PC Communication Interface: RS232/UART on COM1 (SCI1)/ RS232/UART on COM2 (SCI2) • Safe Mode Boot Short pins 2-3 on COM1 (SCI1)/ COM2 (SCI2) • Version Number “AX-0308 Ver 5.
1.2 Features The following features are supported: • Upload firmware (802.15.4/Zigbee application) in Motorola S19 record format through UART/USB. The S1 data record length must be set to 32 bytes • Auto-Detection of the PC communication interface (see Section 1.1.1, Ported Targets). • Initialize memory including stack of uploaded firmware • Initialize the system clock. Self clocked mode and MC13192 clock setup.
1.4.1 Optional Firmware Upload Settings • • Skip flash erase o Disabled The 802.15.4/Application/NVM (except production data section) is erased (default) o Enabled The 802.15.4/Application/NVM is NOT erased Erase production data (get production data from firmware file) o Disabled The production data section (with MAC address) in NVM are preserved.
Chapter 2 Using the Embedded Bootloader This chapter describes the Embedded Bootloader functionality. A detailed description of the functions briefly mentioned in this chapter can be found in Chapter 7. 2.1 Upload Firmware The Embedded Bootloader can be used in different system configurations depending on the PCB and the application.
2.1.2 Use Case Two In this use case, users push a button on the board to enable firmware upload. MC908HCS08GB60(1)/MC13192 B Application o o NVM t l 802.15.4 MAC o a d User Interface 802.15.4 PHY Push Buttons e r 1) I/O Device Driver GPIO S101 S102 S103 S104 Or MC908HCS08GT60 Figure 2 Application Supporting an I/O Interface 2.1.
7. Remove short from UART TX and RX and connect UART cable again (if the RS232 UART interface is used) 8. Power up again 9. Embedded Bootloader is ready to receive new firmware (all LEDs on) 10. Start the PC-Tool. See Chapter 3, for more information. NOTE The Safe Mode Boot description is only valid for the Freescale ported versions of the Embedded Bootloader. Refer to the 802.15.4 Embedded Bootloader Reference Manual, 802154EBRM/D, for more details about a specific port of the Embedded Bootloader. 2.
2.3 System Bus Frequency The MC908HCS08GB60/GT60 starts in 4 MHz self clocked mode. The init code changes this to 8 MHz after a few instructions from reset. If NVM data is found, the system clock (MC908HCS08GB60/GT60 ICG module and MC13192 CLKO) and other options are setup as specified by the uploaded application. See the Freescale 802.15.4 MAC/PHY Software Reference Manual, 802154MPSRM/D, for more details. If no NVM data can be found, the following (safe mode boot) values are used: • MC13192 CLKO = 62.
Chapter 3 Test Tool – Zigbee Flash Tool The Zigbee flash tool is a part of the general Zigbee Test Tool. This chapter provides a brief description of how to use the Zigbee Test Tool to upload new firmware. For more details about installation and other features, see the documentation for the Zigbee Test Tool and the Zigbee.hlp file in Test Tool installation directory .\help. The flash programming part of the Test Tool can be used with two different user interfaces. 1. The GUI-version in ‘Test Tool.exe’ 2.
3.1 Graphical User Interface (GUI) Version To use the GUI version of the Test Tool, execute the following file: [installation directory]\Freescale\Test Tool\Test Tool.exe 3.1.1 Using the Tools Menu Option After clicking on the Tools menu option, click the Communication Settings option to choose the baud rate specified for the current embedded application. Notice that applications require that you push one or more buttons or some other functions to enable upload of new firmware. See the Zigbee/802.15.
3.1.2 Using the View Menu Option After clicking the View menu option, select port COMx and click “OK”. Choose the baud rate specified for the current embedded application. See the Zigbee/802.15.4 Evaluation Kit Quick Start Guide, AN2772/D, for a description of what to do for a specific application. If no application is uploaded, you must use the default settings specified for the Embedded Bootloader. See Chapter 2 for more information.
3.1.3 Selecting the Firmware File to Upload In the ‘Flash Section’ window, click on the application file to upload and then click on the “Upload” button. The upload progress bar begins to indicate upload progress. Upload Progress Field Upload Button Application Files Status/Error Information Field Figure 5 Firmware Upload The Status/Error Information Field shows the Status/Error Information received from the Embedded Bootloader. 3-4 Embedded Bootloader Reference Manual, Rev 0.
After a successful upload of the firmware, the window appears as shown in Figure 6. NOTE A system reset is performed (default) after upload as shown in Figure 6. Automatic Reset Enabled Figure 6 After a Successful Firmware Upload NOTE If the uploaded application uses another baud rate, it is required to change baud rate values in order to be able to communicate with the board. Freescale Semiconductor Embedded Bootloader Reference Manual, Rev. 0.
3.1.4 Using the Help Menu Click on the Embedded Bootloader About box to see the Embedded Bootloader sub version number. Figure 7 Embedded Bootloader Tool Version NOTE The last line is reported from the Embedded Bootloader on the PCB. This version number is only sent to the PC from power up (not on reset). 3.1.5 Changing the NVM Data in Flash or File If users click on an application in the list, it displays the NVM values in the selected application file.
Figure 8 System Configuration Window Freescale Semiconductor Embedded Bootloader Reference Manual, Rev. 0.
3.2 Command Line Version (CMD) The command line version of the Embedded Bootloader flash programming tool must be called with parameters: Execute ‘Bootloader.exe’ without parameters to show a parameter list: Figure 9 Command Line Version (Parameter List) 3-8 Embedded Bootloader Reference Manual, Rev 0.
3.2.1 Normal Use Example (Default) Normal use example (default). ”Bootloader EVK_PTC_Demo.s19 /C:COM2 /B:19200 /-E /-A /-O /-S” Figure 10 Command Line Version (Using Several Options) NOTE It is not possible to edit NVM data with the CMD version. 3.2.2 Flash Erase Disabled Example Flash erase disabled example. ”Bootloader EVK_PTC_Demo.
3-10 Embedded Bootloader Reference Manual, Rev 0.
Chapter 4 Embedded Bootloader Programming This chapter describes how to program the Embedded Bootloader with a P&E Multilink for HCS08 BDM debugger. The Embedded Bootloader is normally downloaded to the PCB where production data is also written. Users must employ different procedures depending on what needs to be programmed. Users can program the Embedded Bootloader to an empty (erased) PCB or they can upgrade to a newer version of the Embedded Bootloader. Follow the procedures in Section 4.
The “Connection Assistant” window appears where you can select the debugger interface connection. As shown in Figure 13, a USB connection was chosen and the HCS08 was selected as the CPU type. Click the “OK” button. Figure 13 Connection Assistant Window 4-2 Embedded Bootloader Reference Manual, Rev 0.
4. Click on “Load Application” under the “File” menu to open the “Load Executable File” window. Specify application file to program in the “Load Executable File” window as shown in Figure 14. Select “Motorola S-Record (*.s19)” using the “Files of type:” drop down menu. Navigate to the folder where a copy of the Embedded Bootloader is located. Select the “Embedded Bootloader.s19” file and click the “Open” button.
The Embedded Bootloader is now programmed to the PCB as shown in the Status Window in Figure 15. Figure 15 Status Window 5. Remove power and disconnect the BDM cable from the PCB. Next, power up the PCB. The PCB is now ready to upload an application. See Chapter 2 for details about how to upload an application. 4-4 Embedded Bootloader Reference Manual, Rev 0.
4.2 Upgrading The Embedded Bootloader This section describes how to upgrade the Embedded Bootloader to a newer version with the P&E Multilink BDM debugger. 1. Execute the HIWAVE.EXE file from your chosen installation directory. For example, [installation directory]\Metrowerks\CodeWarrior_CW08_V3.0\Prog\ 2. From the main window, setup the target by selecting Setup Target, the select the “Component” menu, and click on “Set Target”. The “Set Target” window appears as shown in Figure 16.
4. The “Connection Assistant” window appears where you can select the debugger interface connection. As shown in Figure 17, a USB connection was chosen and the HCS08 was selected as the CPU type. Click the “OK” button. Figure 17 Connection Assistant Window 4-6 Embedded Bootloader Reference Manual, Rev 0.
5. Make a copy of the NVM sector (both NVM0 and NVM1) with the production data. Select the “PEDebug” menu, select “Programming Options”, and then choose “Start Expert Mode Programmer”. The “Programmer Expert” window appears as shown in Figure 18. Figure 18 Programmer Expert Window 6. In the “Programmer Expert” window, click on “UR Upload Range”. The “Start Address” window appears as shown in Figure 19. Here you specify the start address for the NVM section. Click the “OK” button.
8. As shown in Figure 20, use the S19 window to specify which S19 file to store active NVM data to and then click the “OK” button. For NVM0 use ‘PD_NVM0.s19’ and for NVM1 use ‘PD_NVM1.s19’. Figure 20 S19 File Window 9. Close “Programmer Expert” window. 10. Use the PC tool “Production_Data_Converter.exe” to convert the production data in NVM to default NVM sector NVM0. Copy the “Production_Data_Converter.exe” tool to the folder that contains the PD_NVM0.s19 and PD_NVM1.s19 files.
The Embedded Bootloader is now programmed to the PCB as shown in Figure 22. Figure 22 Status Window 12. Write NVM production data back by selecting the “PEDebug” menu. Then select “Programming Options” and “Start Expert Mode Programmer”. Select “SS Specify S-record” and locate the PD_NVM.s19 file built in Step 10. Select the “PM Program Module” option and production data is written to flash. 13. Remove power and disconnect the BDM cable from PCB. Next, power up the PCB.
4-10 Embedded Bootloader Reference Manual, Rev 0.
Chapter 5 Application Integration Reference Guide This chapter describes the deliverables required to build an 802.15.4/Zigbee Application with the Embedded Bootloader. NOTE The Freescale Switch Demonstration application is available with complete source code. The Switch Demonsration shows how to make an 802.15.4 application with the Embedded Bootloader. Refer to the Switch Demonstration Application Note, AN2773, for more details. 5.
5.1.3 Application Linker File The 802.15.4/Zigbee application code must be linked with the following linker file in order to work with the Embedded Bootloader interface. The linker file specifies fixed data and code segments. See linker file for more details. Make sure to use the linker file matching the Embedded Bootloader on the PCB: Ptc_w_Embedded_Bootloader.ach NOTE This file can be used with the MC908HCS08GB60/GT60 MCU. 5.
{ // Do something to aviod that code is removed by linker } 5.2.3 System Clock Setup The Embedded Bootloader contains the ICG_Setup() function which is called if the Embedded Bootloader must start. The Embedded Bootloader sets up the system clock as specified in the NVM section (ICG) if available. If not a default value is used. The 802.15.4/Zigbee application must include a system clock setup function. The 802.15.
NOTE This file can also be used with the MC908HCS08GT60 MCU. 5.3.3 Crt0.c and Crt.h These files contain the basic initialization code (basic system clock, memory and stack setup). The normal basic init file(s) (like the start08.c from Metrowerks) is not needed when the Embedded Bootloader is embedded. In an 802.15.4/Zigbee application with Embedded Bootloader, these files only contain the _startupdata structure.
5.3.4 Embedded_Bootloader.h and Embedded_Bootloader.c These are the interface files for the 802.14.4/Zigbee application. They contain function pointers to functions accessible in the Embedded Bootloader. These files also contain absolute addresses, which should not be changed. Ensure that the two Embedded Bootloader control flags, which control whether the 802.15.4/Zigbee application starts or not, are included in the 802.15.4/Zigbee application build. See Section 5.2.2 for more details.
5.3.7 DummyIsr.c This file contains a dummy ISR function which makes a break if a BDM debugger is attached to the BDM connector. An illegal instruction reset occurs if no BDM debugger is attached. The function is added to all unused ISR vectors in the ISR_Vector.c file. NOTE Users can change this function to any desired functionality. 5-6 Embedded Bootloader Reference Manual, Rev 0.
Chapter 6 Port Integration Reference Guide This chapter describes the Embedded Bootloader source code release deliverables and how to integrate them to make an executable Embedded Bootloader for a specific PCB. NOTE For user convenience, several readme.txt files containing more information are located in various subfolders. 6.1 Embedded Bootloader Build Environment This chapter describes the Embedded Bootloader build environment.
Source file: hw_hc08_libmaker.dll, version 5.0.8.0 Setting: None 6.2 Product Deliverables The Freescale Embedded Bootloaader consists of four major components. Refer to Appendix A for a complete list of released files. 6.2.1 Embedded_Bootloader.mcp This is the Metrowerks Codewarrior mcp project file. This file is used to build the release of the Embedded Bootloader. NOTE It is required that you have Metrowerks Codewarrior installed on your PC to build the Embedded Bootloader. 6.2.2 HCS08_Flash_Lib.
HW_Init.c Hardware init functions HW_Init.h Init function prototypes and defines. Reset_Vector.c System reset vector. main.c Embedded Bootloader main function. 6.3 Porting to a Specific Target This section provides guidelines on how to port the Embedded Bootloader to a specific PCB/target. 6.3.1 Code and Data Segments The Embedded Bootloader must be linked with the linker file as specified in Section 6.1.2. Several code and data segments are listed and must not be changed.
6.4 Source Files This section describes the source files. 6.4.1 Target.h The user must define the PCB target specific #defines in the Target.h in the .\802.15.4_Headers\Ghdr. file for a successful port. NOTE Several other #defines are made in the target description in target.h. The #defines are used by the 802.15.4 MAC/PHY build.
//PTADD = 0x00; #define mSETUP_PORT_B //All Port A input //PTBD = 0x00;\ //PTBPE = 0x00;\ //PTBDD = 0x00; #define mSETUP_PORT_C PTCDD = (ABEL_RESET_PIN | ABEL_ATT_PIN ); Optional for Safe Mode Boot indicator function (LEDs as output): #define mSETUP_PORT_D PTDPE = 0x00;\ PTDDD = (0x01 | 0x02| 0x08 | 0x10); 6.4.2 Reset_Vector.c The system reset vector. NOTE The application does not have a reset vector. If a reset occurs in an application, the Embedded Bootloader’s reset vector is called. 6.4.
#define SET_OUTPUT LED1ON // Defined in Target.h #endif defined TARGET_DIG528_2 || defined TARGET_DIG536_2 6.4.4 HW_Init.h This file contains prototypes of all the init functions and defines. 6.4.5 HW_Init.c This file contains some hardware init functions which depend on the PCB layout. void HWResetAbel(void) Reset of MC13192 RF chip (do not change) void Safe_Boot_Mode_Indicator(void) Users can change this function so it matches the functions available for a particular PCB.
Chapter 7 Embedded Bootloader Public Function Description This section describes the public functions which the 802.15.4/Zigbee application can call in the Embedded Bootloader. 7.1 802.15.4/Zigbee Application Accessible Functions The following functions, located in the Embedded Bootloader, are made accessible for 802.15.4/Zigbee applications. For example, an 802.15.4/Zigbee application is not required to have programming routines to store NVM data in flash.
NOTE All bits are enabled by default. Bits can only be disabled (erased in flash) – never enabled. The bits are enabled again by the new firmware. Input: interface_state - The user selectable options.
7.1.2 Hard_Reset Prototype: void Hard_Reset(void) Description: The application can call this function to make a system reset. The reset is done by executing an illegal instruction. Input: None Output: None 7.1.3 Update_NV_RAM Prototype: bool_t Update_NV_RAM ( NV_RAM_Struct_t const *NV_RAM_Distination_ptr, uint8_t *Source_ptr, uint16_t Source_Length ) Description: The application can call this function to update any NVM parameter with new values specified in the input parameters.
7.1.4 NV_Flash_Setup Prototype: void NV_Flash_Setup(void) Description: This function should never be called under normal conditions. However, it should be called if any of the other Embedded Bootloader functions malfunctions. The function sets up the flash functions (again), i.e. copies the flash routines to RAM for execution and initialize the HCS08 flash module. Input: None Output None 7.1.5 FL_ICG_Setup Prototype: void FL_ICG_Setup(void) Description: This function can be called by the application.
7.1.6 UART_Port_Select Prototype: void FL_ICG_Setup ( uint8_t data_reg_address, uint8_t status_reg_address ) Description: This function can be called when the application has detected the active communication interface if used by the application. The communication interface can be any of the two SCI-ports (SCI1 or SCI2). When called with the proper parameters the Embedded Bootloader knows the active communication interface.
7-6 Embedded Bootloader Reference Manual, Rev 0.
Chapter 8 Embedded Bootloader Memory Map Table 1. Zigbee (MC9S08GB60/GT60) 802.15.
1 (share) 8-2 12 1800 182B 44 High Page Registers (COP, Flash etc.
37 4A00 4BFF 512 FLASH (section 2) 38 4C00 4DFF 512 FLASH (section 2) 39 4E00 4FFF 512 FLASH (section 2) 40 5000 51FF 512 FLASH (section 2) 41 5200 53FF 512 FLASH (section 2) 42 5400 55FF 512 FLASH (section 2) 43 5600 57FF 512 FLASH (section 2) 44 5800 59FF 512 FLASH (section 2) 45 5A00 5BFF 512 FLASH (section 2) 46 5C00 5DFF 512 FLASH (section 2) 47 5E00 5FFF 512 FLASH (section 2) 48 6000 61FF 512 FLASH (section 2) 49 6200 63FF 512 FLASH (sect
8-4 64 8000 81FF 512 FLASH (section 2) 65 8200 83FF 512 FLASH (section 2) 66 8400 85FF 512 FLASH (section 2) 67 8600 87FF 512 FLASH (section 2) 68 8800 89FF 512 FLASH (section 2) 69 8A00 8BFF 512 FLASH (section 2) 70 8C00 8DFF 512 FLASH (section 2) 71 8E00 8FFF 512 FLASH (section 2) 72 9000 91FF 512 FLASH (section 2) 73 9200 93FF 512 FLASH (section 2) 74 9400 95FF 512 FLASH (section 2) 75 9600 97FF 512 FLASH (section 2) 76 9800 99FF 512 FLASH
91 B600 B7FF 512 FLASH (section 2) 92 B800 B9FF 512 FLASH (section 2) 93 BA00 BBFF 512 FLASH (section 2) 94 BC00 BDFF 512 FLASH (section 2) 95 BE00 BFFF 512 FLASH (section 2) 96 C000 C1FF 512 FLASH (section 2) 97 C200 C3FF 512 FLASH (section 2) 98 C400 C5FF 512 FLASH (section 2) 99 C600 C7FF 512 FLASH (section 2) 100 C800 C9FF 512 FLASH (section 2) 101 CA00 CBFF 512 FLASH (section 2) 102 CC00 CDFF 512 FLASH (section 2) 103 CE00 CFFF 512 FLASH (
118 EC00 EDFF 512 FLASH (section 2) 119 EE00 EFBF 448 FLASH (section 2) 119 EFC0 EFFD 62 FLASH (section 2) 802.15.4 app. ISR vectors 119 EFFE EFFF 2 FLASH (section 2) Embedded Bootloader system flags (placed by 802.15.
= May be used by Embedded Bootloader. 802.15.4/App. can reuse this space (overwrite). = Used by Embedded Bootloader. Data/code which must be located on the specified address and (must/will) exists when the application is running = May be used by 802.15.4/App. = Used by 802.15.4/App. Data/code which must be located on the specified address If either the Embedded Bootloader and/or the 802.15.4/App. must not use a particular resource the color from the "General HCS08 Map and Usage" is kept.
8-8 Embedded Bootloader Reference Manual, Rev. 0.
Appendix A Release Folder and File Structure This appendix describes the folder and file structure for this release. A.1. Folder Structure 802.15.4_Headers Global headers from the 802.15.4 MAC/PHY Release Ghdr Bin When target is built, the output files are stored here.
A.2. File Structure This section describes all of the files in the Embedded Bootloader release. .\Embedded_Bootloader Embedded_Bootloader.mcp Metrowerks Codewarrior project file flash.hwc Hiwave system file flash.hwl Hiwave system file flash.ini Hiwave system file .\Embedded_Bootloader\802.15.4_Headers\Ghdr AbelReg.h AppAspInterface.h Debug.h DigiType.h Defined C data types Embedded_Bootloader.h New interface file to Embedded Bootloader (after version 5.00) FreeLoader_inf.
.\Embedded_Bootloader\Bin\Embedded_Bootloader\AX-0308RevC Embedded_Bootloader.elf Elf format file Embedded_Bootloader.map Map file Embedded_Bootloader.s19 Freescale S19 file .\Embedded_Bootloader\Bin\Embedded_Bootloader\DIG-528-2_DIG-536-2 Embedded_Bootloader.elf Elf format file Embedded_Bootloader.map Map file Embedded_Bootloader.s19 Freescale S19 file .\Embedded_Bootloader\Bin\Embedded_Bootloader_Functionality_Lib Embedded_Bootloader_Functionality_Lib.Lib Functionality library .
A-4 Embedded Bootloader Reference Manual, Rev. 0.