
Instructions / Assembly


Installation Instructions
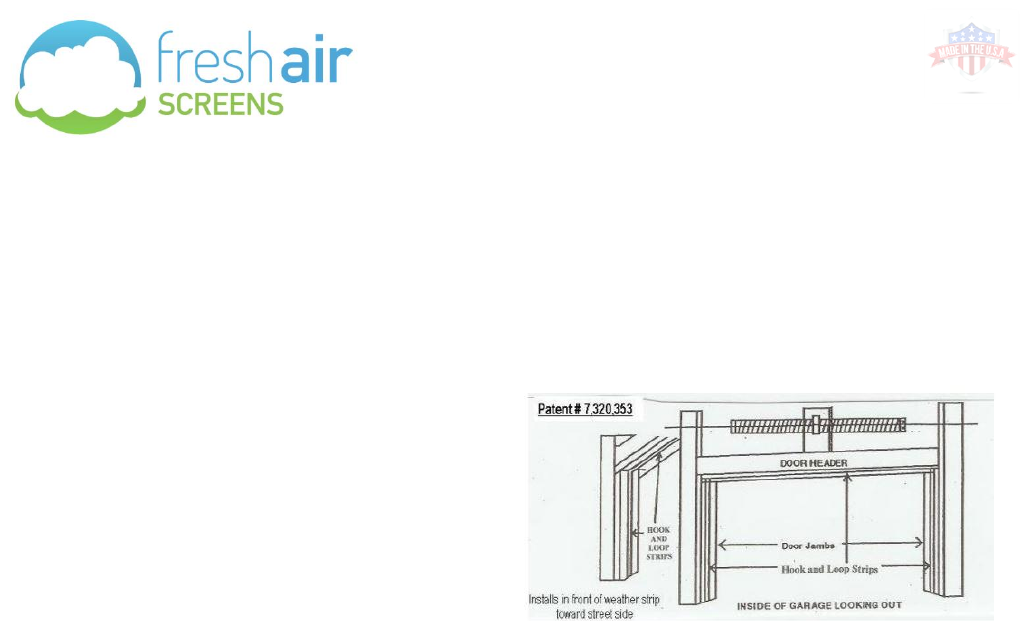
Models C with Rope & Pull Kit
STEP 1
Cut the roll of self-adhesive hook & loop into
3 strips, two lengths equal to the height of
the door jambs, and one long strip for the
header.
STEP 2
Install and align the self-adhesive hook & loop strips on both door jambs about 1” in front
(street side) of the door stops/weather strips. Next add the hook & loop strip to the header, so
that is allows a smooth surface edge with both door jamb strips.
STEP 3
Starting at either upper corner, attach the screen to the hook & loop strip which is mounted
already on the header. Next attach the screen to the hook & loop strips that are mounted on
either of the door jambs of the garage door.
STEP 4 Attach cleat to the door jamb between garage door and screen, about 5’ high on
whichever side willing to pull from, and using wood screws.
STEP 5
Install eye screws. All eye screws should go into the header on the inside of the screen
approximately 1” away.
Eye screw 1 – (Small kit) Place in center of header (equally centered from both sides of garage
opening. (Large Kit) Place in the header 1/3 the distance from the side furthest from the cleat.
Eye screw 5 – (Large kit only!) Place in the header 1/3 the distance from the side closest to the
cleat.
Eye Screw 2- Screw into header 12” from the end of the header furthest away from the cleat.
Eye Screw 3- Screw into header 12” from the end of the header closest to the cleat.
Eye Screw 4- Place within 6” from same side as cleat.
STEP 6
Attach brackets to the header (street side) across from eye screws 1, 2, and 3, (and 5 for large
kits)
Not Included
• Hammer and Step Ladder
• 5/8” Roofing Nails (Optional for Step 8)
• ¾” plastic pipe cut to width of screen (Step 5)
Included
Small Large
• One roll of self-adhesive hook & loop
• Mounting brackets (Small kit – 3, large kit -4)
• Eyelets (Small kit – 4, large kit -5)
• Cords (Small kit – 3, large kit -4)
• (Each different lengths)
• 1 Cleat
• Wood Screws (Small kit – 8, large kit -10)